Table of Contents
Advertisement
Quick Links
Advertisement
Table of Contents

Related Manuals for Fancom 771


Summary of Contents for Fancom 771
- Page 1 INSTALLER MANUAL VERSION B2...
- Page 2 Fancom be liable for any damages in excess of the amount paid for the products.
-
Page 3: Table Of Contents
Fancom 771 INSTALLER: Table of contents Table of contents Introduction ......................2. Technical specifications ..................3. Safety instructions and warnings ................ General ......................Trouble ......................Installation and mounting ................4. Mounting and installation..................Computer......................Connection of the communication network between the different modules.. - Page 4 Fancom 771 INSTALLER: Table of contents 5. Installer settings....................... INSTALLATION ..................... INSTALLATION option 1 Installation ............11 5.1.1 INSTALLATION option 1-1 Relay assignments ......... 12 5.1.2 INSTALLATION option 1-2 Input assignments ......... 14 5.1.3 INSTALLATION option 1-3 Installation general ....... 15 5.1.4 INSTALLATION option 1-4 Installation valves .........
- Page 5 This manual aims to supply the installer with the information necessary for a step by step insight into the working and operation of the 771 dry feed computer. Read this manual carefully chapter by chapter. After the manual has been read, data can be entered in the computer.
-
Page 6: Introduction
INSTALLER: 1. Introduction 1 Introduction The Fancom 771 Dry feed computer has been specially developed for a multiphase feeding supply. Computer control of such dry feed systems enables weighing and blending of the different feed ingredients and their transport to each individual feeder/trough. The quantity of feed and blends necessary can be programmed for the whole (fattening) period. -
Page 7: Technical Specifications
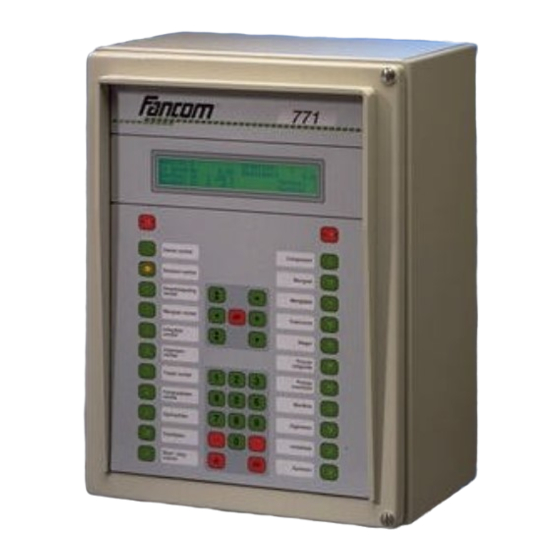
Fancom 771 INSTALLER: 2. Technical specifications 2 Technical specifications • Power supply Voltage..............................24 Vdc Power consumption......................... 200 mA Maximum voltage..........................30 Vdc Minimum voltage..........................18 Vdc • Housing Type..........................Metal housing (IP54) Dimensions (lxwxh).................400x300x225 mm/15.7x11.8x8.8 inches Weight (unpacked)........................8.6 Kg/19lbs • Ambient climate Operating temperature..................0°C to + 40°C (14°F to 104°F) -
Page 8: Safety Instructions And Warnings
• Fancom takes no responsibility for any possible damage as a result of incorrect settings and a non- or partially functioning installation. 3.2 Trouble Caution Never work on a computer with the power switched on. -
Page 9: Mounting And Installation
Fancom 771 INSTALLER: 4. Mounting and installation 4 Mounting and installation 4.1 Computer Caution • It is essential that the alarm contacts of each computer are connected to a separate alarm system circuitry. When mounting the computer, the following has to be observed: •... -
Page 10: Computer
2-core network. The network has the so-called Back Bone structure. Two cores leave a station (including the 771) and go to the next station. From this station the cores go to the following station etc. The Back Bone-wire must never be cut at the point where a station is connected. The insulation must be removed, the wire folded double and placed under the terminal. -
Page 11: Connecting The Valves
The computer must give an alarm if there is a malfunction in the dry feed unit. The external alarm input on the 771 computer is used for this purpose. The following alarm detectors can be installed on this external alarm: •... -
Page 12: Connecting The Pulse Counters
For connection of the overflow detection, refer to the connection diagrams concerned in appendix 1. Connect the contact (per circuit) to the overflow input of the 771 computer. It is also possible to detect surplus feed using a proximity switch (PROX.24F). See connection diagrams Overflow alarm (appendix 1). -
Page 13: Connecting The Feeder Feedback (Optional)
Fancom 771 INSTALLER: 4. Mounting and installation When the PROX.1 activates, the computer receives a signal. The computer then determines for which valve the blend was made, based on the entered distance from the overflow , and gives a Silent alarm. If the overflow is so large within one feeding cycle that PROX.2 also activates, the computer must give still... -
Page 14: Connecting The Current Detection Board
This current detection board is not necessary in this case, but is recommended by Fancom. The current detection board can only be used with indirectly controlled direct current valves. -
Page 15: Wiring Between Pc('S) And One Or More 700-Systems
0.8mm) when using an unshielded 2-core telephone wire (twisted pair). A network card is needed per PC. The 771 computer can be connected directly. The input which is used for the node(s) must be provided with a terminal resistor. This also applies to the last computer on the network. -
Page 16: Installer Settings
Fancom 771 INSTALLER: 5. Installer settings 5 Installer settings INSTALLATION Function key Installation contains all data necessary to install/start up the system. If this function key is pressed, the following will appear on the display: 1 Installation 2 Calibration weigher... -
Page 17: Installation Option 1-1 Relay Assignments
Fancom 771 INSTALLER: 5. Installer settings 5.1.1 INSTALLATION option 1-1 Relay assignments Select option 1-1: Relay assignments. The following will appear on the display: >>Relay assignments Alarm 1001 Outlet 1002 Mixer 1003 Auger dose out 1004 Circuit_1 1005 Feed bin low_1... - Page 18 Fancom 771 INSTALLER: 5. Installer settings The different relays have the following meanings: Alarm Alarm relay. Outlet Outlet valve between weigher and hopper. Mixer Mixer in weigher. Auger dose out Outlet auger below weigher or hopper. Circuit_1...15 Cable machine or circuit auger.
-
Page 19: Installation Option 1-2 Input Assignments
The input assignments concern the connection of a number of signals to the digital inputs. A card with 12 digital inputs has been mounted in the 771. These inputs are connected to the terminal strip. The inputs 10, 11 and 12 are assigned to Feeder sensors, Valve protection and External alarm The other 9 inputs can be freely assigned. -
Page 20: Installation Option 1-3 Installation General
Fancom 771 INSTALLER: 5. Installer settings 5.1.3 INSTALLATION option 1-3 Installation general Select option 1-3 Installation general. The following will appear on the display: >>Installation general No. of valves Control DIRECT SERIAL NUMBER Initialize NO Automatic restart Feed curve setting... - Page 21 Set Automatic restart to YES. Feed curve setting The 771 can use the feed curve with the quantity in Kg feed/day or in EV/day. This setting not only applies to the feed curve, but also to the Dosage/animal at the valve data.
- Page 22 Fancom 771 INSTALLER: 5. Installer settings Mixing after The computer can be programmed to mix after dosing in (Mixing after dosing in = dosing in YES ). At Mixing time enter the period of time (in seconds) needed to mix one kilogram of dosed in feed.
-
Page 23: Installation Option 1-4 Installation Valves
Fancom 771 INSTALLER: 5. Installer settings 5.1.4 INSTALLATION option 1-4 Installation valve Select option 1-4 Installation valve. The following will appear on the display: >>Installation valve_1 Section Circuit number Serial number Position (in pulses) Relay assignment Feeder sensor Settings 1, 2, 3 and 4 can be easily made using the valve cards included (see appendix) . -
Page 24: Installation Option 1-5 Installation Weigher
Wait time till weigher stable No. of attempts dose in Weigher type The 771 has two possible systems for the weigher: 1. The dosing out auger is mounted directly under the weigher. In this case set Weigher type to WITH DOSING OUT AUGER 2. -
Page 25: Installation Option 1-6 Installation Circuit
Fancom 771 INSTALLER: 5. Installer settings 5.1.6 INSTALLATION option 1-6 Installation circuit Select option 1-6 Installation circuit. The following will appear on the display: >>Installation circuit_1 Valve ctrl.time Extra distance Slip After run Detection NO Pos. overflow Extra slip Pulse After flow cor. -
Page 26: Installation Option 1-7 Installation Ingredient
Fancom 771 INSTALLER: 5. Installer settings 5.1.7 INSTALLATION option 1-7 Installation ingredient Select option 1-7 Installation ingredient. The following will appear on the display: >>Installation ingredient_1 Cap. Low 0.50 Cap. High 1.00 After flow Low 0.00 After flow High 0.00 Additive/KG FEED 0.0/PULSE... -
Page 27: Installation Option 2 Calibration Weigher
Fancom 771 INSTALLER: 5. Installer settings 5.2 INSTALLATION option 2 Calibration weigher After the weighing bars have been connected to the ILM.1 , check the system for correct functioning. Control the value at Read out (function key System --> 2. Weigher data ). - Page 28 The realized (expected) consumption and the actual (measured) consumption can be entered using the feed receipts. The 771 then calculates the difference between both values in terms of percentage. This calculated difference can be adjusted as fine adjustment in the weigher calibration by setting the...
-
Page 29: Installation Option 3 Testing Hardware
Fancom 771 INSTALLER: 5. Installer settings 5.3 INSTALLATION option 3 Testing Hardware After all settings have been made, the hardware can be tested. The first test is the Repeated valve test. In addition, the digital inputs can be read out directly: Control digital inputs. Direct relay control enables the relays to be activated. - Page 30 Fancom 771 INSTALLER: 5. Installer settings Note that the computer activates the valve numbers based on the relay assignments of the valves and the way in which the valves are controlled! These valves have to be entered (see section 6.1.2 and section 6.1.3), before starting the test.
-
Page 31: System Option 3-2 Control Inputs
Fancom 771 INSTALLER: 5. Installer settings 5.3.2 INSTALLATION option 3-2 Control inputs Select option 3-2 Control inputs. The following will appear on the display: >>Control digital inputs Meaning EVT--------- XDF987654321 Value 100000000001 At Control digital inputs, the value of the digital input can be read out directly. These values are updated by the computer every second. -
Page 32: System Option 3-3 Direct Relay Control
Fancom 771 INSTALLER: 5. Installer settings 5.3.3 INSTALLATION option 3-3 Direct relay control Select option 3-3 Direct relay control. The following will appear on the display: >>Direct relay control Panel Slot Satellite 0 Relay Value This menu enables a relay to be switched ON and OFF. This is done as follows: •... -
Page 33: System Settings
Fancom 771 INSTALLER: 5. Installer settings 6 System settings SYSTEM The following options can be found at function key System: 1 Configuration 2 Weigher data 3 Internal RAM 6.1 SYSTEM option 1 Configuration Only option 1 Configuration is of importance. Option 3 Internal RAM is only used for control purposes. - Page 34 Fancom 771 INSTALLER: 6. System settings Computer number If the 771 is connected in a loop it must have a unique number, different to all the other computer numbers. Version Read out of the version number of the 771 - software.
-
Page 35: System Option 1-2 Weigher Data
Fancom 771 INSTALLER: 6. System settings 6.2 SYSTEM option 2 Weigher data Select option 2 Weigher data. The following will appear on the display: >>Weigher data Read out 21900 Offset (Zero) Span (Calibr.) Standard weight 15.02 Tare 0.00 Filter After the weigher has been calibrated, the Offset, Span and Standard weight can be read out. Note these values on the installation report (appendix 2). - Page 36 INSTALLER MANUAL APPENDIX 1 Overview installation & system settings...
- Page 37 Fancom 771 INSTALLER: 1. Overview installation & system settings INSTALLER APPENDIX 1: Overview installation & system settings 1 Installation Reference Index 2 Calibration weigher 3 Test Hardware 4 Process >>Installation 1 Relay assignments 5.1.1 2 Input assignments 5.1.2 3 Installation general 5.1.3...
- Page 38 Fancom 771 INSTALLER: 1. Overview installation & system settings 1 Installation Reference Index 2 Calibration weigher 3 Test Hardware 4 Process >>Installation 5.1.1 1 Relay assignments 5.1.2 2 Input assignments 5.1.3 3 Installation general 5.1.4 4 Installation valve 5.1.5 5 Installation weigher 5.1.6...
- Page 39 Fancom 771 INSTALLER: 1. Overview installation & system settings 1 Installation Reference Index 2 Calibration weigher 3 Test Hardware 4 Process >>Test hardware 1 Repeated valve test 2 Control inputs 3 Direct relay control 4 IO-cards present 5 Communication counters >>Repeated valve test...
- Page 40 Fancom 771 INSTALLER: 1. Overview installation & system settings 1 Configuration Reference Index 2 Weigher data 3 Internal RAM >>Configuration New Password Time ..:.. Baud rate ..Communication ..Computer number Version: ..Synchr. time: ..Unit temp..Unit wind speed ..
- Page 41 INSTALLER MANUAL APPENDIX 2 Installation report...
- Page 42 Fancom 771 INSTALLER APPENDIX 2 Installation report INSTALLER APPENDIX 2: Installation report User Installer Name: ............Name: ............. Address: ............Address: ............. City: ............City: ............. Telephone Nº: ............Telephone Nº: ............. Delivery and set into operation Delivered on: ..........
- Page 43 Fancom 771 INSTALLER APPENDIX 2 Installation report INSTALLATION Relay number Relay assignments (continued) HIGH Feed bin 1 Feed bin 2 Feed bin 3 Feed bin 4 Feed bin 5 Feed bin 6 Feed bin 7 Feed bin 8 Feed bin 9...
- Page 44 Fancom 771 INSTALLER APPENDIX 2 Installation report INSTALLATION Factory setting* User's setting Installation weigher Weigher model WITH HOPPER Max. capacity 25.00 SYSTEM Factory setting* User's setting Configuration Baud rate 2400 Bd Communication MASTER Computer number Synchr. time Unit temp. °C...
- Page 45 Fancom 771 INSTALLER APPENDIX 2 Installation report INSTALLATION CIRCUIT 1, 2 ... 15 Circuit Valve control time Extra distance Slip After run Detection Pos. overflow Extra slip Pulse INSTALLATION VALVE 1, 2 ... 600 Valve Section Circuit Serial Distance betw.
- Page 46 Fancom 771 INSTALLER APPENDIX 2 Installation report INSTALLATION VALVE 1, 2 ... 600 Valve Section Circuit Serial Distance betw. Total Position Relay Feeder number 2 serial nos.(cm) (in pulses) sensor...
- Page 47 Fancom 771 INSTALLER APPENDIX 2 Installation report INSTALLATION VALVE 1, 2 ... 600 Valve Section Circuit Serial Distance betw. Total Position Relay Feeder number 2 serial nos. (cm) (in pulses) sensor...
- Page 48 Fancom 771 INSTALLER APPENDIX 2 Installation report INSTALLATION VALVE 1, 2 ... 600 Valve Section Circuit Serial Distance betw. Total Position Relay Feeder number 2 serial nos. (cm) (in pulses) sensor...
- Page 49 Fancom 771 INSTALLER APPENDIX 2 Installation report INSTALLATION VALVE 1, 2 ... 600 Valve Section Circuit Serial Distance betw. Total Position Relay Feeder number 2 serial nos.(cm) (in pulses) sensor...
- Page 50 INSTALLER MANUAL APPENDIX 3 Connection diagrams...
- Page 51 Use a IRM relay board for the relay controls Address 1 for the first IRM board Technical modifications reserved. the second board address 2, etc. Connect the IRM ('s) to the I/O Net. Connect Fancom equipment according to the prevailing standards of the local electrical company.
- Page 52 4th. Dosage valve 17 IRM.16 Dosage valve 18 for max. 16 dosage valves Dosage valve 19 (address 4) Dosage valve 20 etc. Connect Fancom equipment according to the prevailing standards of the local electrical company. Technical modifications reserved.
- Page 53 4th. Dosage valve 41 IRM.16 Dosage valve 42 for max. 16 dosage valves Dosage valve 43 (address 4) Dosage valve 44 Dosage valve 24 etc. Connect Fancom equipment according to the prevailing standards of the local electrical company.
- Page 54 Connection dosage valves: K.64 with IRM.16 (I/O Module) IMC781 IRM.16 address: 3 G3 G4 G5 G6 Group 6 Group 5 Group 4 Group 3 Group 2 + / ~ Power supply valves (See valve specification) - / N C7 P A0 A2 A4 A6 Group 1 K.64...
- Page 55 (+) EXTERNAL ALARM white (-) Input 12 gray (P) yellow (not used) green (no feed) pressostat thermal contact contact Cable break contact maybe more external alarm contacts Connect Fancom equipment according to the prevailing standards of the local electricity company.
- Page 56 Connection overflow alarm with bucket Overflow alarm OVERFLOW bucket Connection overflow alarm with the PROX.24A PROX.24A sensor Overflow not used OVERFLOW Technical modifications reserved. Connect Fancom equipment according to the prevailing standards of the local electrical company.
- Page 57 / + valve concerned white / - grey yellow FEEDER brown / + FEEDBACK white / - grey Input 10 Feeder sensor PROX.24F Technical modifications reserved. Connect Fancom equipment according to the prevailing standards of the local electrical company.
- Page 58 Empty report connection (PROX.24F) Empty report circuit 1 (PROX.24F) Empty report not used no feed Connection pulse counter Fancom pulse counter Driving engine PULSE Circuit Connect Fancom equipment according to the prevailing standards of the local electrical company.
- Page 59 Circuit inlet motor Connect the motor according to the specifications of the motor manufacture Fancom recommend the use of this diagram for a Left/Right motor connection. Make the connection outside the Fancom computer panel. Connect Fancom equipment according to the prevailing...
- Page 60 HIGH 1 HIGH 2 (Connect the motor according to the specifications of the motor manufacturer) Fancom recommend the use of this diagram for a High/Low motor connection. Make the connection outside the Fancom computer panel. 3-10 Connect Fancom equipment according to the prevailing...
- Page 61 M a i n s v o l t a g e Motor control 380V (HAND) Connect the motor according Motor the specification of the 380Vac motor manufacurer 3-11 Connect Fancom equipment according to the prevailing standards of the local electrical company.
- Page 62 The first and the last system must be terminated FNet with a resistance of 120Ω. The order of systems is not important. Polarity of FNet is not important. Connect Fancom equipment according to the prevailing standards of the local electricity company.
Need help?
Do you have a question about the 771 and is the answer not in the manual?
Questions and answers