Table of Contents
Advertisement
Quick Links
Advertisement
Table of Contents

Related Manuals for THORLABS VEG200 Series


Summary of Contents for THORLABS VEG200 Series
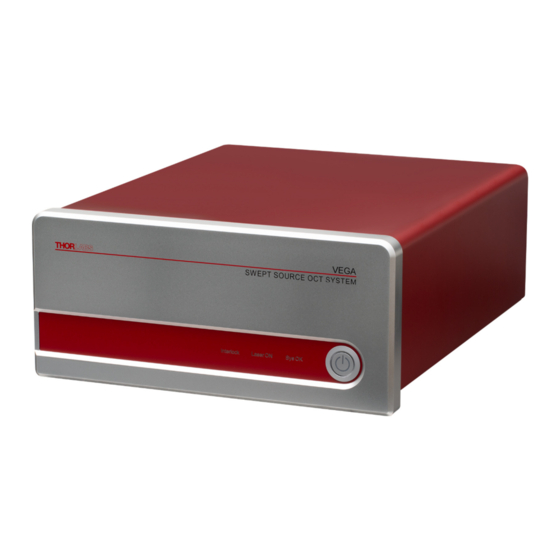
- Page 1 Swept Source OCT System Base Units VEG200 Series User Manual...
- Page 2 Original User Manual – not translated...
-
Page 3: Table Of Contents
2.4. System Installation ....................8 Chapter 3 Description ........................ 1 4 3.1. Tutorial ........................14 Theory ......................... 15 Thorlabs SS-OCT System Technology ............... 16 Nomenclature in OCT imaging ..................18 3.2. SS-OCT Base Unit Components ................20 ... - Page 4 Chapter 10 Mechanical Drawings .................... 5 1 Chapter 11 Regulatory ........................ 5 2 11.1. Waste Treatment is Your Own Responsibility .... Error! Bookmark not defined. 11.2. Ecological Background ..........Error! Bookmark not defined. Chapter 12 Thorlabs Worldwide Contacts .................. 5 3 ...
-
Page 5: Chapter 1 Introduction
Opening the device will void your warranty. Any modification or servicing of this system by unqualified personnel renders Thorlabs free of any liability. This device can only be returned when packed into the complete original packaging, including all foam packing inserts. -
Page 6: Safety
Make sure that the line voltage rating agrees with your local supply and that the appropriate fuses are installed. Fuses should only be changed by qualified service personnel. Contact Thorlabs for assistance. Do not operate without cover installed. Refer servicing to qualified personnel. -
Page 7: Care And Maintenance
If the system is mishandled during shipment, the optical components may become misaligned, which could lead to a decrease in image quality. If this occurs, the system will need to be realigned by qualified personnel. Please contact Thorlabs technical support for more information. ... -
Page 8: Optical Cleaning
Good performance and image quality of the OCT imaging system relies on clean optical connections. Whenever using the Thorlabs OCT system, the following guidelines for optical fiber connection should be followed: 1) Always make sure that the light source is switched off when you clean the fiber. -
Page 9: Service
Thorlabs provides. Any modification or maintenance by unqualified personnel will render the warranty null and void, leaving Thorlabs free of liability. Please contact Thorlabs technical support for questions on customization. -
Page 10: Chapter 2 Setup
SS-OCT System Base Unit Chapter 2: Setup Chapter 2 Setup 2.1. Unpacking Carefully unpack the components from the transport boxes. Make sure that all components are delivered according to the packing list included in the transport box. After unpacking, store the packing cartons and inserts. You may need them in case of a service or upgrade of your OCT system. -
Page 11: Internal Electrical Connections
2.2.3. Electrical Interfaces to Imaging Scanner For the connection to a scanner application there are two different interfaces available: The scanner connection port is intended to be used together with dedicated Thorlabs imaging scanners OCTG and OCTP. The auxiliary connection port is intended to be used together with the dedicated Thorlabs imaging scanner OCTH and furthermore allows the use of a custom scanner. -
Page 12: System Installation
SS-OCT System Base Unit Chapter 2: Setup 2.4. System Installation ATTENTION Make sure the included power cords for the base unit, computer and monitor are connected to a properly grounded outlet (100 – 240 VAC; 50 – 60 Hz). Transportation and delivery may cause the OCT system to be warm or cool upon receipt. Please wait for the system to reach room temperature before attempting to operate. - Page 13 SS-OCT System Base Unit Chapter 2: Setup 5) Attach the electric connection cable to the imaging scanner. Align the red dot of the plug to the alignment mark of the electric connection port of the scanner (e.g. OCTG). Figure 7 Plugging the Electrical Connector into the Scanner ...
- Page 14 SS-OCT System Base Unit Chapter 2: Setup 6) Fiber connection to the imaging scanner: ATTENTION When installing the fiber, make sure that the fiber tip does not get contaminated by dust. Do not touch the fiber tip! Remove the dust caps from one fiber end and from the FC/APC fiber connection at the imaging scanner.
- Page 15 SS-OCT System Base Unit Chapter 2: Setup 7) Attach the electric connection cable to the base unit Align the red dot upwards, facing the alignment mark in the base unit. Push the connector into the plug until a “click” sound is heard. Figure 10 Installing the Scanner Connection Cable at the Base Unit 8) Fiber connection to the base unit:...
- Page 16 SS-OCT System Base Unit Chapter 2: Setup 9) Signal, Trigger and USB connections at the Base Unit (see Figure 12): Attach the SMA cable labeled “k-CLOCK Signal” to the respective SMA port. Attach the SMA cable labeled “OCT Signal” to the respective SMA port. ...
- Page 17 SS-OCT System Base Unit Chapter 2: Setup Figure 13 Connections of the Alazar (top) and NI DAQ (bottoms) Cards 15) Removing the protective cap off the scan objective: Pull the protective cap off the scan objective. Do not rotate the protective cap, as this might loosen the fit of the illumination tube.
-
Page 18: Chapter 3 Description
SS-OCT System Base Unit Chapter 3: Description Chapter 3 Description 3.1. Tutorial Fourier Domain Optical Coherence Tomography (FD-OCT) is based on low-coherence interferometry, which utilizes the coherent properties of a light source to measure optical path length delays in a sample. To obtain cross-sectional images with micron-level resolution using OCT, an interferometer is set up to measure optical path length differences between light reflected from the sample and reference arms. -
Page 19: Theory
SS-OCT System Base Unit Chapter 3: Description 3.1.1. Theory The interference equation for the cross-correlated interference term is ~2 ∙ ∙ ∙ cos Δ With the phase difference Δ being a function of the optical path length difference and the wavenumber Δ... -
Page 20: Thorlabs Ss-Oct System Technology
3D reconstruction of a volume near the sample surface. The internal structure of a sample can be accurately mapped via computer generated tomographic images. The VEG200 Series Swept Source OCT systems (Vega) provide simultaneous multiple imaging channels for microscopic viewing of the sample. The en-face images, similar to those obtained from a conventional microscope, can be acquired from the video camera channel while the cross-sectional images that show the sample's internal structure are acquired from the OCT channel. - Page 21 SS-OCT System Base Unit Chapter 3: Description The schematic setup of the Vega swept source OCT system is shown in Figure 16. Swept Source OCT Imaging System VEG200 Accessories/Peripherals OCT Stand Monitor Imaging Probe Display Port PC System NI PCIe‐6351 DAQ Card USB 2.0 VHDCI AlazarTech ATS9360/ATS9351 DAQ Card Base Unit VEG200 k‐CLOCK USB 2.0 USB 2.0 OCT Signal SYNC Trigger Mouse...
-
Page 22: Nomenclature In Oct Imaging
SS-OCT System Base Unit Chapter 3: Description 3.1.3. Nomenclature in OCT imaging Figure 17 A-Scan Data Set As described before, the FD-OCT engine creates a depth profile from the interference of photons sent into the sample and received back with photons reflected in the reference arm. This depth profile is referred to as an A- scan. - Page 23 SS-OCT System Base Unit Chapter 3: Description When scanning both galvanometer mirrors, a volume can be acquired. This can be imaged by movable sections through the volume or by 3D rendering. Please refer to the SD-OCT Software Manual for all features available. Figure 19 Rendered Volumetric Data Set Figure 20...
-
Page 24: Ss-Oct Base Unit Components
This SS-OCT system is delivered with application software made for the imaging scanners provided by Thorlabs. All required data analysis as well as 2D and 3D display can be performed within the software package. The data can be saved, analyzed and exported for further use. - Page 25 SS-OCT System Base Unit Chapter 3: Description define either a standard scanner provided by Thorlabs or create a software representation of a custom- built device. define simple or complex scan patterns. acquire simple A-Scans, B-Scans or complete volumetric measurements.
-
Page 26: Imaging Scanner (Accessory)
Imaging Scanner (Accessory) Thorlabs SS-OCT systems use a dual path OCT setup in which the sample and the reference paths are split at the input of the interferometer. The reference path is set up inside the base unit. Thus, the imaging scanners presented below are “no-reference”... -
Page 27: Oct-Stand (Accessory)
Figure 24 OCTH-NR Handheld Scanner 3.2.5. OCT-Stand (Accessory) The Thorlabs OCTG and OCTP scanners can be adapted to an OCT-STAND. For this OCT-STAND the rotation- and translation stage OCT-XYR1 is available. Figure 25 OCT-STAND with OCT-XYR1 Rev A, December 17, 2018... - Page 28 SS-OCT System Base Unit Chapter 3: Description Figure 26 OCT-STAND Adjuster Figure 27 OCT-XYR1 Sample Rotation Stage For further details on the OCT-STAND and the OCT-XYR1 please refer to the Thorlabs web page. Page 24 MTN013142-D02...
-
Page 29: Starting The System
SS-OCT System Base Unit Chapter 4: System Operation Chapter 4 System Operation 4.1. Starting the System Follow the steps described in the next three subchapters for proper initialization of the system. Your PC system should already be running. 4.1.1. Turning on the Base Unit The following turn ON procedure is required for proper operation of the base unit. -
Page 30: Starting The Software
SS-OCT System Base Unit Chapter 4: System Operation 4.1.2. Starting the Software 1) Start the ThorImageOCT software (see Software User’s Manual for details). The system will be switched on via remote control from the computer. Wait for about 10 seconds until the PC has recognized the hardware. -
Page 31: Basic Adjustments
Basic Adjustments When receiving the SS-OCT system from Thorlabs, the reference length is adjusted so that OCT imaging in air is possible simply by adjusting the focus to the region of interest. If the reference arm length no longer matches the sample arm length, the following procedure will aid you to a good basic adjustment. - Page 32 SS-OCT System Base Unit Chapter 4: System Operation Use the jog buttons or the input field in the reference stage control to move the reference stage in both directions so that you can see how the image position is shifted. ...
-
Page 33: Adjusting The Polarization
QWP and the other as a HWP. By moving the sliders, the respective single and double fiber loops are rotated, thus changing the state of polarization. The principle of operation is identical to a paddle polarization controller offered by Thorlabs, as shown in Figure 37. Figure 37... -
Page 34: Adjusting The Reference Light Intensity And Amplification
SS-OCT System Base Unit Chapter 4: System Operation 4.2.4. Adjusting the Reference Light Intensity and Amplification If required, the reference light intensity can be modified with the reference intenstity controller in the “Device Settings” tab. Especially when analyzing highly reflective samples, attenuation of the reference light may be necessary. -
Page 35: Advanced Adjustments
OCT B-Scans of scattering particles taken with LSM02, LSM03, and LSM04 Thorlabs offers three objective lenses for different purposes. Figure 39 shows the difference in lateral resolution and depth of focus for the LSM02 (high resolution imaging), LSM03 (general purpose), and LSM04 (high depth of focus). -
Page 36: Imaging Through Refractive Media
Thorlabs offers a special reference arm adapter to further increase the reference arm length, please contact Thorlabs for more information. -
Page 37: Reflecting Surfaces And Interfaces
(e.g. a glass slide) to reduce scattering. Thorlabs offers sample z-spacers that provide a glass plate at a fixed distance to reduce scattering effects and to keep the sample in focus, please contact Thorlabs for more information. -
Page 38: Example Images
SS-OCT System Base Unit Chapter 4: System Operation 4.5. Example Images Spectral Domain OCT can be used for a wide range of real-time monitoring applications in biological and clinical fields as well as in manufacturing and materials science. This technology is ideal for in-line industrial imaging applications ranging from laminated packaging films to 3D visualization of mechanical parts. - Page 39 SS-OCT System Base Unit Chapter 4: System Operation Material Imaging SS-OCT can also be used for non-biological material science applications. SS-OCT is ideal for monitoring surface topography and layered structures. Figure 44 B-Scan of a Semi-Transparent Molded Plastic Cap Figure 45 B-Scan of a Laminated IR Card Biological Imaging Figure 46...
-
Page 40: Chapter 5 Imaging Artifacts
SS-OCT System Base Unit Chapter 5: Imaging Artifacts Chapter 5 Imaging Artifacts 5.1. Saturation and Non-Linearity The OCT A-scan data is created by frequency analysis of the spectral data generated by the spectrometer. Intense reflection from the sample can saturate the sensor of the spectrometer or illuminate very close to saturation. -
Page 41: Multiple Scattering
SS-OCT System Base Unit Chapter 5: Imaging Artifacts 5.2. Multiple Scattering When imaging highly scattering material, a large portion of the photons returned to the detection system have been scattered multiple times from travelling into the sample until exiting. Since OCT visualizes the relative travelled path lengths of photons, signals from multiple scattered photons are shown deeper in the image than physically present. -
Page 42: Phase Wrapping And Fringe Washout
SS-OCT System Base Unit Chapter 5: Imaging Artifacts 5.3. Phase Wrapping and Fringe Washout The A-scan data created by the SD-OCT system is produced from spectral information of an optical interference. Depending on the system setting, a certain integration time is applied for acquisition of each A-scan. Certain movement of the sample or parts of it can well be detected by comparing the phase information of adjacent A- scans. -
Page 43: Flipped Image
SS-OCT System Base Unit Chapter 5: Imaging Artifacts 5.4. Flipped Image Without the introduction of additional techniques not provided by the standard SS-OCT system, there is no distinguishing between photons that traveled a distance d shorter or longer from the beam splitter to the sample compared to the reference arm length. -
Page 44: Shadowing
SS-OCT System Base Unit Chapter 5: Imaging Artifacts 5.5. Shadowing Since the SS-OCT imaging uses light for detection of depth information, one can only see information from regions in the sample where photons are transmitted to and allowed back into the sampling aperture. Reflections, strong scattering and absorption lead to shadows in the depth distribution of the data acquired. -
Page 45: Image Distortion By Refractive Media
SS-OCT System Base Unit Chapter 5: Imaging Artifacts 5.6. Image Distortion by Refractive Media OCT images display path length differences between reference arm length and sample arm length (distance from the beam splitter to the scattering or reflecting object). These path lengths are optical path lengths, calculated from the physical path length multiplied by the group refractive index of the sample. -
Page 46: Measurement Depth In Oct Systems
SS-OCT System Base Unit Chapter 5: Imaging Artifacts In the table below, some materials and their phase refractive indices as well as their group refractive indices are given. Material = 900nm = 1050nm = 1310nm Water 24°C 1.327 1.340 1.324 1.340... -
Page 47: Distortions In The Image
SS-OCT System Base Unit Chapter 5: Imaging Artifacts In most cases the sample is not well known. The measurement depth in air (vacuum) is known and the optical path lengths of the materials are obtained – only with the knowledge of the material properties it is possible to determine the real physical thickness. - Page 48 SS-OCT System Base Unit Chapter 5: Imaging Artifacts As an example a material with a wedge is analyzed: Figure 59 Complex Structure in Image The block shows “standard” behavior on the right side where the surface is perpendicular to the incoming beam. In the chamfered area, there is diffraction and the beam travels under an angle through the block.
-
Page 49: Chapter 6 Troubleshooting
OCT image Other reason Call Thorlabs Flipped Image Reference length set incorrectly Adjust reference length Table 3 Troubleshooting Please refer to Chapter 12 for Thorlabs contact information. Rev A, December 17, 2018 Page 45... -
Page 50: Changing The Input Fuses
SS-OCT System Base Unit Chapter 6: Troubleshooting 6.1. Changing the Input Fuses If for some reason you need to replace a broken fuse in the base unit, you must perform the following procedure: Remove the AC input cable that may be connected to the unit. ... -
Page 51: Chapter 7 Certifications And Compliance
SS-OCT System Base Unit Chapter 7: Certifications and Compliance Chapter 7 Certifications and Compliance 7.1. Declaration of Conformity Vega Series Base Units Rev A, December 17, 2018 Page 47... - Page 52 SS-OCT System Base Unit Chapter 7: Certifications and Compliance Page 48 MTN013142-D02...
-
Page 53: Chapter 8 Warranty
Warranty 8.1. Lasers and Imaging Systems Thorlabs offers a one year warranty on all lasers and imaging systems, with the exceptions of laser diodes. 8.2. Non-Warranty Repairs Products returned for repair that are not covered under warranty will incur a standard repair charge in addition to all shipping expenses. -
Page 54: Chapter 9 Specifications
SS-OCT System Base Unit Chapter 9: Specifications Chapter 9 Specifications General Performance Specifications – Vega Series Base Unit Supply Voltage for Base Unit 100 V – 240 V / AC Maximum Power Consumption 100 W Weight of Base Unit (Approx.) 11.5 kg Storage/Operating Temperature 10 °C to 35 °C... -
Page 55: Chapter 10 Mechanical Drawings
SS-OCT System Base Unit Chapter 10: Mechanical Drawings Chapter 10 Mechanical Drawings Figure 61 Base Unit Dimensions Rev A, December 17, 2018 Page 51... -
Page 56: Chapter 11 Regulatory
Waste Treatment is Your Own Responsibility If you do not return an “end of life” unit to Thorlabs, you must hand it to a company specialized in waste recovery. Do not dispose of the unit in a litter bin or at a public waste disposal site. -
Page 57: Chapter 12 Thorlabs Worldwide Contacts
SS-OCT System Base Unit Chapter 12: Thorlabs Worldwide Contacts Chapter 12 Thorlabs Worldwide Contacts For technical support or sales inquiries, please visit us at www.thorlabs.com/contact for our most up-to- date contact information. USA, Canada, and South America UK and Ireland Thorlabs, Inc. - Page 58 M0009-510-535-A...
Need help?
Do you have a question about the VEG200 Series and is the answer not in the manual?
Questions and answers