Table of Contents
Advertisement
Quick Links
INSTRUCTION
MANUAL
Models: RONDO52XX; RONDO52LEDXX; RONDO58XX; RONDO58LEDXX
CAUTION
Read Instructions carefully
for safe installation and
fan operation
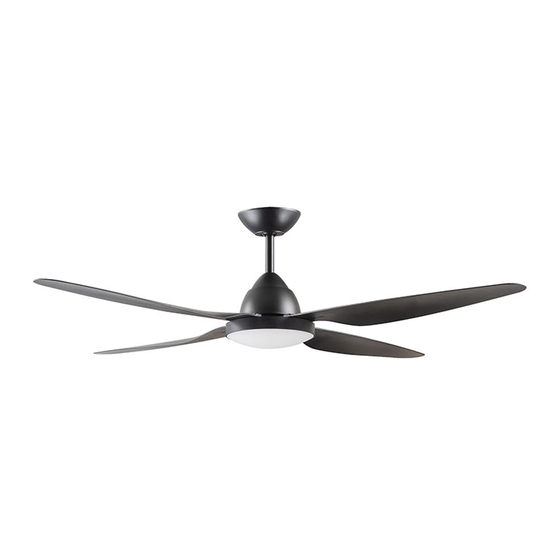
(Fan pictured is for illustration purposes only.
Styles may vary according to the specific models.)
Ceiling Fan Installation Manual, Rev 1.1
RONDO series
• INSTALLATION
• OPERATION
• MAINTENANCE
• WARRANTY
INFORMATION
MUST BE INSTALLED
DIY
BY A LICENSED ELECTRICIAN
Advertisement
Table of Contents

Related Manuals for Deka RONDO Series


Summary of Contents for Deka RONDO Series
- Page 1 INSTRUCTION MANUAL (Fan pictured is for illustration purposes only. Styles may vary according to the specific models.) Ceiling Fan Installation Manual, Rev 1.1 RONDO series Models: RONDO52XX; RONDO52LEDXX; RONDO58XX; RONDO58LEDXX • INSTALLATION CAUTION • OPERATION Read Instructions carefully MUST BE INSTALLED • MAINTENANCE BY A LICENSED ELECTRICIAN...
-
Page 2: Safety Precautions
Thank you for purchasing this quality Deka ceiling fan. To ensure correct function and safety, please read all instructions before using the product and keep all instructions for future reference. SAFETY PRECAUTIONS 1. The appliance is not intended for use by persons (including children) with reduced physical, sensory or mental capabilities, or lack of experience and knowledge, unless they have been given supervision or instruction concerning the use of the appliance by a person responsible for their safety. -
Page 3: Before Installation
BEFORE INSTALLATION Unpack the fan and carefully identify the parts. Please refer to Fig 1. FAN WITH LED LIGHT (Fig 1a.) FAN WITHOUT LIGHT (Fig 1b.) 1. Mounting bracket x 1 1. Mounting bracket x 1 2. Fan assembly with motor, down rod, canopy 2. -
Page 4: Installing The Mounting Bracket
INSTALLING THE MOUNTING BRACKET • The ceiling fan must be installed in a location so that the blades are a minimum 300mm spacing from the tip of the blade to the nearest objects or walls (including bulkheads and beams). • Secure the hanging bracket to the ceiling joist or structure that is capable of carrying a load of at least 30kg, with the two long screws provided (timber use only). -
Page 5: Blade Installation
BLADE INSTALLATION There are two blade installation options, allowing you the choice of either a 3 or 4 bladed ceiling fan. Before installing the blades, select the one which is most suitable for you. 3 blades: use the 3 blade screw mounting holes following the label instruction guide on the ceiling fan motor. 4 blades: use the 4 blade screw mounting holes following the label instruction guide on the ceiling fan motor. - Page 6 BLADE ATTACHMENT Secure the blade on the fan by using 2 blade screws (Fig 2.). For each blade, insert one blade mounting screw through the blade, and attach lightly to the fan. Insert the second blade mounting screw, and then securely tighten both mounting screws. Repeat for all blades. Do not use power tools as this can cause damage to the screws and/or thread in the motor.
-
Page 7: Electrical Wiring Diagram
ELECTRICAL WIRING DIAGRAM WARNING: For your safety all electrical connections must be undertaken by a licensed electrician. NOTE: An additional all pole disconnection must be incorporated in the fixed wiring in accordance with the wiring rules. NOTE: If there are two or more DC ceiling fans installed in the one location, an isolation switch is required for each ceiling fan. -
Page 8: Finishing The Installation
FINISHING THE INSTALLATION • After completing the electrical connection at the mounting bracket terminal block, cover the mounting bracket with the ceiling canopy. Ensure all electrical wiring is tucked inside the canopy and that the wires are not damaged during this step. Secure the canopy to the hanger bracket using the screws provided. -
Page 9: Remote Function
REMOTE FUNCTION ① Fan ON/OFF button • Press the button to turn the fan on/off. • Press and hold the button for 5 seconds within 30 seconds of switching the power to the receiver for pairing the transmitter and receiver. ②... - Page 10 FORWARD/REVERSE FUNCTION Your ceiling fan can operate either in forward mode or reverse mode. Forward Mode: The fan rotates in an anticlockwise direction. The airflow will be directed downwards, for cooling in summer. Reverse Mode: The fan rotates in a clockwise direction. The airflow will be directed upwards, for energy conservation in winter.
-
Page 11: After Installation
AFTER INSTALLATION WOBBLE: Note: Ceiling fans tend to move during operation due to the fact that they are mounted on a rubber grommet. If the fan was mounted rigidly to the ceiling it will cause excessive vibration. Movement of a few centimetres is quite acceptable and does not suggest any problem. -
Page 12: Important Facts
IMPORTANT FACTS All electric motors, including fan motors make some noise and may feel hot if touched – this is NOT A FAULT. Ceiling fans tend to move during operation as they are not generally rigid-mounted. Rigid mounted ceiling fans generate excessive vibration (which leads to noise) and stress on their mountings. Movement in a ceiling fan is not uncommon and does not suggest the fan will fall down. -
Page 13: Warranty Information
What is an in-home warranty? Deka branded ceiling fans offers a two (2) year in-home parts and labour warranty on ceiling fans installed within the coverage of our network of service agents and in cases where the product fails due to defective materials or workmanship. - Page 14 www.dekafans.com.au...
Need help?
Do you have a question about the RONDO Series and is the answer not in the manual?
Questions and answers
How do you remove the light plastic light cover to change the bulb