Table of Contents
Advertisement
Quick Links
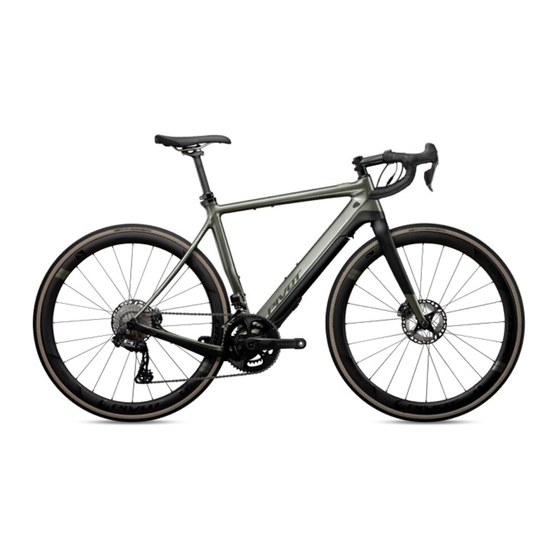
PIVOT E-VAULT
Original Operational Instructions
This manual is intended to provide you with the information needed
to get you on the trail or road. This guide will walk you through the
steps necessary to set up all the components and become familiar
with the Fazua E-bike System. This document contains some helpful
diagrams and reference material to make sure you have everything
necessary to maintain your E-Vault and enjoy it to the fullest.
Advertisement
Table of Contents

Related Manuals for PIVOT cycles E-VAULT


Summary of Contents for PIVOT cycles E-VAULT
- Page 1 Fazua E-bike System. This document contains some helpful diagrams and reference material to make sure you have everything necessary to maintain your E-Vault and enjoy it to the fullest.
-
Page 2: Table Of Contents
TABLE OF CONTENTS PAGE 1. Bike Set-up - Tire Pressure - Adjusting Saddle Height - ISO-Flex Seat Post Insert 2. Fazua Mobile App - Download Mobile App - Launching the Fazua Rider App - Fazua Rider App Navigation 3. Fazua Basics - Removing the Drivepack - Installing the Drivepack - Charging the Battery... - Page 3 - Small Parts Table - Wiring Diagram 5. Warnings - Bicycle Safety - Imporper Use Hazards - Health Hazards - Potential Damage Hazards 6. Additional Information - Fazua Evation Drive System - Pivot E-Vault - Conformity - Sources www.pivotcycles.com info@pivotcycles.com 1.877.857.4868...
-
Page 4: Bike Set-Up
NOTE: The E-Vault can accept both a dropper post and rigid post. The following instructions detail adjusting the saddle height when equipped with a dropper post. For an E-Vault equipped with a rigid post, please skip the first and last step. -
Page 5: Fazua Mobile App
FAZUA MOBILE APP Download Mobile App https://fazua.com/en/drive-system/software/ 1. Go to and click on the "Mobile Apps" link. 2. On the next page, a link will be provided for both the Google Play Store and the Apple App Store. Follow the link corresponding to the operation system of your mobile device (Android or Apple). 3. - Page 6 FAZUA MOBILE APP Activity Feed A) This screen lists all recent activity from the user account. B) The arrow will return to the main Map page. Vehicle A) The icon indicates the current vehicle paired to the bike. By clicking on this icon, you can see the serial number of the drive system and create a custom name and image for the attached device.
-
Page 7: Fazua Basics
FAZUA BASICS Removing the Drivepack NOTE: The battery does not come fully charged and must be completely charged before the first use. The drivepack must be removed in order to charge the battery. 1. Secure the drivepack with one hand. Gently press the the drive pack upward into the downtube to release some pressure off the locking mechanism. -
Page 8: Replacing The Battery In The Drivepack
Remote Detail NOTE: Fazua offers multiple controller options. The E-Vault is equipped with the "fX" model remote. This manual specifically addresses the function of this remote. Additional information regarding the other remote options offered by Fazua can be found on their website. -
Page 9: Speed Sensor
FAZUA BASICS Speed Sensor NOTE: The speed sensor magnet placement is critical to proper system function. Mount the magnet on a spoke on the brake side of the wheel and tighten the screw. 1. Make sure the magnet is in the proper position and distance from the hub. Note the marking on the speed sensor. -
Page 10: Support Modes
FAZUA BASICS Support Modes NOTE: The color of the LEDs indicates the current assistance level. The number of LEDs illuminated indictes the battery charge level. Modes: There are four support levels (each with a distinct color) listed below from least to most support: No support (White), Breeze (Green), River (Blue), Rocket (Red) Changing Support Modes Increase Assistance: Press the upper touch sensor to switch to the next higher support level. -
Page 11: Support Characteristics
Rider Power (Watts) Time (Seconds) * These charts are for illustrative purposes only and do not necessarily represent actual support characteristics of E-Vault Factory Support Settings NOTE: There is an individual support curve for each of the three support modes. Below are the default factory settings. -
Page 12: Fazua Software
FAZUA SOFTWARE Download Software NOTE: All software downloads can be accessed via the Fazua website: https://fazua.com/en/drive-system/software/ Download Desktop Software (Fazua Toolbox) 1. Go to the website listed above and click on the "Desktop Software" link. 2. On the next page, select the operating system of your device click on the plus to view the system requirements and the "Download"... -
Page 13: Customize Assistance Profiles
FAZUA SOFTWARE Customize Assistance Profiles NOTE: A detailed video outlining the procedure for customizing the assistance profiles can be found on the Fazua website: https://fazua.com/en/magazine/toolbox-customizer/ 1. Open the Fazua Toolbox software and connect the drivepack. (Procedure provided above) 2. In the Fazua Toolbox software, on the left panel, click on the "Customizer" menu. 3. -
Page 14: Setting Custom Assistance Profiles
FAZUA SOFTWARE Setting Custom Assistance Profiles To transfer the custom settings to the drivepack, click the "Set Values" button at the top of the screen. Saving Custom Assistance Profiles Once a custom configuration is created, click on "New", give the profile a name and click on "Save". All the profiles you have saved can be called up in the drop-down menu, even if the drivepack is not connected to the computer. -
Page 15: Third Party Compatibility
4. Select "Add Sensor". 5. The Garmin will begin searching for the E-Vault. Turn on the E-Vault by pressing the center Fazua botton on the controller. The lights will flash blue three times. 6. The Garmin will find power or cadence/speed depending on what was selected. Select "Add". -
Page 16: Troubleshooting
TROUBLESHOOTING Troubleshooting Table NOTE: If the system is not functioning as desired, first check whether the fault can be rectified using the following overview table. If the error is not listed below or the recommendations do not correct the issue, contact a Fazua service partner or visit the Fazua service platform: https://fazua.com/en/support/ ISSUE... -
Page 17: Schematics
SCHEMATICS Fazua Evation System Schematic LETTER PART DESCRIPTION PART NAME Fazua Controller 5002000302 Drivepack (Battery / Driver) 5002000101 Bottom Bracket Gear Box 5002000201 Drivepack Locker 5002000601 Speed Sensor (Magnet included with Sensor) 5002000901 (Magnet only: AS-5002003401) Battery Charger - US/CA 5002000502 Battery Charger - EU 5002000501 + 5002001602... -
Page 18: Small Parts Schematic
SCHEMATICS Small Parts Schematic INTERNAL FOAM www.pivotcycles.com info@pivotcycles.com 1.877.857.4868... -
Page 19: Small Parts Table
Small Parts Table NUMBER PART NAME DESCRIPTION TORQUE FP-CVR-EVAULT-SKD-***-V1-R1 E-Vault Skid Plate FP-MNT-BAT-EVAULT-V1-R1 E-Vault Di2 Battery Holder FP-SCW-FLT-M8*25-V1-R1 M8x25 Flat Head Bolts for Skid Plate FP-RDH-NUT-12MM-BLK-V1-R1 12mm RDH Nut V3 (Sleeve Compatible) FP-RDH-TA-12MM-BLK-V4 Vault Derailleur Hanger FP-SCW-SCK-M5*16 M5x16 Rear Derailleur Screw 7 Nm (5 lb·ft) -
Page 20: Wiring Diagram
SCHEMATICS Wiring Diagram ------------------------------------------------ Controller Wire ------------------------------------------------ Speed Sensor Wire ------------------------------------------------ Shimano 4 way Junction Box ------------------------------------------------ Di2 Battery Wire (300mm) ------------------------------------------------ Di2 Front Derailleur Wire (300mm) ------------------------------------------------ Di2 Rear Derailleur Wire (550mm) ------------------------------------------------ Di2 Shifter Wire (1000mm) www.pivotcycles.com info@pivotcycles.com 1.877.857.4868... -
Page 21: Warnings
WARNINGS Bicycle Safety • Read and follow the manufacturer's instructions for e-bike use. • Research and observe any applicaable national, state, or locals laws and regulations regarding e-bikes and their use. Improper Use Hazards • Under no circumstances should the end user modify or alter individual components of the drive system autonomously. -
Page 22: Health Hazards
WARNINGS Health Hazards • Protect the battery from mechanical influences and any other load. • If you notice or suspect that gas is leaking from the battery, immediately ensure a supply of fresh air and seek medical attention as soon as possible. •... -
Page 23: Additional Information
Fazua Evation Drive System visit: https://fazua.com/en/drive-system/software/ Pivot E-Vault • For FAQs and additional technical documents regarding the maintenance of the Pivot E-Vault can be found http://www.pivotcycles.com/bike/evault/ Conformity Fazua confirm the conformity according to 47 CFR Section 15.105 - Information to the user. This equipment has been tested and found to comply with the limits for a Class B digital device, pursuant to part 15 of the FCC Rules.
Need help?
Do you have a question about the E-VAULT and is the answer not in the manual?
Questions and answers