Advertisement
Quick Links
Elevator control wiring and Simple
Title:
Version:
V2.0
Date:
12/5/2017
configuration(Button mode)
Product:
Access Control Device
Page:
1 of 10
Elevator control wiring and simple configuration
(Button mode)
Preparation:
Prepare the following equipment for the test, complete the test and then install
Ds-k2210
Ds-k2m0016
ds-k1106
Step 1: DIP Switch
The DIP switch of the card reader should be
decimal
1 or 2.
The DIP switch of Ds-2100 should be
decimal
1or 2.
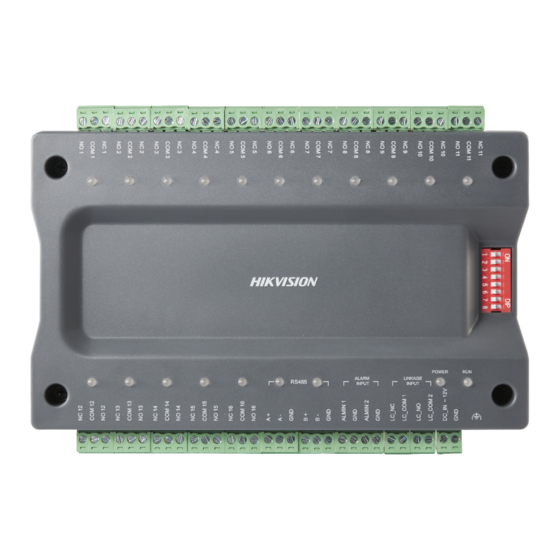
The DIP switch of distributed elevator controller (DS-K2M0016A) is
decimal
3-10
The device USES binary dialing codes
If you want to get dialing 3, Dial 1 and 2,if you want to get 4, Dial 3
Advertisement

Summary of Contents for HIKVISION DS-K2M0016A
- Page 1 1 or 2. The DIP switch of Ds-2100 should be decimal 1or 2. The DIP switch of distributed elevator controller (DS-K2M0016A) is decimal 3-10 The device USES binary dialing codes If you want to get dialing 3, Dial 1 and 2,if you want to get 4, Dial 3...
- Page 2 Elevator control wiring and Simple Title: Version: V2.0 Date: 12/5/2017 configuration(Button mode) Product: Access Control Device Page: 2 of 10 Step2:Wring Step 3:Installation Installation of elevator controller and Elevator button connection controller installation diagram...
- Page 3 3 of 10 Principle: Button(The DIP switch of distributed elevator controller (DS-K2M0016A) is decimal 3- 10) :We control the buttons in the elevator, just put the NC and COM into the button circuit, if the permission is verifiable , the relay will action and you can press the corresponding button.
- Page 4 Elevator control wiring and Simple Title: Version: V2.0 Date: 12/5/2017 configuration(Button mode) Product: Access Control Device Page: 4 of 10 Step 3:Configuration 4200 2.6.2.7 1.4200 ConfigurationClick the access control 2.Activate...
- Page 5 Elevator control wiring and Simple Title: Version: V2.0 Date: 12/5/2017 configuration(Button mode) Product: Access Control Device Page: 5 of 10 3.Modify net info 4.Add to client User name:admin To activate the password, you must check “Export to Group”...
- Page 6 Elevator control wiring and Simple Title: Version: V2.0 Date: 12/5/2017 configuration(Button mode) Product: Access Control Device Page: 6 of 10 5.Determine the controller to display online 6.Configuring the correspondence between floor and relay Drag the right relay to the corresponding floor Click on the upper right corner after the configuration is completed.
- Page 7 Elevator control wiring and Simple Title: Version: V2.0 Date: 12/5/2017 configuration(Button mode) Product: Access Control Device Page: 7 of 10 7.Set the delay time for each floor by default to 120s, which can be set to 15s 8.add the staff permission 9.Add a person's card...
- Page 8 Elevator control wiring and Simple Title: Version: V2.0 Date: 12/5/2017 configuration(Button mode) Product: Access Control Device Page: 8 of 10 10.Add permissions, check permissions and click on the right direction to click ok 11.When you click ok, you will be prompted to send it, and you can click directly.
- Page 9 Elevator control wiring and Simple Title: Version: V2.0 Date: 12/5/2017 configuration(Button mode) Product: Access Control Device Page: 9 of 10 12.Can also be selected permissions set after clicking all issued (delete permission first, then issued all permissions, generally after adding new equipment use) or move issued (group permission to use when there is new change).
- Page 10 Elevator control wiring and Simple Title: Version: V2.0 Date: 12/5/2017 configuration(Button mode) Product: Access Control Device Page: 10 of 10 First Choice for Security Professionals HIKVISION Technical Support...
- Page 11 Elevator control wiring and Simple Title: Version: V2.0 Date: 12/5/2017 configuration(Button mode) Product: Access Control Device Page: 11 of 10...


Need help?
Do you have a question about the DS-K2M0016A and is the answer not in the manual?
Questions and answers