Table of Contents
Advertisement
Quick Links
Advertisement
Table of Contents

Related Manuals for Fermax VIVO Monitor


Summary of Contents for Fermax VIVO Monitor
- Page 1 VIVO MONITOR ENGLISH INSTALLER'S MANUAL...
- Page 2 Code 97721I V06_14 This technical document is published for information purposes by FERMAX ELECTRÓNICA S.A.U., which reserves the right to modify the technical specifi cations of the products referred to herein at any time and with no prior notice. Any such modifi cations shall be included in subsequent editions of this document.
-
Page 3: Table Of Contents
VIVO Monitor VIVO Monitor INDEX VIVO MONITOR ............................6 INTRODUCTION ............................6 - Description of Functional Features: Buttons and Icons .................6 Description of Functional Feature Buttons ..................7 Description of Icons ........................7 - Screen design: Start Menu ........................8 - Language .............................11 - International settings (Date/time) ......................11 - Monitor address programming. - Page 4 VIVO Monitor VIVO Monitor 2.9 Recording Calls ........................57 • 2.9.1 Recording calls made and calls received ................57 • 2.9.2 Recording missed calls ....................58 2.10 Picture View .........................59 2.11 Timer ............................59 2.12 Screen Cleaning ........................60 2.13 Home Automation ........................60 2.14 Alarms ..........................62 •...
- Page 5 Fermax Electrónica develops and manufactures reputable equipment which fulfi ls the highest design and technology standards. The Vivo monitor is a technological device designed to maximise communication, security and comfort in the home. This manual describes all of the functions available on the monitor. These functions may or may not be enabled, depending on installation requirements.
-
Page 6: Vivo Monitor
VIVO MONITOR Introduction The VIVO Monitor is an Internet Protocol-based monitor. This monitor is part of the LYNX system: TCP / IP PoE-based multi-channel data, audio and video. It communicates with a panel based on an IP video-door (the LYNX Audio and Video module) and with a PC-based Guard Unit (the Property Management Station, PMS). -
Page 7: Description Of Functional Feature Buttons
VIVO Monitor VIVO Monitor Buttons Description of functional features - MENU Button. - When the touch screen is on stand-by, the screen will switch on when MENU is pressed. - When the touch screen is on, the screen will return to stand-by when MENU is pressed - When the user is browsing a sub-menu, the monitor returns to the main start screen when MENU is pressed. -
Page 8: Screen Design: Start Menu
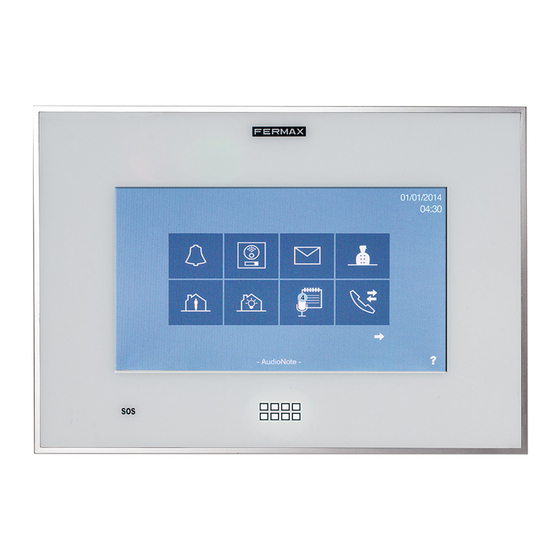
VIVO Monitor VIVO Monitor Screen design. Start Menu. The number of icons on the touch screen may vary depending on the functions enabled in each specifi c installation. A maximum of 8 icons per screen are displayed. The factory default icons are displayed on this screen. - Page 9 VIVO Monitor VIVO Monitor - Note: To go back to the Start Menu, press the intui- tive icons displayed on the monitor - such as arrows or icons corresponding to the current screen - by pressing the MENU button or after a period of time, as the monitor returns to stand-by (screen off) after 30 seconds.
- Page 10 VIVO Monitor VIVO Monitor Notes: - The position of the icons in the menu is defi ned by their priority and availability. The icons can be dragged for a personalised confi guration of the Start Menu with the functions most frequently used and in the required order.
-
Page 11: Language
VIVO Monitor VIVO Monitor Language Select the required language for the monitor. The factory default language is English. To do so, press General Settings to access the screen where the Language Settings option is located. - Note: To go back to the Start Menu, press the intui-... -
Page 12: Monitor Address Programming. Monitor Settings
VIVO Monitor VIVO Monitor Monitor address programming. Monitor Settings. The factory default address of the monitor is 10.0.0.1. - Block: 2 digits (00..99) = block number. - Floor: 2 digits (00..99) - Unit number: 4 digits (0000..8191) = number of homes. -
Page 13: Calls
When the door is opened, the Key icon turns green for 1 second. IMPORTANT: The VIVO monitor is a security device that allows for the visitor's identity to be ascertained. Allowing or rejecting access to visitors is completely the choice and responsibility of the resident. -
Page 14: Call Not Answered
VIVO Monitor VIVO Monitor Call not answered. When the monitor receives a call, the video is displayed immediately (if video transmission is received) and, depending on the origin of the call, the ring tone selected on the monitor is played. The information on the origin of the call is displayed. -
Page 15: Video Settings
VIVO Monitor VIVO Monitor Video Settings. The monitor allows for brightness, contrast and colour to be set by pressing the Video Settings icon. BLOCK 1 BLOCK 1 Picture Capture. Using the Picture Capture icon (camera), pictures can be taken manually or automatically (if it is activated). - Page 16 VIVO Monitor VIVO Monitor When the Pictures icon is pressed, the Picture View screen is accessed, which displays the most recent picture with the defi ned description of the Terminal from where the call was made, the date and the time.
-
Page 17: Picture Resetting
VIVO Monitor VIVO Monitor To delete a picture, select the required picture and press the Delete (waste bin) button. Confi rmation is required. The selected picture, which is the one displayed slightly larger than the rest, is deleted. PICTURE RESET: To delete all existing pictures, press the Delete (waste bin) button for more than 1 second. -
Page 18: Door Release
VIVO Monitor VIVO Monitor - Note: To go back to the Start Menu, press the intui- tive icons displayed on the monitor - such as arrows or icons corresponding to the current screen - by pressing the MENU button or after a period of time, as the monitor returns to stand-by (screen off) after 30 seconds. -
Page 19: Receiving Calls With Several Monitors In The Home
VIVO Monitor VIVO Monitor Notes: - During the conversation, all sound effects in the conversation window are muted. The “click” on the icons and the camera shutter effect are not played when the audio connection is open. - If the MENU button is pressed during the conversation, the monitor will display the Start Menu while the current conversation remains active. -
Page 20: Quick Guide: 1.1 Receiving Calls
VIVO Monitor VIVO Monitor QUICK GUIDE: 1.1 Receiving Calls On receiving a call, the Conversation Screen will open automatically. Icons that are displayed on it: Reject Call. This icon is hidden when the call is answered (green telephone). Answer Call . -
Page 21: Making Calls
VIVO Monitor VIVO Monitor 1.2 Making Calls Calls can be made to: - Outdoor panels: • General Entries. • Panels from its block. • Panels associated to the home. - Property Management Station = PMS (Guard Units). - Another monitor installed in the same home. - Page 22 VIVO Monitor VIVO Monitor BLOCK 1 BLOCK 1 The functions are the same as those seen in Point 1.1 Receiving Calls. If required, users can connect the audio. The screen will return to stand-by mode by pressing the Reject Call icon or after waiting 30 seconds if the audio is not connected.
-
Page 23: Ip Camera Compatibility
To use a standard IP camera with the Vivo monitor, an IP address within the range of the Block Entry panels or Private Home Entry panels must be assigned. In the case of the former, the Block Entry panel, the camera can be used by all monitors in the block. - Page 24 VIVO Monitor VIVO Monitor - Note: This PMS is displayed because it is online and in a mode other than OFF Mode. These parameters can be viewed on the PMS itself. PMS Screens Select Installer to access the screens where the defi ned language, ring tone volume and PMS name are displayed.
- Page 25 VIVO Monitor VIVO Monitor the language and ring tone volume of the PMS are displayed In GENERAL SETTINGS, Note: The application must be restarted for the language change to be effective PMS SETTINGS displays the description (Name) selected for the PMS.
- Page 26 VIVO Monitor VIVO Monitor Select Mode to access the existing modes on the PMS. The mode for the PMS to be operative must be Home Mode or Full Mode. Users can select an PMS and a call is sent to it. The call ring tone is played. If the guard unit does not answer the call in 30", a message is displayed on the screen to indicate that the guard unit is not available...
- Page 27 VIVO Monitor VIVO Monitor On making the call to the PMS, the monitor displays the operator (concierge) if the PC of a camera is available. PMS is busy, he will call back as soon as possible. Once the connection has been made (answer from PMS), the monitor shows the operator (concierge) of the PMS - if the PC has a camera fi...
- Page 28 VIVO Monitor VIVO Monitor To end the conversation, press the End Conversation icon or the conversation will end after 90 seconds. It is possible to call another home through the PMS. The owner calls the PMS and asks for inter- communication with another home, e.g.
- Page 29 VIVO Monitor VIVO Monitor Enter Home number or search for the home using the Address Book Press accept to transfer the call Yaga Yaga Page 29...
- Page 30 VIVO Monitor VIVO Monitor It is also possible to transfer the call to another PMS. The conversation with the PMS is limited to 90 seconds. Page 30...
-
Page 31: Panic Call (Sos Button)
VIVO Monitor VIVO Monitor 1.2.3 Panic Call (SOS button) The panic call is a special call for the Property Management Station (PMS) responsible for receiving this type of call - the PMS ALARMS - and these calls take priority over all others. -
Page 32: Pressing The Sos Button For 3 Seconds
VIVO Monitor VIVO Monitor There are three ways of activating the panic call in the Guard Unit: 1. Pressing the SOS button for 3 seconds. The monitor displays a message indicating that the panic call will be sent in 3 seconds (and the countdown will be displayed, i.e. the seconds remaining) and an alarm tone will be triggered. -
Page 33: Pressing An External Secondary Sos Button
VIVO Monitor VIVO Monitor To end the conversation, press the End Conversation icon or the conversation will end after 90 seconds. 2. Pressing an external secondary SOS button (e.g. a button in the bathroom, in the bedroom, etc.) that is directly connected to the monitor (to the panic terminals: NG, P). This is instant. The monitor only sends a panic message to the Guard Unit. -
Page 34: Activating The Alarm System
VIVO Monitor VIVO Monitor - Note: To go back to the Start Menu, press the intui- tive icons displayed on the monitor - such as arrows or icons corresponding to the current screen - by pressing the MENU button or after a period of time, as the monitor returns to stand-by (screen off) after 30 seconds. -
Page 35: Inter-Communication: Calls Between Monitors
VIVO Monitor VIVO Monitor 1.2.4 Inter-Communication: Calls between monitors It is possible to call from one monitor to another. There are 2 types of calls: - Internal: call from one monitor to another installed in the same home. - External: call between homes, i.e. to another monitor in the same installation. -
Page 36: Internal Calls: Call From One Monitor To Another Installed In The Same Home
VIVO Monitor VIVO Monitor 1.2.4.1 Internal call: Call from one monitor to another installed in the same home. To call another room in the same home, press the Internal Call (Monitor selection) icon in the Start Menu of the monitor. A list will be displayed that contains all the monitors available. Select the required monitor and the call is automatically sent. -
Page 37: External Calls: Call From One Monitor To Another Monitor In The Same Installation
VIVO Monitor VIVO Monitor To access Monitor Settings, press General Settings to access the screen where the Installer Settings option is located (press), enter the Installer PIN code, which by default is 4444 and press OK to access the screen where the Monitor Settings option is located. -
Page 38: Making An External Call
VIVO Monitor VIVO Monitor To call another home in the same installation, press the External Call (Call from Home to Home) icon in the Start Menu of the monitor. A list will be displayed that contains all the monitors available. Users select the monitor required and the call is sent automatically (if the following option is selected in Home to Home Call Settings: Allow All Incoming Calls, explained at the start of this chapter: 1.2.4 Inter-Communication:... -
Page 39: Friendship Request
List icon to open this screen and the display will be empty. The Vivo monitor allows for calls between different homes, as explained. However, to ensure privacy the list of friendship requests can be generated to only accept calls from a list of friends. Press the Friendship Request icon to go to this screen. - Page 40 VIVO Monitor VIVO Monitor Friendship request To call another home in the same installation, fi rst The window to complete this request is automatically send the Friendship request by pressing the icon. displayed. If the home number (Block-monitor no.) is entered, e.g.: 010301, the Tenant Name is automatically completed when “Ready”...
- Page 41 VIVO Monitor VIVO Monitor Press the message to select it. Once the message is selected, press Read Message. Note: Friendship requests between the monitors are recorded in the general message list. The message can be seen in the target home and the following options are permitted: - Accept.
- Page 42 VIVO Monitor VIVO Monitor Friendship request accepted. The Contacts List displays who can be called and who can call: (arrow pointing to the right), you are on their list, but they do not appear on your list and, therefore, you can receive calls from this contact.
-
Page 43: Quick Guide: 1.2 Making Calls
VIVO Monitor VIVO Monitor QUICK GUIDE: 1.2 Making Calls Calls can be made to: - Outdoor panels: • General Entries. • Panels from its block. • Panels associated to the home. - Property Management Station = PMS (Guard Units). - Another monitor installed in the same home. - Page 44 VIVO Monitor VIVO Monitor 1.2.4 Inter-Communication: Calls between monitors It is possible to call from one monitor to another. There are 2 types of calls: - Internal: call from one monitor to another installed in the same home. - External: call between homes, i.e. to another monitor in the same installation.
- Page 45 VIVO Monitor VIVO Monitor To ensure privacy, the list of friendship requests can be generated to only accept calls from a Friends List. Press the Friendship Request icon to go to this screen. friendship request Complete the friendship request. Select Add to Friends List and press confi...
-
Page 46: Start Screen Icons Description And Functional Features
VIVO Monitor VIVO Monitor 2. DESCRIPTION AND FUNCTIONS of START SCREEN ICONS These are all the existing functions on the monitor. Some are enabled by default and others must be enabled, as explained in: Screen design. Start Menu. With all of the functions enabled, the Start Menu screens will be displayed as shown below. -
Page 47: Outdoor Panel
VIVO Monitor VIVO Monitor Once confi rm has been pressed, Do Not Disturb mode is enabled, the Do Not Disturb LED is lit and the Do Not Disturb icon on the start screen changes to indicate that the mode is activated. -
Page 48: External Call (Home To Home Call)
Request through the Contacts List. The Vivo monitor allows for calls between different homes, although to ensure privacy the list of friendship requests can be generated to only accept calls from a list of friends only. Note: This function is synchronised with all of the monitors in a given unit. - Page 49 VIVO Monitor VIVO Monitor Press the Receive Messages icon to go to the Messages screen. The messages are displayed in chronological order, from the latest received (top) to the oldest (bottom). If the list is too long for the size of the screen, it can be scrolled.
-
Page 50: Privacy Settings
A PIN code (password) can be used to protect some of the characteristics of the monitor for privacy purposes or other reasons. The Vivo monitor can be confi gured to request a PIN code to access the messages in the in-tray and/or to access the user confi guration menu. See Chapter: 2.16.6 Privacy Settings (for further details). -
Page 51: Sending Messages
VIVO Monitor VIVO Monitor If, in Privacy Settings, the following is selected in PIN required: Reading Messages, the PIN code request screen will open automatically when the Receive Messages icon is pressed. The default password is: 1234. After entering it, the Proceed with the messages as explained in: 2.7.1... - Page 52 VIVO Monitor VIVO Monitor Press the Send Message icon and the Send Message The Send Message screen displays all of the fi elds screen opens automatically. for drafting and sending the message. Select the recipient (For). Once the recipient has been selected, draft the mes- sage, (pressing previously on the screen).
-
Page 53: Audio Notes
VIVO Monitor VIVO Monitor Notes: - The maximum length per message is 128 characters. - Once the message has been sent there are several options: • If the message is correctly received, “Message sent” is displayed. The recipient unit will include the message in the list. -
Page 54: Playing Audio Notes
VIVO Monitor VIVO Monitor A message is displayed to indicate that the audio The Audio Notes icon changes to indicate that the note has been recorded. audio note has been recorded on the monitor and displays a blue circle with the number. - Page 55 VIVO Monitor VIVO Monitor - a) Play Audio Note. • Play: The selected audio note is played. A progress bar is displayed. • Pause: This pauses the audio note being played. • Back: This returns to the Audio Notes Menu.
- Page 56 VIVO Monitor VIVO Monitor The Audio Notes icon changes to indicate that audio notes have been recorded on the monitor and displays a blue circle with the number of notes recorded. Access the Audio Note screen by pressing the audio Notes icon.
- Page 57 VIVO Monitor VIVO Monitor 2.9 CALLS REGISTER Function to view the Call History. This function enables users to open a list containing all calls. The lists are available on three different tabs: - a) Dialled calls. - b) Received calls.
- Page 58 VIVO Monitor VIVO Monitor 2.9.2 Missed Calls Register The Calls Register on the start screen has two different options: - List of calls. When no number is displayed on the Calls Register icon, this indicates that there are no new missed calls.
- Page 59 VIVO Monitor VIVO Monitor Once the Call History screen has been opened, the blue circle disappears and the Calls Register returns to its original appearance. 2.10 PICTURE VIEW Function to view all of the picture captures made. To view the pictures captured, press the Pictures icon on the start screen. The Picture View screen allows for all pictures captured from the Conversation Screen during calls to be viewed (see Chapter: 1.
- Page 60 - Use a soft, lint-free cloth for cleaning. Abrasive cloths, towels, paper towels and similar can damage the Vivo monitor screen. Avoid any liquid and dampness on the openings. Do not use aerosols, solvents or abrasives. Do not spray cleaning products directly.
- Page 61 - Port. Optional (if required). Port number. - URL. Web address of the server. Once the data has been entered, For example: http://www. fermax.com press to validate - Unit Router. Select this option if the Home Automation server is in another LAN. A ROUTER is required in the home that is confi...
- Page 62 NIGHT mode 2.14.1 Alarm Management The Vivo monitor can manage a Fermax proprietary alarm through its Sensor Module. This Sensor Module allows for the management of up to 16 zones. This module can also be managed in parallel using D16 keypads and, therefore, the visual status of the Sensor Module can be monitored by both units.
- Page 63 VIVO Monitor VIVO Monitor Parameters in Alarm Settings: It is possible to confi gure the following parameters in the Sensor Module: - Address. Address of the Sensor Module from 0 to 3. [0] by default. - Zone. A Sensor Module allows for the management of up to 16 zones. A maximum of 4 Sensor Modules (Sensor 1, Sensor 2, Sensor 3 and Sensor 4) can be managed.
- Page 64 VIVO Monitor VIVO Monitor - Note: To go back to the Start Menu, press the intui- tive icons displayed on the monitor - such as arrows or icons corresponding to the current screen - by pressing the MENU button or after a period of time, as the monitor returns to stand-by (screen off) after 30 seconds.
- Page 65 When an alarm is activated, notifi cation is sent to the corresponding Property Management Station (Guard Unit) Alarm. On receiving an alarm, the Vivo monitor sends it to the Property Management Station Alarm with the following information: Home number, Sensor Module Address, Zone number and Zone Name (if defi...
- Page 66 VIVO Monitor Sabotage Detection System (alarms) The Vivo monitor has a tamper connector. The monitor generates an alarm tone and sends an alarm report to the Property Management Station Alarm should anyone try to disconnect it. Any type of sabotage must be detected and communicated to the Property Management Station (Guard Unit) Alarm.
- Page 67 VIVO Monitor VIVO Monitor residents (Tenants) so that, when one of them shows their user device to the Outdoor Panel (proximity modules, fi ngerprint, radio-frequency or alphanumeric code), the system activates the corresponding relay on the Panel and the relays that enable the corresponding button for their Floor and any additional fl...
- Page 68 VIVO Monitor VIVO Monitor Lift Settings. This allows for the existing lifts in the installation to be defi ned and associated to the accesses possible to the Lift Control. From the Installer Menu go to: Lift Settings. Page 68...
- Page 69 VIVO Monitor VIVO Monitor Lift Settings - Table a. Press Add to open a screen where the data for control of a new lift must be entered. The parameters in Lift Settings are: - Tag. Lift description. - Block. Block where the lift is located.
- Page 70 VIVO Monitor VIVO Monitor Lift Settings - Table b. Press Add to open a screen where the fl oors to be represented with text instead of numbers are defi ned, for example: «BASEMENT», «GARAGE», etc. - FLOOR: these are the characters represented in the FLOOR box in the USERS table (Address Book).
- Page 71 VIVO Monitor VIVO Monitor Once all of the parameters are defi ned, press Save. When Save is pressed, all of the confi guration is saved in the different system units: Panels, Monitors, etc. Page 71...
- Page 72 VIVO Monitor VIVO Monitor From the Administrator Menu go to: - Lifts - Address Book Lifts. This table defi nes the fl oors that users can access using the lift. Each user is automatically assigned the relay corresponding to his/her fl oor (depending on the Address Book) and a certain Group (optional) to allow access to the fl...
- Page 73 VIVO Monitor VIVO Monitor Enter the parameters. Once all of the parameters are defi ned, press Save. Note: Use the characters AA to indicate ranges of fl oors, e.g.: 0 AA 20 means relays from 0 to 20. Page 73...
- Page 74 VIVO Monitor VIVO Monitor Address Book. This table defi nes the parameters for Tenants. Depending on these parameters and following the programming of Lift Control, tenants can perform the functions defi ned in Lift Control. - Lift Control from the monitor.
- Page 75 VIVO Monitor VIVO Monitor Enter the parameters. Once all of the parameters are defi ned, press Save. Page 75...
- Page 76 VIVO Monitor VIVO Monitor Once all of the parameters are defi ned, press Save. When Save is pressed, all of the confi guration is saved in the different system units: Panels, Monitors, etc. Page 76...
- Page 77 VIVO Monitor VIVO Monitor 2.16 GENERAL SETTINGS Function to make different settings to the monitor. Press the General Settings icon to access a screen containing different icons for this confi guration. These settings can also be made/ personalised by the user.
- Page 78 VIVO Monitor VIVO Monitor 2.16.8.3 Lift Control Settings 2.16.8.4 Optional Functions 2.16.8.5 Alarm Settings 2.16.8.6 Home Automation Settings 2.16.8.7 Installer Privacy Settings 2.16.8.8 SD Card Menu on the General Settings screen Description and functions of the icons 2.16.1 CALL SETTINGS...
- Page 79 VIVO Monitor VIVO Monitor For example, the Timer Alarm tone can be selected. To do so, search for Timer and press the tone. The Timer screen opens and the current tone and its volume are heard. This screen displays the tones available and the volume setting bar.
- Page 80 VIVO Monitor VIVO Monitor 2.16.3 LANGUAGE SETTINGS The Language Settings function enables you to select the required language for the monitor. The factory default language is English. - Note: To go back to the Start Menu, press the intui- tive icons displayed on the monitor - such as arrows...
- Page 81 The Privacy Settings function allows for some of the characteristics of the monitor to be protected by a PIN code (password) for privacy purposes or other reasons. The Vivo monitor can be confi gured to request a PIN code to: - Access the user confi guration menu and/or...
- Page 82 VIVO Monitor VIVO Monitor With the User Settings option selected, press the General Settings icon in the Start Menu and enter the PIN code that, by default, is 1234 (if it has not been changed) and press OK to access the screen where the icons corresponding to the different monitor settings are located.
- Page 83 VIVO Monitor VIVO Monitor The default password is: 1234. After entering it, the Proceed with the messages as explained in: 2.7.1 message screen is accessed. Receiving Messages. 2.16.6.2 Changing PIN a) User PIN To change the user PIN. The default user PIN: 1234.
- Page 84 VIVO Monitor VIVO Monitor Once the User PIN code has been changed, press on the General Settings icon in the Start Menu and enter the NEW PIN code and press OK to access the screen where the icons corresponding to the different Monitor Settings are located.
- Page 85 VIVO Monitor VIVO Monitor A screen is displayed to indicate that the alarm PIN has been changed. Once the Alarm PIN code has been changed, press the Alarm Mode icon in the Start Menu to access the Alarm Mode screen and change the alarm status. (See Chapter 2.14.2 Alarm Modes (Functions).
- Page 86 VIVO Monitor VIVO Monitor The monitors are identifi ed by 2 labels: - Tenant Name: This identifi es the home (e.g. the Garcia family, name Marta Jover, etc.). Note: All monitors in the same home must have the same Name, Block and Unit.
- Page 87 VIVO Monitor VIVO Monitor Press the Installation Settings icon and use the 2.16.8 INSTALLATION SETTINGS. Installer PIN code to access a screen containing different icons for these settings. Note: The Installation Settings function is PIN-protected, so that it can only be used by qualifi...
- Page 88 VIVO Monitor VIVO Monitor - Note: To go back to the Start Menu, press the intui- tive icons displayed on the monitor - such as arrows or icons corresponding to the current screen - by pressing the MENU button or after a period of time, as the monitor returns to stand-by (screen off) after 30 seconds.
- Page 89 VIVO Monitor VIVO Monitor Note: Relay modules are installed in groups (groups of relays) and each group has: • Master IP relay module: 4 Relays. • 0 or more RS-485 slave modules: up to 32 modules, each one with 10 relays.
- Page 90 VIVO Monitor VIVO Monitor - Note: To go back to the Start Menu, press the intui- tive icons displayed on the monitor - such as arrows or icons corresponding to the current screen - by pressing the MENU button or after a period of time, as the monitor returns to stand-by (screen off) after 30 seconds.
- Page 91 The Alarm Settings function allows for the various Sensor Modules and their parameters to be confi gured. The Vivo monitor can manage a Fermax proprietary alarm through its Sensor Module. This Sensor Module allows for the management of up to 16 zones.
- Page 92 VIVO Monitor VIVO Monitor Parameters in Alarm Settings: It is possible to confi gure the following parameters in the Sensor Module: - Address. Address of the Sensor Module from 0 to 3. [0] by default. - Zone. A Sensor Module allows for the management of up to 16 zones. A maximum of 4 Sensor Modules (Sensor 1, Sensor 2, Sensor 3 and Sensor 4) can be managed.
- Page 93 - Port. Optional (if required). Port number. - URL. Web address of the server. Once the data has been entered, For example: http://www. fermax.com press to validate - Unit Router. Select this option if the Home Automation server is in another LAN. A ROUTER is required in the home that is confi...
- Page 94 VIVO Monitor VIVO Monitor It is therefore possible to change: a) User PIN To change the User PIN. The default User PIN: 1234. Press the User PIN parameter to select it. A screen opens and requests the current User PIN (1234 by default).
- Page 95 VIVO Monitor VIVO Monitor Press the Alarm PIN parameter to select it. A screen opens and requests the current Alarm PIN (0000 by default). Once entered, press OK. A screen opens where the current Alarm PIN can be A screen opens to confi rm the new Alarm PIN. Once changed (4 digits).
- Page 96 VIVO Monitor VIVO Monitor A screen opens where the current Installer PIN can A screen opens to confi rm the new Installer PIN. be changed (4 digits). Once entered, press OK. Once entered, press OK. A screen is displayed to indicate that the Installer PIN has been changed 2.16.8.8 SD Card Menu...
- Page 97 VIVO Monitor VIVO Monitor - To delete an app, drag and drop from Installed to the Waste Bin icon or select the app and press the Waste Bin icon. The system will request confi rmation. 3. Confi guration from the web server The Monitor has a web server incorporated that allows for confi...
- Page 98 VIVO Monitor VIVO Monitor 4. Connectors Monitor connection. - 30 pins to attach to the monitor connector. - Mini USB (internal) for fi rmware (during start-up). - Connector for the SD card. Monitor connector. Connections: - RJ-45 10/100 Base -T Ethernet, socket powered. RJ-45.
- Page 99 VIVO Monitor VIVO Monitor 5. Technical Specifi cations - Operating temperature: 0ºC to +40ºC. - Relative humidity: 5-95%, no condensation. Monitor Capacity and Parameters (default values between brackets [ ]): - Maximum number of monitors per home: 8. - Maximum number of homes per Block: 8.192.
- Page 100 Audio and Video Door Entry Systems www.fermax.com fermax@fermax.com...
Need help?
Do you have a question about the VIVO Monitor and is the answer not in the manual?
Questions and answers