Table of Contents
Advertisement
To be the Chief Evangelist
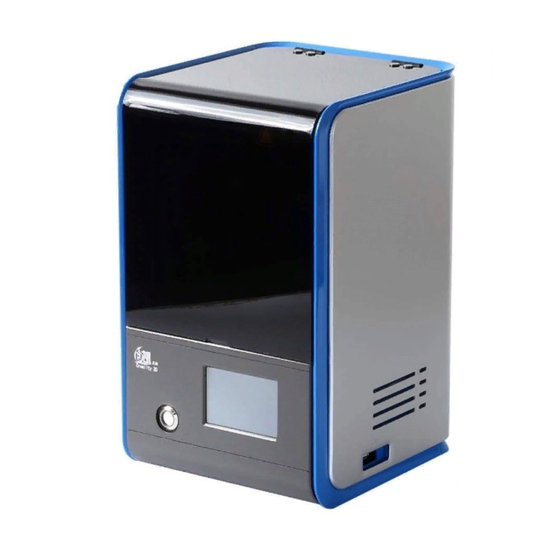
LD-001 Series 3D Printer
To make Top-quality 3D printer
This guidebook is for standard LD-001.
T h e s o f t w a r e a n d h a r d w a r e u p g r a d e s a n d
equipment types are different, it is common that
the product you received have sightly different, so
the products actually received shall prevail.
See the SD card for detailed instructions.
Guide Book
Advertisement
Table of Contents

Related Manuals for Creality 3D LD-001 Series


Summary of Contents for Creality 3D LD-001 Series
- Page 1 To be the Chief Evangelist LD-001 Series 3D Printer Guide Book To make Top-quality 3D printer This guidebook is for standard LD-001. T h e s o f t w a r e a n d h a r d w a r e u p g r a d e s a n d...
- Page 2 The operation interface is based on the actual goods received. Thank you for your support for the Creality 3d printer, welcome to make the constructive comments on our products.
-
Page 3: Table Of Contents
Contents 9. Interface introduction…………………..…10 1. Equipment introduction………………..……...1 10. Add model…………………….......11 2. Unpacking Content…………………....…2 11. Observation view………………....…12 3. Boot Information………………..….....…3 12. Information modification……………...….13 4. Platform Calibration………………..….....…4 13. Add support…………………....…14 5. Loading consumables……………..………....6 14. Slice save…………………......16 6. software installment………………..…....…7 15. Quick screen change …………………...…18 7. - Page 4 Notes 1.Do not use the Printer in any other way not described herein for avoid personal injury or property damage. 2.Do not place the Printer near flammables, explosives or heat sources. It is best to place it in a well-ventilated, low-dust environment.
-
Page 5: Equipment Introduction
1.Equipment introduction Parameter LD-001 Operation 3.5-inch color touch screen slicing software 3D Creator(Chinese |English) Printing method USB、 Wifi X、Y resolution 47 micro meter(2560*1440) Z axis precision 0.02mm-0.05mm 20mm/hour Printing speed ordinary rigid photosensitive Special filament resin Light source UV integrated lamp configuration beads(wave length: 405mm) Operation system... -
Page 6: Unpacking Content
2.Unpacking Content LD-001 3D Printer printing platform tool package Tool package list quantity Image name quantity Image name quantity Image name Screw Mask driver Metal Paper blade funnel Power supply Plastic Glove blade photose Paint Release nsitive brush film... -
Page 7: Boot Information
LCD Screen information 3.Boot Information Main primary Explanation and catalogu catalogue instruction first layer exposure Pause model Print printing exposure stop (S) Screen test Casting Internet Service 1.Connect the power supply, enter the setting E-mail page after turn on the machine.IP Address. System System Information... -
Page 8: Platform Calibration
4.Platform Calibration 1. Before start printing, calibrate the printing platform, loosen both side of the screws, take out the trough. 2. Loosen the four printing platform screws slightly counterclockwise, just a little bit. - Page 9 4.Platform Calibration2 1. After loosening the screws, place 2. keep the paper is moderately a sheet of A4 paper under the tight and keep platform and platform and press the “Zero”. bottom section in balance. 3. Hold down both sides of the platform 4.
-
Page 10: Loading Consumables
5.Loading consumables 1. check there's light on the led lamp or not, keeping the printing screen clean always. Precautions: The photosensitive resin is an epoxy resin that is irritating to the skin. When cleaning printed products or touching photosensitive resins, be sure to wear protective gloves. -
Page 11: Software Installment
6.Software Installation Check the ID address System → Information → ID number (ID number of each printer is different, add the printer in the slicing software to use the machine) software installation cancel Double-click the installation package file to complete the installation → Open the LCD light curing 3D printing software →... -
Page 12: Network Connection
7.Network Connection 1. Wificonnection (Settings→Wifi Settings→Enter Wifi Account, Password) 2. Device connection (Copy IP address→Device connection Wifi network→ input IP address) 192.168.1.107 IP Address Mobile... -
Page 13: Ready To Print
8 .Ready to print Print Slice Open LCD Curing 3D Printing Slicing Software → Add Model → Modify Parameters Precautions: According to the process of operation printing, exposure time to the above parameters as a reference, you should promptly checked with a plastic blade if there’s a printing failure. -
Page 14: Interface Introduction
1. menu list 2.quick operation 5.model action edit model add、 duplicate、 remove 3.observation view check the model view 7.platform 4.model action Editing model placement commands 6.support manual support and auto-support... -
Page 15: Add Model
10.Add model Add model: ①Add model→②Select the stl format file model→③Open model ④duplicate the same model or remove Open... -
Page 16: Observation View
11.Observation view Check the view: ①Right-click on the screen. ②Click on the perspective you want to view. -
Page 17: Information Modification
12.Information modification Model information (click Enter to confirm) Size: Data of size. Position: The XYZ coordinates determines the position. Scaling factor: Change the size of the model, select the lock aspect ratio and Scaling, then Mirrored. Rotation(degrees):Rotate the angle vertically, change different angles, reset the rotation. -
Page 18: Add Support
13.Add support1 Manual support 1.Support height: When set to 0, the bottom surface is attached, and the model is suspended if set to above 0. 2. Support parameter ①Graphics: support "graphics" as a shape, the top is generally set to cone50%, the middle and bottom are generally set to cylinder. - Page 19 13.Add support2 Baseplate: Adding baseplate can increase the viscosity. Remove support: Delete some supports after selecting. 3.Modify support 1 Remove all supports, reset support parameters, and modify the support thickness. 4.Modify support 2 Select Add, Delete, Modify, Supported Changes. X-ray perspective: view the internal structure. 5.Automatically add support: Global support and platform support: All support includes all suspended parts, platform support is suspended and platform.
-
Page 20: Slice Save
14.slicing save1 slicing save: ①slicing ②save tfl format:save the added support data. Save... - Page 21 14.Slicing save2 print step: ①start slicing→②Export file→③Change the exposure time(Reference value, also adjustable on the printer) →④click memory card ③ 1.mission name 2.Split layer thickness Save data Each layer thickness, 50 is the unit of micron ④ 3.Print display effect ①...
-
Page 22: Quick Screen Change
15.quick screen change1 1. Unscrew four screws on the 2. Open the cover on the side of print screen; the fuselage; 3. Remove the print screen cable; 4. Remove the print screen. - Page 23 15.quick screen change2 1. Exchange print screen; 2. The screen wire passes through the print screen chassis; 3. Insert the print screen wire and 4. Tighten the four screws on the print press the cable to install; screen and close the machine chassis.
-
Page 24: Change Release Film
16.change Release film 1. Unscrew all hexagon socket screws in 2. Press the pressing die onto the order and remove the release film; gap; 3. Align the holes in the hole and hold 4. Remove the exposed release film with a the diaphragm and twist the hexagon utility knife. - Page 25 Shenzhen Creality3D Technology CO.,LTD. After-Sales Service Tel: 400-6133 882 O f f i c i a l W e b s i t e : www.creality3d.cn. C o m p a n y A d d r e s s : 12F, Building No.3, Jinchengyuan Industrial Area, Huafan Road, Dalang, Longhua, Shenzhen,Guangdong Province...
Need help?
Do you have a question about the LD-001 Series and is the answer not in the manual?
Questions and answers