Table of Contents
Advertisement
Quick Links
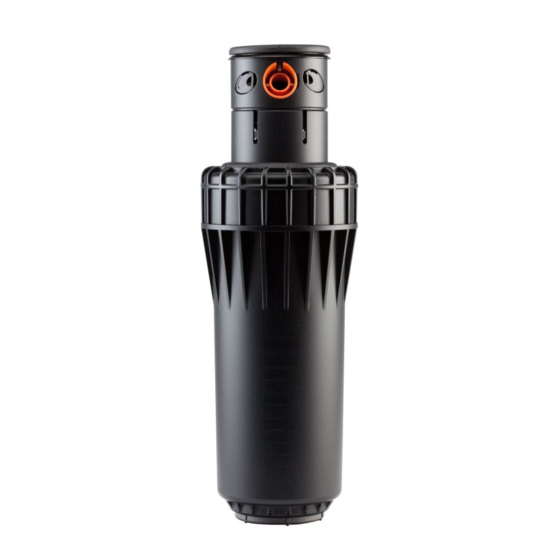
I-90 GEAR-DRIVEN SPRINKLERS
INSTITUTIONAL SERIES
I-90-ADV & 36V NOZZLE INSTALLATION
Caution! The riser assembly is under spring tension. Wear
eye protection and follow proper procedures when servicing
this product.
Tools needed: Phillips-head screwdriver and needle-nose pliers
Preparation
Unscrew the body cap from the body and withdraw the riser.
Compress the riser spring and seal assembly by pressing downward
to expose the nozzle. Hold compressed assembly in this position
firmly with one hand while servicing with the other hand.
NOZZLE REMOVAL AND REPLACEMENT
Remove the logo cap, which is retained by a central Phillips screw.
The nozzle is retained in the nozzle housing by a setscrew. To remove
the nozzle, back out the setscrew using the hex key on the Hunter
wrench so that the nozzle will clear. Grasp the nozzle with pliers and
pull to remove.
Insert the replacement nozzle in the housing. Press firmly to fully
seat the nozzle so that it will clear the retaining setscrew. Using the
hex key on the Hunter wrench, turn the setscrew down to retain
the nozzle.
Note: When changing from one nozzle number to another, check the
stator for proper setting before returning the head to service.
STATOR RING ADJUSTMENT
When installing the nozzle, you must also correctly set the stator to
ensure proper speed of rotation. Failure to correctly set the stator may
cause a non-rotation condition.
The stator is located in the base of the riser assembly. First remove the riser
assembly from the body. Then remove the filter screen to access the stator.
The stator has a protruding tab that aligns with a pointer. Remove the stator
by grasping this tab with pliers and pulling. Replace the stator so that its
pointer is set to the number agreeing with the nozzle installed. Refer to the
Nozzle/Stator Chart at right for nozzle and stator settings.
Visually check for proper assembly of nozzle, setscrews, and stator. Reverse
the preparation procedure to reassemble the unit.
PRECIPITATION RATE ADJUSTMENT
If you have excessively wet or dry areas, you can change the nozzle in
the sprinkler to increase or decrease the precipitation rate. For dry areas,
install a larger nozzle. For wet areas, install a smaller nozzle.
I-90-ADV ONLY: ARC ADJUSTMENT
Adjustable heads are preset to approximately 180°. Sprinklers may be
adjusted with water on or off. It is recommended that initial
adjustment be made before installation.
Rotate the nozzle turret clockwise to the right stop. This is the fixed
side of the arc. The nozzle turret must be held in this position for arc
adjustments. The right stop does not change.
To Increase Arc:
1. Insert the plastic key end of the Hunter wrench into the adjustment
socket (Fig. 1 & 2).
2. While holding the nozzle turret at the right stop, turn the wrench
clockwise. Each full 360° turn of the wrench increases the arc 45°.
3. Adjust to any arc between 40° and 360°. The wrench will stop
turning, or there will be a ratcheting noise, when the maximum arc
of 360° (full circle) has been reached.
To Decrease Arc:
1. Insert the plastic key end of the Hunter wrench into the adjustment
socket (Fig. 1 & 2).
2. While holding the nozzle turret at the right stop, turn the wrench
counterclockwise. Each full 360° turn of the wrench will decrease the arc 45°.
3. Adjust to any arc between 40° and 360°. The wrench will stop turning,
or there will be a ratcheting noise, when the minimum arc of 40°
has been reached.
Note: It is not necessary to disassemble the sprinkler to make adjustments.
I-90-ADV ONLY: ALIGNING THE RIGHT (FIXED) SIDE OF THE ARC
If the right side of the arc is not properly aligned, the result may be a wet walkway or a
dry turf area. The right side can easily be realigned. One way to realign the right stop is
to unscrew the body cap counterclockwise and remove the internal assembly from the
body. Once removed, rotate the nozzle turret to the right stop. Then insert the internal
assembly back into the body with the nozzle aligned to the right side of the area you want
irrigated. At this point you realigned the right arc stop, and you can adjust the left arc to an
appropriate setting.
hunterindustries.com
I-90 Riser Assembly
NOZZLE/STATOR CHART
Nozzle
Numbers
25 - Lt. Blue
33 - Gray
38 - Red
43 - Dk. Brown
48 - Dk. Green
53 - Dk. Blue
63 - Black
73 - Orange
Li Up
Socket
I-90
AD V
Arc Adjustment Socket
Arc Adjustment
Direction
Retainer Cap
Opening
for Nozzle
Stator Ring
Filter Screen
Stator
Position
25
33
38
43
48
53
63
73
Non-
Potable
Water
Speci c
Model
Fig. 1
Fig. 2
Advertisement
Table of Contents

Related Manuals for Hunter INSTITUTIONAL SERIES I-90


Summary of Contents for Hunter INSTITUTIONAL SERIES I-90
- Page 1 Remove the logo cap, which is retained by a central Phillips screw. The nozzle is retained in the nozzle housing by a setscrew. To remove the nozzle, back out the setscrew using the hex key on the Hunter wrench so that the nozzle will clear. Grasp the nozzle with pliers and pull to remove.
- Page 2 * Factory-installed nozzle Notes: Precipitation rates for ADV models are calculated for 180° operation. Precipitation rates for 36V models are calculated for 360° operation. All triangular rates are equilateral. Complies to ASAE standard. © 2020 Hunter Industries Inc. LIT-364 E 1/20...
Need help?
Do you have a question about the INSTITUTIONAL SERIES I-90 and is the answer not in the manual?
Questions and answers