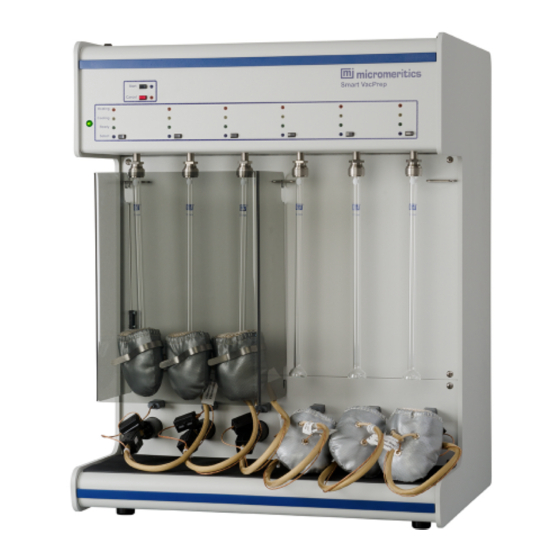
Micromeritics Smart VacPrep Operator's Manual
Intelligent vacuum sample preparation system
Hide thumbs
Also See for Smart VacPrep:
- Installation instructions manual (33 pages) ,
- Operator's manual (65 pages)

Related Manuals for Micromeritics Smart VacPrep


Summary of Contents for Micromeritics Smart VacPrep
- Page 1 MART NTELLIGENT ACUUM AMPLE REPARATION YSTEM PERATOR ANUAL 067-42800-01l Dec 2013...
- Page 2 Smart VacPrep is a registered trademark of Micromeritics Instrument Corporation. _____________________________________________________________________________________ © Micromeritics Instrument Corporation 2013. All rights reserved. Printed in the U.S.A. The software described in this manual is furnished under a license agreement and may be used or...
-
Page 3: About This Manual
WARNING - Warnings contain information to help prevent actions that may cause per- sonal injury. For Chemisorption - Indicates the marked item is applicable to chemisorption analyzers only. For Physisorption - Indicates the marked item is applicable to physisorption analyzers only. Smart VacPrep Operator Manual — 067-42800-01 Dec 2013... - Page 4 Screen Tabs are represented as italicized words. Some examples are: Sample Description, Degas Conditions, Analysis Conditions, and Report Options. Screen Titles Screen Titles are represented as italicized words. Some examples are: Ana- lysis Adsorptive Properties, Free Space, Sample Tube, etc Smart VacPrep Operator Manual — 067-42800-01 Dec 2013...
-
Page 5: Contact Us
Phone: (770) 662-3636 Fax: (770) 662-3696 www.Micromeritics.com --------------- U.S. Inquiries U.S. Sales: (770) 662-3636 ussales@micromeritics.com --------------- Quotes, Orders, and Customer Satisfaction Customer Service: (770) 662-3636 Orders@Micromeritics.com --------------- U.S. Instrument Service Department Phone: (770) 662-3666 Smart VacPrep Operator Manual — 067-42800-01 Dec 2013... -
Page 7: Table Of Contents
1 About the Smart VacPrep 1 - 1 Specifications for the Smart VacPrep 1 - 3 Set the Voltage for the Smart VacPrep 1 - 3 2 About the Smart VacPrep Software 2 - 1 Add or Remove a Smart VacPrep... - Page 8 6 - 3 Replace the Alumina in the Oil Vapor Trap 6 - 6 6 - 10 Replace the Vacuum Pump Exhaust Filter 7 Parts and Accessories for the Smart VacPrep 7 - 1 8 Error Messages 8 - 1 Index...
-
Page 9: About The Smart Vacprep
The degas program may be started or terminated by using the analyzer software on the computer attached to the analyzer or with push buttons on the front panel of the Smart VacPrep. The push button control on each port provides the ability to attach the sample tube with heating mantle, and immediately start degassing a sample. - Page 10 Smart VacPrep unit or by going to Smart VacPrep > Unit [n] > Degas > Start Degas A Check Seal or TransSeal can be used to transfer air-sensitive samples from the Smart VacPrep to the analyzer's port without atmospheric contamination. To order these parts, reference the Parts and Accessories section for the analyzer.
-
Page 11: Specifications For The Smart Vacprep
OLTAGE FOR THE MART The Smart VacPrep voltage setting is housed in a compartment adjacent to the power connector on the back of the unit. 1. Use a flat head screwdriver to gently pry open the cover of the compartment. -
Page 13: About The Smart Vacprep Software
BOUT THE MART OFTWARE If a software update is required for the analyzer to support the Smart VacPrep, the software can be downloaded from the internet at this location: http://www.micromeritics.com/Smart-VacPrep-Software.aspx The degasser software is installed as a part of the analyzer installation. During installation, an IP address will be assigned to the unit allowing the unit to connect automatically during startup. -
Page 14: Add A Smart Vacprep Unit
2 About the Smart VacPrep Software DD A MART REP UNIT Smart VacPrep > Add 1. When prompted, enter the serial number of the unit being added. Duplicate serial numbers are not allowed. 2. Click Add. Initialization begins. EMOVE A MART REP UNIT Smart VacPrep > Remove... -
Page 15: Smart Vacprep Configuration
Smart VacPrep Configuration MART ONFIGURATION Smart VacPrep > Unit [n] > Configuration Displays the Smart VacPrep configuration and software versions. Smart VacPrep Unit Configuration Fields and Buttons Table Field or Button Description Board ID Click to display the board ID. Click to display the Unit IP Setup window. The IP address and Subnet Change IP mask assigned during installation display. -
Page 17: Operate The Smart Vacprep
Cancel to stop the process. VACUATE THE MART ORTS Unit [n] > Smart VacPrep > Evacuate Smart VacPrep Ports Allows manual evacuation of up to six degas ports. Smart VacPrep Operator Manual — 067-42800-01 3 - 1 Dec 2013... - Page 18 The QuickStart Degas Conditions option provides the ability to enter commonly used degas conditions for each Smart VacPrep port without the need for a sample information file. Degassing can then be easily started using the front panel buttons on the Smart VacPrep unit.
-
Page 19: Quickstart Degas Conditions
5. Repeat these steps for each applicable unit and port. 6. If using a Check Seal, verify that the Check Seal opener is installed in the Smart VacPrep port. Follow the instructions included with the Check Seal for instructions on inserting the opener. -
Page 20: Load Quickstart Degas Conditions Into A Sample File
10. Install the safety shield. 11. Press the Select button for the port to be degassed. A blue LED is lit. 12. Press the Start button on the Smart VacPrep panel to start the degas process for all ports that have a blue LED lit. -
Page 21: Start Smart Vacprep Degas
Field or Button Description Save Saves changes to the active window. This option is applicable only when degassing with a Smart VacPrep. Smart VacPrep Evac- uation Backfill sample tube. Indicate if the sample tube should be backfilled automatically or wait for operator response. - Page 22 Open. Do this for each Smart VacPrep port to be used. 2. If using a Check Seal, verify that the Check Seal opener is installed in the Smart VacPrep port. Follow the instructions included with the Check Seal for instructions on inserting the opener.
-
Page 23: Show Smart Vacprep Dashboard
Red numbers on the dashboard require attention. To reset the dashboard numbers, right click on the dashboard setting, then click Reset. Smart VacPrep Dashboard Gauges and Descriptions Table Field or Button Description Days until roughing-pump Annual maintenance is recommended. -
Page 24: Show Smart Vacprep Log
3 Operate the Smart VacPrep Smart VacPrep Dashboard Gauges and Descriptions Table (continued) Field or Button Description turned on. At 110% and above, only the red LED is lit and attention is required. MART Smart VacPrep > Unit [n] > Show Log Use to display a log of recent analyses, calibrations, or messages. -
Page 25: Show Smart Vacprep Schematic
Unit [n] > Show Instrument Schematic Use to display an analyzer schematic. To operate the valves and elevator from this window, manual control must be enabled ( Smart VacPrep > Unit [n] > Enable Manual Control Smart VacPrep Schematic Components Icon Table Field or Button Description Open Valve. -
Page 26: Smart Vacprep Schematic Shortcut Menus
Set. Select to set the following: Enable or disable temperature control Control sample temperature Control furnace temperature Cool the sample to less than 50 °C Set heater power percent 3 - 10 Smart VacPrep Operator Manual — 067-42800-01 Dec 2013... -
Page 27: Show Smart Vacprep Status
Show Smart VacPrep Status MART TATUS Smart VacPrep > Unit [n] > Show Status The Smart VacPrep Status window allows the monitoring of degas operations for a manual degas operation. Smart VacPrep Status Fields and Buttons Table Field or Button Description Cancels the current degas operation. -
Page 29: Smart Vacprep Calibration
Smart VacPrep > Unit [n] > Calibration > Pressure Offset Use to perform system calibration. This option evacuates the system and zeros the pressure transducer. Disabled calibration options can be accessed only with the assistance of an authorized Micromeritics service representative. Start Click to begin the process. - Page 30 The pressure transducer should be calibrated before starting this calibration procedure. 1. Go to Smart VacPrep > Unit [n] > Calibration > Servo Valve 2. Click Start. The window closes when the calibration is complete. Click Cancel to stop the cal- ibration process.
-
Page 31: Smart Vacprep Diagnostics
5 Smart VacPrep Diagnostics MART IAGNOSTICS IAGNOSTIC EPORT FOR MART Smart VacPrep > Unit [n] > Diagnostics > Diagnostic Test Report Displays previously run diagnostic tests. Separate directories store tests run once, daily, weekly, and monthly. CHEDULE MART IAGNOSTIC Smart VacPrep > Unit [n] > Diagnostics > Schedule Diagnostic Tests Allows the specification of one-time or periodic running of a sequence of diagnostic tests. - Page 32 Insert. The new test will be inserted above the highlighted row. Select a row and click Delete to remove the test from the sequence. Select Clear to remove all entries from the Test Sequence box. 5 - 2 Smart VacPrep Operator Manual — 067-42800-01 Dec 2013...
-
Page 33: Maintenance And Troubleshooting
ANUAL ONTROL FOR MART Smart VacPrep > Unit [n] > Enable Manual Control Use to enable the manual control of certain system valves and elevator components. When this option is enabled, a checkmark appears to the left of Unit [n] > Enable Manual Control If the schematic is not immediately visible, go to Unit [n] >... -
Page 34: Replace The Smart Vacprep Fuse
EPLACE THE MART The Smart VacPrep uses two 5 amp fuses located in a compartment adjacent to the power connector on the back of the unit. 1. Use a flat head screwdriver to gently pry open the cover of the compartment. -
Page 35: Oil Based Vacuum Pump
The oil in the vacuum pump should be changed every three months when the efficiency of the vacuum pump declines (requiring increased time to reach vacuum levels) or if it becomes discolored. Smart VacPrep Operator Manual — 067-42800-01 6 - 3... - Page 36 Change or Add Oil Drain the oil while the pump is warm and disconnected from the power source. Use oil supplied by Micromeritics or refer to the vacuum pump manual for other acceptable oils. 1. Unplug the vacuum pump from the power source.
- Page 37 7. Remove the drain plug from the oil-fill port on top of the pump. 8. Slowly add oil to the port until the level is midway between the indicator lines in the oil-level win- dow when the pump is running. Smart VacPrep Operator Manual — 067-42800-01 6 - 5 Dec 2013...
-
Page 38: Replace The Alumina In The Oil Vapor Trap
Do not perform the following procedure on used alumina. The resultant oil vapors may cause a fire. 6 - 6 Smart VacPrep Operator Manual — 067-42800-01 Dec 2013... - Page 39 Exposure of the trap body to oil vapor may cause small cracks on the inside surface of the trap body. Under normal circumstances, these cracks will not cause problems or leaks. Smart VacPrep Operator Manual — 067-42800-01 6 - 7...
- Page 40 9. Screw the other end fitting back onto the trap and tighten securely by hand. 10. Lightly tap both ends of the trap body on the work surface to remove remaining dust from the pel- lets. 6 - 8 Smart VacPrep Operator Manual — 067-42800-01 Dec 2013...
- Page 41 14. Open the clamp and place it around the flange of the intake port and the flange of the trap. Swing the clamp fastening screw toward the intake port until it fits into the slot in the other half of the clamp. Tighten the wing nut securely by hand. Smart VacPrep Operator Manual — 067-42800-01 6 - 9 Dec 2013...
- Page 42 6 - 10 Smart VacPrep Operator Manual — 067-42800-01 Dec 2013...
-
Page 43: Replace The Vacuum Pump Exhaust Filter
Tighten the wing nut securely by hand. 6. Turn on the power to the pump. Smart VacPrep Operator Manual — 067-42800-01 6 - 11 Dec 2013... -
Page 45: Parts And Accessories For The Smart Vacprep
7 Parts and Accessories for the Smart VacPrep ARTS AND CCESSORIES FOR THE MART Part Number Item and Description Cables 003-63801-01 Cable, Ethernet straight-thru; for connecting instrument to control module (computer) Gas Cylinder Accessories 004-25549-00 Reducer, 1/8 in tube × 1/4 in tube 004-33601-00 Expansion kit;... - Page 46 7 Parts and Accessories for the Smart VacPrep Part Number Item and Description Option kit, 3/8 in. ferrules and O-rings (6 ferrules and 12 O-rings) 067-33604-00 067-33605-00 Option kit, 9 mm ferrules and O-rings (6 ferrules and 12 O-rings) 260-25843-00...
-
Page 47: Error Messages
%s before it can be added. Cause: The Smart VacPrep was already installed for another application / unit. Action: Remove the Smart VacPrep from the installed unit before adding it to the preferred unit. 4409 A free IP address on the same subnet as %s could not be found."... - Page 48 Check the power cable, power switch, and Ethernet cable, then reconnect to the Smart VacPrep either through the Smart VacPrep menu for this instrument or by restart- ing the application. If the problem persists, contact your Micromeritics service rep- resentative.
- Page 49 Cause: The current operation cannot be completed because the port is already in use. Action: Wait for port to terminate operation or perform the desired operation on an unused port. Smart VacPrep Operator Manual — 067-42800-01 8 - 3 Dec 2013...
- Page 51 Specifications Smart VacPrep 1 - 3 Dashboard System valves 3 - 10, 6 - 1 Smart VacPrep, manifold outgas rate 3 - 7 Smart VacPrep, roughing pump 3 - 7 Degas conditions heating phase 3 - 4 soak time 3 - 4...
Need help?
Do you have a question about the Smart VacPrep and is the answer not in the manual?
Questions and answers