Table of Contents
Advertisement
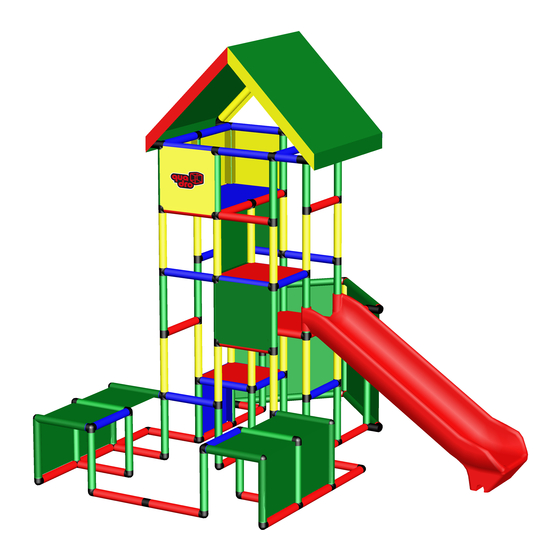
QUADRO
BUILD • CLIMB • DRIVE • SLIDE • SPLASH
SICHERHEIT • SAFETY
Please keep these information for future reference.
Bitte bewahren Sie diese Informationen
fŸr spŠtere RŸckfragen auf.
tested • approved • recommended • worldwide • since 1979
tested • approved • recommended • worldwide • since 1979
EN
DE
Advertisement
Table of Contents

Subscribe to Our Youtube Channel
Related Manuals for Quadro Starter


Summary of Contents for Quadro Starter
- Page 1 QUADRO BUILD • CLIMB • DRIVE • SLIDE • SPLASH SICHERHEIT • SAFETY Please keep these information for future reference. Bitte bewahren Sie diese Informationen fŸr spŠtere RŸckfragen auf. tested • approved • recommended • worldwide • since 1979 tested • approved • recommended • worldwide • since 1979...
-
Page 2: Table Of Contents
Falls Sie Fragen haben sollten, wenden Sie sich bitte an unseren Kundenservice. Bewahren Sie diese Anleitung gut auf!“ „Dear QUADRO customer, dear supervisor, We ask you to read the instructions carefully before you start assembling the QUADRO models. If you have any questions please contact our customer service. Keep this manual in safe custody!“... -
Page 3: Konstruktionshinweise
It is not allowed to leave un- Achtung: Auf jedes Rohr gehören immer 2 Kupplungszapfen. connected or unscrewed tubes or connector-plugs! Montage + Demontage von QUADRO Kupplung und Rohr: Rohr immer durch Caution: Each tube always needs two connector pins. -
Page 4: Platten
1.3 Platten Panels Platten nur dann belasten, wenn sie mit Rohren an allen vier Seiten ver- Only put weight on the panels when they are screwed to supporting tubes schraubt sind. Bei Demontage nicht von innen herausstoßen, sondern stets on all four sides! Do not push panels out from the inside, always lift them out behutsam herausnehmen. -
Page 5: Plexiglasscheibe
In order to insert the plexiglass panel into the construction, you need the mat- (Art. 25605). ching plexiglass screw. The screw will be fixed with the help of the QUADRO key. Assemble the plexiglass panel as demonstrated in the illustrations. -
Page 6: Multirad
Tipp: Um das Bespannen des Multirades mit dem Laufreifen zu erleichtern, erwärmen Sie die Laufreifen vorher in warmem Wasser. Achten Sie darauf, dass sich das QUADRO Multirad bei der Montage in der korrekten Position befindet. Tipp: Verwenden Sie Schmiermittel zwischen QUADRO Radlager (Art. 00501) und QUADRO Multirad für ein besseres und längeres Laufverhalten. -
Page 7: Doppelrohrverbinder
Double tube connector assembled inflexible: The Double tube connector is chend Abb. 1-4, 1-2 oder 5-6 mit der QUADRO Plattenschraube verschraubt. screwed according to illustration 1-4 , 1-2 or 5-6. The double tube connector Für den Spielbetrieb mit Kindern müssen die Doppelrohrverbinder IMMER ver- MUST BE ALWAYS fixed with panel screws when the model is used from... - Page 8 1.14 Pool Pool Hinweis: Das Aluminiumprofi l ist in der Mitte der 3-armigen Flächenkupp- Pool S: lung (Art. 00131) zu positionieren. Hierzu stecken Sie erst die 75 cm Rohre - Dimensions: 125 x 85 x 25cm (outside), 122,5 x 82,5 x 25cm (inside, pool liner) (Art.
-
Page 9: Spielsack
Advice: With the QUADRO aluminium profi le connector (Art. 40274) you are able to extend the aluminium profi le as many times as you like (illustration 3). Please note that in the middle of the Alu profi le connector a Cable strap is fi xed properly in order to prevent the slipping of the Alu profi le connector. -
Page 10: Rundtextil
1.18 Dachtextil Roof textile Hinweis: Das Dachtextil wird mit etwas Kraft über die Winkel- kupplungen (Art.00911) gestülpt (siehe Abb. 1). Bitte beachten Sie, dass die Verwendung des Dachtextils (Art.00353) nur möglich ist, wenn die rot markierten Winkelkupplungen identisch einge- baut sind. Achtung: Niemals versuchen, sich auf das Dachtextil zu setzen oder zu stellen. -
Page 11: Montage Der Modularrutsche
This opportunity is recommended when the Modular Slide is combined with nutzen, wenn die QUADRO Modularrutsche mit dem QUADRO Pool (Art. 11670 the QUADRO Pool (Art. 11670 or 11680). Model proposals are shown in the oder 11680) verbunden wird. Modellverschläge finden Sie in der QUADRO Model Database (quadroworld.com/models, quadroworld.com/getcreative... -
Page 12: Montage Der Bogenrutsche
This opportunity is recommended when the Curved Slide is combined with besten nutzen, wenn die QUADRO Bogenrutsche mit dem QUADRO Pool (Art. the QUADRO Pool (Art. 11670 or 11680). Model proposals are shown in the 11670 oder 11680) verbunden wird. Modellverschläge finden Sie in der QUADRO Model Database (quadroworld.com/models, quadroworld.com/getcreative... - Page 13 Art. 00612-00615 Art. 00630 Art. 00630 Art. 00620 Art. 00623...
-
Page 14: Montage Der Integralrutsche
As shown in the illustration, attach the QUADRO panel Platte mit den QUADRO Plattenschrauben. Schieben Sie dann die QUADRO with the matching screws for panels. Then slide the QUADRO slide over the Integralrutsche über die beiden offenen 35cm Rohre. two open 35 cm tubes. -
Page 15: Montage Der Doppelrutsche (Bogen- & Modularrutsche)
Verschrauben Sie jetzt die QUADRO Platte im oberen Be- Step 6 (Illustration 8): Now screw the QUADRO panel in the upper part of the reich des Modells. In diesem letzten Schritt wird auch die lange Rutschen- model in the correct position according to the illustration. In this last step schraube (Art. -
Page 16: Montage Der Doppelrutsche (2X Modularrutsche)
Sie diese mit Hilfe der Plattenschraube (Art. 00620), der Step 5 (Illustration 7): Now screw the QUADRO panel in the upper part of the Rutschenschraube konisch (Art. 00630) sowie Rutschenverbinder Gegen- model in the correct position according to the illustration. In this last step stücke (Art. - Page 17 This opportunity is recommended when the Double Slide is combined with larrutsche. Dieses Feature lässt sich am besten nutzen, wenn die the QUADRO Slide Extension (Art. 10035). Model proposals are shown in the QUADRO Doppelrutsche mit der QUADRO Rutschenverlängerung (Art.
-
Page 18: Integralrutsche + Plexiglasscheibe
Für Konstruktionen vertikal oder horizontal ab 60 cm Höhe gilt: Öffnungen For constructions vertically or horizontally from 60 cm heights onwards ap- die ein Innenmaß von 35 x 15 cm aufweisen, müssen durch die QUADRO plies: openings that have inside dimensions of 35 x 15 cm have to be cove- Halbplatte (Art. -
Page 19: Kleinteile / Altershinweis
According to the current safety norms, it is regulated that in case your QUADRO Modell bei einer Plattformhöhe > 60 cm mit der Wand oder dem QUADRO model reaches a height of over 60 cm, it needs to be permanently Boden dauerhaft zu fi xieren (Abb.1). -
Page 20: Kippsicherheit
Sie darauf, dass Ihre Modelle genügend Stabilität aufweisen. tipping over. Make sure that your models have enough stability. Hinweis: Stellen Sie die QUADRO Modelle nur auf ebenen Flächen auf. Advice: Please mount QUADRO models only on flat grounds. 7. Fallhöhe Height for free falls 8. -
Page 21: Wartung / Nutzungshinweise
Beispiel zusammen mit dem Special Kit (Art. 10743) Schlit- the Special Kit (Art. 10743) you can build for example sledges from ten aus QUADRO bauen. Prüfen Sie das Modell vor dem Spielbetrieb auf QUADRO. Before operating, check the model for icy surfaces on tubes, vereiste Flächen an Rohren, Kupplungen und vor allem Platten. -
Page 22: Offene Schraubverbindungen Und Defekte Teile
To avoid injuries caused by lack of quality, only dung tragen, die ein Hängenbleiben am Modell begünstigt. Fahrradhelme sind use original parts and tools from QUADRO. They are easy to identify by the unzulässig. Nur für den Hausgebrauch. Wenn Sie das Modell nicht für den QUADRO Logo . -
Page 23: Einzelteile Quadro
12. Einzelteile QUADRO Components QUADRO Raumkupplungen Flächenkupplungen Schrauben Connectors 3D Connectors 2D Screws Rohrschraube Flächenkupplung Raumkupplung Tube screw 2-armig (90°) 6-armig Elbow connector 6 way connector Art. 00612-00615 Art. 00121 Plattenschraube Art. 00061 Panel screw Flächenkupplung Art. 00620 2-armig (180°) - Page 24 12. Einzelteile QUADRO Components QUADRO Spezialteile (Rohre) Rutschen Rutschen Special parts (tubes) Slides Slides Klammer Clamp Bogenrutschen Set Art. 00945 Curved Slide set Intergralrutsche Integrated Slide Art. 10020 Doppelrohrverbinder Art. 10040 Double tube connector inkl. incl. Art. 10023 Art. 00955 Art.
- Page 25 12. Einzelteile QUADRO Components QUADRO Räder Pool Spezialteile (Pool) Wheels Pool Special parts (pool) Poolverschluß Poolfolie S (A Ø 35 mm) Pool foil S Pool cap (old) Multirad Multi-wheel Art. 10012 Art. 00019 Art. Poolverschluß 00852-00855 (A Ø 48 mm) Maße/Dim.
- Page 26 12. Einzelteile QUADRO Components QUADRO Textilen und Netze Spezialschrauben Spezialteile Textiles und nets Special-screws Special parts Flügelschraube Netz (Ballcage) Netclip Plexiglasscheibe Net (ballcage) Plexiglass panel Art. 00663 (40 x 40 cm) Art. 10233 VIP-Schraube Art. 00359 VIP screw Netz (Baby Ballcage) Art.
- Page 27 13. Einzelteile miniQUADRO, Maßstab 1:5 Components miniQUADRO, scale 1:5 Raumkupplungen Platten Connectors 3D Panels Raumkupplung 6-armig Platte 6 way connector (8 x 8 cm) Panel Art. 20061 (8 x 8 cm) Art. Raumkupplung 20402-20405 5-armig 5 way connector Rohre Art. 20051 Tubes Rohr (2 cm) Raumkupplung...
- Page 28 Tel. +49 40 79 00 50 80 | Fax +49 40 52 98 23 32 info@quadroworld.com | www.quadroworld.com version: 3.0 © 1979-2018 by QUADRO DER GROSSBAUKASTEN Ltd. © 1979-2018 by QUADRO DER GROSSBAUKASTEN Ltd. © 1979-2018 by QUADRO DER GROSSBAUKASTEN Ltd.
Need help?
Do you have a question about the Starter and is the answer not in the manual?
Questions and answers