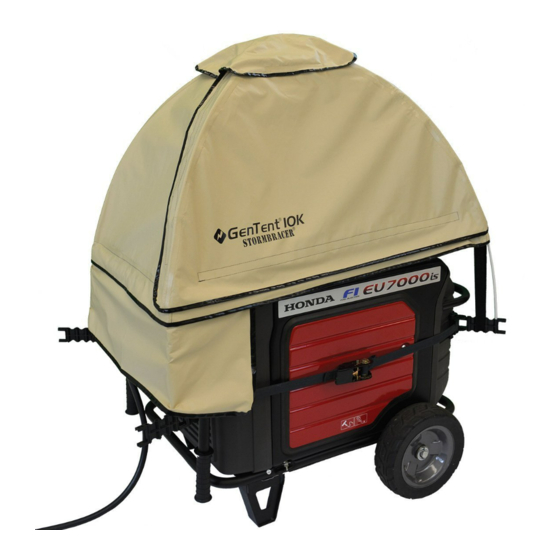
GenTent StormBracer 10k Product Installation And Safety Manual
Hide thumbs
Also See for StormBracer 10k:
- Product safety & installation manual (20 pages) ,
- Product installation and safety manual (20 pages)
Table of Contents
Advertisement
Quick Links
Page: 1 of 18
®
GenTent
10k/20k
StormBracer
®
Product Installation and Safety Manual
Free Installation Videos
www.GenTent.Com/Installation
Read this Manual in Color Online
www.GenTent.Com/Manual
THANK YOU
Congratulations on your purchase of the GenTent® StormBracer®, the first ever
wet weather safety canopy specifically engineered for portable generators.
We are proud to provide this high-quality product.
Copyright © 2017 GenTent® Safety Canopies, LLC – All Rights Reserved V6.6.2–November, 2017
Advertisement
Table of Contents

Summary of Contents for GenTent StormBracer 10k
- Page 1 Congratulations on your purchase of the GenTent® StormBracer®, the first ever wet weather safety canopy specifically engineered for portable generators. We are proud to provide this high-quality product. Copyright © 2017 GenTent® Safety Canopies, LLC – All Rights Reserved V6.6.2–November, 2017...
-
Page 2: Table Of Contents
Installation addendums exist for certain generators. Please review www.gentent.com/docs to see if there is one for your generator. Currently they exist for the Generac LP5500, XG10000/XP10000, and GP15000/GP17500 and certain Ridgid generators. Copyright © 2017 GenTent® Safety Canopies, LLC – All Rights Reserved V6.6.2–November, 2017... -
Page 3: Important Product Safety
NOTE Should GenTent cover block pull starter, it is advisable to release the elastic straps on the pull starter side and temporarily move GenTent canopy out of the way. -
Page 4: Limited Warranty
GenTent, or rips, tears or breaks due to sharp and/or heavy and/or falling objects or animals. This warranty does not cover issues arising because of modifications made to your portable generator or to the GenTent®... -
Page 5: Package Contents
Your kit may include an optional frame extender or frame adaptation kit. Please see separate instructions for these items. Frame extension or adaptation, if required, must be completed prior to installing the GenTent. Copyright © 2017 GenTent® Safety Canopies, LLC – All Rights Reserved V6.6.2–November, 2017... -
Page 6: Installation Overview
Cover it: Slide the GenTent canopy over the frame and secure by sliding the elastic straps over and behind the clamp telescoping rod. Once the GenTent is installed, it can be left in place during generator storage or easily removed and stored separately. Should you wish to store the generator with the GenTent attached, we recommend releasing the elastic straps to keep them fresh and ready. -
Page 7: Install Gentent Clamps On Generator Frame
Tip: For 1.5” frames, use the sticky back rubber pads that may have come in your kit, or contact GenTent for a set of rubber pads. Alternatively cut any rubber 1/8” or less in thickness to fit between the frame and clamp ( such as an old bicycle tire tube) . - Page 8 - Repeat procedure on remaining three sides; position clamps at the same height. Fig. 3-A Fig. 3-B Fig. 3-C Copyright © 2017 GenTent® Safety Canopies, LLC – All Rights Reserved V6.6.2–November, 2017...
- Page 9 Page: 9 of 18 Copyright © 2017 GenTent® Safety Canopies, LLC – All Rights Reserved V6.6.2–November, 2017...
- Page 10 0 and the outside frame rod hole for settings 1-4. (b) SMALL indicates that the use of a Four corner frame extension kit is required. The GenTent will be too loose on the frame otherwise. Copyright © 2017 GenTent® Safety Canopies, LLC – All Rights Reserved V6.6.2–November, 2017...
-
Page 11: Install Gentent Frame On The Gentent Clamps
- Repeat for final two fiberglass rods (fig. 5-C). - Recheck clamps; they should be firmly in place and may exhibit a slight upward lean. Fig. 5-A Fig. 5-B Fig. 5-C Copyright © 2017 GenTent® Safety Canopies, LLC – All Rights Reserved V6.6.2–November, 2017... -
Page 12: Secure Gentent Canopy Over Gentent Frame
Cover seams generally match the frame rods. Recheck clamps; they should be firmly in place and may exhibit a slight upward lean. Fig. 6-B Copyright © 2017 GenTent® Safety Canopies, LLC – All Rights Reserved V6.6.2–November, 2017... -
Page 13: Select And Install Electrical Apron
6” around the adjacent sides. Do not cover other parts of your generator with the Electrical aprons, especially the exhaust area! Copyright © 2017 GenTent® Safety Canopies, LLC – All Rights Reserved V6.6.2–November, 2017... - Page 14 In the case that your portable generator is in this category, or if you purchased one of our universal fit GenTent bundles, there will be between one (1) and four (4) GTU Frame Adapters in your package. Each GTU Frame Adapter includes: GTU adapter –...
- Page 15 - Install a GenTent rubber adapter onto the GTU before installing the GenTent clamp (Fig. 8-E) - Set the GenTent clamp rod one step in versus other clamps that are attached directly to the generator frame (for example, if your normal clamp pin setting is 2, set the...
-
Page 16: Important Gentent Usage Tips
Clear Vinyl Electrical aprons GenTent 20k and (Optional) GenTent 10k Omni Fit Apron The clear vinyl skirt for the GenTent 10k and the GenTent 20k Electrical aprons provide a window to gauges during operation and can be stacked together for double height (Fig. -
Page 17: Gentent Accessories And Spare Parts Catalog
GenTent Accessories and Spare Parts Catalog GenTent accessories are available at www.gentent.com/accessories. Spare parts are available at www.gentent.com/spares. Here is a short list of what we offer: Copyright © 2017 GenTent® Safety Canopies, LLC – All Rights Reserved V6.6.2–November, 2017... -
Page 18: Register Your Purchase - Activate Your Warranty
Page: 18 of 18 Register Your Purchase – Activate Your Warranty Note: If you purchased directly at GenTent.Com, your purchase is already registered and completing this registration document is not required! Complete your registration online at www.gentent.com/register or fill out this card and mail to:...


Need help?
Do you have a question about the StormBracer 10k and is the answer not in the manual?
Questions and answers