Table of Contents
Advertisement
Advertisement
Table of Contents

Subscribe to Our Youtube Channel
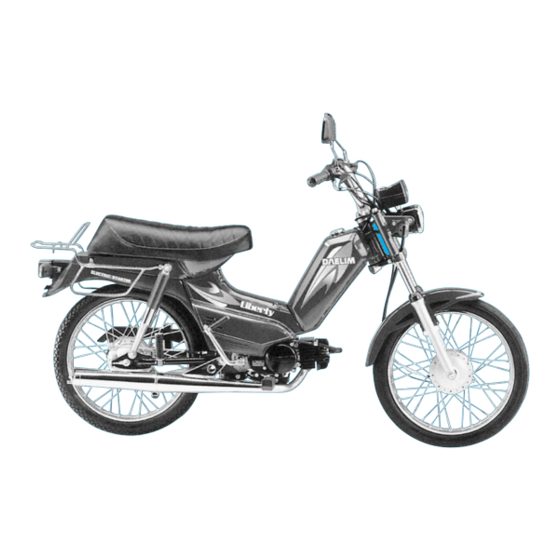
Related Manuals for DAELIM LIBERTY


Summary of Contents for DAELIM LIBERTY
- Page 1 OWNER'S MANUAL MANUAL DEL PROPIETARIO...
-
Page 2: Table Of Contents
CONTENTS CONTENIDO 1. ESPECIFICACIONES........... 3 1. SPECIFICATION ............ 3 2. OPERACIÓN 2. OPERATION 2-1. LLAVE DE COMBUSTIBLE ......5 2-1. FUEL COCK ............5 2-2. LLENADO DE COMBUSTIBLE Y 2-2. FILLING OF FUEL AND ENGINE OIL ..5 ACEITE DEL MOTOR........5 2-3. - Page 3 CONTENTS CONTENIDO 4. MAINTENANCE AND LUBRICATION 4. MANTENIMIENTO Y LUBRICACIÓN 4-1. ENGINE OIL ........... 18 4-1. ACEITE DEL MOTOR ........18 4-2. GEAR OIL ............19 4-2. ACEITE DE LA CAJA DE CAMBIOS ..19 4-3. SPARK PLUG ..........21 4-3.
-
Page 4: Specification
1. SPECIFICATION 1. ESPECIFICACIONES ITEM CARACTERÍSTICA DATA DATOA AIR-COOLED, ONE UN CILINDRO, ENFRIADO TYPE TIPO CYLINDER, 2 STROKE POR AIRE, DOS TIEMPOS 40 X 39.5mm BORE AND STROKE DIAMETRO Y CARRERA 40 X 39.5mm PISTON DISPLACEMENT 49.6cc DESPLAZAMIENTO DEL PISTON 49.6cc COMPRESSION RATIO 6.5:1... - Page 5 1. SPECIFICATION 1. ESPECIFICACIONES ITEM CARACTERÍSTICA DATA DATOA TYPE TIPO TUBULAR TUBULAR WHEEL BASE BASE DE LA RUEDA 1,150mm 1,150mm SEAT HEIGHT ALTURA DEL ASIENTO 750mm 750mm TELESCÓPICO TELESCOPIC DELANTERO SUSPENSION SUSPENSIÓN BRAZO L’OCO SWING ARM (OIL) TRASERO ZAPATA DEL FRENO DRUM BRAKE DELANTERO BRAKE...
-
Page 6: Operation
2. OPERATION 2. OPERACIÓN 2-1 FUEL COCK 2-1 LLAVE DE COMBUSTIBLE To open the fuel cock, turn the lever Para abrir la llave de combustible, into position ‘ON’. When the mover la palanca a la posición ON. engine stops due to lack of fuel, just Cuando el motor se detiene por falta turn the lever to position de combustible, lo único que tiene... -
Page 7: Ignition Key
2-3 IGNITION KEY 2-3 LLAVE DE ENCENDIDO With just one key, you can use for Usted puede usar una sola llave para lgnition and Handle Lock. el encendido y bloqueo delas manijas. ① Main switch ① Interruptor principal Posición Remover Function Función Position... -
Page 8: Starting
2-4. STARTING 2-4. ARRANQUE Turn the fuel cock lever into ‘ON’ Mover la palanca a la posición ON position. (ILL.5) (FIG. 5) (ILL. 5) FUEL COCK LEVER (FIG. 5) PALANCA DE LA LLAVE DE COMBUSTIBLE Turn the ignition key to ‘ON’ Girar la llave de encendido a la position. - Page 9 Be sure to hold the rear brake lever Por su seguridad, asegurarse de for your safety when starting the sujetar la palanca del freno trasero engine. cuando arranque el motor. With Cold Engine Con el motor frío Pull the choke knob, then press the Jalar la perilla del estrangulador de starter button.
-
Page 10: Check Points When Engine Fails To Start
2-5 CHECK POINTS WHEN 2-5 PUNTOS A REVISAR SI HAS ENGINE FAILS TO START FALLOS EN EL MOTOR 1) Fuel level in fuel tank. 1) Nivel de combustible en el tanque 2) Electric starter ; Starter motor, button, battery. 2) Arrancador eléctrico ; motor, botón de arranque, batería 3) Contamination of carburetor. -
Page 11: Driving Off
2-6 DRIVING OFF 2-6 ARRANQUE Liberty has an automatic clutch for easier driving-off. El modelo Liberty tiene un sistema de embrague automático para un arranque fácil. Motorbike will pull smoothly away when throttle grip is turned slowly. Cuando gire lentamente la manija del obturador, la motocicleta arrancará... -
Page 12: Driving On Slopes
2-7 DRIVING ON SLOPES 2-7 MANEJO EN PENDIENTES Uphill Cuesta arriba When driving uphill, turn accelerator Cuando conduzca cuesta arriba, girar grip slowly to maintain engine speed la manija del acelerador lentamente a flexibility, whereupon 1st gear or 2nd fin de mantener la flexibilidad del gear is automatically engaged motor, luego de lo cual el cambio de according to degree of slope and speed... -
Page 13: Braking
2-8 BRAKING 2-8 FRENOS Practice stopping with either brakes. Practicar el frenado con ambos frenos. Use both front and rear brakes for maximum braking Use ambos frenos, delantero y trasero, para una máxima efficiency and for your safety. eficiencia en el frenado y seguridad suya. For stopping, you just close the throttle. -
Page 14: Turn Signals And Horn
2-9 TURN SIGNALS AND HORN 2-9 GUIÑADORES Y BOCINA During riding, you can simply Cuando conduzca, usted puede operate turn signal lights by using operar fácilmente los guiñadores the switch on left handle lever usando el interruptor en la palanca holder. -
Page 15: Head Light And Tail & Stop Light
2-10 HEAD LIGHT AND TAIL 2-10 LUCES DELANTERA, AND STOP LIGHT TRASERA Y DE PARADA On the left handle lever holder, you Para manejar de noche, puede can use head light switch for night- encender la luz delantera utilizando time driving.(ILL.12) el interruptor ubicado en la palanca de la manija izquierda.(FIG. -
Page 16: Speedometer & Odometer
2-11 SPEEDOMETER AND 2-11 VELOCIMETRO Y ODOMETER ODÓMETRO You can easily find out the running Se puede saber fácilmente la speed by the speedometer. velocidad a la que se está con- The maximum speed shown on duciendo usando el velocímetro. speedometer is 70km/h. -
Page 17: Check Points For Maximum Performance
3. CHECK POINTS FOR MAXIMUM 3. PUNTOS A REVISAR POR MAXIMO PERFORMANCE RENDIMIENTO 3-1 DAILY CHECK 3-1 REVISIÓN DIARIA 1. Engine oil level in oil tank. 1. Nivel del aceite de motor en el tanque de aceite. 2. Gear oil level in transmission 2. -
Page 18: Regularly Scheduled Check
3-2 REGULARLY SCHEDULED CHECK 3-2 REVISIONES REGULARES PROGRAMADAS SERVICE PERIODO DE PERIODS SERVICIO ITEM PIEZA Brake Frenos ○ ○ ○ ● ○ ○ ● ○ ○ ● ○ ○ ● ○ ○ ○ ● ○ ○ ● ○ ○ ● ○... -
Page 19: Maintenance And Lubrication
(ILL. 14) vez, asegurarse de llenar el tanque de aceite debajo del asiento.(FIG. 14) Recommend you to use DAELIM 2 Se recomienda utilizar aceite para stroke motorcycle oil or it’s motocicletas de dos tiempos (ILL. -
Page 20: Gear Oil
4-2 GEAR OIL 4-2 ACEITE DE LA CAJA DE CAMBIOS To drain, remove right side cover Para purgar el aceite, remover la then open the oil cap. Open the cubierta del costado derecho y abrir drain bolt. (ILL. 16, 17) la tapa del aceite. - Page 21 Revisar el nivel mediante el orificio de nivel de aceite. (FIG.18) ※Always use genuine DAELIM oil in ※Usar siempre el aceite DAELIM order to lengthen the life of the genuino a fin de prolongar la vida motorbike.
-
Page 22: Spark Plug
4-3 SPARK PLUG 4-3 BUJÍA DE ENCENDIDO 1. Note that sparks can not be 1. Notar que las chispas no pueden discharged when the electrodes are descargarse cuando los electrodos Normal clearance: contaminated or wet with mixed están contaminados o humedecidos 0.6-0.7 mm (0.024-0.028″... -
Page 23: Fuel Cock
4-4 FUEL COCK 4-4 LLAVE DE COMBUSTIBLE To supply the clean fuel there is filter Para alimentar al motor un element in fuel cock. combustible limpio, hay un filtro en la llave de combustible. Cleaning procedure ; Procedimiento de limpieza ; 1. -
Page 24: Air Cleaner
4-5 AIR CLEANER 4-5 LIMPIADOR DE AIRE Maintain the air cleaner clean Mantener siempre el aire limpio. Un always. Contaminated air cleaner limpiador de aire contaminado causa gives bad effect on engine un mal efecto en el rendimiento del performance. motor. -
Page 25: Throttle Cable Adjustment
4-6 THROTTLE CABLE 4-6 AJUSTE DEL CABLE DEL ADJUSTMENT OBTURADOR 1. Remove the left side cover. 1. Remover la cubierta del lado izquierdo. 2. Adjust with the adjuster located 2. Ajustar el cable con el ajustador upper part of carburetor. (ILL. 24) situado en la parte superior del carburador. -
Page 26: Carburetor Adjustment
4-7 CARBURETOR ADJUSTMENT 4-7 AJUSTE DEL CARBURADOR 1. Turn the air screw until it stops. 1. Girar el tornillo de aire hasta que se Then unscrew 1½ turns. (ILL. 26) detenga, luego darle una vuelta y media. (FIG. 26) 2. Start the engine and make it 2. -
Page 27: Brake Adjustment
4-8 BRAKE ADJUSTMENT 4-8 AJUSTE DE LOS FRENOS The free play of front and rear brake La holgura de la palanca de los lever is 15-20mm after adjustment. frenos delantero y trasero es de 15- Check the operation of stop light. 20 mm luego del ajuste. -
Page 28: Drive Chain
4-9 DRIVE CHAIN 4-9 CADENA To adjust Para ajustar la cadena The drive chain slack should be La tirantez de la cadena debe ser adjusted to allow 10-20mm vertical ajustada a fin de permitir un movement by hand. (ILL. 28) movimiento vertical de 10-20 mm con la mano. - Page 29 To clean Para limpiar cadena 1. Remove the drive chain and wash 1. Sacar la cadena y limpiarla con una with brush and solvent. escobilla y solvente. 2. Dry the chain and be sure to avoid 2. Secar la cadena y asegurarse de su any dirts.
-
Page 30: Battery
4-10 BATTERY 4-10 BATERÍA 1. Remove right side cover. 1. Sacar la cubierta lateral derecha. 2. Disconnect lead wire. 2. Desconectar el alambre de plomo. 3. The electrolyte level must be 3. El nivel de electrólito se debe maintained between the upper and mantener entre las marcas superior lower level marked on the side of e inferior situadas en el costado de... -
Page 31: Fuse Replacement
4-11 FUSE REPLACEMENT 4-11 REEMPLAZO DEL FUSIBLE [Removal ] [Sacar] Fuse holder Insertar el fusible en el portafusible. Fuse is inserted in battery holder. Portafusible El tipo de fusible es de 7A. Fuse rating is 7A Pull up Atención: Jalar Attention Pull up 1. -
Page 32: Ignition Time
4-12 IGNITION TIME 4-12 TIEMPO DE IGNICIÓN It is not required to disassemble No se requiere desarmar el stator components in flywheel, as componente del estator en la rueda C.D.I. ignition system is used. voladora dado que se usa el sistema de encendido C.D.I. -
Page 33: Cumbustion Chamber
4-14 COMBUSTION CHAMBER 4-14 DECARBONIZACIÓN DE LA DECARBONIZING CAMARA DE COMBUSTIBLE Procedure Procedimiento 1. Unscrew the cylinder head nuts. 1. Sacar los tuercas del cabezal del cilindro. 2. Remove the cylinder head. 2. Remover el cabezal del cilindro. (ILL. 35) (FIG. - Page 34 OWNER’S MANUAL MANUAL DEL PROPIETARIO 2001.8. PRINTED NO COPY IMPRESO 1995.1. PUBLICATION PUBLICACÓN...
Need help?
Do you have a question about the LIBERTY and is the answer not in the manual?
Questions and answers