Table of Contents
Advertisement
Quick Links
Advertisement
Table of Contents

Related Manuals for Agnpro EP-15AV


Summary of Contents for Agnpro EP-15AV
- Page 1 EPUMREV4.7...
-
Page 2: Table Of Contents
Table of Contents Introduction... 2 Introduction ... 2 Package Contents... 2 Monitor Stand Options... 3 Care of Your Monitor... 4 Installation... 4 Power connection... 4 Maintenance ... 4 Transportation ... 5 Controls... 6 Setup ... 8 Customizing Your Monitor Adjusting Your LCD Selecting OSD Features... -
Page 3: Introduction
Introduction Congratulations on purchasing AGNPRO flat panel monitors. Your LCD monitor incorporates a high quality display in a small light weight package with standard vesa mounting for ease of installation. It also features power-saving and low emissions. CCTV applications, your monitor provides enhanced video output and features to enhance your overall system. -
Page 4: Monitor Stand Options
Monitor Stand Options The EP series monitor comes with picture frame stand as shown in the illustration below or a standard desktop stand depending on the specific model purchased. Picture frame stand Standard desktop stand... -
Page 5: Care Of Your Monitor
Care of Your Monitor Installation • Do not cover or block the ventilation holes in the case. • Do not install the monitor near heat sources such as radiators or air ducts, or in a place subject to direct sunlight, excessive dust, mechanical vibration or shock. -
Page 6: Transportation
• Do not rub, touch, or tap the surface of the screen with sharp or abrasive items such as a pen or screwdriver. This type of contact may result in a scratched glass. • Do not insert sharp objects or spill liquid into the monitor through ventilation holes. -
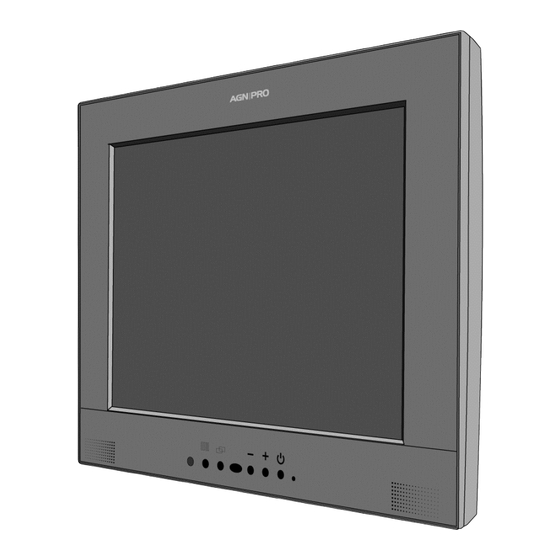
Page 7: Controls
Controls 1. * Infrared receiver: Remote control to select the OSD of LCD Monitor and TV functions. (Does not apply to models: EP15AV and EP17AV) 2. Power LED: This power LED indicates different status when this unit operates in different modes. 3. - Page 8 8. * Light sensor: Automatically detects ambient light to adjust brightness to optimize picture quality. (Does not apply to models: EP15AV and EP17AV) 9. Headphone jack: (Does not apply to models: EP15AV and EP17AV) 10. * Internal Microphone: (Does not apply to models: EP15AV and EP17AV) * Options (These buttons/functions are not active on models: EP15AV and EP17AV)
-
Page 9: Setup
Setup Remove the dust-proof plastic sheet Remove the dust-proof plastic sheet from the surface of monitor. Connect your monitor to the video source Composite Video Input - Connect your monitor to a video source such as Digital Video Recorder, Multiplexer, Camera, VCR, etc using a cable with an RCA jack. - Page 10 Use 1024 x 768 resolution for model EP15AV or 1280 X 1024 for model EP17AV and press performance. (If you are not using a computer, please skip this step.) Before starting to work, you are recommended to adjust the resolution of video signal from your computer to its native resolution: (1024 x 768 at 60 KHz for EP15AV) / (1280 X 1024 at 60 KHz for EP17AV) for best picture performance.
-
Page 11: Customizing Your Monitor
Adjusting Your LCD Panel Using your on screen display (OSD) menu, you will be able to fine tune and optimize your LCD monitor. Important! Though manual adjustment of the LCD panel is available, we strongly recommend you to use the auto adjustment function of the panel. It will automatically tune your LCD panel to the optimal performance. - Page 12 BRIGHTNESS: Adjusts the background black level of the screen image. CONTRAST: Adjusts the foreground white level of the screen image. H.POSITION: Moves the screen image left or right. V.POSITION: Moves the screen up and down. PITCH: Adjusts image distortion appearing as vertical bars or noise PHASE: Adjusts image distortion appearing as horizontal noise on the screen SHARPNESS: Adjusts the clarity and focus of the screen images...
-
Page 13: Troubleshooting
Troubleshooting Symptom No picture Power LED is off. The texts are not solid • Screen image is not centered properly. • Some lines are missing Check Items Check that the power switch of monitor is turned on. Check that the power adapter is properly connected to the monitor. -
Page 14: Technical Features And Specifications
Specifications Size / Model Electrical characteristics Screen size Pixel format Horizontal frequency Vertical frequency Maximum pixel clock Connections Physical characteristics Weight Tilt angle Temperature Humidity Technical Features and Specifications 15” / EP15AV 15” diagonal 1024 x 768 26kKHz – 81kKHz 50KHz –... -
Page 15: Preset And User Modes
Preset and User Modes The EP series monitors have 16 factory preset modes. Model EP15AV Preset Model EP17AV Preset Resolution H Freq(kHz) 640*350 640*400 640*400 640*480 640*480 640*480 640*480 720*400 800*600 800*600 800*600 800*600 832*624 1024*768 1024*768 1024*768 1024*768 Resolution H Freq(kHz) 720*350 660*680... - Page 16 800*600 800*600 800*600 832*626 1026*768 1026*768 1026*768 1026*768 1 2 8 0 * 1 0 2 6 1 2 8 0 * 1 0 2 6 37.879 68.077 66.875 69.750 68.363 56.676 58.038 60.023 66.000 80.000 60.317 72.188 75.000 76.500 60.006 70.069 71.918...
-
Page 17: Regulation
FCC compliance This device complies with Part 15 of the FCC Rules. Operation is subject to the following two conditions: (1) this device may not cause harmful interference, and (2) this device must accept any interference received, including interference that may cause undesired operation. NOTE: This equipment has been tested and found to comply with the limits for a Class B digital device, pursuant to Part 15 of the FCC Rules.
Need help?
Do you have a question about the EP-15AV and is the answer not in the manual?
Questions and answers