Table of Contents
Advertisement
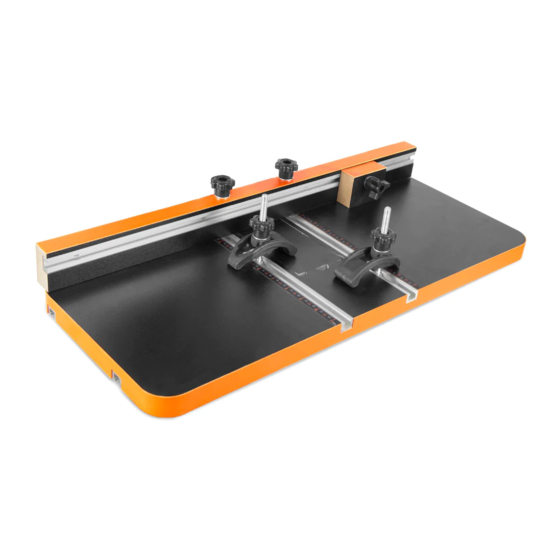
MODEL DPA2513
DRILL PRESS
TABLE
Instruction Manual
NEED HELP? CONTACT US!
Have product questions? Need technical support? Please feel free to contact us:
1-800-232-1195 (M-F 8AM-5PM CST)
TECHSUPPORT@WENPRODUCTS.COM
IMPORTANT: Your new tool has been engineered and manufactured to WEN's highest standards for dependability,
ease of operation, and operator safety. When properly cared for, this product will supply you years of rugged,
trouble-free performance. Pay close attention to the rules for safe operation, warnings, and cautions. If you use
your tool properly and for its intended purpose, you will enjoy years of safe, reliable service.
WENPRODUCTS.COM
For replacement parts and the most up-to-date instruction manuals, visit
Advertisement
Table of Contents

Subscribe to Our Youtube Channel
Related Manuals for Wen DPA2513


Summary of Contents for Wen DPA2513
- Page 1 1-800-232-1195 (M-F 8AM-5PM CST) TECHSUPPORT@WENPRODUCTS.COM IMPORTANT: Your new tool has been engineered and manufactured to WEN’s highest standards for dependability, ease of operation, and operator safety. When properly cared for, this product will supply you years of rugged, trouble-free performance. Pay close attention to the rules for safe operation, warnings, and cautions. If you use your tool properly and for its intended purpose, you will enjoy years of safe, reliable service.
-
Page 2: Table Of Contents
CONTENTS WELCOME Introduction ..................... 3 Specifications ....................3 SAFETY General Safety Rules ..................4 BEFORE OPERATING Assembly & Adjustments ..................5 OPERATION & MAINTENANCE Exploded View & Parts List ................9 Warranty Statement ..................10... -
Page 3: Welcome
INTRODUCTION Thanks for purchasing the WEN Drill Press Table. We know you are excited to put your tool to work, but first, please take a moment to read through the manual. Safe operation of this tool requires that you read and understand this operator’s manual and all the labels affixed to the tool. -
Page 4: Safety
GENERAL SAFETY RULES WARNING! Read all safety warnings and all instructions. Failure to follow the warnings and instructions may result in electric shock, fire and/or serious injury. Safety is a combination of common sense, staying alert and knowing how your item works. The term “power tool” in the warnings refers to your mains-operated (corded) power tool or battery-operated (cordless) power tool. -
Page 5: Before Operating
GENERAL SAFETY RULES WARNING! Read all safety warnings and all instructions. Failure to follow the warnings and instructions may result in electric shock, fire and/or serious injury. Safety is a combination of common sense, staying alert and knowing how your item works. The term “power tool” in the warnings refers to your mains-operated (corded) power tool or battery-operated (cordless) power tool. -
Page 6: Assembly & Adjustments
ASSEMBLY & ADJUSTMENTS INSTALLATION ON TABLES WITH THROUGH SLOTS Fig. 1 1. Slide the heads of the M8x90 bolts (Fig. 1 - 1) into the back T-track (Fig. 1 - 2), one on each side, and slide one into the front T-track (Fig. - Page 7 ASSEMBLY & ADJUSTMENTS INSTALLATION ON TABLES WITHOUT THROUGH SLOTS 1. Slide the heads of the M8x90 bolts (Fig. 1 - 1) into the back T-track (Fig. 1 - 2), one on each side, and slide one into the front T-track (Fig. 1 - 3), if desired. 2.
- Page 8 ASSEMBLY & ADJUSTMENTS ASSEMBLING THE STOP BLOCK Fig. 7 1. Place the M6x40 bolt (Fig. 7 - 1) though the stop block (Fig. 7 - 2) and washer (Fig. 7 - 3). Loosely thread the stop block knob (Fig. 7 - 4) onto the bolt. 2.
-
Page 9: Operation & Maintenance
EXPLODED VIEW & PARTS LIST Part No. Description Qty. DPA2513-001 Fence DPA2513-002 Bolt M8x70 DPA2513-003 Stop Block DPA2513-004 Bolt M6x40 DPA2513-005 Triangle Knob DPA2513-006 Washer 6x18x1.2 Clamp Clamp Bushing DPA2513-CLAMP Bolt M8x90 Flower Knob Washer 8x20x1.5 DPA2513-012 Table DPA2513-013 Table Insert... -
Page 10: Warranty Statement
WARRANTY STATEMENT WEN Products is committed to building tools that are dependable for years. Our warranties are consistent with this commitment and our dedication to quality. LIMITED WARRANTY OF WEN PRODUCTS FOR HOME USE GREAT LAKES TECHNOLOGIES, LLC (“Seller”) warrants to the original purchaser only, that all WEN consumer power tools will be free from defects in material or workmanship during personal use for a period of two (2) years used for professional or commercial use. - Page 11 NOTES...
- Page 12 THANKS FOR REMEMBERING V. 2020.08.04...
Need help?
Do you have a question about the DPA2513 and is the answer not in the manual?
Questions and answers