Advertisement
Quick Links
Advertisement

Subscribe to Our Youtube Channel
Related Manuals for Grohe 39315000


Summary of Contents for Grohe 39315000
- Page 1 39315000 99.0567.031/ECN 235920/11.15 顶视图 前视图 侧视图 顶视图 前视图 侧视图 Nov.2015 Rev.03...
- Page 2 Nov.2015 Rev.03...
- Page 3 Nov.2015 Rev.03...
- Page 4 Nov.2015 Rev.03...
- Page 5 安 装 横 排 管 道 如图7.1和7.2的建议尺寸将排污管插入墙面 管道孔内。 地面固定装置 注意: 如果有必要,可以在排污管与墙面接口处涂 一圈PVC胶(不提供)使其密封性能更好。 将座厕向排污管方向移动,使其出口与排污 管连接。 190±5毫米 毫米 318毫米 固 定 座 厕 / 检 测 水 平 先用水平尺检查其水平,然后用提供的螺丝 按图示将座厕固定到地面上。 连 接 水 箱 的 供 水 软 管 将供水软管连接到供水角阀上。 注意: 在连接供水软管和角阀之前先关闭水源。 - 5 - Nov.2015 Rev.03...
- Page 6 Nov.2015 Rev.03...
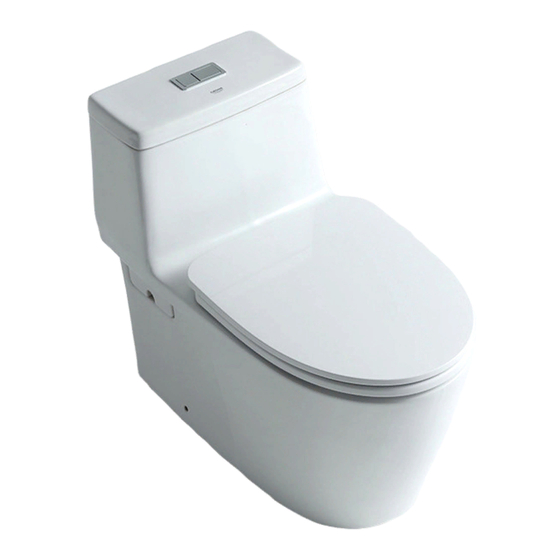
- Page 8 VORTEX OP TOILET 39315000 99.0567.031/ECN 235920/11.15 Installation Manual Thank you for selecting our products which have been the benchmarks of fine quality for years.To help ensure that the installation process will proceed smoothly, please read these instructions carefully before you begin. Also review the recommended tools and materials in the list, carefully unpack and examine your new plumbing fixture.
- Page 9 PIPING PREPARATION AND CONNECTING WASTE PIPE AND WATER SUPPLY VALVE 4” Unit: mm Unit: mm WATER SUPPLY PIPE : Connecting size ” � � WASTE PIPE (Fig.�.� / �.�) : Size �” (PVC. pipe class �.� or a regular pipe with an internal diameter of ���...
- Page 10 FLOOR FIXING SET INSTALLATION �.�) Set properly the VC. on the floor, k r a e h t x i f g n i l o h � e i ํ � o t n e h t o l f .
- Page 11 In case length of “A” is less than ��� mm. but not lower than ��� mm. Plastic Cover = �� - (��� - A) = ��� + (��� - A) Rubber In case length of “A” is greater than ���mm. but not over than ���...
- Page 12 INSTALLATION THE PLASTIC CONNECTOR INTO THE WALL (P-TRAP) �.�) Insert the plastic connector into the waste pipe on the wall up to protruding lenght of ��� mm. as shown in figures �.� NOTE : (If necessary, apply PVC cement solvent (not supplied) around the end tip of plastic connector to be fitted with the waste pipe to strengthen the connection joint between waste pipe and plastic connector)
-
Page 13: Care And Maintenance
Do not use cleaners in tank. Products containing chlorine(calcium hydrochlorite) can seriously damage fitings in the tank. This damage can cause leakage and property damage. GROHE shall not be responsible or liable for any tank fitting damage caused by the use of cleaners containing chlorine (calcium hydrochlorite) - 6 - Nov.2015... - Page 14 +43 1 68060 +1 800 80 6570 +66 2610 3 685 +33 1 49972900 info-at@grohe.com marketing-fr@grohe.com info-singapore@grohe.com info-singapore@grohe. com Sydney +358 10 8201100 Argent +47 22 072070 +90 216 441 2 3 7 0 +(02) 8394 5 800 grohe@grohe.no GroheT urkey@grome.com...
- Page 15 安装使用说明书 产品型号:39316000 99.0567.031/ECN 235920/11.15 3. 推荐工具和材料(客户自备) 4.3. 如图所示,在排污管周围涂上白水泥或者 为了安全请务必遵守 安装使用前的注意事项 石灰,按照图示安装地面固定装置。 陶瓷属于易碎品,安装前请先确认是否有因 在使用时为避免发生不必要的事故或故障,特提 运输不当产生的破损。 出以下注意事项: 安装时请按先排水分离器后坐便器的顺序 在安装、使用便器之前,请先阅读以下项目,正 进行安装。(具体步骤参照便器安装方法) 确理解之后再进行安装、使用。 安装中或安装完毕后,请确认是否有因安装 专业修理者以外的人员,请不要进行拆卸、修理、 不当产生的破损。 弯管空隙处 改造本产品。 一字形螺丝起子 可调扳手 因不正确安装和使用不当而发生的事故,本 矽胶 本产品已做抗菌处理,清洗时请勿使用强酸强碱 填满水泥 公司将不予以承担责任,敬请客户谅解。 物质,以免破坏抗菌涂层。 施工结束后,在确认各部件能否正常工作的同时, 并向用户说明使用和保养的方法。 5.安装弯管上的橡胶垫圈到弯管 请将本说明书交于最终用户保管,以备查阅。 卷尺 胶带 冲击钻 鲤鱼钳 按照图示安装弯管橡胶垫圈。...
- Page 16 请您务必遵守。 +43 1 68060 +1 800 80 6570 +33 1 49972900 +66 2610 3 685 水阀上,检查漏水。进水阀的水必须是打开的,以确保随时能 info-at@grohe.com marketing-fr@grohe.com info-singapore@grohe.com info-singapore@grohe. com 9.1. 请勿蹬踏座厕。 上厕所用。 *否则容易引发破损,造成人身伤害。 Sydney +358 10 8201100 Argent +47 22 072070 +90 216 441 2 3 7 0 +(02) 8394 5 800 grohe@grohe.no...
- Page 17 MANUAL FOR INSTALLATION AND USING PRODUCT CODE :39316000 99.0567.031/ECN 235920/11.15 4. Install P-trap. 5. Install the rubber gasket into P-trap. 1.Installation drawing After the trap has been fixed on the floor, 4.1. The distance from floor to top side of drainage pipe is 12- place the rubber washer on the mouth of 13mm.
- Page 18 9.2: Don't kick strongly at the flexible hose, or else it can be damaged it or Sydney...
Need help?
Do you have a question about the 39315000 and is the answer not in the manual?
Questions and answers