Table of Contents
Advertisement
Quick Links
Advertisement
Table of Contents

Related Manuals for Optoma DC552


Summary of Contents for Optoma DC552
- Page 1 DC552/DC556 Document Camera English User manual...
- Page 2 • Welcome: Thanks for purchasing this product. Please read the instructions carefully before using this product. • FCC Compliance Statement (Class A): This device complies with Part 15 of the FCC Rules. Operation is subject to the following two conditions: (1) this device may not cause harmful interference, and (2) this device must accept any interfer- ence received;...
- Page 3 Warning 1. Do not look directly at the LED light source,which may cause retinal damage. 2. Carry the product by holding the lower part of the main unit in both hands. Never hold the product by the arm or the camera head only. 3.
-
Page 4: Preparing The Document Camera
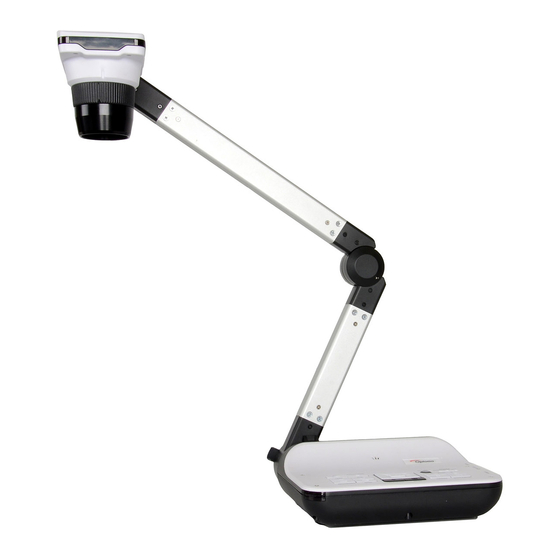
Preparing the Document Camera » Knowing the Document Camera Parts Carrying Handle Slide out the handle out to carry the Document Camera. Camera Head USB Port LED Lamp VGA Output Port Control Panel HDMI Output Port Audio Output Port Speaker Audio Input Port VGA Input Port SD Card Slot... -
Page 5: Control Panel
» Control Panel PASS POWER OUTPUT THROUGH BRIGHTNESS HDMI LAMP FLIP ZOOM RECORDING SNAP FREEZE AUTO FOCUS PLAYBACK MENU Button Function Button Function Power on/off Pass the signal from PC Invert image 180° Show/hide brightness adjustment bar. "Freeze" the current image or "Pause"... -
Page 6: Remote Control
» Remote Control Button Function Brightness hotkey Power on / off Freeze current image. * Pause the clip while playing videos Show or hide on-screen icons To show or hide OSD menu P l a y b a c k m o d e t o d i s p l a y recorded pictures and video clips Invert image 180°... - Page 7 » Setting up • Camera Head Roll the lens rotator to rotate image 90°. 90° • Illumination Lamp If you are in a dark environment, please turn the LED lamp on to get better exposure. 1. Press the LED lamp button ( ) on the base to turn on/off the LED lamp.
-
Page 8: Basic Operation
» Basic Operation • Menu options in Preview Mode Name Icon Option Description Use the Right / Left buttons to make Brightness the image brighter / darker To improve the tint of color-based Graphic The function is designed especially for text-based documents to which can Text be enhanced white and black subjects... - Page 9 Disk Mode Select “PC Cam“ to enter PC Cam USB Connection PC cam Mode Disable USB function DC552: 720P / 1080P HDMI Out Select output resolution DC556: 720P / 1080P / 4K XGA / UXGA / 720P / VGA Out...
- Page 10 • Adjusting the brightness 1. Press BRIGHTNESS button on the control panel ( ) or remote control ( 2. Use ( ) buttons to increase or decrease the brighness level. • Zoom Function 1. Use the Zoom button ( ) to zoom in or zoom out the screen. •...
- Page 11 ) to start recording and press it again to stop recording Output Switch Resolution Setting Recording resolution Model 1024 x 768 UXGA DC552 / DC556 720P 1280 x 720 WXGA 1280 x 800 720P 1280 x 720 DC552 / DC556...
-
Page 12: Making The Connections
Please refer to the table listed below : Output Aspect-Ratio Resolution Vertical Frequency Model 1024 x 768 1600 x 1200 50 / 60 Hz DC552 / DC556 1280 x 720 16:9 1280 x 800 1280 x 720 50 / 60 Hz DC552 / DC556 HDMI 16:9... - Page 13 Step 3 / Connecting with Components Product Display Cable PC Port Port Device Port RGB OUT- RGB INPUT INPUT OUTPUT HDMI HDMI-INPUT HDMI HDMI HDMI- OUTPUT TYPE B TYPE A Port TYPE A Port Port • Connect via VGA OUTPUT To display images, you can use VGA cable to connect to your television’s RGB port via the VGA OUT connector.
- Page 14 • Connect via USB Press MENU ( ) button → select "USB Connect". Choose "Disk" to connect mass storage. Choose "PC Cam" to use as a PC-Cam. • Copying to your computer Please notice that the video clips are recorded in MOV format and are compiled as CLIPxxxx.mov (xxxx are four serial numbers).
- Page 15 • Passthrough Function To display computer image, press PASSTHROUGH button ( ) on the control panel. For laptop to output display mode, use the keyboard command ( Fn + ) to swtich between the display modes. For different command, please refer to your laptop manual. The signal is only pass through from VGA IN port to VGA OUT port or HDMI In port to HDMI Out port on document camera.
-
Page 16: Advanced Operation
» Advanced operation • Highlight function 1. Use the Highlight display to draw attention to a particular section of the output image. Press the Highlight button ( ) on the remote control, and use the direction buttons to move the highlighted area. •... - Page 17 • Connect to a microscope Connect to a microscope enables you to examine microscopic objects on a big screen. 1. Adjust the microscope and focus objects. 2. Choose an appropriate microscope adapter. 3. Microscope adapter accessories are applicable to Ø28mm,Ø31mm, Ø33mm, and Ø34mm eyepieces.
- Page 18 » Storing 1. Power off the product by long pressing below button. POWER OUTPUT HDMI ZOOM 2. Unplug the AC adapter from the wall outlet. Disconnect the AC Adapter and all cables. 3. Fold the camera head and arms in the way shown...
-
Page 19: Troubleshooting
» Troubleshooting Problem Cause Solution Cannot power on The AC adapter is not Re-connect one end of the AC adapter normally. correctly connected to the to the document camera and the other wall outlet or the document end to a wall outlet. camera. - Page 20 Problem Cause Solution The LCD screen The format of the memory Format the card. displays “MEMORY card is not compatible with ERROR” or “CARD the document camera. ERROR” message or The memory card is Replace the memory card with a new memory card cannot corrupted.
- Page 21 ADDITIONAL INFORMATION Japan 47697 Westinghouse Drive, 888-289-6786 東京都足立区綾瀬3-25-18 Fremont, CA 94539, USA 510-897-8601 info@os-worldwide.com 株式会社オーエス www.optomausa.com services@optoma.com 0120-380-495 www.os-worldwide.com コンタク トセンター: Canada Taiwan 47697 Westinghouse Drive, 888-289-6786 12F., No.213, Sec. 3, Beixin Rd., +886-2-8911-8600 Fremont, CA 94539, USA 510-897-8601 Xindian Dist., New Taipei City 231, +886-2-8911-6550 www.optomausa.com...
- Page 22 TS-82-932-90021 www.optoma.com...
Need help?
Do you have a question about the DC552 and is the answer not in the manual?
Questions and answers