Advertisement
Quick Links
• Clean Air Sub 0.6 g/kg
TESTED in compliance with AS/NZS 2918: 2001 by Spectrum Laboratories Limited
GENERAL:
•
This appliance is not intended for use by persons (including children) with reduced
physical, sensory or mental capabilities, or lack of experience and knowledge, unless they
have been given supervision or instruction concerning use of the appliance by a person
responsible for their safety.
•
For the protection of young children, install an effective fire safety screen around your fire.
Always keep children well away from the wood burner when it is alight.
•
Supervise young children to ensure they do not play with the appliance.
•
During initial burns of the appliance, ventilate the rooms well. It is recommended that
babies, small children, pregnant women and pets should not be present in the area during
initial burns, as this is the firebox paint curing period.
•
Do not make any modifications to the unit. Use it only in the manner described in the
Operations Manual. Using it in any manner not recommended by the manufacturer may
result in injury or death.
FOR UNITS INCLUDING ELECTRICAL CONNECTIONS:
•
If the wood burner is permanently connected to an electrical source, an isolating switch
(wall switch) must be installed.
•
New circuits or modifications may be made, if required, but must be made using the
services of a certified electrician only.
•
Ensure that the outlets you use are grounded properly, polarised and provided with fuse
units.
•
Ensure that the electrical plug is accessible after installation. The wood burner must not
be located immediately below an electrical socket. The socket should be located to one
side of the wood burner. The electrical outlet should not be installed higher than 300mm
maximum from the floor to the top of the plug socket outlet cover plate.
•
Never operate the appliance with a damaged plug or cord. If you observe the fan unit is
malfunctioning or the heater has been damaged in any way, call the authorised service
person immediately for repairs, or to make electrical or mechanical adjustments. Isolate
the electrical supply in order to alleviate any potential risk.
•
If the supply cord is damaged, the manufacturer, its service agent or a suitably qualified
person must replace it in order to avoid electrical hazard. Any cord similar to the original
can be used.
Install-TOMMI - JUN_2020 - 2020-06-18.docx
A division of Terry Young Ltd, New Zealand
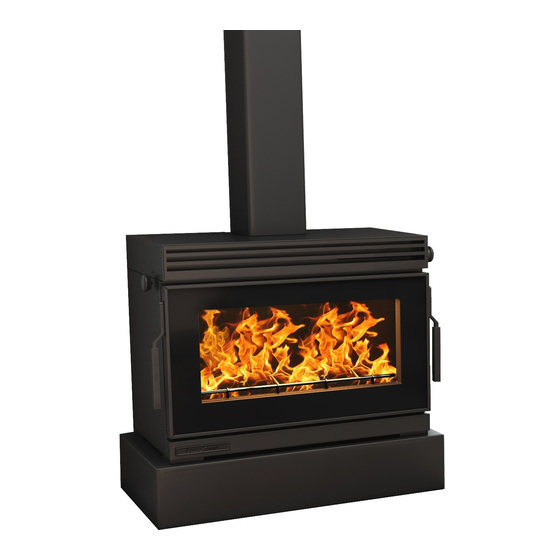
INSTALLATION INSTRUCTIONS for
TOMMI
WOOD BURNER
JUNE 2020
SAFETY INFORMATION
• Non Clean Air (Rural).
www.yunca.co.nz
Page 1 of 15
Advertisement

Related Manuals for Yunca Gas TOMMI


Summary of Contents for Yunca Gas TOMMI
- Page 1 If the supply cord is damaged, the manufacturer, its service agent or a suitably qualified person must replace it in order to avoid electrical hazard. Any cord similar to the original can be used. Install-TOMMI - JUN_2020 - 2020-06-18.docx www.yunca.co.nz Page 1 of 15...
-
Page 2: Installation
Also notify your Insurance Company that a solid fuel heater has been installed. – Projection of required floor protector may be read off the graph C. Floor Protector: and/or table on the next page: Install-TOMMI - JUN_2020 - 2020-06-18.docx www.yunca.co.nz Page 2 of 15... -
Page 3: Seismic Restraint
Table 2. Floor Protector Reductions for Tommi Freestanding Installation Freestanding Elevation (mm) Hearth Projection (mm) Note: Floor Protector must: 1. Extend in front of the fuel-loading or ash-removal opening as per the above chart but must continue to extend a minimum of 300mm at 475mm or higher above the floor. - Page 4 1 x 1200mm length, “U” section, front guard, plus optional extension as required. Please Note: The Tommi Flue Shield is to be full height within the room. H. TOMMI WOODBURNER Main Air Intake Assembly. 1 x Outer wall vent cowl.
- Page 5 FIG. A: HEATER DIMENSIONS – TOMMI WOODBURNER (Not to Scale.) Install-TOMMI - JUN_2020 - 2020-06-18.docx www.yunca.co.nz Page 5 of 15...
- Page 6 FIG. B: HEATER POSITION – TOMMI WOODBURNER (Not to Scale.) Install-TOMMI - JUN_2020 - 2020-06-18.docx www.yunca.co.nz Page 6 of 15...
- Page 7 FIG. C: TOMMI FREESTANDING WOODBURNER – TYPICAL FLUE INSTALLATION Install-TOMMI - JUN_2020 - 2020-06-18.docx www.yunca.co.nz Page 7 of 15...
- Page 8 E. CRACKED AND BROKEN COMPONENTS E.G. GLASS PANELS OR FIRE BRICKS, MAY RENDER THE INSTALLATION UNSAFE. F. SEISMIC RESTRAINT: • Secure the heater base to the hearth or sub-framing with Dynabolts or similar. • Follow local Council’s Specifications. Install-TOMMI - JUN_2020 - 2020-06-18.docx www.yunca.co.nz Page 8 of 15...
- Page 9 FIG E: MAIN AIR INTAKE DUCT ASSY (Not to scale) Install-TOMMI - JUN_2020 - 2020-06-18.docx www.yunca.co.nz Page 9 of 15...
- Page 10 5. Ensure that the flue will miss ceiling and roof support members. The minimum rear clearance for the Tommi fire is 100mm from the wall to the fan housing, at the rear of the fire. If the fire is being set up parallel to the wall, this clearance will be achieved with a distance of 350mm from the wall to the centre of the flue.
- Page 11 6. If the fire is to be set up to be diagonally across a corner, the minimum clearance to the walls at each side is 400mm. This is achieved with a parallel distance from each wall to the centre of the flue of 879mm. (See Fig 2 below). Fig 2 – Plan View – Tommi Installed Diagonally OPENING ANGLE Fig 3 –...
- Page 12 (You may yet wish to slide the Ceiling Tile Frame up or down the slope of the ceiling). Caution: The edges of the frame are sharp. Install-TOMMI - JUN_2020 - 2020-06-18.docx www.yunca.co.nz...
- Page 13 13.2. It can be positioned at the correct height vertically to cope with: Floor Protector + height of Plinth + height of Tommi + length of available Flue Guard and still have the Flue Guard lap neatly onto the lower portion of the Drop Box.
- Page 14 Move the two halves together such that the outer half slides over the inner. 21.2. Once you have the inner half captured inside the outer, push the two halves firmly together so the push pins on both halves engage in their sockets. Install-TOMMI - JUN_2020 - 2020-06-18.docx www.yunca.co.nz Page 14 of 15...
- Page 15 26. Complete Liner install and install flue. 27. Install Tommi Flue Guard over flue within the room, lapping it over base of Drop Box and fastening to 28. Install any remaining parts; Flashing around Outer Liner, Flue Cowl, etc.
Need help?
Do you have a question about the TOMMI and is the answer not in the manual?
Questions and answers