
Related Manuals for STOLZENBERG TwinSweep 900E


Summary of Contents for STOLZENBERG TwinSweep 900E
- Page 1 TwinSweep 900E Instruction Manual (Translation of the Original Version) 2021-01-11 htttp://www.stolzenberg.de...
-
Page 3: Table Of Contents
Contents, General ….3 CONTENTS / CONTENTS / GENERAL Contents .…3 Proper Use ….3 EC Conformity Declara on .…3 Ra ng Plate .…3 1.1 C ONTENTS Explana on of Symbols .…4 Construc on, Func on, Technical Data .…4 This operating manual contains instructions for using the Packing Contents .…4 sweeper. -
Page 4: Proper Use
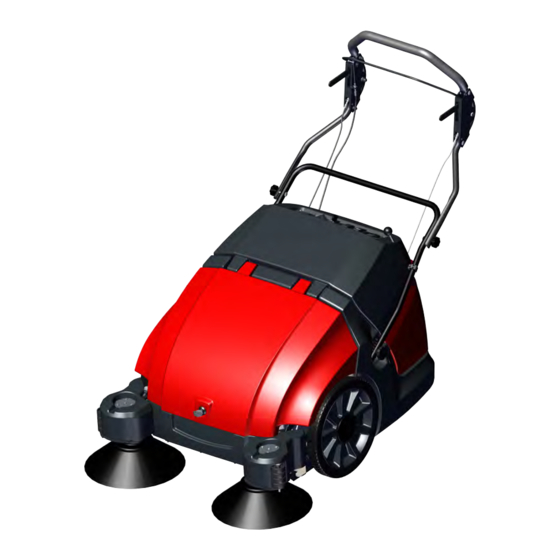
Observe the maximum climbing ability specified in the technical GVW: 165 kg data and maximum possible slope inclination for operating Stolzenberg GmbH & Co. KG across slopes. Due to an abrupt change of direction, particularly Hamburger Str. 15-17 49124 Georgsmarienhütte on slopes, the sweeper may tip. - Page 5 2.3 O PERATING AND FUNCTIONAL COMPONENTS ONSTRUCTION, FUNCTION, TECHNICAL DATA Overview: The TwinSweep 900E is a battery-operated, hand-driven 1 1 11 pedestrian-controlled vacuum sweeper fitted with the tandem 1 1 5 1 1 8 roller system (TRS). 1 1 3...
-
Page 6: Technical Data
2.4 T ECHNICAL DATA Technical data Basic Plus Machine data Length x width x height (pusing handle unfolded) max 1085x820x1200 1085x820x710 Length x width x heigth (without pusing handle) Length x width x height (pusing handle folded in) 1085x820x790 Weight (without batteries) Weigth (with batteries) Permissible overal weight Driving and sweeping speed... -
Page 7: Safety
SAGE SAGE SAGE SAGE SAGE SAGE • To avoid damage to health, smoking, eating and drinking AFETY NTRODUCTION NTRODUCTION NTRODUCTION NTRODUCTION NTRODUCTION NTRODUCTION ROPER ROPER ROPER ROPER ROPER ROPER in the area of the battery charging station is to be avoided. -
Page 8: Safety Equipment
3.4 S 4.3 A AFETY EQUIPMENT DJUSTING THE TRANSPORT BAR • Undo star screws of the raster fastening on the frame (I) - Safety equipment is to be inspected for functioning before starting work. • Fold out lower transport bar (II) •... -
Page 9: Unpacking The Sweeper
• Connect the terminal (red cable) to the plus pole of the 4.5 O 4 .5 O PENING THE PENING EQUIPMENT PANEL RONT ANEL battery. The front panel is unlocked with a panel • Push the side brushes on the driver and screw key (rotate clockwise). -
Page 10: 4.8.4 Charger
After charging, unplug the on-board 4.8.3 CHARGING B ATTERIES • charging unit mains cable. DANGER Risk of injury, the charger must only be • Unwind the mains cable from the charger cable bracket. put into operation if the mains cable is not damaged. -
Page 11: Opera On
4.9 S U 5.2 D RIVING WEEPER • Pull drive lever The sweeper moves forwards. General Instructions Switching on The drive speed is according to the lever setting DANGER! Risk of injury! Switch off equipment before steplessly controllable. removing the dirt-hopper. •... -
Page 12: Switching Off Sweeper
5.6 C WITCHING WEEPER LEANING THE ILTER • Set down the machine on a level, dry and CAUTION! Risk of crushing when closing protected ground surface. the filter box. • Switch off the roller brush, side brushes and vacuuming system. •... - Page 13 EHLERSUCHE UND TÖRUNGSBESEITIGUNG ROUBLESHOOTING Help for faults Possible cause Fault Remedy Device does not start Battery state ≤20% ►Charge battery Battery cable not correctly connected or loose ►Check cabling of the batteries and connect correctly Safety switch in the filter cover not operated ►Close filter cover and insert dirt-hopper correctly.
-
Page 14: Care And Maintenance (Minor Repairs)
EHLERSUCHE UND TÖRUNGSBESEITIGUNG 7.2 C HANGING Care and Maintenance LEANING ILTER (No Repair) CAUTION! Before starting to change or clean the dust filter, clean off the dust filter and empty the dirt- hopper Wear dust protection mask and protective goggles when Regular maintenance of the sweeper is useful for the working on the filter system. -
Page 15: Inser Ng The Filter
7.4 T 7.3 I IPPING THE WEEPER NSERTING THE ILTER • Insert filter in the installation direction (see symbol CAUTION! Risk of injury! on the filter) into the filter holder. • Put ignition key into the “OFF” position and pull out. •... -
Page 16: Se Ng Roller Brush Clearance
7.7 C 7.6 S S R B C HANGING THE RUSHES • Switch of the sweeper. The side brushes are subjected to wear. On abrasive surfaces, • Raise the side brushes. wear to the brushes is faster than on smooth floors. •... -
Page 17: Contact Data
• To set the height, undo the fastenings (2 screws), readjust or 7.14 C ONTACT replace the side sealing rubber, align and fasten. Manufacturer: Stolzenberg GmbH & Co. KG Hamburger Straße 15-17 49124 Georgsmarienhütte T: +49 (0) 5401 / 8353-0 F: +49 (0) 5401 / 8353 - 11 service@stolzenberg.de... -
Page 18: Maintenance Work / Maintenance Table
7.15 M AINTENANCE AINTENANCE ABLE Instruction: The following maintenance work must be carried out by instructed and authorised specialist staff at the set intervals. CAUTION! In the event that damage to the machine is established, it must not be used until the damage has been remedied by specialist staff. - Page 19 S, D, D ONG-TERM TOPPAGE OF THE WEEPER • INSTRUCTION If it is stopped for a long period, the batteries must charge at intervals of approximately 2 months so they are not damaged by a deep discharge. • Set down the sweeper onto a level, dry and protected surface.
- Page 20 C ...
Need help?
Do you have a question about the TwinSweep 900E and is the answer not in the manual?
Questions and answers