Table of Contents

Related Manuals for Daikin FXFA20A2VEB


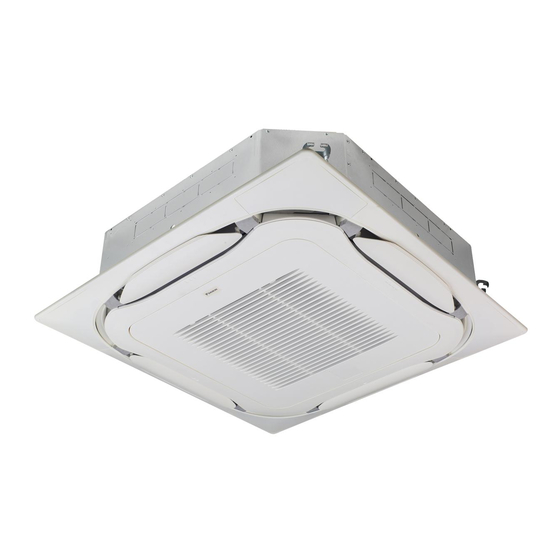
Summary of Contents for Daikin FXFA20A2VEB
- Page 1 Installation and operation manual VRV system air conditioner FXFA20A2VEB FXFA25A2VEB FXFA32A2VEB FXFA40A2VEB FXFA50A2VEB FXFA63A2VEB FXFA80A2VEB Installation and operation manual FXFA100A2VEB English VRV system air conditioner FXFA125A2VEB...
- Page 2 3P480520-15E...
-
Page 3: Table Of Contents
▪ A subset of the latest technical data is available on the regional Daikin website (publicly accessible). 13 Piping installation ▪ The full set of latest technical data is available on the Daikin 13.1 Preparing refrigerant piping............17 Business Portal (authentication required). -
Page 4: Instructions For Equipment Using R32 Refrigerant
WARNING Make sure installation, servicing, maintenance, repair and ▪ If the power supply has a missing or wrong N-phase, applied materials follow the instructions from Daikin and, in equipment might break down. addition, comply with applicable legislation and are ▪ Establish proper earthing. Do NOT earth the unit to a performed by qualified persons only. -
Page 5: Installation Space Requirements
WARNING Make sure installation, servicing, maintenance and repair CAUTION comply with instructions from Daikin and with applicable Do NOT use potential sources of ignition in searching for legislation (for example national gas regulation) and are or detection of refrigerant leaks. -
Page 6: Instructions For Safe Operation
3 User safety instructions given supervision or instruction Instructions for safe operation concerning the use of the appliance by WARNING a person responsible for their safety. ▪ Do NOT modify, disassemble, Children MUST NOT play with the remove, reinstall or repair the unit appliance. - Page 7 3 User safety instructions CAUTION WARNING To avoid oxygen deficiency, ventilate NEVER replace a fuse with a fuse of a the room sufficiently if equipment with wrong ampere ratings or other wires burner is used together with the when a fuse blows out. Use of wire or system.
-
Page 8: About The System
4 About the system ▪ Be aware that the refrigerant inside About the system the system is odourless. WARNING WARNING ▪ Do NOT modify, disassemble, remove, reinstall or repair the unit yourself as incorrect dismantling or The refrigerant inside the unit is mildly installation may cause an electric shock or fire. -
Page 9: User Interface
5 User interface Icon Operation mode User interface Fan only. In this mode, air circulates without heating or cooling. CAUTION ▪ NEVER touch the internal parts of the controller. Dry. In this mode, the air humidity will be lowered with a minimal temperature decrease. -
Page 10: Active Circulation Airflow
7 Maintenance and service INFORMATION NOTICE Depending on system layout and organisation, Auto airflow NEVER inspect or service the unit by yourself. Ask a direction may not be available. qualified service person to perform this work. However, as end user, you may clean the air filter, suction grille, air INFORMATION outlet and outside panels. -
Page 11: To Clean The Suction Grille
7 Maintenance and service 1 Open the suction grille. Standard panel: Standard panel: Design panel: Design panel: 2 Remove the suction grille. 2 Remove the air filter. Standard panel: Standard panel: 45° Design panel: Design panel: 3 Remove the air filter. 3 Clean the air filter. -
Page 12: About The Refrigerant
8 Troubleshooting NOTICE NOTICE ▪ Do NOT use gasoline, benzene, thinner polishing Functionality of the safety measures are periodically powder or liquid insecticide. Possible consequence: automatically checked. In case of malfunction, error code Discoloration and deformation. will display on the user interface. ▪... -
Page 13: Relocation
9 Relocation If after checking all above items, it is impossible to fix the problem Malfunction Measure yourself, contact your installer and state the symptoms, the complete If a safety device such as a fuse, a Turn OFF all main power model name of the unit (with manufacturing number if possible) and circuit breaker or a residual current supply switches to the... -
Page 14: Mounting The Indoor Unit
12 Unit installation Minimum distance to the wall (see below) 12.2 Mounting the indoor unit Minimum and maximum distance to the floor (see below) 20~63 class: ≥224 mm: In case of installation with standard decoration 12.2.1 Guidelines when installing the indoor unit panel ≥266 mm: In case of installation with design decoration INFORMATION... -
Page 15: Guidelines When Installing The Drain Piping
12 Unit installation Centre of the unit Centre of the ceiling opening Paper pattern for installation (upper part of the packing) Screws (accessories) ▪ Ceiling opening and unit: ▪ Make sure the ceiling opening is within the following limits: Minimum: 860 mm to be able to fit the unit. In case of installation with standard decoration panel In case of installation with fresh air intake kit Maximum: 910 ... - Page 16 12 Unit installation Hanging bar Allowed Not allowed ▪ Condensation. Take measures against condensation. Insulate the complete drain piping in the building. ▪ Rising piping. If necessary to make the slope possible, you can install rising piping. ▪ Drain hose inclination: 0~75 mm to avoid stress on the piping and to avoid air bubbles.
-
Page 17: Piping Installation
13 Piping installation Refrigerant piping material ▪ Piping material: Phosphoric acid deoxidised seamless copper. ▪ Flare connections: Only use annealed material. ▪ Piping temper grade and thickness: Outer diameter Temper grade Thickness (t) (Ø) Ø 6.4 mm (1/4") Annealed (O) ≥0.8 mm 9.5 mm (3/8") 12.7 mm (1/2") 15.9 mm (5/8") -
Page 18: Electrical Installation
14 Electrical installation MCA=Minimum circuit ampacity. Stated values are maximum values (see electrical data of indoor unit for exact values). 14.2 To connect the electrical wiring to the indoor unit NOTICE ▪ Follow the wiring diagram (delivered with the unit, located at the inside of the service cover). -
Page 19: Commissioning
15 Commissioning Tie wrap The system is properly earthed and the earth terminals Connection of user interface and transmission cable are tightened. Complete system example The fuses or locally installed protection devices are installed according to this document, and have NOT been 1 user interface controls 1 indoor unit. - Page 20 16 Configuration Setting: Time to clean air filter ▪ For all-round airflow, use the table below. This setting must correspond with the air contamination in the room. If the distance to the floor is (m) Then It determines the interval at which "Time to clean filter" notification —...
-
Page 21: Technical Data
▪ A subset of the latest technical data is available on the regional Daikin website (publicly accessible). Harness H*P, LED*, V*L Pilot lamp, light emitting diode ▪ The full set of latest technical data is available on the Daikin Business Portal (authentication required). Light emitting diode (service monitor green) 17.1... - Page 22 17 Technical data Symbol Meaning PTC* PTC thermistor Insulated gate bipolar transistor (IGBT ) Circuit breaker Q*DI, KLM Earth leak circuit breaker Overload protector Thermo switch Residual current device Resistor Thermistor Receiver Limit switch Float switch S*NG Refrigerant leak detector S*NPH Pressure sensor (high) S*NPL...
- Page 24 3P599604-1C 2020.10 Verantwortung für Energie und Umwelt...
Need help?
Do you have a question about the FXFA20A2VEB and is the answer not in the manual?
Questions and answers