Table of Contents
Advertisement
Quick Links
Advertisement
Table of Contents

Subscribe to Our Youtube Channel
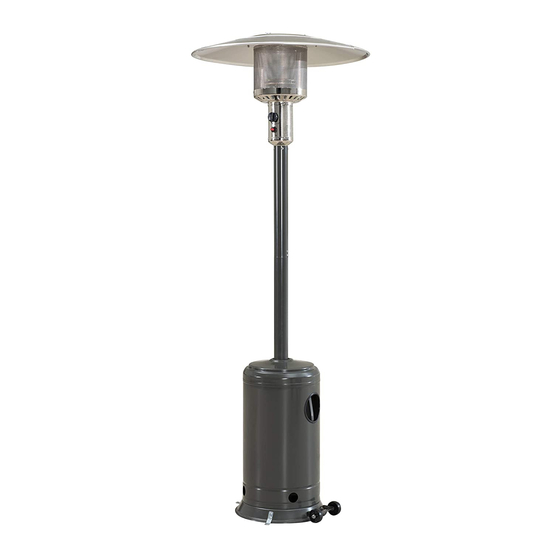
Summary of Contents for Sunjoy A306006402
-
Page 1: Table Of Contents
USE AND CARE GUIDE Patio Heater A306006402... -
Page 2: Table Of Contents
Table of Contents Table of Contents ........2 Leak Testing . -
Page 3: Safety Information
Safety Information (continued) WARNING: WARNING: immediately disconnect the gas cylinder moving it away YOURSELF AT RISK! WARNING: When positioning, ensure the unit is a from all sides and above. WARNING: Ensure aerosols are not used near this unit when in use. WARNING: Always leak test the unit before use, annually, or after storage, when parts are replaced/serviced or if the WARNING: Ensure all packaging and plastic bags are... -
Page 4: Pre-Assembly
Pre-Assembly PLANNING ASSEMBLY When you are ready to start, make sure that you have the right tools at hand, plenty of space and a clean dry area for assembly. NOTE: It is recommended that the carton is cut open and WARNING: While every precaution has been made in the manufacture of this product, care must be taken during assembly in case sharp edges are present. -
Page 5: Package Contents
Pre-Assembly (continued) PACKAGE CONTENTS Part Description Quantity Item Description Support Legs Reflector Panel Base Center Reflector Wheel Assembly Head Assembly Post Tank Housing Post Support... -
Page 6: Technical Data
Pre-Assembly (continued) TECHNICAL DATA Overall Height 88 in. approx. Overall Weight 35.2 lbs Overall Width 30 in. Heater Heat Input (·Qn) 47,000 Btu/h Heater Gas Consumption 1.77 Lbs per hour Heater Injector Size 0.0778 in. Setting Pressure 11.0 in. per W.C Regulator Outlet Pressure 11.0 in. -
Page 7: Assembly
Assembly Attach wheel assembly to base Attach ground fixtures to base Align the holes in the wheel assembly (I) with the holes Mount the three anchoring arms (Il) to the holes on the in the base (H), and attach the wheel assembly to the base base (H) using six M6x12 bolts (AA) and six M6 using two M6x12 bolts (AA) and two M6 nuts (BB). - Page 8 Assembly (continued) Attach support legs to base Attach post support to the support legs Attach the three support legs (G) to the top of the base (H) Attach the post support (F) to the top of the support legs using three M8 bolts (CC). (G) using six M6 x 22 bolts (DD) and six M6 nuts (BB).
- Page 9 Assembly (continued) Place the tank housing Attach reflector studs to head assembly Place the tank housing (E) on top of the assembly. Screw the threaded end of the reflector studs (FF) into the top holes of the head assembly (C).
- Page 10 Assembly (continued) Install reflector Attach the reflector to the head assembly Remove plastic protective coating on WARNING: Attach the reflector assembly made in step 7 to the top of the reflector panel (A) and center the reflector (B) the reflector studs (FF) on the head assembly (C). Fasten before assembling! with six flat washers (HH) and three wing nuts (GG).
- Page 11 Assembly (continued) Attach head assembly to post Attach post to the post support Unscrew the four screws that are preassembled on the Remove the preassembled screws from the post support head assembly (C). Place the head assembly (C) into the top (F) and attach the post (D) to the post support (F) using those of the post (D) by inserting the regulator (H) into the post four screws.
- Page 12 Assembly (continued) Place the gas cylinder in the base Attach the regulator to the cylinder valve Place the 20 lb gas cylinder in the center of the base and fasten Turn the cylinder valve on the tank clockwise to close the it with the webbing (MM).
-
Page 13: Operation
Operation Before performing a leak test, be sure that no sparks can occur and you are in a spacious outdoor area. Connect the propane gas tank to the regulator and turn the valve on the unit to the "off" position. Brush a soap and water mixture on all connections. Turn the gas supply on;... - Page 14 Operation (continued) Before performing any maintenance always disconnect propane gas tank. Keep the heating item free and clear from combustible materials. Visually inspect burner for obstructions and keep tank enclosure free and clear from debris. Use a soft brush to get rid of mild stains, loose dirt and soil after the burner is completely cooled down.
-
Page 15: Leak Testing
Operation (continued) LEAK TESTING Your patio heater has been checked at all factory connections for leakage. To check the connection at the gas hose/regulator/cylinder: Ensure you are in a well ventilated area. Confirm all control knobs are in the off position. Open the gas control valve on the bottle. -
Page 16: Maintenance
Maintenance FLAME CHARACTERISTIC The heater should not be operated again until the unit is serviced or repaired. Yellow Tip SCREW AND BOLT CONNECTIONS All screws and bolts, etc, should be checked and tightened on a regular basis. STORAGE Do not leave the patio heater exposed to outside weather conditions or stored in damp moist conditions. damaged or deformed, as this will affect performance. -
Page 17: Troubleshooting
Troubleshooting Problem Cause Solution The burner will not light. The burner injector is clogged. Clean the burner injector. There is low gas supply pressure. Call your gas supplier. The burner flame goes There is low gas pressure. Call your gas supplier. off immediately after ignition.


Need help?
Do you have a question about the A306006402 and is the answer not in the manual?
Questions and answers