
Related Manuals for EF BO AE 63 A


Summary of Contents for EF BO AE 63 A
- Page 1 Models: BUILT-IN OVEN BO AE 63 A 60CM BO AE 86 A BO AE 1370 A THE BEAUTY OF SIMPLICITY USER MANUAL...
- Page 2 Please read this user manual before usage! Dear Customer, Thank you for purchasing this EF product. We hope that you obtain the greatest performance from our products which has been manufactured with excellent quality, state-of-the-art technology that will be able to contribute to making your everyday life even easier.
-
Page 3: Table Of Contents
Oven Controls ......................12 Oven Displays ......................13 Accessories ......................14 BO AE 63 A, BO AE 86 A & BO AE 1370 A .............. 16 Initial Use ........................17 Initial Oven Clock Setting ..................17 First Cleaning Of The Appliances ................17 Initial Heating ...................... -
Page 4: General Safety
Grip the middle of the handle as the two ends will get hot due to the hot air from the cavity Make sure of below settings when the appliance is not in use; BO AE 63 A & BO AE 86 A – All knobs are in the “ “ or “ “ position ... -
Page 5: Disposal Instructions
The appliance should be powered down before replacing the lamp to avoid the possibility of electric shock. Never store flammable materials in the oven and avoid using flammable liquids near the appliance. DISPOSAL INSTRUCTIONS The material used to package this appliance is recyclable. ... -
Page 6: Child Safety
The oven’s electrical circuitry features a thermal shutoff system. If a cooking time is not entered, the oven will shut itself off after two hours. If the oven heats to abnormally high temperatures, the system will shut off the power supply to the heating elements for a period of time or oven for all along. - Page 7 For aluminium parts, wipe the plate gently with a soft cloth or microfiber cloth and a mild window cleaning detergent. Oven Interior Do not hand-clean the door seal. Do not use coarse scouring pads or cleaning sponges. ...
-
Page 8: Maintaining Efficiency
GENERAL INFORMATION MAINTAINING EFFICIENCY Only call the service centres authorized by manufacturer Always use original spare parts by the manufacturer If the supply cord is defective, it must be replaced by a special cord or assembly available from the manufacturer or an authorized service agent. -
Page 9: Installation Of Built-In Ovens
The figure below gives the dimensions of the cut-out for installation under the counter or in a wall cabinet unit. BO AE 1370 A BO AE 86 A BO AE 63 A N.B: Installation in compliance with the consumption declaration. In order to ensure adequate ventilation, the back panel of the cabinet unit must be removed. Installing the oven so that it rests on two strips of wood is preferable. -
Page 10: Electrical Connection
ELECTRICAL CONNECTION Those ovens equipped with a three-pole power supply cable are designed to operate with an alternating current. The wire for earthing the appliance is yellow-green in colour. 1. Fitting on a Power Supply Cable Opening the terminal board - Using a screw driver unscrew the bolt on the side tabs of the terminal board cover - Using a screwdriver unhooking the 2 fixing hooks, pull open the cover of the terminal board. -
Page 11: Parts And Features
PRODUCT OVERVIEW PARTS AND FEATURES Sliding Racks / Top Heating Element Light Bulb Side Runners Level 5 Rotisserie Level 4 Hole Level 3 Level 2 Level 1 Oven Fan Levels 4 and 5 are used mainly for the grill functions. Refer to the cooking guides provided throughout this manual to determine appropriate shelf levels for your dishes. -
Page 12: Oven Controls
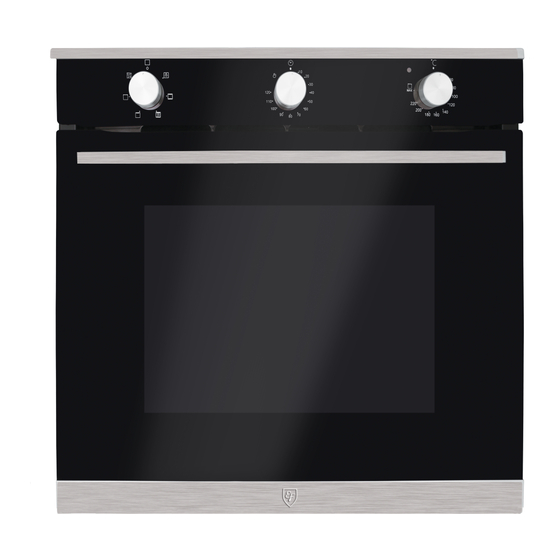
OVEN CONTROLS BO AE 63 A 1 – Cooking Mode Selection Knob 4 – Oven Indication Light 2 – Manual Operation Setting 5 – Cooking Temperature Selection Knob 3 – Cooking Time Selection Knob BO AE 86 A 1 – Cooking Mode Selection Knob 3 –... -
Page 13: Oven Displays
OVEN DISPLAYS BO AE 86 A 1/7 – Backward / Forward Adjustment 4 – Function Setting 2 – Timer 5 – End Cooking Time Setting 3 – Cooking Time Setting 6 – Clock BO AE 1370 A 11 12 14 15 20 22 Function Shortcut Buttons Window Display... -
Page 14: Accessories
ACCESSORIES BO AE BO AE BO AE Items Usage 63 A 86 A 1370 A For dishes, cake tins, roasting and grilling tray ✔ ✔ ✔ Positioning the wire grill, insert the wire Wire Grill grill at any desired level. ... - Page 15 Hole Neck Fig.B Fig.A Support Handle Tray Fig.C Fig.D Refer to the “Practical Cooking Advices Table” if you are unsure of which position best suited for your dish. Do not allow these accessories to contact the bottom surface of the oven as it can damage the enamel of the surface.
-
Page 16: Bo Ae 63 A, Bo Ae 86 A & Bo Ae 1370 A
PRODUCT SPECIFICATIONS BO AE 63 A, BO AE 86 A & BO AE 1370 A Image Model BO AE 63 A BO AE 86 A BO AE 1370 A Types Conventional Oven Multi-Function Oven Multi-Function Oven Size 60cm 60cm 60cm Capacity ... -
Page 17: Initial Use
BO AE 1370 A – Touch the “Light Button” icon BO AE 63 A / BO AE 86 A – Adjust the “Cooking Mode Selection Knob” to the symbol. 2. Clean all oven trays, accessories and side runners with warm water or washing up liquid and polish dry with a soft clean cloth. -
Page 18: Bo Ae 63 A
OPERATING OF APPLIANCES BO AE 63 A Cooking Mode Selection Knob (1) 1. Adjust the knob to the desired cooking mode. 2. Remember to readjust the knob to symbol after completing the session. Cooking Time Selection Knob (3) 1. - Page 19 4. After these settings, the red lights above the symbols and will light up, it indicates the baking procedure of oven has been set and remembered automatically. Example: The oven will only start to operate at 13:15, runs for 45 minutes, ends at 14:00. 5.
-
Page 20: Bo Ae 1370 A
BO AE 1370 A Setting Oven Function i. After the clock is set, select function by touching the icon repeatedly or any function from the “Oven Shortcut” section to choose your desired oven function on the control panel. ii. Press the “Start/Stop Button” and the oven will operate accordingly. - Page 21 Kitchen Timer 1. Touch the “Kitchen Timer Button” until icon and “0:00” on the display begin to flash. 2. Touch the “Temp /Function Adjust Button “ to set the desired time. 3. Touch the “Kitchen Timer Button” to start the kitchen timer. 4.
-
Page 22: Features By Models
OVEN FEATURES FEATURES BY MODELS BO AE 63 A BO AE 86 A BO AE 1370 A Mode Symbols ✔ ✔ ✔ Top Heating ✔ ✔ ✔ Convection ✔ ✔ ✔ Full Grill ✔ ✔ ✔ Fan Grill Assist ✔... -
Page 23: How To Use Oven Modes
HOW TO USE OVEN MODES Convection Mode The top and bottom heating elements will come on. This is the classic, traditional type of oven which has been perfected with heat distribution and reduced energy consumption. The convection oven is still unequalled when it comes to cooking dishes made up of ingredients (E.g. cabbage with ribs, Spanish style cod, Ancona style stockfish, tender veal strips with rice, etc.) ... - Page 24 Pizza Cooking Mode The bottom and circle heating elements, as well as the fan, will come on. This combination rapidly heats the oven due to the large amounts of power used by the appliance, which results in the production of considerable heat coming prevalently from the bottom. ...
-
Page 25: Cleaning The Oven
Before using this function, make sure the rotisserie spit is connect properly to the oven (Refer to “Connecting Rotisserie Spit” section) To start the turnspit, proceed as follows: BO AE 63 A BO AE 86 A BO AE 1370 A Only can be used in the below Only can be used in the below... -
Page 26: How To Remove The Oven Door
There is a rubber seal surrounding the oven opening which guarantees its perfect functioning. Check the condition of this seal on a regular basis. If necessary, clean it and avoid using abrasive products or objects to do so. HOW TO REMOVE THE OVEN DOOR ... -
Page 27: Tips For Saving Energy
Method 2: 1. Flip the glass plane retainers located at the bottom of the oven door outwards to open them (Fig.1) 2. Gently lift up the inner pane and remove it (Fig.2) 3. Gently lift up the middle pane and remove it (Fig.3) 4. - Page 28 When baking cakes, always place them in a preheated oven. Make sure you wait until the oven has been preheated thoroughly (For model BO AE 63 A & BO AE 86 A, the end light “E” will turn off).
- Page 29 In general; Pastry is too dry – Increase the temperature by 10°C and reduce the cooking time. Pastry dropped – Use less liquid or lower the temperature by 10°C. Pastry is too dark on top – Place it on a lower rack, lower the temperature, and increase the cooking time.
-
Page 30: Practical Cooking Advices Table
PRACTICAL COOKING ADVICES TABLE Cooking Selector rack Preheating Thermo Cooking Weight knob Food to be Cooked position time stat time (in kg ) setting (from (Mins) Setting (Mins) bottom) Convection 65 – 75 Duck 70 – 75 Roast veal or beef 70 –... - Page 31 8 – 10 Full Grill Soles and cuttlefish 6 – 8 Squid and prawn kebabs Cod filet 10 – 15 Grilled vegetables 15 – 20 Veal steak 15 – 20 Cutlets 7 – 10 Hamburgers 15 – 20 Mackerels 2 – 3 Toasted sandwiches With Rotisserie 80 –...
- Page 32 FAQS AND TROUBLESHOOTING Problem Possible cause and Remedy The oven does not heat up The oven may not be switched on Switch the oven on. The clock may not be set. Set the clock Check to see if the required settings have been applied.
- Page 33 WARRANTY & SERVICE To activate your warranty, please register your appliance. Warranty registration can be done through EF website or by scanning the QR Code below. Website 1. Visit our website www.ef.com.sg 2. Under the tabs, click on “Customer Care”...
- Page 34 Casa (S) Pte Ltd. reserves the rights to the final interpretation of the content of this manual. Customer will not be notified in the event of any amendments to the content. The manufacturer and agent decline all responsibilities in the event of damage caused by improper, incorrect or illogical use of the appliance.
Need help?
Do you have a question about the BO AE 63 A and is the answer not in the manual?
Questions and answers