Table of Contents
Advertisement
Available languages
Available languages
Quick Links
ELM4L (Nicad,Non SDRT)
EMERGENCY LIGHTING UNIT
Installation and wiring ................................................................................... P. 2-3
Testing and maintenance .............................................................................. P. 4-5
.
NOTE: Product versions that comply with CA Title 20 are marked BC on the product label.
!
WARNING:
FAILURE TO FOLLOW THESE INSTRUCTIONS AND WARNINGS MAY RESULT IN DEATH, SERIOUS INJURY OR
SIGNIFICANT PROPERTY DAMAGE
maintaining this equipment. These instructions do not attempt to cover all installation and maintenance situations. If you do not understand
these instructions or additional information is required, contact Lithonia Lighting or your local Lithonia Lighting distributor.
!
WARNING:
RISK OF ELECTRIC SHOCK – NEVER CONNECT TO, DISCONNECT FROM OR SERVICE WHILE EQUIPMENT
IS ENERGIZED
.
!
WARNING:
DO NOT USE ABRASIVE MATERIALS OR SOLVENTS. USE OF THESE SUBSTANCES MAY DAMAGE FIXTURE,
WHICH MAY RESULT IN PERSONAL INJURY.
!
WARNING:
RISK OF PERSONAL INJURY
removing from carton, handling, installing and maintaining this product.
!
WARNING
:
The battery used in this device may present a risk of fire or chemical burn if mistreated. Do not disassemble, heat above
70° C (158° F), or incinerate. Replace battery only as directed on the battery label and page 4 of these instructions. Use of unauthorized
battery voids warranty and UL listing of this product, and may present a risk of fire or explosion.
•
Disconnect A.C. power before servicing.
•
All servicing should be performed by qualified personnel.
•
Consult your local building code for approved wiring and installation.
•
Do not use outdoors unless used with Acuity Brands accessories appropriate to the application.
•
Do not mount near gas or electric heater.
•
Equipment should be mounted in locations and at heights where it will not readily be subjected to tampering by unauthorized personnel.
•
The use of accessory equipment not recommended by the manufacturer may cause an unsafe condition.
•
Do not use this equipment for other than intended use.
AND DELIVER TO OWNER AFTER INSTALLATION
IMPORTANT SAFEGUARDS
When using electrical equipment, basic safety precautions
Should always be followed, including the following:
READ AND FOLLOW ALL SAFETY INSTRUCTIONS
- For your protection, read and follow these warnings and instructions carefully before installing or
–
This product may have sharp edges. Wear gloves to prevent cuts or abrasions when
SAVE THESE INSTRUCTIONS
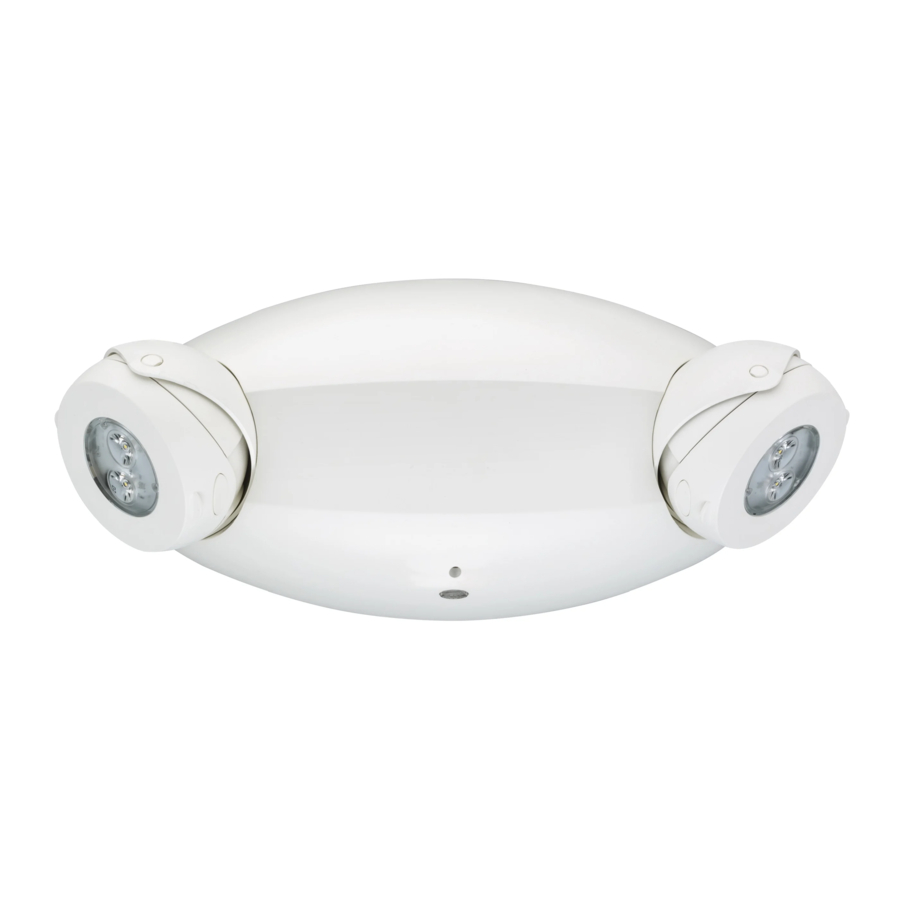
"TEST" button / status
indicator
Press latches to disengage
housing from mounting plate
Advertisement
Table of Contents

Related Manuals for Quantum ELM4L


Summary of Contents for Quantum ELM4L
- Page 1 ELM4L (Nicad,Non SDRT) EMERGENCY LIGHTING UNIT Installation and wiring ………………….…….…….…….….……..…..…………… P. 2-3 Testing and maintenance ………...………………….………..……..………………. P. 4-5 NOTE: Product versions that comply with CA Title 20 are marked BC on the product label. “TEST” button / status indicator Press latches to disengage...
-
Page 2: Installation And Wiring
24 hours without continuous AC power provided. See also “Important Battery Information”, page 4. NOTE: To meet the minimum illumination requirements of NFPA 101 (current Life Safety Code), the maximum mounting height of ELM4L from ground is 26.3 feet. JUNCTION BOX MOUNTING... -
Page 3: Final Assembly
INSTALLATION and WIRING (CONTINUED) page 3 FINAL ASSEMBLY Connect battery and lamp plug to Install the plastic film to housing. Housing attachment to mounting charger board. Connect AC input plug to charger plate: board. Make certain all wires and connectors are routed to avoid interference with other components. -
Page 4: Testing And Maintenance
NFPA 101 or as often as local codes The “TEST” button illuminates to indicate the following conditions: require, to ascertain that all components are operational. ELM4L Basic version: NOTE: Allow batteries to charge for 24 hours before Indication: Status: initial testing. -
Page 5: Lamp Replacement
TESTING and MAINTENANCE (CONTINUED) page 5 LAMP REPLACEMENT Remove lamp bezel as shown below. Gently bend the snap at each side of Route the lamp wires through one of the collar to release the lamp the center spaces under the new assembly.Unplug the connector from lamp assembly, and replace it firmly the lamp assembly. - Page 6 Part # 912-00027-004 Rev. A © Acuity Brands Lighting, Inc. 2018 All Rights Reserved. LIFE SAFETY OLUTIONS TEL: 800-334-8694 www.lithonia.com...
- Page 7 ELM4L (Nicad, non SDRT) UNITÉ D’ÉCLAIRAGE D’URGENCE Installation et câblage ………………….…….…….…….….……..…..……. P. 2-3 Essais et entretien ………...………………….………..……..………………. P. 4-5 REMARQUE : Les versions de produits conformes à la Loi « Title 20 » en vertu du « Code of regulations » de l’État de Californie portent la mention «...
-
Page 8: Installation Et Câblage
CA continue, cela pourrait l’endommager. Voir aussi « Informations importantes sur la batterie », à la page 4. REMARQUE : Pour satisfaire aux exigences minimales d’éclairage de la norme NFPA 101 (le Life Safety Code), la hauteur de montage maximale d’ELM4L à... -
Page 9: Assemblage Final
INSTALLATION et CÂBLAGE (SUITE) Page 3 ASSEMBLAGE FINAL Branchez la batterie et la fiche de la lampe à Posez le film plastique sur le boîtier. Boîtier de fixation à la plaque de montage : Branchez la fiche d’entrée CA à la carte la carte du chargeur. -
Page 10: Remplacement De La Pile
Le bouton « TEST » s’allume pour indiquer les conditions suivantes : souvent que les codes locaux l’exigent, afin de s’assurer que tous les composants sont opérationnels. Version de base d’ELM4L : Indication : État : REMARQUE : Laissez les batteries se charger pendant 24 heures L’unité... -
Page 11: Remplacement De La Lampe
ESSAIS et ENTRETIEN (SUITE) Page 5 REMPLACEMENT DE LA LAMPE Retirez le cadre de la lampe comme indiqué Pliez doucement les boutons-pression Acheminez les fils de la lampe dans l’un ci-dessous. de chaque côté de la bague pour des espaces centraux sous le nouvel libérer l’ensemble de la lampe. - Page 12 Pièce n 912-00027-004 Rév. A, 03/10/2018 SOLUTIONS DE SÉCURITÉ DES PERSONNES © Acuity Brands Lighting, Inc. 2018 Tous droits réservés. TÉL. : 800-334-8694 www.lithonia.com...
Need help?
Do you have a question about the ELM4L and is the answer not in the manual?
Questions and answers