Table of Contents
Advertisement
Quick Links
Advertisement
Table of Contents

Related Manuals for BRONZE GYM MNM-006


Summary of Contents for BRONZE GYM MNM-006
- Page 3 ▲Please carefully read this manual prior to assembling and using the machine. We assume that you have read it when you are using it. ▲Please fill out the warranty card carefully and keep it with receipt and stub for after-sales service. ▲This manual may be modified along with improvement of the machine and we’ll not give further notice about it.
-
Page 4: Table Of Contents
CONTENTS INSTRUCTIONS.................1 STRUCTURE..................3 PRODUCT INTRODUCTION..............4 SPECIFICATIONS................5 ASSEMBLY TOOLS................5 PACKING LIST..................6 ASSEMBLY INSTRUCTIONS.............7 MUSCLE DIAGRAM.................13 USAGE GUIDANCE.................14 NOTICES..................16 ROUTINE MAINTENANCE...............17... -
Page 5: Instructions
INSTRUCTIONS 1. This equipment is only intended for use in organizations with training areas, sport associations, clubs and educational establishments. 2. The max user weight is 150kg (330pound). (NOTICE) 3. It must be used under the supervision of a coach in case of any accident or damage to the machine. - Page 6 mechanical part, please contact professional to fix it immediately in case of accident as weight stacks may fall off. (WARNING) 10. Please wear suitable dresses and shoes during exercise. (NOTICE) 11. 5 to 10 minutes of warm-up exercise must be taken prior to exercise on the machine. 12.
-
Page 7: Structure
STRUCTURE Elbow rest Shroud assembly Headrest Water bottle holder Upper frame assembly Press arm assembly Back pad Cushion Handle Saddle assembly Main frame assembly Lower connecting assembly... -
Page 8: Product Introduction
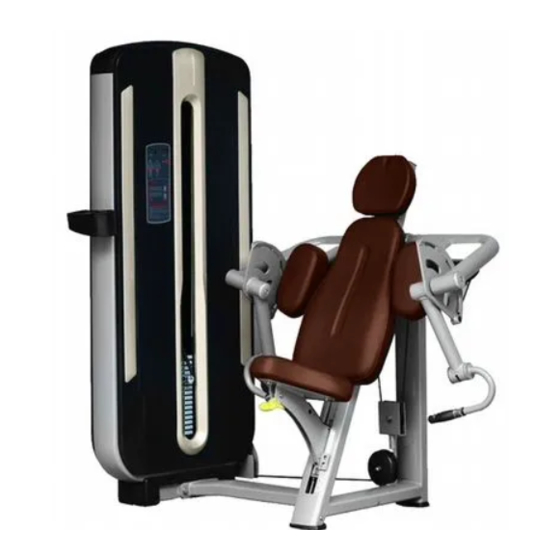
PRODUCT INTRODUCTION Target muscles: Latissimus dorsi and Biceps brachii. Welded quality flat oval pipes and steel bring the unit scientific structure, simplified and elegant look as well as ergonomic movement trajectory. Shroud assembly: It perfectly protects users from weight stacks and enhances usage safety. Junctions: High-end bearings used for junctions bring smoother movements. -
Page 9: Specifications
SPECIFICATIONS Product dimension: 1420mm(L)×970mm(W)×1680mm(H) Weight stack: 80kg (standard); 80~130kg (optional) User weight: <150kg Unit weight: 225kg ASSEMBLY TOOLS NAME SPECIFICATION QUANTITY Screwdriver Philips Open-ended spanner 17-19 Socket wrench Allen wrench 10mm Allen wrench Allen wrench Allen wrench Allen wrench... -
Page 10: Packing List
PACKING LIST NAME QUANTITY Main frame assembly Upper frame assembly Press arm assembly Upper connecting assembly Lower connecting assembly Saddle assembly Cushion Elbow rest Back pad Headrest Guide rod for weight stacks Shroud assembly Hardware tools kit Water bottle holder... -
Page 11: Assembly Instructions
ASSEMBLY INSTRUCTIONS 1. Due to the big size of the unit, please assemble it in a space which is big enough. 2. Open the carton, remove all packing materials and take out the parts, classify them and tidily put them on vacant floor. 3. - Page 12 (3) Assemble weight stack on ( 1 ) D i s m a n t l e f r o n t a n d (2) Assemble weight stack: the top. (Picture C) rear shrouds; put them in Insert the two guide rods into safe area (No scratching or the two attachment holes on crashing!).
- Page 13 (5) Pass steel cable through (6) Distribute steel cables (4) Put circlips on upper c o r d l o c k ; f i x t h e c a b l e . according to Picture G. parts of guide rods in right (Picture E and Picture F) positions;...
- Page 14 (7) Assemble water bottle (8) Assemble front shroud (9) Assemble rear shroud. holder. Check if all pulleys and counter; connect counter (Picture J.) can move smoothly. (Picture cables. (Picture I.)
- Page 15 6. Assemble frame (1) Put shroud which has been assembled in the area where the machine will be used. Check whether all the other parts are there according to the right diagram; remove packing materials and place them tidily. Assemble main frame, attach fixing plate for upper and lower connecting&supporting assemblies to shroud with fastening screws as the diagram shows.
- Page 16 (3) Get steel cables distributed as the right diagram shows. (4) Attach cushion, back pad and elbow rests to frame. (5) Recheck all junctions and tighten all loose screws in case of slack. (6) Finally, a trial must be taken by professional to assure that it’s correctly assembled.
-
Page 17: Muscle Diagram
MUSCLE DIAGRAM... -
Page 18: Usage Guidance
USAGE GUIDANCE Instructions Insert selector pin into weight stack at a suitable resistance Start level. Adjust the saddle height so you are able to reach the handles comfortably. Please consult a coach if you are unsure on how to use this machine or experience any sharp pain during the exercise. - Page 19 Target Muscles Biceps brachii Brachialis Target muscle (main) Target muscle (secondary)
-
Page 20: Notices
NOTICES 1. 5~10 minutes of warm-up must be taken prior to having exercise on this machine. Record the time while having free exercise which aims to active the joints in case of injury to them during training. 2. Inspection must be carried out prior to using the machine. For any potential problem, please contact the staff immediately. -
Page 21: Routine Maintenance
ROUTINE MAINTAINANCE 1.Daily Inspection Clean and inspect machine frame everyday; clean all decorative parts on it; check steel cables and the terminals to see if there’s abrasion. Clean decorative parts and machine frame with neutral soapy water, remove dirt, oil stain and sweat on the surfaces and air dry them completely. - Page 22 contacts. Picture 1 (2) Z-type twist or wave on cable. (3) Tangled cables (Internal of cable may be damaged.). (4) External part shrinks. (5) External part gets inflated. In addition, the following inspections must be carried out. (1) Make sure that steel cables are correctly adjusted and Picture 2 fastened onto the top of weight stacks.
- Page 23 2. Weekly Inspection Adjust and clean decorative parts; clean and lubricate cable rod terminal; clean and lubricate guide rods; inspect cables, connecting parts, and the tension; inspect cable accessories; inspect pulleys; inspect each weight stack and selector pin; inspect and lubricate bearings and bushings; inspect saddle adjustment system and test saddle adjustment system and saddle adapter pin.
- Page 24 (5) Inspect and test steel cables and the junctions completely every week; inspect cable tension. (6) Inspect cables connections at weight stacks. Make sure less than 11/4 " (32mm) of most of the parts are exposed, so that the bolts can make at least 10 turns towards selector pin rod. Make adjustment according to this length, and fasten check nuts towards selector pin.
- Page 25 abraded or damaged. 3. Monthly Inspection (1) Inspect main frame and press arm: lubricate the pin; inspect and lubricate lever for saddle; inspect all fastening parts. (2) Inspect main frame and press arm: check if they are complete and work normally; check if there’s cracking, coating damage or rustiness.
- Page 26 (6) Frequency and exercise duration can be displayed on counter during exercise. If not, battery needs to be replaced. Remove shroud, you can see an AAA battery, replace it with a new one. It’s suggested that it gets replaced monthly. 4.
Need help?
Do you have a question about the MNM-006 and is the answer not in the manual?
Questions and answers