Table of Contents
Advertisement
Quick Links
ACG+
User Manual
Commercial in Confidence
The ACG+ must be returned to Analox in its
original storage and transit case.
Failure to do so may result in damage which
will be chargeable.
Analox Limited
15 Ellerbeck Court, Stokesley Business Park,
North Yorkshire, TS9 5PT, UK
UK/RoW T: +44 (0)1642 711400 F: +44 (0)1642 713900
US T: (714) 891-4478
W: www.analox.net E:
info@analox.net
Copyright © 2014 Analox Ltd. All Rights Reserved.
Advertisement
Table of Contents

Related Manuals for ANALOX ACG+


Summary of Contents for ANALOX ACG+
- Page 1 ACG+ User Manual Commercial in Confidence The ACG+ must be returned to Analox in its original storage and transit case. Failure to do so may result in damage which will be chargeable. Analox Limited 15 Ellerbeck Court, Stokesley Business Park,...
-
Page 3: Table Of Contents
Filter replacement ........................82 10.3 Service requirements ......................83 Specifications ......................91 11.1 Instrument specification .......................91 11.2 Sensor specification ......................91 Declaration of conformity ..................93 Document ref: P0149-801-09 January 2018 Page Copyright © 2014 Analox Ltd. All Rights Reserved. Commercial in Confidence... - Page 4 Table 12 List of accessories ....................... 73 Table 13 Maintenance schedule of ACG+ components ..............74 Table 14 Service schedule of ACG+ components ................83 Document ref: P0149-801-09 January 2018 Page Copyright © 2014 Analox Ltd. All Rights Reserved. Commercial in Confidence...
-
Page 5: Contents Checklist
ACG+. If dry gas is constantly being passed over the sensors they will dry out and stop performing correctly. Document ref: P0149-801-09 January 2018 Page Copyright © 2014 Analox Ltd. All Rights Reserved. Commercial in Confidence... -
Page 6: Safety Information
User Manual Int. Approved Safety information WARNING: Read the safety information fully before using the Analox ACG+. Capabilities to test gases against the EN 12021:2014 standard The ACG+ is partially capable to test gases against EN 12021:2014. The ACG+ can test the following gas types from the standard: •... -
Page 7: Pid Lamp Cleaning Kit
Pressure relief is fitted to the unit such that damage from over pressurisation is minimised but units may still be damaged. Document ref: P0149-801-09 January 2018 Page Copyright © 2014 Analox Ltd. All Rights Reserved. Commercial in Confidence... -
Page 8: Introduction
8) Exhaust 9) Breather 10) Humidifier (Optional) 11) M16 cable gland (Optional) 12) Override keyswitch (Optional) 13) Exhaust 14) Blow out blanking plug Document ref: P0149-801-09 January 2018 Page Copyright © 2014 Analox Ltd. All Rights Reserved. Commercial in Confidence... -
Page 9: Installation Details
The ID at one end of the PTFE tubing will require stretching slightly to fit over the rear of the Linktech inline socket. Document ref: P0149-801-09 January 2018 Page Copyright © 2014 Analox Ltd. All Rights Reserved. Commercial in Confidence... - Page 10 • At the free end of the PTFE tubing, a compression nut should be fitted to connect to the regulated pressure source. Document ref: P0149-801-09 January 2018 Page Copyright © 2014 Analox Ltd. All Rights Reserved. Commercial in Confidence...
-
Page 11: Installation (Portable)
Connection should be made through the 3 way panel mount socket on the front panel located next to the USB connector. Battery Connection Battery Connected Document ref: P0149-801-09 January 2018 Page Copyright © 2014 Analox Ltd. All Rights Reserved. Commercial in Confidence... - Page 12 LED will go green, for Li-Ion chargers the red LED will extinguish). • Once complete, disconnect the charger, the battery is then ready for connection to the ACG+. Document ref: P0149-801-09 January 2018 Page Copyright © 2014 Analox Ltd. All Rights Reserved. Commercial in Confidence...
-
Page 13: Installation (Fixed)
Fit an M6 full nut to the screw thread at the back of the mounting panel and fully tighten (alternatively, the screws could be fitted into M6 tapped holes with the M6 nuts not required). Document ref: P0149-801-09 January 2018 Page Copyright © 2014 Analox Ltd. All Rights Reserved. Commercial in Confidence... -
Page 14: Table 2 Connector J17 Pin Assignments
Connector J3 pin assignments Terminal No. Function Details Solenoid drive (+ve) Not for user connection Solenoid drive (-ve) Reserved Not for user connection Reserved Document ref: P0149-801-09 January 2018 Page Copyright © 2014 Analox Ltd. All Rights Reserved. Commercial in Confidence... -
Page 15: Safety Interlock Relay (Acg+ Fixed)
Table 4 shows a typical example of the relay used in a system Document ref: P0149-801-09 January 2018 Page Copyright © 2014 Analox Ltd. All Rights Reserved. Commercial in Confidence... -
Page 16: Safety Interlock Override Key-Switch (Acg+ Fixed)
Sensor alarm active Normal Open circuit Closed circuit Override Closed circuit System or sensor Normal Open circuit Closed circuit fault active Override Closed circuit Document ref: P0149-801-09 January 2018 Page Copyright © 2014 Analox Ltd. All Rights Reserved. Commercial in Confidence... -
Page 17: Switched 24V Dc Outputs (Acg+ Fixed)
Figure 7 shows a typical example of the switched 24V DC outputs used in a system. Figure 7 - Typical use of switched 24V outputs Document ref: P0149-801-09 January 2018 Page Copyright © 2014 Analox Ltd. All Rights Reserved. Commercial in Confidence... -
Page 18: Operating Instructions
(for example, a high alarm due to atmospheric air present in internal plumbing). Figure 8 - Start-up splash screen Document ref: P0149-801-09 January 2018 Page Copyright © 2014 Analox Ltd. All Rights Reserved. Commercial in Confidence... -
Page 19: Controls
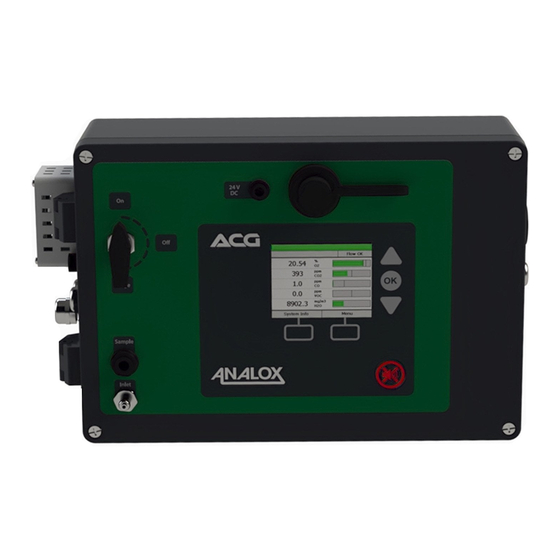
6) USB port 7) Up button 8) OK button 9) Down button 10) Mute button 11) Context sensitive buttons (function depends on current context) Document ref: P0149-801-09 January 2018 Page Copyright © 2014 Analox Ltd. All Rights Reserved. Commercial in Confidence... -
Page 20: Inlet/Purge Valve
Analox recommend that the purge system is used whenever a new pipe connection is made to the ACG+, if the inlet line has been open to atmosphere or it has been exposed to damp gas. -
Page 21: Menu
The highlighted menu option can be changed by using the up and down buttons. An arrow at the top or bottom of a menu indicates that there are more menu options above or below those currently shown. Document ref: P0149-801-09 January 2018 Page Copyright © 2014 Analox Ltd. All Rights Reserved. Commercial in Confidence... -
Page 22: Adjusting The Backlight
When the device is in sleep mode this disables the following: • Networking capabilities • Sounder • Data logging • Alarms • Screen Document ref: P0149-801-09 January 2018 Page Copyright © 2014 Analox Ltd. All Rights Reserved. Commercial in Confidence... -
Page 23: System Flow
The measured flow rate can be viewed on the system information screen as described in section 5.12. Note: Alarms triggered by flow do not affect the current state of the safety interlock relay (Fixed variants) (see section 4.5). Document ref: P0149-801-09 January 2018 Page Copyright © 2014 Analox Ltd. All Rights Reserved. Commercial in Confidence... -
Page 24: Sensor Readings
The bar graph is not intended to show absolute readings. Document ref: P0149-801-09 January 2018 Page Copyright © 2014 Analox Ltd. All Rights Reserved. Commercial in Confidence... - Page 25 In cases where a sensor fault has been identified and a reading can still be obtained from the sensor, the bar graph will be show coloured yellow (Figure 19). Figure 19 - Sensor in fault bar graph indicator Document ref: P0149-801-09 January 2018 Page Copyright © 2014 Analox Ltd. All Rights Reserved. Commercial in Confidence...
-
Page 26: Alarms
Figure 21 - Mute Button Document ref: P0149-801-09 January 2018 Page Copyright © 2014 Analox Ltd. All Rights Reserved. Commercial in Confidence... -
Page 27: Table 6 Scaled Hysteresis Values
The alarm latching option can be turned on and off through the device menu. This can be found in the main menu under ‘System options>Alarm latching’. The latching alarm option can also be changed using the PC tool (see section 6.3). Document ref: P0149-801-09 January 2018 Page Copyright © 2014 Analox Ltd. All Rights Reserved. Commercial in Confidence... - Page 28 Once the desired new set-point is shown, press ’Accept’ to store the new value. Press ‘Cancel’ to leave the alarm set-point unchanged. Figure 24 - Example of alarm set-point adjustment Document ref: P0149-801-09 January 2018 Page Copyright © 2014 Analox Ltd. All Rights Reserved. Commercial in Confidence...
-
Page 29: Calibration Adjustment
• Fit the 0.5 LPM gas flow regulator accessory (see section 9) or suitable regulator to the calibration gas bottle (Figure 25). Document ref: P0149-801-09 January 2018 Page Copyright © 2014 Analox Ltd. All Rights Reserved. Commercial in Confidence... - Page 30 9) and then connect the inlet/calibration gas connector to the calibration inlet on the ACG+ (Figure 26). Push the fitting on fully until it latches in place. Figure 26 - Connecting calibration fitting to ACG+ calibration port Document ref: P0149-801-09 January 2018 Page Copyright © 2014 Analox Ltd. All Rights Reserved. Commercial in Confidence...
- Page 31 For each sensor marked for adjustment, a rotating progress symbol will be shown whilst each sensor works out whether the adjustment is valid. Document ref: P0149-801-09 January 2018 Page Copyright © 2014 Analox Ltd. All Rights Reserved. Commercial in Confidence...
- Page 32 (Figure 29). • To re-enable the sensor for adjustment, press the ‘Enable/Disable’ context button again. This can be repeated for multiple sensors. Document ref: P0149-801-09 January 2018 Page Copyright © 2014 Analox Ltd. All Rights Reserved. Commercial in Confidence...
- Page 33 (Figure 31). The reminder is displayed when the time since the last full high and low calibration adjustment was performed exceeds the required calibration regime. Document ref: P0149-801-09 January 2018 Page Copyright © 2014 Analox Ltd. All Rights Reserved. Commercial in Confidence...
-
Page 34: Viewing Device Information
To view information about an individual sensor, select ‘Sensor options’ from the main menu and then select the sensor of interest. Next select the ‘Sensor information’ option. The sensor information screen will be shown (Figure 33). Document ref: P0149-801-09 January 2018 Page Copyright © 2014 Analox Ltd. All Rights Reserved. Commercial in Confidence... -
Page 35: Data-Logging
Alternatively, for convenience, the full set of data-log files can be downloaded from the device, directly onto a USB memory stick via the USB port on the front panel. To download the data logs, prepare a USB Document ref: P0149-801-09 January 2018 Page Copyright © 2014 Analox Ltd. All Rights Reserved. Commercial in Confidence... - Page 36 When a download is cancelled, all full data-log files that have been downloaded up until the point of cancellation will remain on the USB memory stick. Document ref: P0149-801-09 January 2018 Page Copyright © 2014 Analox Ltd. All Rights Reserved. Commercial in Confidence...
-
Page 37: Sensor Replacement Reminder
If a sensor becomes difficult to calibrate after a period of time in service then it should be replaced regardless of the reminder status. Document ref: P0149-801-09 January 2018 Page Copyright © 2014 Analox Ltd. All Rights Reserved. Commercial in Confidence... - Page 38 The reset feature should only be used if the sensor has been physically replaced. Figure 37 - Sensor replacement reset confirmation screen Document ref: P0149-801-09 January 2018 Page Copyright © 2014 Analox Ltd. All Rights Reserved. Commercial in Confidence...
-
Page 39: Timed Sample Draw
A flow meter kit (1 to 10l/m) is also available as an accessory (P0149-611) which can be fitted to the sample gas outlet port to provide a suitable flow for other sampling techniques. Document ref: P0149-801-09 January 2018 Page Copyright © 2014 Analox Ltd. All Rights Reserved. Commercial in Confidence... - Page 40 When the sample is complete, the ACG+ will give three beeps and the sample valve will close. The main screen shall show that the sample is complete (Figure 40). Document ref: P0149-801-09 January 2018 Page Copyright © 2014 Analox Ltd. All Rights Reserved. Commercial in Confidence...
-
Page 41: Setting The Date And Time
Alternatively, the date and time can be set using the PC tool (see section 6.5). Figure 41 - Date and time adjustment screen Document ref: P0149-801-09 January 2018 Page Copyright © 2014 Analox Ltd. All Rights Reserved. Commercial in Confidence... -
Page 42: Configuration
16) Repeat steps 4) to 11) to reinstall the ACG+ driver then go to step 17). 17) The device should automatically connect to ActiveSync and may pop up the ActiveSync window. This window can be closed. Document ref: P0149-801-09 January 2018 Page Copyright © 2014 Analox Ltd. All Rights Reserved. Commercial in Confidence... - Page 43 9) In the device manager window, locate ‘YELLOW’ under ‘Other devices’. Right click this and select ‘Properties’. 10) Select the ‘Driver’ tab and click ‘Update Driver...’. Document ref: P0149-801-09 January 2018 Page Copyright © 2014 Analox Ltd. All Rights Reserved. Commercial in Confidence...
- Page 44 12) Click ‘Browse’ and locate the ACG+ driver folder. This will be the folder named ‘Drivers’ on the ACG+ software disc. Click ‘Next’. 13) Click ‘Install this driver software anyway’ when prompted. Document ref: P0149-801-09 January 2018 Page Copyright © 2014 Analox Ltd. All Rights Reserved. Commercial in Confidence...
- Page 45 Then, go to General, and scroll to the bottom of the page, on the right hand side click Restart Now button under Advanced Startup section. Remember to save all your work first before clicking it. Document ref: P0149-801-09 January 2018 Page Copyright © 2014 Analox Ltd. All Rights Reserved. Commercial in Confidence...
- Page 46 The computer reboots to a startup menu, in which click Troubleshoot. Click Advanced Options at next screen. Choose Startup Settings next. Click Restart button. Document ref: P0149-801-09 January 2018 Page Copyright © 2014 Analox Ltd. All Rights Reserved. Commercial in Confidence...
- Page 47 7) In the device manager window, locate ‘YELLOW’ under ‘Other devices’. Right click this and select ‘Properties’. 8) Select the ‘Driver’ tab and click ‘Update Driver...’. Document ref: P0149-801-09 January 2018 Page Copyright © 2014 Analox Ltd. All Rights Reserved. Commercial in Confidence...
- Page 48 10) Click ‘Browse’ and locate the ACG+ driver folder. This will be the folder named ‘Drivers’ on the ACG+ software disc. Click ‘Next’. Document ref: P0149-801-09 January 2018 Page Copyright © 2014 Analox Ltd. All Rights Reserved. Commercial in Confidence...
- Page 49 15) From the ACG+ software disk, run the installer file called ‘Setup’. 16) The ACG+ installer wizard will be displayed. Follow the on-screen instructions to install the ACG+ software. Document ref: P0149-801-09 January 2018 Page Copyright © 2014 Analox Ltd. All Rights Reserved. Commercial in Confidence...
- Page 50 Advanced Startup section. Remember to save all your work first before clicking it. The computer reboots to a startup menu, in which click Troubleshoot. Document ref: P0149-801-09 January 2018 Page Copyright © 2014 Analox Ltd. All Rights Reserved. Commercial in Confidence...
- Page 51 ACG+ User Manual Int. Approved Click Advanced Options at next screen. Choose Startup Settings next. Click Restart button. Document ref: P0149-801-09 January 2018 Page Copyright © 2014 Analox Ltd. All Rights Reserved. Commercial in Confidence...
- Page 52 3) Windows will pop up a message box stating that it is attempting to install drivers. Windows will fail to find drivers for the device. Document ref: P0149-801-09 January 2018 Page Copyright © 2014 Analox Ltd. All Rights Reserved. Commercial in Confidence...
- Page 53 7) In the device manager window, locate ‘YELLOW’ under ‘Other devices’. Right click this and select ‘Properties’. 8) Select the ‘Driver’ tab and click ‘Update Driver...’. 9) Click ‘Browse my computer for driver software’. Document ref: P0149-801-09 January 2018 Page Copyright © 2014 Analox Ltd. All Rights Reserved. Commercial in Confidence...
- Page 54 13) If the driver fails to update and you get the following message, please perform the following steps to update Windows Mobile Device Centre. Document ref: P0149-801-09 January 2018 Page Copyright © 2014 Analox Ltd. All Rights Reserved. Commercial in Confidence...
- Page 55 ACG+ User Manual Int. Approved 14) Right click on Start 15) Open Computer Management 16) Open Services & Applications 17) Open Services Document ref: P0149-801-09 January 2018 Page Copyright © 2014 Analox Ltd. All Rights Reserved. Commercial in Confidence...
- Page 56 After this is removed, browse to C:\Program Files and delete the ActiveSync folder. Restart the computer and reinstall ActiveSync ® using the installer. Document ref: P0149-801-09 January 2018 Page Copyright © 2014 Analox Ltd. All Rights Reserved. Commercial in Confidence...
-
Page 57: Making A Connection
If not already open, run the ACG+ software. The ACG+ software will recognise the device and read the current settings form the device. Once fully connected the window shown in Figure 44 will be displayed. Document ref: P0149-801-09 January 2018 Page Copyright © 2014 Analox Ltd. All Rights Reserved. Commercial in Confidence... -
Page 58: Changing Options
Note: Any changes made to the general options will not come into effect on an ACG+ device until the ‘Apply Changes’ button has been clicked with the exception of setting the date and time (see section 6.5). Document ref: P0149-801-09 January 2018 Page Copyright © 2014 Analox Ltd. All Rights Reserved. Commercial in Confidence... -
Page 59: Downloading Data-Logs
ACG+ software. With an ACG+ connected to the ACG software, select the ‘General’ tab. Click the ‘Set Time...’ button. This will display the window Document ref: P0149-801-09 January 2018 Page Copyright © 2014 Analox Ltd. All Rights Reserved. Commercial in Confidence... - Page 60 OK. The ACG+ will play a sound to acknowledge that the date and time have been set successfully. Figure 47 - Setting the date and time on an ACG+ Document ref: P0149-801-09 January 2018 Page Copyright © 2014 Analox Ltd. All Rights Reserved. Commercial in Confidence...
-
Page 61: Networking
“<?xml version="1.0" encoding="utf-16"?>” Although the XML document is listed as “UTF-16” the actual data is encoded into standard “UTF-8” (ASCII) during physical transmission. Document ref: P0149-801-09 January 2018 Page Copyright © 2014 Analox Ltd. All Rights Reserved. Commercial in Confidence... -
Page 62: Setting The Acg Static Ip Address
For example, if the ACG is set to 10.0.0.2, the client can use 10.0.0.1 or (10.0.0.3 to 10.0.0.254). Set the client’s subnet mask to 255.255.255.0. Document ref: P0149-801-09 January 2018 Page Copyright © 2014 Analox Ltd. All Rights Reserved. Commercial in Confidence... -
Page 63: Retrieving Data Using Tcp/Ip Requests
To receive the datagram, a client must set up a UDP client listening to port 5020. The UDP datagram is received by the client as one block, so there is no need to assemble message blocks and detect end of message. Document ref: P0149-801-09 January 2018 Page Copyright © 2014 Analox Ltd. All Rights Reserved. Commercial in Confidence... -
Page 64: Datagram Structure
<WorkingUnits> <Status> SensorStatus. Status flags for the description below. sensor (End of base sensor data) Document ref: P0149-801-09 January 2018 Page Copyright © 2014 Analox Ltd. All Rights Reserved. Commercial in Confidence... - Page 65 <SerialNumber> String Serial Number of the “MEC-123456” sensor <PartNumber> String Analox part “MECHEMBAP” number sensor Document ref: P0149-801-09 January 2018 Page Copyright © 2014 Analox Ltd. All Rights Reserved. Commercial in Confidence...
- Page 66 Set if the sensors reading outside acceptable range. <MonitorUnderRangeFaultState> <State> Set if the sensors reading outside minimum maximum range set on the ACG. Document ref: P0149-801-09 January 2018 Page Copyright © 2014 Analox Ltd. All Rights Reserved. Commercial in Confidence...
- Page 67 <Flow> Flow data is a record of type BaseSensorData. It is described in the <SensorData> section above, ending half-way down the table. Document ref: P0149-801-09 January 2018 Page Copyright © 2014 Analox Ltd. All Rights Reserved. Commercial in Confidence...
- Page 68 <Temperature> Float Current temperature 24.9148445 <EnvironmentFaultCode> Fault code environment pressure/temperature sensor <InstrumentFlags> Instrument status flags <VersionString> String Software version “1.0” number Interface Board Document ref: P0149-801-09 January 2018 Page Copyright © 2014 Analox Ltd. All Rights Reserved. Commercial in Confidence...
- Page 69 Bool True if a fault has “True”, ”False” been acknowledged. <IsChanged> Bool True if the status of “True”, ”False” the fault has changed. Document ref: P0149-801-09 January 2018 Page Copyright © 2014 Analox Ltd. All Rights Reserved. Commercial in Confidence...
-
Page 70: Troubleshooting
‘---‘ interleaved with the fault code. Figure 48 - A system showing a fault condition Document ref: P0149-801-09 January 2018 Page Copyright © 2014 Analox Ltd. All Rights Reserved. Commercial in Confidence... -
Page 71: Table 9 List Of System Faults And Possible Solutions
Restart the ACG+ device to see if the fault clears. If the fault persists, contact your supplier for repair advice. Document ref: P0149-801-09 January 2018 Page Copyright © 2014 Analox Ltd. All Rights Reserved. Commercial in Confidence... -
Page 72: Table 10 List Of Sensor Faults And Possible Solutions
For O2 or CO sensor, replace the sensor’s electrochemical cell (section 10.1). For VOC sensor, clean or replace the PID lamp component (section 10.1). If the problem persists, please contact your supplier for assistance. Document ref: P0149-801-09 January 2018 Page Copyright © 2014 Analox Ltd. All Rights Reserved. Commercial in Confidence... - Page 73 6. Follow the user manual instructions for installation of the device drivers. This time the installer should locate the correct file and install correctly Document ref: P0149-801-09 January 2018 Page Copyright © 2014 Analox Ltd. All Rights Reserved. Commercial in Confidence...
-
Page 74: Recommended Spares And Accessories
CO2, O2, CO and water vapour ACG+ Display Module – Configured for ACGSDA/4 CO2, O2, CO Replacement oring for sensor flow adaptor 2323-0017X Document ref: P0149-801-09 January 2018 Page Copyright © 2014 Analox Ltd. All Rights Reserved. Commercial in Confidence... -
Page 75: Table 12 List Of Accessories
P0149-660 External flow meter sample support kit P0149-611 VOC electrode stack removal tool 9300-1021 VOC lamp cleaning kit 9300-1022 ACG+ Fixing Kit P0075-615 Document ref: P0149-801-09 January 2018 Page Copyright © 2014 Analox Ltd. All Rights Reserved. Commercial in Confidence... -
Page 76: Maintenance Requirements
Rinse contaminated surfaces with water. If contact is made with the electrolyte, please refer to Section 1. Document ref: P0149-801-09 January 2018 Page Copyright © 2014 Analox Ltd. All Rights Reserved. Commercial in Confidence... - Page 77 Using a terminal screwdriver push down the clamp release button to release the clamp and gently pull the cell wire from the clamp. Repeat this for both the red and black wires. Document ref: P0149-801-09 January 2018 Page Copyright © 2014 Analox Ltd. All Rights Reserved. Commercial in Confidence...
- Page 78 Note: Following an oxygen cell replacement a full calibration must be performed. See section 5.11 for details. Also, a replacement notification reset should be performed. See section 5.15.1 for details. Document ref: P0149-801-09 January 2018 Page Copyright © 2014 Analox Ltd. All Rights Reserved. Commercial in Confidence...
- Page 79 Use a flat blade screwdriver to pop out the cell holder from the sensor bulkhead fitting. Rotate the cell PCB connector clockwise to release from the cell holder. Document ref: P0149-801-09 January 2018 Page Copyright © 2014 Analox Ltd. All Rights Reserved. Commercial in Confidence...
- Page 80 The lamp and electrode stack are both part of the PID component of the sensor. The cleaning an replacement processes are documented below. Document ref: P0149-801-09 January 2018 Page Copyright © 2014 Analox Ltd. All Rights Reserved. Commercial in Confidence...
- Page 81 Document ref: P0149-801-09 January 2018 Page Copyright © 2014 Analox Ltd. All Rights Reserved. Commercial in Confidence...
- Page 82 Carefully place the lamp into the rear recess of the electrode stack, this will be held by the O-ring seal in the electrode pellet. Document ref: P0149-801-09 January 2018 Page Copyright © 2014 Analox Ltd. All Rights Reserved. Commercial in Confidence...
- Page 83 Using a 30mm spanner (part number 9300-1020), loosen the sensor from its housing and unscrew the sensor fully from its mount. Take care when performing this step as the sensor head is delicate. Document ref: P0149-801-09 January 2018 Page Copyright © 2014 Analox Ltd. All Rights Reserved. Commercial in Confidence...
-
Page 84: Filter Replacement
The procedure for changing the activated charcoal filter is as follows. Disconnect both 6mm elbow push fittings from filter. Document ref: P0149-801-09 January 2018 Page Copyright © 2014 Analox Ltd. All Rights Reserved. Commercial in Confidence... -
Page 85: Service Requirements
Remove the flow adaptor for the sensor and remove the old oring. Take a new 11.1mmOD x 8.1mmID oring (2323-0017X) and refit to the flow adaptor, replace the flow adaptor to the sensor. Document ref: P0149-801-09 January 2018 Page Copyright © 2014 Analox Ltd. All Rights Reserved. Commercial in Confidence... - Page 86 To replace the PID component, remove the flow adaptor from the sensor inlet. Use a flat blade screwdriver to pop out the PID holder from the sensor bulkhead fitting. Document ref: P0149-801-09 January 2018 Page Copyright © 2014 Analox Ltd. All Rights Reserved. Commercial in Confidence...
- Page 87 Note: Following a VOC PID lamp replacement or cleaning, or replacing the cell a full calibration must be performed. See section 5.11 for details. Document ref: P0149-801-09 January 2018 Page Copyright © 2014 Analox Ltd. All Rights Reserved. Commercial in Confidence...
- Page 88 Disconnect the membrane label connection ribbon cable from the rear of the display module. Disconnect the earth tag from the rear of the display module. Remove all connections from the rear of the display module. Document ref: P0149-801-09 January 2018 Page Copyright © 2014 Analox Ltd. All Rights Reserved. Commercial in Confidence...
- Page 89 Feed the cable harness under the pipework for the flow meter, then reconnect the header to the ribbon header previously removed, making sure the brown wire is connected to the ribbon wire at the top of the ribbon. Document ref: P0149-801-09 January 2018 Page Copyright © 2014 Analox Ltd. All Rights Reserved. Commercial in Confidence...
- Page 90 Using a 4mm hex key, remove the two M4 hex bolts from the top right and bottom left corners of the 5S3 sensor. Document ref: P0149-801-09 January 2018 Page Copyright © 2014 Analox Ltd. All Rights Reserved. Commercial in Confidence...
- Page 91 4mm hex key. Secure the 5S3 in place with the remaining M4 hex bolt using a 4mm hex key. Document ref: P0149-801-09 January 2018 Page Copyright © 2014 Analox Ltd. All Rights Reserved. Commercial in Confidence...
- Page 92 Reconnect the 5 way plug from the 5S3 lead to J8 on the chassis PCB as shown, this will only fit one way. Document ref: P0149-801-09 January 2018 Page Copyright © 2014 Analox Ltd. All Rights Reserved. Commercial in Confidence...
-
Page 93: Specifications
ACG+ User Manual Int. Approved Specifications Analox reserve the right to upgrade, develop or change specifications without prior notice. 11.1 Instrument specification Power Input voltage: 24V DC, Power consumption: 24 W 100 to 250v AC, 50/60Hz (Optional power supply) Operating... - Page 94 0 to 100mg/m Accuracy ±(0.15mg/m O + 20% of reading) (over ±10°C range) Detection mode Capacitive Service interval 2 Years (service exchange for calibration) Document ref: P0149-801-09 January 2018 Page Copyright © 2014 Analox Ltd. All Rights Reserved. Commercial in Confidence...
-
Page 95: Declaration Of Conformity
ACG+ User Manual Int. Approved Declaration of conformity Document ref: P0149-801-09 January 2018 Page Copyright © 2014 Analox Ltd. All Rights Reserved. Commercial in Confidence...
Need help?
Do you have a question about the ACG+ and is the answer not in the manual?
Questions and answers