Table of Contents
Advertisement
Available languages
Available languages
Quick Links
We appreciate the trust and con dence you have placed in Hampton Bay through the purchase of this solar fence light.
We strive to continually create quality products designed to enhance your home. Visit us online to see our full line of
products available for your home improvement needs. Thank you for choosing Hampton Bay!
USE AND CARE GUIDE
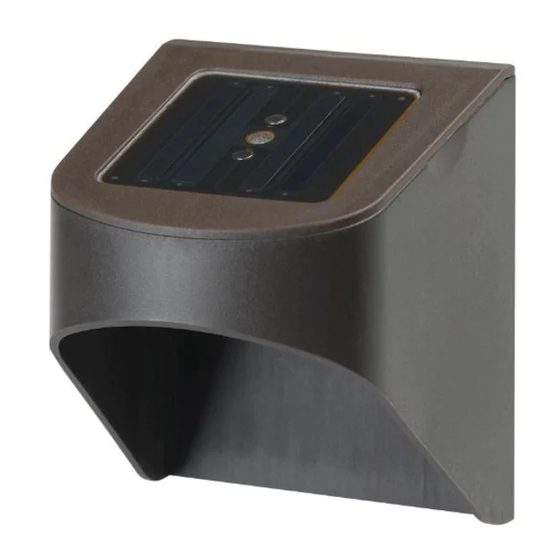
SOLAR FENCE LIGHT 2PK
Questions, problems, missing parts? Before returning to the store,
call Hampton Bay Customer Service
8 a.m. - 6 p.m., EST, Monday - Friday
1-855-HD-HAMPTON
1-855-HD-HAMPTON
1-855-HD-HAMPTON
HAMPTONBAY.COM
HAMPTONBAY.COM
HAMPTONBAY.COM
THANK YOU
THANK YOU
THANK YOU
THANK YOU
THANK YOU
Item # 1000000000
Model # SL18P-R5X-DB-2
R
Advertisement
Chapters
Table of Contents

Subscribe to Our Youtube Channel
Related Manuals for HAMPTON BAY SL18P-R5X-DB-2


Summary of Contents for HAMPTON BAY SL18P-R5X-DB-2
- Page 1 THANK YOU We appreciate the trust and con dence you have placed in Hampton Bay through the purchase of this solar fence light. We strive to continually create quality products designed to enhance your home. Visit us online to see our full line of...
-
Page 2: Table Of Contents
Table of Contents Table of contents........2 Installation........5 Safety Information......2 Operation..........6 Warranty..........2 Operation..........7 2 Year Limited Warranty......2 Maintenance........8 Pre-Installation........3 Care and Cleaning......8 Planning Installation.........3 Troubleshooting........8 Tools Required..........3 Service Parts........9 Hardware Included........3 Model Type..........9 Package Contents........4 Safety Information Please read and understand this entire manual before CAUTION: CAUTION: attempting to assemble, operate or install the product. -
Page 3: Pre-Installation
Pre-Installation PLANNING INSTALLATION PLANNING INSTALLATION PLANNING INSTALLATION Before beginning installation of product, make sure all parts are present. Compare parts with package contents list. If any part is missing or damaged, do not attempt to assemble, install or operate the product. TOOLS REQUIRED TOOLS REQUIRED TOOLS REQUIRED... -
Page 4: Package Contents
Pre-Installation (continued) PACKAGE CONTENTS PACKAGE CONTENTS PACKAGE CONTENTS Quantity Quantity Quantity Part Part Description Description Description Part Part Top Housing Lens... -
Page 5: Installation
Installation Marking the location Marking the location Marking the location Fixing the screws Fixing the screws Fixing the screws Mark the location where you want to mount the Insert the plastic plugs (BB) so they are ush with light. the surface. Measure the width of two holes on the back of Insert the screws (AA) and leave at least 1/4 in., or the solar fence light to align holes for 2 the... - Page 6 Operation Operation Mounting the light Mounting the light Mounting the light Removing the isolation strip Removing the isolation strip Removing the isolation strip Remove the top housing (A) from the lens (B). Reinsert the top housing (A) into the lens (B). On the bottom of the top housing (A), pull off Mount the light on the screws (AA) by placing the isolation strip.
-
Page 7: Operation
Operation Replacing the battery Replacing the battery Replacing the battery Replacing the battery Replacing the battery Replacing the battery (Continued) (Continued) (Continued) Remove the light from the screws (AA). At the bottom of the top housing (A), remove the compartment cover. Take the top housing (A) out of the lens (B). -
Page 8: Maintenance
Maintenance Clean the solar module with a damp towel to ensure optimum performance of the solar fence light. Do not use any type of solvent for cleaning and be careful not to put too much pressure on the module while cleaning. Care and Cleaning Winter tips Keep debris and snow off the solar panel (A) to allow the batteries to recharge. -
Page 9: Service Parts
Service Parts SL18P-R5X-DB-2 Description Description Description Quantity Quantity Quantity Part Part Part Top Housing Lens Rechargeable battery HAMPTONBAY.COM HAMPTONBAY.COM HAMPTONBAY.COM Please contact 1-855-HD-HAMPTON for further assistance. - Page 10 Questions, problems, missing parts? Before returning to the store, call Hampton Bay Customer Service 8 a.m. - 6 p.m., EST, Monday - Friday 1-855-HD-HAMPTON 1-855-HD-HAMPTON 1-855-HD-HAMPTON HAMPTONBAY.COM HAMPTONBAY.COM HAMPTONBAY.COM Retain this manual for future use.
- Page 11 GRACIAS POR TU COMPRA Apreciamos la con anza que has depositado en Hampton Bay al comprar esta lámpara solar para cerca. Nos esforzamos para continuamente crear productos de calidad diseñados para mejorar tu hogar. Visítanos por Internet para ver nuestra...
- Page 12 Tabla de contenido Tabla de contenido......2 Instalación.........5 Información de seguridad....2 Funcionamiento........6 Garantía..........2 Funcionamiento........7 Garantía limitada de 2 años......2 Mantenimiento........8 Preinstalación........3 Cuidado y limpieza......8 Plani cación de la instalación....3 Solución de problemas....8 Herramientas necesarias......3 Piezas de repuesto......9 Herrajes incluidos........3 Tipo de modelo........9 Contenido del paquete......4 Información de seguridad Lee y entiende este manual por completo antes de intentar...
-
Page 13: Preinstalación
Preinstalación PLANIFICACIÓN DE LA INSTALACIÓN PLANIFICACIÓN DE LA INSTALACIÓN PLANIFICACIÓN DE LA INSTALACIÓN Antes de instalar el producto, asegúrate de tener todas las piezas. Compara las piezas con la lista de contenido del paquete. Si falta alguna pieza o está dañada, no intentes ensamblar, instalar u operar el producto. HERRAMIENTAS NECESARIAS HERRAMIENTAS NECESARIAS HERRAMIENTAS NECESARIAS... -
Page 14: Contenido Del Paquete
Preinstalación (continuación) CONTENIDO DEL PAQUETE CONTENIDO DEL PAQUETE CONTENIDO DEL PAQUETE Cantidad Cantidad Cantidad Descripción Descripción Descripción Pieza Pieza Pieza Pieza Carcasa superior Lente... -
Page 15: Instalación
Instalación Cómo jar los tornillos Cómo jar los tornillos Cómo jar los tornillos Cómo marcar el lugar de montaje Cómo marcar el lugar de montaje Cómo marcar el lugar de montaje Marca el lugar donde quieras colocar la lámpara. Inserta los tapones de plástico (BB) de manera que queden al ras de la super cie. - Page 16 Operation Funcionamiento Cómo quitar la cinta de aislamiento Cómo quitar la cinta de aislamiento Cómo quitar la cinta de aislamiento Cómo montar la lámpara Cómo montar la lámpara Cómo montar la lámpara Quita la carcasa superior (A) del lente (B). Vuelve a colocar la carcasa superior (A) sobre el lente (B).
-
Page 17: Funcionamiento
Funcionamiento Cómo reemplazar la batería Cómo reemplazar la batería Cómo reemplazar la batería Cómo reemplazar la batería Cómo reemplazar la batería Cómo reemplazar la batería (continuación) (continuación) (continuación) Saca la lámpara de los tornillos (AA). Retira la cubierta del compartimiento que está Retira la carcasa superior (A) del lente (B). -
Page 18: Mantenimiento
Mantenimiento Limpia el módulo solar con una toalla húmeda para asegurar el máximo rendimiento de la lámpara solar para cerca. No uses ningún tipo de solvente para la limpieza y ten cuidado de no presionar demasiado el módulo mientras lo limpias. -
Page 19: Piezas De Repuesto
Piezas de repuesto SL18P-R5X-DB-2 Descripción Descripción Descripción Cantidad Cantidad Cantidad Pieza Pieza Pieza Carcasa superior Lente Batería recargable HAMPTONBAY.COM HAMPTONBAY.COM HAMPTONBAY.COM Para obtener asistencia, llama al 1-855-HD-HAMPTON. - Page 20 ¿Preguntas, problemas o piezas faltantes? Antes de regresar a la tienda, llama al servicio al cliente de lunes a viernes, de 8:00 a.m. a 6:00 p.m., hora estándar del Este al 1-855-HD-HAMPTON 1-855-HD-HAMPTON 1-855-HD-HAMPTON HAMPTONBAY.COM HAMPTONBAY.COM HAMPTONBAY.COM Conserva este manual para uso en el futuro.
Need help?
Do you have a question about the SL18P-R5X-DB-2 and is the answer not in the manual?
Questions and answers