Table of Contents
Advertisement
Quick Links
Advertisement
Table of Contents

Subscribe to Our Youtube Channel
Related Manuals for 4xem WPTZ


Summary of Contents for 4xem WPTZ
- Page 2 Product name: Network Camera Release Date: 2004/11/29 Manual Revision: 1.00 Made in Taiwan. ©Copyright 2000-2004. All rights reserved - 1 -...
-
Page 3: Before You Use This Product
Before You Use This Product The use of surveillance devices may be prohibited in your country by law. The Network Camera is not only a high-performance web-ready camera but also can be part of a flexible surveillance system. It is the user’s responsibility to ensure that the operation of such devices is legal before installing this unit for its intended use. -
Page 4: Package Contents
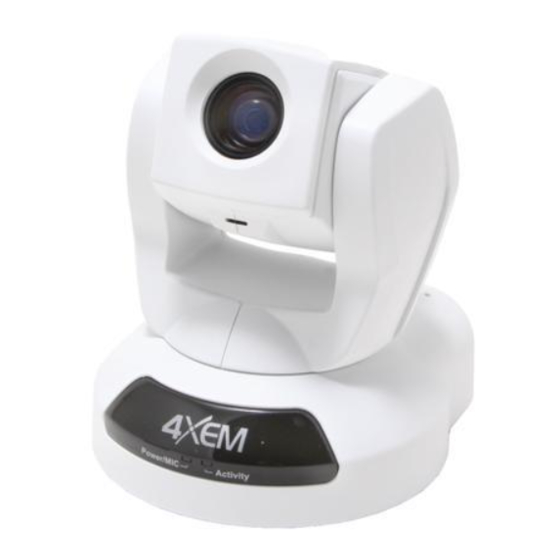
Package Contents Network Camera Remote Controller Power adapter Camera stand A/V Cable Software CD - 3 -... -
Page 5: Table Of Contents
Table of Contents Installation ...4 Hardware Installation ... 4 To install in Ethernet... 4 Software Installation ... 6 Initial Access to the Network Camera ... 10 Installing Plug-in ... 10 Check Network Settings ... 11 Add Password to Prevent Unauthorized Access ... 11 How to Use ... - Page 6 If the web space has no FTP service ... 24 Build a Security Application... 26 Send Snapshots When Motion is Detected ... 27 Definitions in Configuration ... 29 System Parameters ... 30 User Group Administration ... 31 Edit User ... 33 Network Settings ...
- Page 7 Style Convention ... 62 General CGI URL Syntax and Parameters ... 63 Get Server Parameter Values... 63 Set Server Parameter Values ... 64 Available Parameters on the Server ... 65 Drive the Digital Output... 74 Query Status of the Digital Input ... 75 Capture Single Snapshot ...
-
Page 8: Installation
Installation Hardware Installation Upon powering up, the device runs through a self-test procedure and the front LEDs will blink between green and red for a few times. If self-test passes, the LEDs will shut off and the Network Camera will be on stand-by and ready for software installation. If self-test fails the red LED will blink several times. - Page 9 self-test, go to next paragraph “Software Installation”. If the Ethernet is not available, the Network Camera will switch to wireless LAN mode. Consult with the dealer of the peripherals for correct installation. INPUT (Max. 50mA, 12VDC) INPUT (Initial state of DI is low) SW_COMMON OUTPUT (open from SW_OPEN at initial state) (close with SW_OPEN when set DO to ON)
-
Page 10: Software Installation
Software Installation In this manual, "User" refers to whoever has access to the Network Camera, and "Administrator" refers to the person who can configure the Network Camera and grant user access to the camera. At the end of the hardware installation, the Administrator must place the product software CD into the CD-ROM drive of the PC running in MS Windows. - Page 11 Upon Installation Wizard’s start up, a searching box will pop up. searches for product on the same LAN: For the series number in the “Serial Number” field, please check the label on the bottom of the camera. After searching, Video Servers or Network Cameras will be located by the Installation Wizard.
- Page 12 The IP addresses shown in the "Current IP Address" field reflect those on the local network. They may be from the DHCP server. If there is no DHCP server, the camera will try to find a free IP address (this takes from 15 second to 3 minutes, depending on the LAN status).
- Page 13 For more detailed usage of the Installation Wizard, please refer to the user’s manual of the Installation Wizard. - 9 -...
-
Page 14: Initial Access To The Network Camera
Initial Access to the Network Camera Installing Plug-in For the initial access to the Network Camera in Windows, the web browser may prompt for permission to install a new plug-in for the Network Camera after a period of time of downloading. -
Page 15: Check Network Settings
Check Network Settings The Network Camera can be connected either before or immediately after software installation onto the Local Area Network. The Administrator should complete the network settings on the configuration page, including the correct subnet mask and IP address of gateway and DNS. Ask your network administrator or Internet service provider for the detail information. -
Page 16: How To Use
How to Use Authentication After opening the web browser and typing in the URL of the Network Camera, a dialogue window pops up to request a username and password. The foreground is the login window and the background shows the message if authentication fails. -
Page 17: Primary User's Capabilities
Primary User’s Capabilities Main Screen with Camera View The main page layout has three parts: Configuration functions: The camera can be configured using these user interfaces. Camera View: What the camera sees. Pan/Tilt/Zoom control buttons: These buttons provide a command interface to control the aim of the camera. -
Page 18: The Configuration
The Configuration: “Digital Output” Clicking on the “On” or “Off” button turns the digital output to either on or off status. “Snapshot” Clicking on the “Snapshot” can get a JPEG format image of the current camera view in another window. “Client Settings”... -
Page 19: The Ccd Control Buttons
“Tilt speed” This selection box sets the moving range of the “Up” and “Down” commands. “Zoom speed” This selection box sets the moving range of the “zoom in” and “zoom out” commands. “Auto pan” This button commands the camera to pan from the current position to the left-most and then to the right-most position. -
Page 20: Client Settings
Client Settings There are four settings for the client side. Media Options - For the User to determine whether to receive video, audio or both. Protocol Options – Which allows choosing on connection protocol between client and server. There are two protocol choices to optimize your usage – UDP and HTTP. The UDP protocol allows for more real-time audio and video streams. - Page 21 client periodic update the JPEG image from server according to the “Frame rate” settings. Talk Button Control Style – For the User to determine whether to “click once and talk” or “push to talk”. - 17 -...
-
Page 22: Administrator's Capabilities
Administrator’s Capabilities Fine-tuning for Best Performance There are a few choices the Administrator is allowed to maximize the capabilities of the Network Camera. Best performance generally equates to the fastest image refresh rate with the best video quality, and at the lowest network bandwidth as possible. The six factors, “Size”, “Maximum frame rate”, “Video codec type”, “Key frame interval”, “Fix bit rate”, and “Fix quality”... -
Page 23: Only Quality Images Will Do
broadband network is over 1 Mbps, set the “Fix bit rate” to 1000Kbps or 1200Kbps, or set “Fix quality” at the highest quality. The maximum frame rate is 25 fps in a 50Hz system and 30 fps in a 60Hz system. If your network bandwidth is more than 384Kbps, you can fix the bit rate according to your bandwidth and set the maximum frame rate to 25 fps or 30 fps. -
Page 24: Select For Motion Jpeg
Select for Motion JPEG The Network Camera with Pan/Tilt/Zoom is a camera with dual video codec, they’re MPEG4 and MJPEG. If MJPEG is selected, the camera will transmit video data in JPEG format. Therefore, it requires higher bandwidth to view smooth video. General speaking, each normal sized JPEG image would be 3k~12k bytes, depending on the selected video quality and contents. -
Page 25: Opening Accounts For New Users
Opening Accounts for New Users Protect Network Camera by Passwords The Network Camera is shipped without any password by default. That means everyone can access the Network Camera including the configuration as long as the IP address is known. It is necessary to assign a password if the Network Camera is intended to be accessed by others. -
Page 26: More Flexible Options For Viewers
the server. You may edit or delete some users from the third field. More Flexible Options for Viewers If you want to have a guest account for viewers only, you just need to add a user without password and disable all the privileges. Share the account to your friends to access your camera. - Page 27 will remain constant. 1. Click on “Configuration” on the homepage, 2. Click on “Mail & FTP” in the left column, 3. Fill in the FTP related settings including server, server port, user name and password, as well as the upload path if it is specified by the web space, - 23 -...
-
Page 28: If The Web Space Has No Ftp Service
4. Click on “Save”, 5. Click on “Application” in the left column, 6. Select the day or days of the week in “Weekly schedule” you want to upload the pictures, 7. Select “Sequential operation” and set the interval, 8. Unselect “FTP put snapshots with date and time suffix” as the upload method and click on “Save”, 9. - Page 29 Example of an auto-refresh web page: <html> <head> <title>Example - auto refresh</title> </head> <body> <p align=left> <font size="7" face="Comic Sans MS" color="#FF0000"> MiniAVServer Demo </font> </p> <p align=left> <!-- Begin of scripts to auto refresh the image. Change the IP address in the image URL and refreshrate if necessary.
-
Page 30: Build A Security Application
Build a Security Application The Administrator can combine options on the application page to perform many useful security applications. There trigger sources coming from attached devices, such as for motion detection. There are also two kinds of actions responding such events, including uploading snapshots over the... -
Page 31: Send Snapshots When Motion Is Detected
Send Snapshots When Motion is Detected If no external sensor is available, the Administrator can use the built-in motion detection to monitor any movement and send snapshots via emails for security check. 6. Click on “Motion detection” in the left column, 7. - Page 32 17. Click on “Save” to validate. - 28 -...
-
Page 33: Definitions In Configuration
Definitions in Configuration Only the Administrator can access system configuration. Each category in the left column will be explained in the following pages. The bold texts are the specific phrases on the Option pages. The Administrator may type the URL below the figure to directly enter the frame page of configuration. -
Page 34: System Parameters
System Parameters "Host name" The text displays the title at the top of the main page. “Turn off the LED indicator” Check this option to shut off the LED on the rear. It can prevent the camera’s operation being noticed. "Keep current date and time"... -
Page 35: User Group Administration
User Group Administration “Root password” Change the Administrator’s password by typing in the new password identically in both text boxes. The typed entries will be displayed as asterisks for security purposes. After pressing , the web browser will ask the Administrator for the new password for access. - Page 36 <url> http://<Network Camera>/setup/security.vspx <Network Camera> is the domain name or original IP address of the Network Camera. - 32 -...
-
Page 37: Edit User
Edit User Type the new password, change the privilege and press to modify the account. <url> http://<Network Camera>/setup/edituser.vspx <Network Camera> is the domain name or original IP address of the Network Camera. - 33 -... -
Page 38: Network Settings
Network Settings Any changes made on this page will need to restart the system in order to validate the changes. Make sure every field is entered correctly before clicking on "Get IP address automatically" & “Use fixed IP address” The default status is “Get IP address automatically”. This can be tedious having to perform software installation whenever the Network Camera starts. -
Page 39: Streaming
when the Administrator changes the HTTP port of the Network Camera whose IP address is 192.168.0.100 from 80 to 8080, the User must type in the web browser “http://192.168.0.100:8080” instead of “http://192.168.0.100”. Streaming “UDP Audio channel port” This can be something other than the default port 5002 in order to work with the port opened by the firewall. -
Page 40: Ddns & Upnp
DDNS & UPnP “Enable DDNS” This option turns on the DDNS function. “Provider” The provider list contains four hosts that provide DDNS services. Please connect to the service provider’s website to make sure the service charges. “Host Name” If the User wants to use DDNS service, this field must be filled. Please input the hostname that is registered in the DDNS server. - Page 41 <url> http://<Network Camera>/setup/ddnsupnp.vspx <Network Camera> is the domain name or original IP address of the Network Camera. - 37 -...
-
Page 42: Mail & Ftp
Mail & FTP SMTP “1st SMTP (mail) server” The domain name or IP address of the external email server. “1st SMTP account name” Granted account name on the email server. “1st SMTP password” Granted password on the email server. “1st recipient email address” The email address of recipients for snapshots or log file. - Page 43 “1st FTP passive mode” The Network Camera is located inside the network protected by a firewall, data connection for FTP may be prohibited. By selecting passive mode, the FTP can bypass the rule and allow snapshot upload to proceed. If the passive mode is selected, the Network Camera can automatically attempt for active mode, if the external FTP server does not support passive mode.
- Page 44 <url> http://<Network Camera>/setup/mailftp.vspx <Network Camera> is the domain name or original IP address of the Network Camera. - 40 -...
-
Page 45: Video Codec Parameters
Video Codec Parameters “Text on video” The text will be displayed in the black bar above the video window with a timestamp. The timestamp is captured from date and time of the Network Camera that is maintained by a built-in real-time clock. “Color”... -
Page 46: Image Settings
established. <url> http://<Network Camera>/setup/video.vspx <Network Camera> is the domain name or original IP address of the Network Camera. Image Settings Click on “Image Settings” to pop up another window for tuning "Brightness", “Contrast”, “Hue” and "Saturation" for video compensation. - 42 -... -
Page 47: Ccd Settings
CCD Settings Click on “CCD Settings” button, the CCD settings window will pop up. The default setting of the CCD is of auto-IRIS mode. Therefore the “Auto electronic shutter” (AES) option will be fixed at 1/60 (1/50) second. Once the shutter is selected as “Auto”, the IRIS of the CCD will become fixed. - Page 48 about sensitivity of BLC detection. Clicking on “BLC Area Selection”, a selecting window will pop up. As the window shows, the video is divided to 48 rectangle areas with the same size. Select the areas to enable BLC, if no area is selected, checking “Enable BLC” option makes the video no differences.
- Page 49 The picture illustrates the corresponding areas of the selecting window in the real video. “Select All” will check all the areas in the windows and “Clear All” will do vice versa. “Save” button can set the selected areas for BLC. In the CCD settings window, click on “Preview”...
-
Page 50: Audio
Audio “Transmission mode” There are five options to select. For all the modes, only one client can talk to the server at the same time. “Full-duplex (Talk and listen simultaneously)” In this mode, the User can talk to the server while listening sound from the server simultaneously. “Half-duplex (Talk or listen, not at the same time)”... - Page 51 <url> http://<Network Camera>/setup/audio.vspx <Network Camera> is the domain name or original IP address of the Network Camera. - 47 -...
-
Page 52: Motion Detection
Motion Detection “Enable motion detection” Check this option to turn on motion detection. Click on this button to add a new window. At most three windows can exist simultaneously. Use the mouse to click, hold and drag the window frame to resize or the title bar to move. - Page 53 <url> http://<Network Camera>/setup/motion.vspx <Network Camera> is the domain name or original IP address of the Network Camera. - 49 -...
-
Page 54: Camera Control
Camera Control On the Camera Control page, there are two main function control areas: Camera control area The pan and tilt functions can be controlled with these buttons. The “Left” button aims the camera to the left; the “Right”, “Up”, and “Down” buttons aim the camera accordingly. - Page 55 Camera is doing auto panning. “Enable IR control” Checking this box allows the Administrator to enable the IR controller to move the aim of the camera. To allow controls only through URL commands or web pages, leave this box unchecked. “Zoom times display”...
- Page 56 Camera control area Preset function area <url> http://<Network Camera>/setup/camctrl.vspx <Network Camera> is the domain name or original IP address of the Network Camera. - 52 -...
-
Page 57: Application Setup
Application Setup Weekly Schedule “Sun” ~ “Sat” Select the days of the week to perform the following operations. “Snapshots begin at” Set the time to start operations. “Snapshots stop at” Set the time to stop operations. Setting identical begin time and stop time means 24-hour operation. -
Page 58: Sequential Operation
is open. Either email or FTP can be used to command uploading snapshots. The snapshot names will be “videopre.jpg”, “videotrg.jpg”, and “videopos.jpg”, respectively. They stand for the snapshots, before event, right upon event, and after event. The date and time suffix may also be added as an option. Confirm the external mail or FTP server settings in the network configuration. - Page 59 <url> http://<Network Camera>/setup/app.vspx <Network Camera> is the domain name or original IP address of the Network Camera. - 55 -...
-
Page 60: Viewing System Log
Viewing System Log Click on the link on the configuration page to view the system log file. The content of the file provides useful information about configuration and connections after system boot-up. Viewing System Parameters Click on this link on the configuration page to view the entire system’s parameter set. The content is the same as those in CONFIG.INI. -
Page 61: Remote Controller
Remote Controller Network Camera provides a remote controller to command the camera’s pan/tilt and other functions. The direction control part provides the function as on the main web page. The Pan/Patrol/Stop functions are also the same as on the main web page. “Auto Patrol”... -
Page 62: Appendix
Appendix A. Troubleshooting Status LED After powering up, the Network Camera performs a self-diagnostic to detect any hardware defects. The following table lists the LED patterns in general. In case of any fatal error, the LED will blink in a pattern other than those below. Condition During self-diagnostic after power on Ethernet signal is lost... - Page 63 B. Frequently Asked Questions Q What if I forget my password? A After the Administrator's password has been assigned, every access to the Network Camera needs authentication. If you are one of the managed users, you have to ask the Administrator for the password. If you are the Administrator, there is no way to recover the root password except by restoring the factory default settings.
- Page 64 Q Can I install it on ceiling? A Yes. There are flip and mirror options in video configuration page to correct the images for upside down installation. Q The image is not clear enough. A Rotate the lens to adjust the focus after the Network Camera has been installed in the proper position.
- Page 65 Q How fast is the video rate of the Network Camera? A The MPEG4 codec engine can process up to 30 frames per second internally. However the total performance is subject to many coefficients such as: 1. Network throughput, 2. Bandwidth share, 3.
-
Page 66: Url Commands Of The Network Camera
C. URL Commands of the Network Camera For some customers who already have their own web site or web control application, the Network Camera can be easily integrated through convenient URLs. This section lists the commands in URL format corresponding to the basic functions of the Network Camera. -
Page 67: General Cgi Url Syntax And Parameters
string HTTP is line separated with a Carriage Return and Line Feed (CRLF) printed as \r\n. Return: HTTP/1.0 <HTTP code> <HTTP text>\r\n URL syntax examples are written with "Example:" in bold face followed by a short description and a light grey box with the example. Example: request a single snapshot image http://mywebserver/cgi-bin/video.jpg General CGI URL Syntax and Parameters... -
Page 68: Set Server Parameter Values
do not specify the any parameters, all the parameters on the server will be returned. If you specify only <group>, the parameters of related group will be returned. When query parameter values, the current parameter value are returned. Successful control requests returns paramter pairs as follows. Return: HTTP/1.0 200 OK\r\n Content-Type: text/html\r\n... -
Page 69: Available Parameters On The Server
[nosync=<value>&]<parameter>=<value> [&<parameter>=<value>…][&return=<return page>] parameter value 0, 1 nosync <group>_<name>. value to assigned Assign <return page> return Example: Set the IP address of server to 192.168.0.123 http://myserver/cgi-bin/admin/setparam.cgi?Network_IPAddress=192.168.0.123 Available Parameters on the Server Group: System NAME VALUE hostname <text (r/w) than 15 characters> ledoff (r/w) description... - Page 70 date <yyyy/mm/dd> (r/w) <keep> <auto> time <hh:mm:ss> (r/w) <keep> <auto> <domain name or IP (r/w) address> timezone -12 ~ 12 (r/w) updateinterval 0 ~ 2147483 (r/w) serialnumber <mac address> firmwareversion <text than 39 characters> restore restart 0 ~ 65535 (w)(restart) do<1~4>...
- Page 71 Group: Security NAME VALUE username_<1~ <text string 10> than 15 characters> (r/w) userpass_<0~1 <text string 0> than 15 characters> (r/w) userattr_<1~1 [dido][|talk][|listen][|c 0> amctrl][|conf] (r/w) usercount 1 ~ 11 Group: Network NAME VALUE resetip (r/w)(restart) ipaddress <IP address> (r/w) (restart) subnet <IP address>...
- Page 72 smtp1 <domain (r/w) address> mailto1 <Recipient (r/w) address> mailuser1 <user account name on (r/w) smtp server> mailpass1 <user password (r/w) mailuser1> smtp2 <domain (r/w) address> mailto2 <text string shorter than (r/w) 80 characters> mailuser2 <user account name on (r/w) smtp server> mailpass2 <user password...
- Page 73 ftpport2 <number (r/w) 65535> ftpuser2 <user account on 2 (r/w) server> ftppass2 <password for ftpuser2> password for secondary FTP server, max 15 (r/w) ftpfolder2 <target folder on 2 (r/w) server> ftppassmode2 (r/w) httpport <number (r/w) (restart) 65535> videoport <number (r/w) 65535>...
- Page 74 bitrate 64000 (r/w) 128000 256000 384000 512000 768000 1000000 1200000 maxframe (r/w) flip (r/w) mirror (r/w) Group: Audio NAME VALUE bitrate 8000 (r/w) 24000 32000 transfermode (r/w) normal quality of video higher quality of video highest quality of video set bit rate to 64K bps set bit rate to 128K bps set bit rate to 256K bps set bit rate to 384K bps...
- Page 75 sendclientaudio (r/w) source (r/w) lowbandwidth (r/w) enableaec (r/w) Group: Image NAME VALUE brightness <-5 ~ 5> (r/w) saturation <-5 ~ 5> (r/w) contrast <-5 ~ 5> (r/w) <-5 ~ 5> (r/w) mode Preview Restore Save Group: Motion NAME VALUE enabled (r/w) win<1~3>_enabled (r/w)
- Page 76 win<1~3>_left 0 ~ 352 for CCD (r/w) 0 ~ 320 for CMOS win<1~3>_top 0 ~ 288 for PAL (r/w) 0 ~ 240 for NTSC & CMOS win<1~3>_width 0 ~ 352 for CCD (r/w) 0 ~ 320 for CMOS win<1~3>_height 0 ~ 288 for PAL (r/w) 0 ~ 240 for NTSC &...
- Page 77 (r/w) Group: CAMCTRL NAME VALUE -5 ~ 5 panspeed (r/w) -5 ~ 5 tiltspeed (r/w) -5 ~ 5 zoomspeed (r/w) autospeed -5 ~ 5 (r/w) dwelling 0 ~ 9999 (r/w) enableir 0, 1 (r/w) presetname_<0~9> Text string shorter than (r/w) 30 characters.
-
Page 78: Drive The Digital Output
lowluxmode 0 or 1 (r/w) obwlowluxmode 0 or 1 (r/w) enableblc 0 or 1 (r/w) blcsenslevel (r/w) blcarea(0) 0~255 (r/w) blcarea(1) 0~255 (r/w) blcarea(2) 0~255 (r/w) blcarea(3) 0~255 (r/w) blcarea(4) 0~255 (r/w) blcarea(5) 0~255 (r/w) Drive the Digital Output Note: This request requires the privilege of I/O access control. Method: GET/POST Syntax: http://<servername>/cgi-bin/setdo.cgi?do1=<state>[&do2=<state>]... -
Page 79: Query Status Of The Digital Input
NO (normal open) connected with COMMON. The number of DO dependents on the server type. parameter Value <state> do<num> <return page> return Example: Drive the digital output 1 to high and redirect to an empty page http://myserver/cgi-bin/setdo.cgi?do1=H Query Status of the Digital Input Note: This request requires the privilege of I/O access control. -
Page 80: Capture Single Snapshot
where <state> can be H or L. Example: Query the status of digital input 1 Request: http://myserver/cgi-bin/getdi.cgi?di1 Response: HTTP/1.0 200 OK\r\n Content-Type: image/jpeg\r\n Content-Length: 7\r\n \r\n di1=H\r\n Capture Single Snapshot Note: This request require normal user privilege Method: GET/POST Syntax: http://<servername>/cgi-bin/video.jpg Server will return the most up-to-date snapshot in JPEG format. - Page 81 Method: GET/POST Syntax: http://<servername>/cgi-bin/admin/editaccount.cgi? method=<value>&user=<name>[&pass=<value>][&privilege=<value>] [&privilege=<value>][…][&return=<return page>] parameter value method delete edit username <name> userpass <value> privilege <value> dido listen talk camctrl conf return <return page> description Add an account to server. When using this method, “username” field is necessary. It will use default value of other fields if not specified.
-
Page 82: System Logs
System Logs Note: This request require administrator privilege Method: GET/POST Syntax: http://<servername>/cgi-bin/admin/syslog.cgi Server will return the up-to-date system log. Return: HTTP/1.0 200 OK\r\n Content-Type: text/plain\r\n Content-Length: <syslog length>\r\n \r\n <system log information>\r\n Configuration File Note: This request requires administrator privilege Method: GET/POST Syntax: http://<servername>/cgi-bin/admin/configfile.cgi... -
Page 83: Upload File (Firmware)
HTTP/1.0 200 OK\r\n Content-Type: text/plain\r\n Content-Length: <configuration file length>\r\n \r\n <configuration data>\r\n Upload File (firmware) Note: This request requires administrator privilege Method: POST Syntax: http://<servername>/cgi-bin/admin/upload.cgi Post data: file=<file name>[&return=<return page>]\r\n \r\n <multipart encoded form data> Server will accept the upload file named <file name> to be stored on the flash as “flash.bin”... - Page 84 parameter value move home down left right speedpan -5 ~ 5 speedtilt -5 ~ 5 speedzoom -5 ~ 5 speedapp -5 ~ 5 auto patrol stop zoom wide tele focus auto stop iris auto open stop return <return page> description Move to camera to home position Move camera up Move camera down...
-
Page 85: Recall
Recall Note: This request requires camera control access privilege Method: GET Syntax: http://<servername>/cgi-bin/recall.cgi? recall=<value>[&return=<return page>] parameter value recall Text string than 30 characters return <return page> System Information Note: This request requires normal user privilege Method: GET/POST Syntax: http://<servername>/cgi-bin/sysinfo.cgi Server will return the system information. Return: HTTP/1.0 200 OK\r\n Content-Type: text/plain\r\n... -
Page 86: Preset Locations
Content-Length: <system information length>\r\n \r\n Model=<model name of server>\r\n HostName=<host name of server>\r\n Location=<video on text of server>\r\n [Preset<0>=<first preset location>\r\n] [Preset<1>=<second preset location>\r\n] [...] PTZEnabled=<PTZ status>\r\n Where the <PTZ status> is a 32-bits integer, each bit can be set separately as follows: Bit 0 =>... - Page 87 return <return page> Redirect to the page <return page> after the parameter is assigned. The <return page> can be a full URL path or relative path according to the current path. If you omit this parameter, it will redirect to an empty page. - 83 -...
-
Page 88: Technical Specifications
D. Technical Specifications - System CPU: Trimedia PNX1300 RAM: 16MB SDRAM ROM: 4MB FLASH ROM - Networking Protocol TCP/IP, HTTP, SMTP, FTP, Telnet, NTP, DNS uPnP, DDNS and DHCP Physical 10BaseT Ethernet or 100BaseT Fast Ethernet - Video Algorithm supported MPEG4 SP MJPEG Features...
Need help?
Do you have a question about the WPTZ and is the answer not in the manual?
Questions and answers