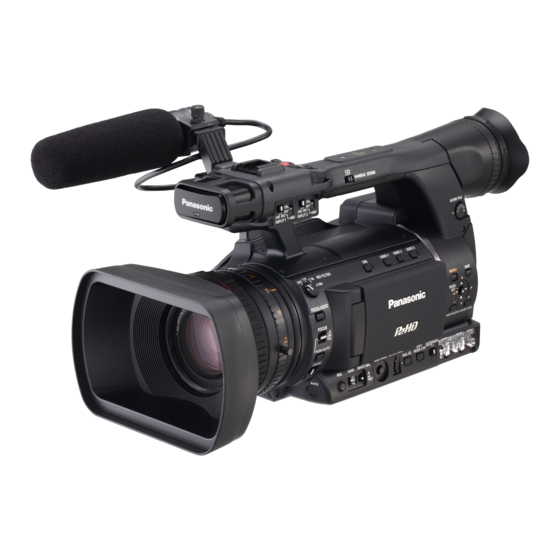
Panasonic AG-HPX250P Electrical Adjustment

Panasonic AG-HPX250P Electrical Adjustment

Hide thumbs Also See for AG-HPX250P:

Advertisement

ELECTRICAL ADJUSTMENT
Model No. :
1. Preparation of adjustment ........................................................................................................... ELE-1
1-1. PC EVR software................................................................................................................ ELE-1
1-1-1. Required tools and equipment for PC EVR software .............................................. ELE-1
1-1-2. Installation method of USB driver ............................................................................ ELE-1
1-1-3. Setup for PC EVR Software..................................................................................... ELE-4
1-2. Adjustment Item.................................................................................................................. ELE-5
1-3. Adjustment after replacement of major parts...................................................................... ELE-6
2. Adjustment Procedure................................................................................................................. ELE-7
2-1. Adjustment Tool screen ...................................................................................................... ELE-7
2-1-1. Zoom center Adjustment.......................................................................................... ELE-9
2-1-2. Hall Amp / Iris PWM / OIS Hall Amp Adjustment..................................................... ELE-9
2-1-3. Zoom tracking and De-focus Adjustment ................................................................ ELE-10
2-1-4. White Balance Adjustment....................................................................................... ELE-13
2-1-5. Blemish Compensation Adjustment......................................................................... ELE-14
2-1-6. White Shading Adjustment ...................................................................................... ELE-15
2-1-7. ND FILTER Compensation Adjustment................................................................... ELE-16
2-1-8. Video Output Level Adjustment ............................................................................... ELE-18
2-1-9. Int. Frequency Adjustment....................................................................................... ELE-19
AG-HPX250P/EJ/EN/260MC
CONTENTS

Advertisement

Table of Contents
loading

Summary of Contents for Panasonic AG-HPX250P

  • Page 1: Table Of Contents

    ELECTRICAL ADJUSTMENT AG-HPX250P/EJ/EN/260MC Model No. : CONTENTS 1. Preparation of adjustment ......................ELE-1 1-1. PC EVR software........................ ELE-1 1-1-1. Required tools and equipment for PC EVR software ..........ELE-1 1-1-2. Installation method of USB driver ................ELE-1 1-1-3. Setup for PC EVR Software..................ELE-4 1-2.
  • Page 2: Preparation Of Adjustment

    1. Preparation of adjustment When an electrical adjustment is executed, the PC EVR software is used. 1-1. PC EVR software 1-1-1. Required tools and equipment for PC EVR software When the PC EVR software is used, the following tools are required. NAME Part Number Pcs.
  • Page 3 1. When the USB cable is connected between USB connector and PC, the following “Found New Hardware Wizard” automatically opens on PC. In the window, check “Install from a list of specific location (Advanced)” and click “Next” button. 2. The following screen is displayed. Put the check in “Include this location in the search” and click “Browse” button.
  • Page 4 4. The following message window may appear after a while clicking “Next” button on the “Found New Hardware Wizard” screen. Click “Continue Anyway” button. 5. When the installation is completed, the following screen is displayed. Click “Finish” button. ELE-3...
  • Page 5: Setup For Pc Evr Software

    1-1-3. Setup for PC EVR Software 1. Copy all files of the PC EVR software (VVS0095) to the PC. 2. Supply power to the Camera-Recorder and turn power ON. 3. Start up the PC EVR software by double-clicking “HPX250.exe”. 4. The Selection screen will appear. Select the model name. 5.
  • Page 6: Adjustment Item

    1-2. Adjustment Item Below indicated tools are required to perform each adjustment in addition to tools in introduced in item 1-1-1. ADJUSTMENT ITEM Required Tool and equipment Remark Zoom center Adjustment Unnecessary Manual Adj. Hall Amp / Iris PWM / OIS Hall Amp AUTO Adj.
  • Page 7: Adjustment After Replacement Of Major Parts

    1-3. Adjustment after replacement of major parts When the following parts are exchanged showing in the table, the adjustment and confirmation are required follow the items shown by mark “X” in the table. PARTS NAME *CAM P.C.B. CAMERA LENS U GRIP U When When no...
  • Page 8: Adjustment Procedure

    2. Adjustment Procedure When performing the electrical adjustment, the Adjustment Tool screen is used. 2-1. Adjustment Tool screen < How to display the Setting Tool screen. > 1. Select “Adjustment Tool” in “Tools(W)” menu, Adjustment Tool screen will appear on screen. Adjustment completion message is displayed in this STATUS column <...
  • Page 9 < Setting of System Mode > System Mode can be set on the Adjustment Tool screen. The System frequency is displayed. It is set to this System Mode. System Mode is set to 1080/60i as shown in the following screen. The setting procedure of System Mode is as follows (Ex.: When setting it to 1080/50i.).
  • Page 10: Zoom Center Adjustment

    2-1-1. Zoom center Adjustment 1. Select “CAM(C)” section after start up the PC EVR software, and click “OK” button. 2. Select “Adjustment Tool” in “Tools(W)” menu, Adjustment Tool screen will appear on screen. 3. Make the zoom position Tele terminal by pressing Zoom lever. 4.
  • Page 11: Zoom Tracking And De-Focus Adjustment

    2-1-3. Zoom tracking and De-focus Adjustment 1. Please make a halogen lamp (3100K) into a light source (Refer to page ELE-12). 2. Set the each switch of camera recorder as follows. ● GAIN switch: L (0dB) ● BARS button: OFF ●...
  • Page 12 14. Clicking the “Execute” button, the adjustment is executed automatically. 15. When the adjustment is completed, the message “Tracking Adjustment Completed!” is displayed in the STATUS column on the Adjustment Tool screen and the following message screen is displayed. Clicking “OK”...
  • Page 13 < Method of installing collimator (RFKZ0422) > 1. The collimator adapter is composed of the following parts. Attachment ring Adapter Hex. Screw (A) X 4 Hex. Screw (B) X 2 2. Insert Collimator (RFKZ0422) in the adapter while expanding the space as shown in figure. NOTE: Please expand the space when you remove the Collimator (RFKZ0422) from the adapter.
  • Page 14: White Balance Adjustment

    2-1-4. White Balance Adjustment 1. Set the each switch of camera recorder as follows. ● GAIN switch: L (0dB) ● AUTO/MANUAL switch: MANUAL ● WHITE BAL switch: B ● USER switch: OFF ● SHUTTER: OFF 2. Open the OPTION MENU screen and confirm that the item “P.A.P FILTER” is set as “TYPE2” (MAIN MENU > OPTION MENU >...
  • Page 15: Blemish Compensation Adjustment

    2-1-5. Blemish Compensation Adjustment 1. Set the each switch of camera recorder as follows. ● GAIN switch: L (0dB) ● AUTO/MANUAL switch: MANUAL ● WHITE BAL switch: B ● USER switch: OFF ● SHUTTER: OFF 2. Open the OPTION MENU screen and confirm that the item “P.A.P FILTER” is set as “TYPE1” (MAIN MENU > OPTION MENU >...
  • Page 16: White Shading Adjustment

    2-1-6. White Shading Adjustment 1. Set the each switch of camera recorder as follows. ● BARS button: OFF ● GAIN switch: L (0dB) ● AUTO/MANUAL switch: MANUAL ● ND FILTER dial: OFF ● ZOOM switch: SERVO ● FOCUS switch: MANUAL ●...
  • Page 17: Nd Filter Compensation Adjustment

    2-1-7. ND FILTER Compensation Adjustment 1. Set the each switch of camera recorder as follows. ● BARS button: OFF ● AUTO/MANUAL switch: MANUAL ● ZOOM switch: SERVO ● GAIN switch: L (0dB) ● ND FILTER dial: OFF ● IRIS: F5.61 ●...
  • Page 18 Start button Clicking the “Set” button, the adjusted value is saved in EEPROM. Adjustment value Execute button R-ch Upper/Lower, B-ch Upper/Lower 25. Clicking the “Start” button for ND Filter3, the camera recorder is set to ND Filter3 adjustment mode. 26. Confirm that the white level of Y signal is around 70%. 27.
  • Page 19: Video Output Level Adjustment

    2-1-8. Video Output Level Adjustment 1. Connect the WFM to the VIDEO OUT with 75ohm termination. 2. Open the SYSTEM SETUP screen and set the item “SYSTEM MODE” to “1080/59.94i” (MAIN MENU > SYSTEM SETUP > SYSTEM MODE). 3. Select “CAM(C)” section after start up the PC EVR software, and click “OK” button. 4.
  • Page 20: Int. Frequency Adjustment

    2-1-9. Int. Frequency Adjustment 1. Connect the WFM to the VIDEO OUT with 75ohm termination. 2. Open the SYSTEM SETUP screen and set the item “SYSTEM MODE” to “1080/59.94i” (MAIN MENU > SYSTEM SETUP > SYSTEM MODE). 3. Input a color bar signal to EXT IN BNC of WFM. 4.

This manual is also suitable for:

Ag-hpx250ejAg-hpx250enAg-hpx260mc

Table of Contents