Astralpool PAR56 Installation And Maintenance Manual
Underwater light
Hide thumbs
Also See for PAR56:
- Manual (53 pages) ,
- Installation and maintenance manual (37 pages) ,
- Instruction manual for electrical connection (25 pages)
Table of Contents
Advertisement
Available languages
Available languages
Quick Links
UNTERWATER LIGHT
PROJECTEUR SOUS-MARIN
PROYECTOR SUBACUATICO
FARO SUBACQUEO
UNTERWASSER-SCHEINWERFER
FARO SUBACQUEO
INSTALLATION AND MAINTENANCE MANUAL
MANUEL D'INSTALLATION ET D'ENTRETIEN
MANUAL DE INSTALACIÓN Y MANTENIMIENTO
MANUALE DI INSTALAZIONE E MANUTENZIONE
EINBAU-UND BETRIEBSANLEITUNG
MANUAL DE INSTRUÇÕES E MANUNTENÇÃO
Advertisement
Table of Contents

Related Manuals for Astralpool PAR56


Summary of Contents for Astralpool PAR56
- Page 1 UNTERWATER LIGHT PROJECTEUR SOUS-MARIN PROYECTOR SUBACUATICO FARO SUBACQUEO UNTERWASSER-SCHEINWERFER FARO SUBACQUEO INSTALLATION AND MAINTENANCE MANUAL MANUEL D’INSTALLATION ET D’ENTRETIEN MANUAL DE INSTALACIÓN Y MANTENIMIENTO MANUALE DI INSTALAZIONE E MANUTENZIONE EINBAU-UND BETRIEBSANLEITUNG MANUAL DE INSTRUÇÕES E MANUNTENÇÃO...
-
Page 2: General Characteristics
ENGLISH IMPORTANT: The instruction manual you are holding includes essential information on the safety measures to be implemented for installation and start-up. Therefore, the installer as well as the user must read the instructions before beginning installation and start-up. Keep this manual for future reference. To achieve optimum performance of the Standard Floodlamp follow the instructions provided below: 1. -
Page 3: Maintenance
4. ASSEMBLY: After installation of the housing and the clamp, if it is a prefabricated swimming pool, assemble the floodlamp. To connect the floodlamp to the electric power supply insert the cable through the gland seal nut (16). Tighten the gland seal nut until you can verify that the cable will not yield when you pull on it with your hand. -
Page 4: Vérifier Le Contenu De L'emballage
FRANÇAIS IMPORTANT: le manuel d’instructions que vous avez entre les mains contient des informations de première importance sur les mesures de sécurité à adopter au moment de l’installation et de la mise en service. Il est par conséquent indispensable que l’installateur et l’utilisateur lisent attentivement les instructions avant de commencer le montage et la mise en marche. -
Page 5: Montage
4. MONTAGE: Une fois installée la niche et la bride, dans le cas de la piscine préfrabriquée, procéder au montage du projecteur. Pour brancher le projecteur à la ligne électrique introduire le câble à travers l'écrou presse-étoupe (16). Serrer l'écrou presse-étoupe et s'assurer que le câble tient bon !orqu'on tire sur celui-ci. -
Page 6: Características Generales
ESPAÑOL IMPORTANTE: El manual de instrucciones que usted tiene en sus manos, contiene información fundamental acerca de las medidas de seguridad a adoptar a la hora de la instalación y la puesta en servicio. Por ello, es imprescindible que tanto el instalador como el usuario lean las instrucciones antes de pasar al montaje y la puesta en marcha. -
Page 7: Montaje
4. MONTAJE: Una vez instalado el nicho y la brida, puede proceder al montaje del proyector. Para conectar el proyector a la red eléctrica debe introducir el cable a través de la tuerca prensaestopas (16). Apriete la tuerca prensaestopas hasta asegurarse que al tirar del cable con la mano éste no cede. Debe tener la precaución de dejar 1,5 m de cable enrollados en el fondo del proyector (nº... -
Page 8: Controllare Il Contenuto Dell'imballaggio
ITALIANO IMPORTANTE: Il manuale d’istruzioni in suo possesso contiene informazioni fondamentali sulle misure di sicurezza da adottare per l'installazione e la messa in servizio. Per ciò è imprescindibile che sia l’installatore che l’utente leggano le istruzioni prima di iniziare il montaggio e la messa in servizio. Conservi questo manuale per poter consultare in futuro in merito al funzionamento di questo apparecchio. -
Page 9: Manutenzione
4. MONTAGGIO: Una volta installata la nicchia, e la flangia nel caso della piscina prefabbricata, si può procedere al montaggio del proiettore, Per collegare iI proiettore alla rete elettrica, inserire il cavo attraverso iI dado premistoppa (16), Stringere iI dado premistoppa fino ad essere sicuri che tirando iI cavo con la mano, questo non ceda. - Page 10 DEUTSCH WICHTIG: Das Handbuch mit den Betriebsanleitungen, das Sie in Händen halten, enthält wichtige Information über die anzuwendenden Sicherheitsmaßnahmen für die Installation und Inbetriebnahme. Es ist daher unerläßlich, daß die Anweisungen vom Installateur und vom Benutzer vor der Montage und Inbetriebnahme aufmerksam durchgelesen werden. Bewahren Sie dieses Handbuch auf, falls Sie zu einem späteren Zeitpunkt Informationen über die Funktion dieses Apparates nachschlagen möchten Um die beste Leistung des Standardstrahler, zu erzielen, empfiehlt es sich, die nachfolgenden Anweisungen zu...
-
Page 11: Wartung
Den Liner, der innen im Flansch übersteht, abschneiden, damit die Nische frei ist, und anschließend den Projektor montieren. 4. MONTAGE: Nach Einbau der Nische und der Klammer, falls es sich um einen vorgefertigten Swimmingpool handelt, kann mit der Montage des Strahlers begonnen werden. Für den Anschluβ des Strahlers an die Stromieitung muβ das Kabel über die Stopfbuchsenschraube eingeführt werden (16). -
Page 12: Características Gerais
PORTUGUÊS IMPORTANTE: O manual de instruções que você tem nas mãos contém informação fundamental sobre as medidas de segurança a tomar ao realizar a instalação e a colocação em funcionamento. Por isso, é imprescindível que tanto o instalador como o utilizador leiam as instruções antes de realizar a montagem e a colocação em funcionamento. -
Page 13: Colocação Em Funcionamento
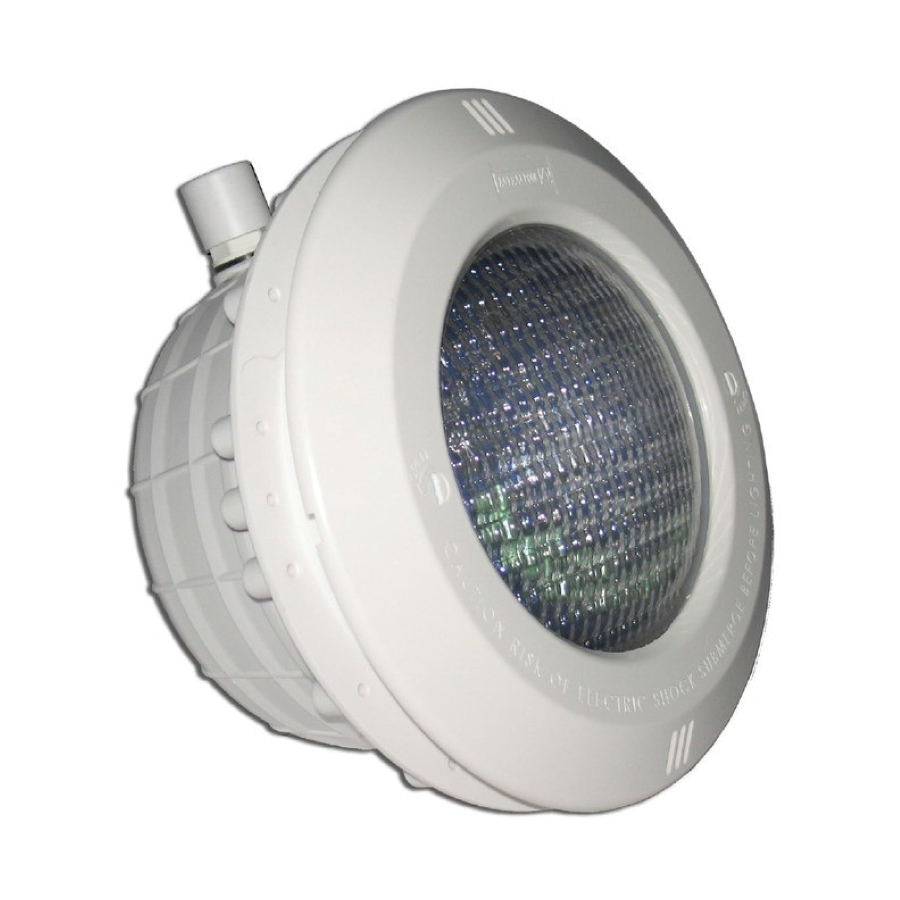
4. MONTAGEM: Depois de instalar o nicho, e o flange no caso da piscina pré-fabricada, proceda à montagem do projector, Para ligar o projector à rede eléctrica deverá introduzir o cabo através da porca prensa-estopas (16). Aperte a porca prensa-estopas até se certificar de que o cabo não cederá ao ser puxado com a máo. Deve-se ter a precaução de deixar 1,5 m de cabo enrolado no corpo do projector (n. - Page 15 ENGLISH CODE DESCRIPTION CODE DESCRIPTION 07838R0001 White decorative ring 23670R0002 Self-threading housing 7013106080 Screw DIN 966 M-6x80 23671R0001 Metric pitch housing (1) 00347R0002 Floodlamp base fastening ring 07838R0012 Gland seal body butt joint 7010106055 DIN 933 M-6x55 screw 07838R0007 Gland seal body 00370 PAR 56 300W 12V lamp (2) 07838R0008...
- Page 16 ESPAÑOL CÓDIGO DESCRIPCIÓN CÓDIGO DESCRIPCIÓN 07838R0001 Anillo embellecedor blanco 23670R0002 Nicho autorroscante 7013106080 Tornillo DIN 966 A2 M-6x80 23671R0001 Nicho con rosca métrica (1) 00347R0002 Aro fijación fondo proyector 07838R0012 Junta plana cuerpo prensaestopas 7010106055 Tornillo DIN 933 A2 M-6x55 07838R0007 Cuerpo prensaestopas 00370...
- Page 17 DEUTSCH ARTIKEL NR. BESCHREIBUNG ARTIKEL NR. BESCHREIBUNG 07838R0001 Verzierungsring wieB 23670R0002 Selbstschraubender Nische 7013106080 Schraube DIN 966 M-6x80 23670R0002 Nische mit métrischer Windung (1) 00347R0002 Rin zur Befestigung des Strahlerbodens 07838R0012 Flache Dichtung Stopfbuchsenkörper 7010106055 Schraube DIN 966 M-6x55 07838R0007 Stopfbuchsenkörper 00370 Lampe PAR 56 300W 12V (2)
- Page 20 • TECHNICAL CHARACTERISTICS • CARACTERISTIQUES TECHNIQUES • CARACTERISTICAS TECNICAS • DATI TECNICI • TECHNISCHE ANGABEN • CARACTERISTICAS TECNICAS DESCRIPTION STANDARD Rated voltage / tension nominale / Tensión nominal 12 V Tensione nominale / Anschlusspannung / Tensao nominal Current suply / Type de courant / Tipo de corriente / Tipo di corrente Stromtype / Tipo de corrente Power / Pouvoir / Potencia / Potere / Macht / Poder PAR 56 12V AC 300 W...
Need help?
Do you have a question about the PAR56 and is the answer not in the manual?
Questions and answers