Table of Contents
Advertisement
Advertisement
Table of Contents

Related Manuals for Kenwood NV-500


Summary of Contents for Kenwood NV-500
-
Page 1: Instruction Manual
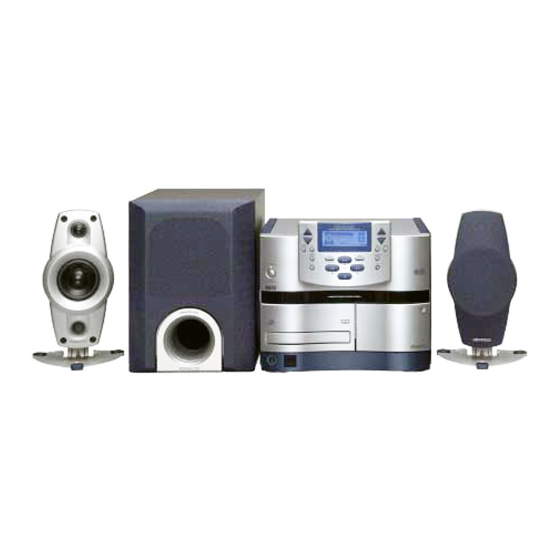
COMPACT HIFI SYSTEM NV-500 NV-600 INSTRUCTION MANUAL KENWOOD CORPORATION This instruction manual is used to describe multiple models listed above. Model availability and features (functions) may differ depending on the country and sales area. COMPACT DIGITAL AUDIO TEXT B60-4290-00... -
Page 2: Before Applying Power
Before applying power Units are designed for operation as follows. U.S.A. and Canada ... AC 120 V only Australia ... AC 240 V only For the United Kingdom Factory fitted moulded mains plug 1. The mains plug contains a fuse. For replacement, use only a 13-Amp ASTA-approved (BS1362) fuse. -
Page 3: Table Of Contents
Caution : Read the pages marked carefully to ensure safe operation. Contents Preparation section Before applying power ... 2 Safety precautions ... 2 IMPORTANT SAFEGUARDS ... 4 Special features ... 6 In regard to demonstration ... 6 Accessories ... 6 System connection ... -
Page 4: Important Safeguards
IMPORTANT SAFEGUARDS Please read all of the safety and operating instructions before operating this appliance. Adhere to all warnings on the appliance and in the instruction manual. Follow all the safety and operating instructions. operating instructions should be retained for future reference. - Page 5 Caution : Read this page carefully to ensure safe operation. 13.Lightning – For added protection for this appliance during a lightning storm, or when it is left unattended and unused for long periods of time, unplug it from the wall outlet and disconnect the antenna or cable system.
-
Page 6: Special Features
The Dolby Virtual Surround function provides realistic surround effect through only two loudspeakers. High output power with large headroom High, 100 W + 100 W power amplifier enables powerful musical reproduction. (NV-500) In regard to demonstration This unit is equipped with a demonstra- tion function (only display). -
Page 7: System Connection
System connection AM loop antenna connection AM loop antenna connection The supplied antenna is for indoor use. Place it as far as possible from the main system, TV set, speaker cords and power cord, and set it to a direction which provides the best reception. -
Page 8: Connection Of The Speaker System
Twist NV-600 Speaker (right) DIGITAL OPTICAL NV-500 Speaker (right) DIGITAL OPTICAL • Never short-circuit the + and – speaker cords. • If the left and right speakers are connected inversely or if the speaker cords are connected with reversed polarity, the sound becomes unnatural with ambiguous acoustic image positioning. -
Page 9: Connection Of Other Accessories
VIDEO PLAY PLAY VIDEO 1 VIDEO 2 AUDIO ANTENNA FRONT SPEAKERS SUPER WOOFER (6 - 16 ) PRE OUT AC 110– AC 110– AC 220– AC 220– 120V 240V 120V 240V SUPER WOOFER PRE OUT Only for NV-500 Powered subwoofer... -
Page 10: Channel Space Setting
CHANNEL SPACE setting The space between radio channels has been set to the one that prevails in the area to which the system is shipped. However, if the current channel space setting does not match the setting in the area where the system is to be used, for instance when you move from area 1 or area 2 shown in the following table or vice versa, proper reception of AM/FM broadcasts cannot be expected. -
Page 11: Controls And Indicators
Controls and indicators STANDBY/TIMER POWER ON/STANDBY TUNER ACTIVE STANDBY/TIMER TUNER/BAND STOP ON/STANDBY PHONES *The displayed information is variable depending on areas. ¤ ¤ IR POWER & VOLUME CONTROL CLOCK MUTE /LIGHT CONFIRM /DEMO IR ON/STANDBY HOME ¡ ™ TAPE MUTE STEREO TAPE MUTE... -
Page 12: Operation Of Remote Control Unit
Operation of remote control unit Loading batteries 1 Remove the cover. 2 Insert batteries. ÷ Insert six R6 (“AA”-size) batteries following the polarity indications. Operation After plugging the power cord of this unit, press key of the remote control unit to turn the system ON. -
Page 13: Basic Configuration Of The Remote Control Menu
Basic configuration of the remote control menu Screen configuration (Example when selecting the stereo mode of the tuner) Basic screen Shows the selected input, recording condition, etc. Press the SET key to go to a menu screen. ˚ Menu screen CURSOR Press the CURSOR keys to select a menu item. -
Page 14: Clock Adjustment
Clock adjustment After plugging the AC cord into a power outlet, set the time of the day as described below. CLOCK 4, ¢ STANDBY/TIMER CLOCK /LIGHT ¢ –P.CALL– To display the time Adjust the clock before setting the timer. ON/STANDBY 1. -
Page 16: Let's Put Out Some Sound
Let's put out some sound Basic use method STANDBY/TIMER TUNER TAPE ™ £ /BAND MUTE The volume The volume decreases increases VOLUME 1. Switch power ON. If a CD or cassette has been loaded in the unit, simply pressing the play key (6) turns power ON and starts playback automatically. -
Page 17: Adjusting The Left And Right Volume Balance
Muting the sound temporarily MUTE ÷ Press again to resume the original volume. ÷ This is also cancelled when the volume is changed. Listening through headphones Insert the headphone plug into the “PHONES” jack. PHONES ÷ Headphones with a stereo mini plug can be connected. ÷... -
Page 18: Receiving Broadcast Station
Receiving broadcast station TUNER /BAND Main unit TUNER /BAND Main unit ¢ –P.CALL– Remote control only 1. Select the TUNER input. 2. Select the broadcast band. Each press changes the band. 3. Select a station. It is recommended to preset radio stations in advance. Every time the key (4 or ¢) is pressed, the preset stations are switched over as follows. -
Page 19: Switching Between Stereo Tuning And Monaural Tuning
Switching between stereo tuning and monaural tuning Use the monaural tuning mode when the radio wave is weak and noisy. 1 With the TUNER input selected, press the SET key to display the Tuner menu. 1 VIDEO1 2 VIDEO2 INPUT 3 CD 4 TUNER 5 TAPE... -
Page 20: Collective Presetting Of Stations (Auto Preset)
Collective presetting of stations Presetting R.D.S. stations (RDS auto memory for Europe and U.K. ) A maximum of 40 stations will be preset. When there are many stations and the intended station has not been preset, please also use “One-by-one presetting (manual preset)”. 1 Select the TUNER input. -
Page 21: One-By-One Presetting (Manual Preset)
One-by-one presetting Desired radio stations can be selected and preset one by one. (Up to 40 stations can be preset in memory.) 1 Receive a desired station in advance. ("To receive a station that has not been preset") 2 With the TUNER input selected, press the SET key to display the Tuner menu. -
Page 22: Playback Of Cd
Playback of CD Skipping tracks To stop playback When a CD disc has been loaded in the CD tray in advance, simply pressing the CD 6 key on the main unit turns power ON and starts playback automatically. STOP INPUT Start playback/ to pause... -
Page 23: Skipping Tracks
Skipping tracks To skip backward –P.CALL– ÷ The track in the direction of the key pressed skipped, and the selected track will be played from the beginning. ÷ When the 4 key is pressed once during playback, the track being played will be played from the beginning. When a key is held depressed: ÷... -
Page 24: Playback Of Tape
Playback of tape Fast forwarding /rewinding or skipping tape To stop playback PUSH OPEN TAPE ™ £ To stop playback STOP ÷ Do not take out the cassette tape until the tape transport has stopped completely. If you load a tape in the cassette deck in advance while the power is off. -
Page 25: Fast Forwarding/Rewinding Or Skipping Tape
Fast forwarding/rewinding or skipping tape By leaving non-recorded blanks of 4 seconds or more between each piece of music, desired piece of music can be selected by skipping others (up to 16 in each of the backward and forward directions). To rewind tape or skip To fast forward tape or music in direction |... -
Page 26: Let's Recording
Let's recording Recording on TAPE PUSH OPEN INPUT CURSOR DIRECTION Note that this cassette deck cannot record onto Note Note Note Metal tapes. 1. Load a cassette tape. 1 Open the cassette holder. 2 Insert a tape and close the cassette holder ÷... -
Page 27: Stop The Recording
Pause the recording (A.R.M.) ÷ Press the ¶REC key during recording. It stops after leaving a non-recorded blank of 4 seconds. (Press the key again to resume recording.) Stop the recording CD synchronized recording When recording a CD, the playback of the source and recording of the cassette deck can be synchro- nized by putting the cassette deck in record-pause mode. -
Page 28: Radio Data System) (For Europe And U.k.)
R.D.S. (Radio Data System) (for Europe and U.K.) RDS is a system which transmits useful informa- tion (digital data) for FM broadcasts together with the broadcast signal. Tuners and receivers de- signed for RDS reception can extract the informa- tion from the broadcast signal for use with vari- ous functions such as automatic display of the station name. -
Page 29: Searching For A Desired Program Type (Pty Search)
Searching for a desired program type (PTY search) By specifying the type of program (genre) you want to listen to, the tuner automatically searches for a station which is currently broadcasting a program of the specified type. Preset the RDS stations before setting the PTY 1 Select the TUNER input. -
Page 30: To Be Able To Listen To The Desired Information At Any Time (Eon)
To be able to listen to the desired information at any time By using the EON function, which manages the information of other stations, listening to desired information like traffic information or news etc. can be reserved even when it is not being transmitted at the present. - Page 31 Receive an RDS station. Select a station where “RDS” and “EON” are lit. ¢ –P.CALL– Wait for the desired information. CD or TAPE playback may also be started. As long as the unit is ON, the unit is always ready for the reception.
-
Page 32: Playback Of Cd
Playback of CD Listening in the desired sequence Use the following procedure to program desired tracks in a desired order. (up to 32 tracks) Program desired tracks. 1 Select the CD input. 2 Display the "CD" menu. 3 Select the message to be displayed, "Program On"... - Page 33 Play the programmed tracks. BAND Checking the program (In stop mode only) Use the following procedure to check the pro- grammed tracks. 1 Select the CD input. INPUT 2 Display the "CD" menu. 3 Select the message to be displayed, "Program On". CURSOR 4 Select the "Check".
-
Page 34: Repeated Playback
Repeated playback You can repeatedly listen to a favorite track or disc. Program repeat playback ÷ By programming only the desired tracks, it is possible to perform the repeat playback of only the programmed tracks later. ÷ To repeat playing a single track, program that track only and start its repeat playback. -
Page 35: Listening To An Unexpected Title Sequence (Random Playback)
Listening to an unexpected title sequence As the titles each time are selected randomly, the music can be enjoyed without getting tired of it. ÷ It is not possible to perform random playback of programmed tracks. Random repeat playback ÷ When repeat playback is set before starting random playback, the random playback of the disc will be repeated. -
Page 36: Convenient Recording Methods
Convenient Recording Methods Selection of the Recording Type This unit provides the following recording fea- tures in addition to normal recording. Select the appropriate method according to the purpose of recording. Recording all tracks in a CD onto tape CD direct recording CD direct recording Recording a single track in CD onto tape CD one-track recording... -
Page 37: Recording An Entire Cd Onto Tape
Recording an entire CD onto tape ÷ This function is canceled when the program mode is activated. ÷ This function is available only when the CD player is in stop mode. Preparation ÷ Perform step 3 ( "Select the tape transport direc- tion") on page 26. -
Page 38: Recording Every Desired Track In Cd Onto Tape (Cd One-Track Recording)
Recording every desired track in CD onto tape During playback of a CD track, only the track being played can be selected and recorded from the beginning. ÷ CD random playback cannot be recorded. Preparation ÷ Perform step 3 ( "Select the tape transport direc- tion") on page 26. -
Page 39: Recording Desired Cd Tracks In A Desired Order Onto Tape (Cd Program Recording)
Recording desired CD tracks in a desired order onto tape The desired tracks in a CD can be programmed in a desired order and recorded. ÷ This function is available only when the CD player is in stop mode. Preparation ÷... -
Page 40: Tone Control And Sound Field Effect Adjustment
Tone control and sound field effect adjustment Adjusting the external input level Use the following procedure to adjust the levels of the Video1 and Video2 inputs. 1 Display the "Function" menu. CURSOR 2 Select the message to be displayed, "Input Level". CURSOR 3 Select the "Video1"... -
Page 41: Tone Adjustment
(low frequencies) and treble (high frequencies). ÷ The sound field effects of Bass Boost and tone control cannot be used simultaneously. Selecting the bass boost (NV-500 only ) 1 Display the "Function" menu. CURSOR 2 Select the "Listen Mode". CURSOR 3 Select the message to be displayed, "Bass Boost... -
Page 42: Dolby Virtual Setting
Dolby Virtual setting The Dolby Virtual function is designed to provide a simulated surround effect from two speakers on the left and right. This is a convenient function for playing a movie, etc. ÷ The DSP mode is canceled when Dolby Vir- tual is set. -
Page 43: Dsp Mode Setting
DSP mode setting The DSP (Digital Surround Processor) controls the tone of a signal in the digital form and makes sound processing without quality degradation possible. The DSP built into this unit provides appropriate tone patterns (equalizing patterns) for major musical categories. ÷... -
Page 44: Timer Operation
Timer operation O.T.T. : Starts playback of the selected input source when the set time comes and turns power off in an hour. This program is executed only once every time after it is set. Timer playback, timer recording: Plays the selected input source (or records tuner broadcasting or external input source) in the set time zone. SLEEP timer: Turns power off automatically after the set period of time. -
Page 45: Normal Timer Playback
Setting the timer playback Timer playback includes normal timer playback and AI (Artificial Intelligence) timer playback. Normal timer playback: Starts playback of the selected source at the set on time and turns power OFF at the set off time. AI timer playback: Increases the playback volume gradually after the start of timer playback. -
Page 46: Sleep Timer (Sleep)
7 Select a preset radio station. (This step is required only when the tuner input is selected in the above.) –P.CALL– 8 Select the message to be displayed, "AI-Play" or “Normal-Play”. –P.CALL– 9 Press the ENTER key to complete the setting. 0 After completing the set- ting, set the power OFF. -
Page 47: Timer Recording
Timer recording Timer recording is used to record a source onto a tape. The TUNER or the component connected to the Video1 or Video 2 input can be selected as the source. 1 Display the "Function" menu. CURSOR 2 Select the message to be displayed, "Timer Rec Off"... -
Page 48: Checking The Time Information Display Of Cd
Checking the time information display of CD The remote control unit can display the time information of CD such as the playing time and total time. The time information can be checked while the CD is playing or stopped. 1 Display the "Function" menu. CURSOR 2 Select the information item to be displayed. -
Page 49: Adjusting The Display Contrast
Adjusting the display contrast Use the following procedure to adjust the density of the display on the remote control unit. 1 Display the "Function" menu. CURSOR 2 Select the message to be displayed, "Contrast". CURSOR 3 Adjust the contrast. –P.CALL– 4 Press the ENTER key ENTER ¢... -
Page 50: Remote Control Of External Components
Remote control of external components Registering the controlled components in the remote control unit The remote control unit can also be used to control the major functions of externally connected components such as a TV, VCR and DVD player. To make the control possible, it is required to select the manufacturer and type (VCR, DVD, etc.) of each com- ponent and register it in the memory of the remote control unit. - Page 51 Registering the component connected to the rear-panel Video1 or Video2 input 1 Display the "Function" menu. CURSOR 2 Select the message to be displayed, "Video1" or "Video2". CURSOR 3 Select the type of the com- ponent (VCR, DVD, etc). CURSOR 4 Select the manufacturer.
- Page 52 Remote control of external components By registering the externally connected components such as a TV, VCR and DVD player in the remote control unit, it can be used to control the major functions of the external components. Select the input corresponding to the com- ponent to be remote controlled.
-
Page 53: Vcr Control Screen
TV control screen This screen consists of a single page. Symbol on the Display Function remote control 6 BAND Vol 5 Volume Up Vol ∞ Volume Down ¢ Ch 5 Channel Up Ch ∞ Channel Down ENTER Power DIRECTION MUTE Muting ¶... -
Page 54: Cleaning The Head Section
Important Items Maintenance Cleaning the head section Cotton swab Capstan Head Pinch roller Tape guides Maintenance of the Set When the front panel, the case, etc. becomes dirty, wipe with a soft, dry cloth. Do not use thinner, alcohol, etc., as these can cause discoloration. -
Page 55: Disc Handling Precautions
Disc handling precautions Handling Hold the discs so that you do not touch the playing surface. Label side Playing side Sticker Do not attach paper or tape to ei- ther the playing side or the label side of the discs. Sticky paste Cleaning If fingerprints or foreign matter be-... -
Page 56: Fcc Warning
KENWOOD CORPORATION 2967-3, ISHIKAWA-CHO, HACHIOJI-SHI, TOKYO, JAPAN KENWOOD CORP. CERTIFIES THIS EQUIPMENT CONFORMS TO DHHS REGULATIONS NO. 21 CFR 1040.10, CHAPTER 1, SUBCHAPTER J. Location: Back Panel FCC WARNING This equipment may generate or use radio frequency energy. Changes or modifications to this equipment may cause harmful interference unless the modifications are expressly approved in the instruction manual. -
Page 57: In Case Of Difficulty
In case of difficulty What seems to be a malfunction is not always so. Before calling for service, check the following table according to the symptom of your trouble. Operation to reset The microcomputer may fall into malfunction (impos- sibility to operate, erroneous display, etc.) when the power cord is unplugged while unit is ON or due to an external factor. -
Page 58: Cd Player Section
CD player section Symptom A CD is placed in the player but it cannot be played. Sound is not produced. Sound skips. “Text Full” is displayed Remote control unit Symptom Remote control operation is not possible. The “Low Battery” alarm is displayed. -
Page 59: Cassette Deck
Cassette deck Symptom ÷ The head is dirty. Sound cannot be produced by pressing the play key. ÷ The tape is wound too tight due to ÷ A nonrecorded tape is played. ÷ The cassette holder is not closed com- No operation occurs even when an operation key is ÷... -
Page 60: Index
INDEX A.R.M..27 ACTIVE indicator ... 11 Adjusting the display contrast ... 49 Adjusting the external input level ... 40 Adjusting the left and right volume balance ... 17 Adjusting the subwoofer output level ... 40 AI timer playback ... 45 Auto preset ... -
Page 61: Menu Display Chart
<Sound Mode> Listen Mode Virtual Virtual On (Off) Effect DSP Mode DSP On (Off) Stadium Arena Live house Bass Boost On (Off) (NV-500 only) Balance Tone Control Bass Treble Input Level Video1 Video2 S.W. Level (NV-600 only) <Time INFO> CD Single... -
Page 62: Specifications
(Composite) ... 1 Vp-p/75 [Tuner section] FM tuner section Tuning frequency range ... 87.5 MHz ~ 108 MHz KENWOOD follows a policy of continuous advancements in development. For this reason specifications may be changed without notice. Notes Notes ÷ Sufficient performance may not be exhibited at extremely cold locations (where water freezes). - Page 63 [Video section] Input/ Output (Composite) ... 1 Vp-p/75 KENWOOD follows a policy of continuous advancements in development. For this reason specifications may be KENWOOD follows a policy of continuous advancements in development. For this reason specifications may be changed without notice.
-
Page 64: For Your Records
For your records Record the serial number, found on the back of the unit, in the spaces designated on the warranty card, and in the space provided below. Refer to the model and serial numbers whenever you call upon your dealer for informa- tion or service on this product.
Need help?
Do you have a question about the NV-500 and is the answer not in the manual?
Questions and answers