Advertisement

黄志胜
2013.11.04
S
胡业涛
杨垒
1、
2、
3、
4、
KE
1
更改第5页把手安装图,自A02068更换。 2014.02.10
更改封面/目录,删除最后一页,
2
自A04451更新。
3
页码8温控贴纸有更改,即日起更新
4
自MO-250557更新版本。
5
自62310-45415801更改封底。
6
自62310-50153101更改封面、封底。
7
自62310-64719901更新版本。
HD-663W
(UR-BCD510W-S)
(g)
20P
50200101C927
16131000A02192
封面100g铜版纸
内容页80g双胶纸
scale
1:1
2015.01.15
2015.5.29
2016.09.19
2017.09.06
2017.12.06
2019.07.03
黄志胜
黄志胜
程磊
黄志胜
黄志胜
黄志胜
黄志胜

Advertisement

Table of Contents
loading
Need help?

Need help?

Do you have a question about the HD-663W and is the answer not in the manual?

Questions and answers

Subscribe to Our Youtube Channel

Summary of Contents for Midea HD-663W

  • Page 1 黄志胜 2013.11.04 HD-663W 50200101C927 16131000A02192 (UR-BCD510W-S) 封面100g铜版纸 内容页80g双胶纸 胡业涛 scale 杨垒 1、 2、 3、 4、 更改第5页把手安装图,自A02068更换。 2014.02.10 黄志胜 更改封面/目录,删除最后一页, 2015.01.15 黄志胜 自A04451更新。 页码8温控贴纸有更改,即日起更新 2015.5.29 程磊 自MO-250557更新版本。 2016.09.19 黄志胜 自62310-45415801更改封底。 2017.09.06 黄志胜 自62310-50153101更改封面、封底。 2017.12.06 黄志胜 自62310-64719901更新版本。 2019.07.03 黄志胜...
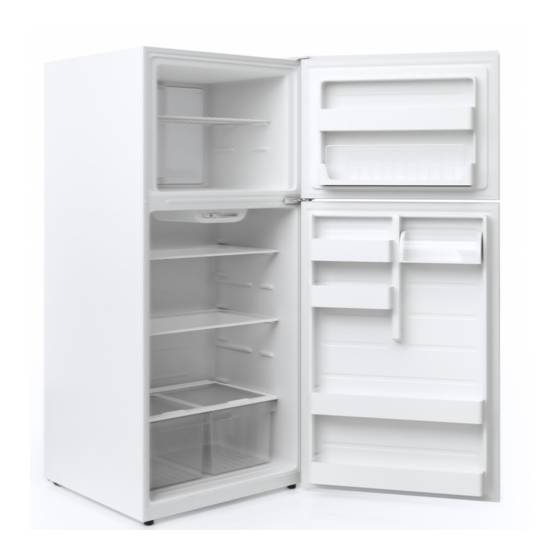
  • Page 2 Refrigerator Freezer Model: HD-663W / WHD-663FWESS1...
  • Page 3 Welcome to the World of Simple Handling and No Worries  Thank you for choosing Midea. This manual contains all the information you will need to safely and  correctly use your refrigerator. Please read all the instructions prior to using the appliance, and keep  this manual in a secure place for future reference. Do not remove from the refrigerator the attached  adhesive identification label that contains the code and model number, the manufacturer and other  information. This label will be used by the Midea authorized service representative in the event that  your refrigerator needs servicing.  Environmental Advice The packaging material used is recyclable. We recommend that you separate plastic, paper and  cardboard and give them to recycling companies. To help preserve the environment, the refrigerant  used in this product is R600a (Hydro fluorocarbon or HFC), which does not affect the ozone layer  and has little impact on the greenhouse effect. According to Waste Electrical and Electronic  Equipment (WEEE) guidelines, waste from electrical and electronic devices should be collected  separately. If you need to dispose of this appliance in the future, do NOT throw it away with the rest  of your domestic garbage. Instead, please take the appliance to the nearest, available WEEE  collection point.  Attention  The refrigerator you have just purchased may be slightly different from the one shown in the  drawings in this manual, but its overall design is the same.  Please read the information referring to its operation. This refrigerator is intended for domestic use  only. The plug on the refrigerator you have purchased may be different from the one shown in the  manual, as the plug that accompanies the product meets your country’s electrical specifications. ...
  • Page 4: Table Of Contents

    Table of Contents SAFETY WARNINGS ......................3 INSTALLATION ........................4 ........................4 Door Handle .................... 4 Reversing the Door Swing ..................5-7 Ice Maker Installation Instructions.................8-11 Door Space Requirements ..................12 Leveling the Unit ...................... 12 Cleaning Before Use ....................12 Before Using Your Unit .....................
  • Page 5: Safety Warnings

    1. SAFETY WARNINGS Caution: risk of fire  1) WARNING―Keep ventilation openings, in the appliance enclosure or in the built‐in structure, clear of obstruction.  2) WARNING―Do  not  use  mechanical  devices  or  other  means  to  accelerate  the  defrosting process, other than those recommended by the manufacturer.  3) WARNING―Do not damage the refrigerant circuit. 4) WARNING―Do  not  use  electrical  appliances  inside  the  food  storage  compartments  of  the appliance, unless they are of the type recommended by the manufacturer.  5) WARNING―DANGER: Risk of child entrapment. Before you throw away your old refrigerator or freezer:  •Take off the doors to prevent children from becoming entrapped. •Leave the shelves in place so that children may not easily climb inside.
  • Page 6: Installation

    2. INSTALLATION 2.1 Loca When ng a posi on for your refrigerator, you should make sure the floor is flat and firm, and the room is well ven lated with an average room temperature between 50°F (10°C) and 109.4°F (43°C). Avoid placing your unit near a heat source, e.g. stove, heater or radiator. Also avoid direct sunlight as it may increase the electrical consump on.
  • Page 7: Reversing The Door Swing

    2.3 Reversing the Door Swing Reversing the door position Parts included with the hinge kit: Parts already mounted on the door (as shipped): Right top hinge cover Center right hinge Center left hinge Left top hinge cover Top right hinge Top left hinge Screws (4) Upper door...
  • Page 8 5 Unscrew the two screws holding the bottom hinge, then 9 Insert the plastic bushings into the remove the bottom hinge from the bottom right side of left sides of freezer and refrigerator the refrigerator. doors. 6 Unscrew the hinge pin from the right side of the bottom hinge and move it to the left side, then secure the bottom hinge to the bottom left side of the refrigerator, using the screws you removed previously.
  • Page 9 12 Remove the right upper door self-locking block 16 Remove the screw caps on the door handles, and the right door-open stopper. Store in a safe then remove the four Allen-screws securing place in case you need to reverse the door the handles to the left side of the doors with position again.
  • Page 10: Ice Maker Installation Instructions

    2.4 Ice Maker Installation Instructions The refrigerator is ready for ice maker installation, if you need ice maker, Please select the type IM1800MD Midea Ice Maker Kit. Contact your retailer or call Midea warranty for more information. Supplies Required: -1/4 inch copper supply line with shut off valve -1/4 inch brass compression nut and ferrule -Freezer shelf If your model does not have one, contact your dealer to order one.
  • Page 11 Tools Required: Putty Knife Pliers ¼ inch Socket Wrench Needle Nose Pliers or Nut Driver Adjustable Wrench Knife Flat Screw Driver Disconnect the unit from the electrical supply. Remove ice tray rack from freezer. Move the freezer shelf to the next position. In order to remove the plug, you need to squeeze the two ends and pull the plug out, or need to use the tools such as a flat screw driver or needle nose plier...
  • Page 12 Slide the hose through the hole of the security bracket and the foam insulation pad, with the pad facing the rear of the refrigerator and affix the hose security bracket and foam insulation pad in place using the two (2) screws provided. Push the water supply hose into the water inlet hose as far as it will go and tighten the Nylon compression nut onto the water inlet hose until it is secure/tight.
  • Page 13 Adjust the leveling bracket to ensure the ice maker assembly is totally level. The ice maker will be level when the gap between the freezer wall and the ice maker assembly is the same at the top and bottom. Once completely level, tighten the leveling bracket screw. Reinstall the freezer shelf below the ice maker assembly.
  • Page 14: Door Space Requirements

    2.5 Door Space Requirements The refrigerator door must be able to open fully as shown. Make sure that the refrigerator can open at least this wide and this deep – 50.8"W x 58.5"D. 2.6 Leveling the Unit Adjust the two leveling feet at the front of the unit. If the unit is not level, the door and magnetic seal alignments will not be covered properly.
  • Page 15: Product Overview

    In order to make the most of the volume of the fresh food storage compartment and frozen-food storage compartment, the user can remove one or more shelves or drawers from the appliance, according to your daily use. 3. PRODUCT OVERVIEW Door Shelf Steel Wire Shelf Thermostat C...
  • Page 16: Operation

    4. OPERATION The operator panel and display layout are referred to in the following figure: 4.1 Key ① ② ③ ④ ⑤ ⑥ COLDEST A. SET posi on key 4.2 Display Screen ① Se ng 1 ② Se ng 2 ③...
  • Page 17: The Standby Control Func On

    4.6 The Standby Control While the refrigerator is opera ng, press and hold the SET key for 3 seconds, and the refrigerator will enter standby mode. The standby indicator will light up, and all se ngs will stop working. While the refrigerator is in standby, press the SET key, and the refrigerator will resume normal opera on.
  • Page 18: Cleaning Tips

    5.3 Cleaning Tips Condensation may appear on the outside of the unit. This may be due to a change in room temperature. Wipe off any moisture residue. If the problem continues, please contact a qualified technician for assistance. 6. MAINTENANCE 6.1 Changing the Internal Light Light must be replaced by a professional.
  • Page 19: Summer Weather Tips

    Problem Problem Causes Refrigerator door cannot be There may be too much food in the freezer; or the refrigerator properly closed. may not be level. The food is not level in the unit. Refrigerator is making loud The refrigerator is not balanced. noises.
  • Page 20 The vegetable and fruit drawers should not be lined with aluminum foil, wax paper or  paper towels. Liners interfere with cold air circulation, making the refrigerator less efficient. Organize and label food to reduce door openings and extended searches. Remove as ...
  • Page 21 Customer service Toll free: 1-866-646-4332 www.midea.com...

This manual is also suitable for:

Whd-663fwess1

Table of Contents

Save PDF