Table of Contents
Advertisement
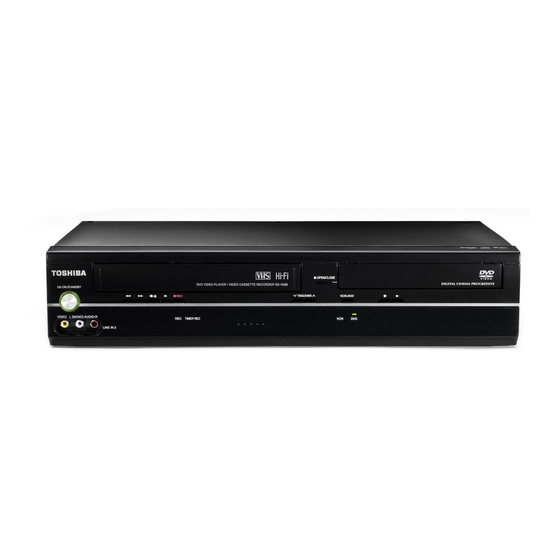
DVD VIDEO PLAYER / VIDEO CASSETTE RECORDER
SD-V296KU
© 2008 Toshiba Corporation
E8EB5UD_SD-V296KU_EN_ES_v1.indd 1
E8EB5UD_SD-V296KU_EN_ES_v1.indd 1
Owner's Record
The model number and serial number are on the back
of your product. Record these numbers in the spaces
below. Refer to these numbers whenever you communicate
with your Toshiba dealer about this product.
Model number:
Serial number:
2008/07/14 10:36:07
2008/07/14 10:36:07
Advertisement
Table of Contents

Related Manuals for Toshiba SD-V296KU


Summary of Contents for Toshiba SD-V296KU
- Page 1 The model number and serial number are on the back of your product. Record these numbers in the spaces below. Refer to these numbers whenever you communicate with your Toshiba dealer about this product. Model number: Serial number: 2008/07/14 10:36:07...
-
Page 2: Laser Safety
TO REDUCE THE RISK OF FIRE OR ELECTRIC SHOCK, DO NOT EXPOSE THIS WARNING: APPLIANCE TO RAIN OR MOISTURE. CAUTION RISK OF ELECTRIC SHOCK DO NOT OPEN CAUTION : TO REDUCE THE RISK OF ELECTRIC SHOCK, DO NOT REMOVE COVER (OR BACK). NO USER SERVICEABLE PARTS INSIDE. -
Page 3: Important Safety Instructions
IMPORTANT SAFETY INSTRUCTIONS This unit has been designed and manufactured to assure personal safety. Improper use can result in electric shock or fire hazard. The safeguards incorporated in this unit will protect you if you observe the following procedures for installation, use and servicing. This unit is fully transistorized and does not contain any parts that can be repaired by the user. -
Page 4: Installation Location
“standard definition” output. If there are questions regarding your TV set compatibility with this 480p DVD recorder, please contact Toshiba Customer Service. Auto Power Off and Screen Saver Function (DVD Only) If the player is left with no activity for more than 5... -
Page 5: Table Of Contents
Maintenance SERVICING • Please refer to relevant topics on the “Troubleshooting” on page 27 before returning the unit. • If this unit becomes inoperative, do not try to correct the problem by yourself. There are no user-serviceable parts inside. Turn off, unplug the power plug, and please call our help line to locate an Authorized Service Center. -
Page 6: Setup
• Because of problems and errors that can occur during the creation of DVD and CD software and/or the manufacture of DVD and CD discs, Toshiba cannot assure that this DVD player will successfully play every disc bearing the DVD and CD logos. If you happen to experience any difficulty playing a DVD and/or CD disc on this DVD player, please contact Toshiba Customer Service. -
Page 7: Index To Parts And Controls
Index to Parts and Controls Front Panel 3 4 5 6 7 21 20 19 18 ( * ) The unit can also be turned on by pressing these buttons or by inserting a cassette tape. 1. I/y y ON/STANDBY button Press to turn on and off the unit. -
Page 8: Remote Control
Remote Control Installing the Batteries for the Remote Control Install two AA batteries (supplied) match- ing the polarity indicated inside battery compartment of the remote control. Keep in mind the following when using the remote control: • Make sure that there are no obstacles between the remote control and the infrared sensor window on the unit. -
Page 9: Dvd Display Panel
DVD Display Panel Displays a type of the disc which is inserted on the tray. • DVD: DVD-video • CD: Audio CD/JPEG on CD Appears when the A-B repeat function is on. Appears when the repeat function is on. GROUP Appears when the ALL repeat Displays how long the current title or track... -
Page 10: Connections
Connections If your TV has AUDIO/VIDEO input jacks, see the section “Connection to a TV” on this page. If not, it is still possible to connect this unit to your TV by using a STEREO AUDIO/VIDEO RF modulator (commercially available). In this case, follow the instructions below. Connection to RF Modulator (Not Supplied) 1) Disconnect the power cords of the devices from the AC outlet. -
Page 11: Connection To An Audio System
Connection to an Audio System If using this DVD player to play back a DVD in a Dolby Digital Multi-channel surround or DTS surround format, the DVD player outputs a Dolby Digital or DTS data stream from its COAXIAL DIGITAL AUDIO OUT jack. By hooking up the player to a Dolby Digital or DTS decoder, you can enjoy more convincing, realistic ambience with powerful and high- quality surrounding sound of a professional standard which can be heard in movie theaters. -
Page 12: Preparation For Use
Preparation for Use Turning on Unit for the First Time Please note: most instructions in this man- ual refer to remote control use. Be sure your TV’s input is set to VIDEO. (Name may vary with TV manufacturer. See your TV manual for details.) Select your on-screen language. -
Page 13: Vcr Functions
Playback Before: Turn on the TV. Insert a cassette tape To start playback into this unit. PLAY To stop playback To eject the cassette tape OPEN/CLOSE STOP When You Playback a Cassette Tape Recorded in Hi-Fi Stereo Press [AUDIO ] on the remote control, then select “HIFI” or “MONO”. •... -
Page 14: Auto Repeat
Auto Repeat The unit will automatically rewind the cassette tape when it has reached the end and will automatically start playback unless you press [STOP C] or you turn off the unit. Press [SETUP], and choose “AUTO REPEAT”. SETUP Note: •... -
Page 15: Notes For Timer Recording & One-Touch Timer Recording (Otr)
Select “ONCE”, “DAILY” (Mon-Fri), or “WEEKLY”. Then press [B] to go to next step. Select the desired date. Then press [B] to go to next step. • You can program the unit to record up to 8 programs, for up to a year in advance. -
Page 16: Satellite Link
Satellite Link You can set the unit to start recording whenever it detects a video signal from the external tuner. Preparing for the Satellite Link Timer Recording: Preparation on the tuner • Satellite link accepts only the connection from L1 (rear) with the external tuner. -
Page 17: Dvd To Cassette Tape Duplication
DVD to Cassette Tape Duplication This will be possible only if the DVD is not copy protected. Before you begin: • Insert a cassette tape in the cassette compartment. Make sure the tape’s record tab is intact and the tape is long enough to record the DVD. -
Page 18: On-Screen Display
Slow Forward / Reverse Search Press [g] or [h] repeatedly in the pause mode to select the required forward or reverse speed. To continue playback, press [PLAY B]. Note: • Slow forward or reverse speed is different depending on the disc. Approximate speed is 1(1/16x), 2(1/8x), 3(1/2x). -
Page 19: Jpeg Playback
JPEG Playback JPEG is a method of compressing files. You can copy JPEG files on CD-RW/-Rs from the computer and play the files on this unit. Insert a JPEG-format disc, then the file list will automatically appear on the TV screen. Press [MENU] when you want to call up the file list if JPEG-format disc is already inserted. -
Page 20: Search Functions
Search Functions Search function does not work during programmed or random playback. Using Track Search Press [SEARCH MODE]. SEARCH MODE Select track number by using [the Number buttons] within 30 seconds. • For the disc with less than 10 tracks, press the track number directly. •... -
Page 21: Repeat / Random / Programmed Playback
Repeat / Random / Programmed Playback Repeat Playback Repeat function is available only during playback. Press [REPEAT] to select the desired option to repeat during playback. REPEAT PLAY Each time you press [REPEAT], repeat function changes as exam- ple below. (repeat off) (current chapter repeat) CHAPTER... -
Page 22: Special Settings
Special Settings Subtitle Language This unit allows you to select a subtitle language (if available) during DVD playback. Press [SUBTITLE ] during playback. SUBTITLE PLAY Each time you press [SUBTITLE ], subtitle language changes as example below. To cancel subtitle Press [SUBTITLE ] during playback. -
Page 23: Dvd Setting
DVD Setting QUICK Menu You can select “PLAYER MENU”, “TV ASPECT”, “PROGRESSIVE”, “DOLBY DIGITAL” or “DTS” from “QUICK” menu quickly. Press [SETUP] in the stop mode. SETUP STOP SETUP menu Confirm that “QUICK” is selected. QUICK SETUP PLAYER MENU ENGLISH TV ASPECT 4:3 LETTER BOX PROGRESSIVE... -
Page 24: Display Setting
DISPLAY Setting You can change the display functions. Follow steps 1 to 3 in the “CUSTOM Menu” section on page 23. Select the desired item. DISPLAY menu DISPLAY TV ASPECT 4:3 LETTER BOX STILL MODE AUTO PROGRESSIVE ENTER Note: PROGRESSIVE: •... -
Page 25: Parental Setting
PARENTAL Setting This function prevents unit from playing material inappropriate for children. Parental Levels Parental level allows you to set the rating levels of your DVD software. Playback will stop if the ratings exceed the levels you set. Follow steps 1 to 3 in the “CUSTOM Menu” section on page 23. Enter your desired 4-digit password (except for 4737). -
Page 26: Others Setting
OTHERS Setting You can change the other functions. Follow steps 1 to 3 in the “CUSTOM Menu” section on page 23. Select the desired item. OTHERS menu OTHERS ANGLE ICON AUTO POWER OFF ON SLIDE SHOW 5sec ENTER Reset to the Default Setting (Except for PARENTAL Setting) Press [SETUP] in the stop mode. -
Page 27: Information
Troubleshooting If this unit does not perform properly when operated as instructed in this manual. Refer to the following: Symptom No power. • Make sure the power plug is connected to an AC outlet. • Make sure the power is turned on. The unit switches from DVD •... -
Page 28: Specifications
Symptom “ ” appears on the TV screen, • That operation is prohibited by this unit or the disc. prohibiting an operation. - This is not a malfunction. Completely distorted picture • Connect the unit directly to the TV. or black/white picture with •... -
Page 29: Limited Warranty
Digital Audio Video (“DAV”) Product - Exchange Warranty Toshiba America Consumer Products, L.L.C. (“TACP”) makes the following limited warranties to original consumers in the United States. THESE LIMITED WARRANTIES EXTEND TO THE ORIGINAL CONSUMER PURCHASER OR ANY PERSON RECEIVING THIS DAV PRODUCT AS A GIFT FROM THE ORIGINAL CONSUMER PURCHASER AND TO NO OTHER PURCHASER OR TRANSFEREE. - Page 30 E8EB5UD_SD-V296KU_EN_ES_v1.indd 30 E8EB5UD_SD-V296KU_EN_ES_v1.indd 30 – 30 – 2008/07/14 10:38:44 2008/07/14 10:38:44...
- Page 31 E8EB5UD_SD-V296KU_EN_ES_v1.indd 31 E8EB5UD_SD-V296KU_EN_ES_v1.indd 31 – 31 – 2008/07/14 10:38:46 2008/07/14 10:38:46...
-
Page 32: Español
Conexiones Si su televisor tiene entradas de AUDIO/VIDEO vea la sección “Connection to a TV” en la página 10 en el manual de manejo. En caso contrario, vea la sección “Connecting to RF Modulator (Not Supplied)” en la página 10 en el manual de manejo. Instalación de las pilas del control remoto Conmutación VCR/DVD Botón VCR/DVD... -
Page 33: Control Remoto
Reproducción de la grabadora de vídeo Antes: Encienda el televisor. Inserte un casete Para empezar la de vídeo en esta reproducción unidad. PLAY Para parar la Para expulsar reproducción OPEN/CLOSE STOP Reproducción de DVD/CD Antes: Encienda el televisor, amplificador y otros equipos que puedan estar conectados a esta unidad. - Page 34 Memo E8EB5UD_SD-V296KU_EN_ES_v1.indd 34 E8EB5UD_SD-V296KU_EN_ES_v1.indd 34 – 34 – 2008/07/14 10:39:04 2008/07/14 10:39:04...
- Page 35 Memo E8EB5UD_SD-V296KU_EN_ES_v1.indd 35 E8EB5UD_SD-V296KU_EN_ES_v1.indd 35 – 35 – 2008/07/14 10:39:04 2008/07/14 10:39:04...
- Page 36 Printed in China E8EB5UD_SD-V296KU_EN_ES_v1.indd 36 E8EB5UD_SD-V296KU_EN_ES_v1.indd 36 1VMN26053 / E8EB5UD 2008/07/14 10:39:04 2008/07/14 10:39:04...
Need help?
Do you have a question about the SD-V296KU and is the answer not in the manual?
Questions and answers