
Related Manuals for Zipp Manufacturing PRO VEE Full Race Mono Hull


Summary of Contents for Zipp Manufacturing PRO VEE Full Race Mono Hull
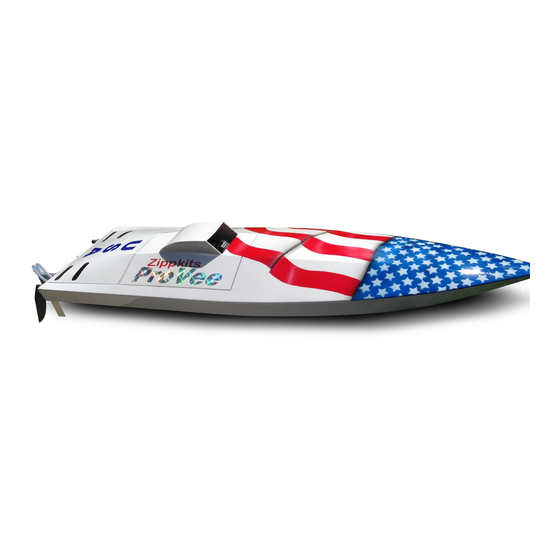
- Page 1 P R O V E E Z I P P M A N U F A C T U R I N G PRO VEE Full Race Mono Hull A Zippkits RC Boat Building Instructions 2016 JMP Hobby Group LLC Indiana USA (866) 922-9477 www.zippkits.com...
- Page 2 D E S I G N C U S T O M I Z A T I O N Introduction Thank you for purchasing this kit. We are sure that it will provide you with many hours of enjoyment. Please take the time to read this entire manual before building this boat.
- Page 3 P R O V E E The manufacturer assumes no liability for damages or other loss in the use of this product, as we have no control over the construction or end use of this product. Purpose This boat was designed as race boat from the start. It is legal for racing in any mono class, due to its vee bottom, if you choose to race.
- Page 4 P R O V E E Tools and supplies needed to build: Small wood plane (mini plane) Sanding blocks with 80 and 220 grit paper Drill with bits Square FLAT work bench (the thicker the better) ...
- Page 5 P R O V E E Additional items needed to complete: Gasoline engine with 5 inch mounts (Zipp 3409 Zenoah mounts) .250 Collet for engine (Zenoah type engines) (Zipp 3440 ) .250 24 inch cable w/welded stub shaft (Zenoah type engines) (Zipp 3444 ) ...
- Page 6 P R O V E E Before we can start building, we need to do some prep work. Good prep work will pay off later with a straight, true running boat. First, we need a flat work surface. Nothing else will do. If you don’t have a perfectly flat bench, you can make one with a piece of 12x48 plywood.
- Page 7 P R O V E E We like the Great Planes 11 inch bar sanders Your life will be much easier with one of these Acid brush trimmed for fast epoxy application Use good quality epoxy and finishing resin...
-
Page 8: Let's Get Started
P R O V E E Let’s get started. Attach the jig board to your FLAT bench (or 12x48 ply) with screws, nails, clamps or whatever you need, to make sure it’s attached to the surface. Remove bulkheads 1, 2, and 3 from the sheet. Note that the bulkheads are marked. - Page 9 P R O V E E The keel should be dry by now. Check the fit of the keel into bulkheads 1, 2 and 3. If okay, glue it into the slots in the jig board. Glue to the bulkheads, making sure that it is fully seated.
- Page 10 P R O V E E Glue the laminated shaft support into the slots. You will have to spread the rails apart slightly to do this. Note that the engine rails fit fully in their slots. No part of the engine rails should be above the bulkheads.
- Page 11 P R O V E E Chine Supports The chine supports have a very important role in keeping the bottom of the boat straight and flat. The chine supports are marked CS, and that mark should face out on both sides. The lettering for “PRO VEE”...
- Page 12 P R O V E E Test fit the chines in place. Note that the chines have small tabs at the front. These key into the keel. The chines will end up with a small angle at the front, which is correct. Do not glue the deck chine to bulkhead 5 at this time.
- Page 13 P R O V E E Repeat for the bottom chines. Glue to both CS as well. You can make great clamps from some 3 inch PVC pipe. We sliced it into 1 inch pieces with the band saw, and cut out a small section of the circle. These clamps are cheap, and work very well.
- Page 14 P R O V E E Blending the chines Before we can glue the side sheeting in place, we need to make sure the chines are flat. Do this with your sanding block and fresh 80 grit paper. Sand the chines, using your sanding block to blend them at the front.
- Page 15 P R O V E E Align the marks and start clamping with rubber bands as before, adjusting the sheeting for equal overlap on the top and bottom. Line up the nose, so that the side covers half of the keel.
- Page 16 P R O V E E Bottom Sheeting Use the angle on the bulkheads to determine the angle that you hold the sanding block. Use fresh 80 grit on your sanding block. This is one of the most critical parts of assembly, as it sets the shape of the bottom.
- Page 17 P R O V E E Also coat half of the keel. Brush epoxy onto the first 6 inches of the front of the bottom sheet, to help the glue joint here. This should be done on the side WITHOUT the strake outline.
- Page 18 P R O V E E Put weights on it, and set aside. Make sure that the bottom sheet is in contact all the way around. Clamp the nose. You can also tack glue the bottom sheets together at this time. Put a drop of medium CA about every two inches or so, check that the bottom sheets are properly aligned, and hit the drop with a shot of accelerator.
- Page 19 P R O V E E Glue the radio box top on. This is the 1/8 inch Birch top. Take a break for a while, so that the radio box glue joints can cure. Lightly sand the top of the box. Glue the 1/16 ply top to the radio box.
- Page 20 P R O V E E Deck Framework The first step is to test fit and glue the spines in place. We used Titebond lll. The center spine (CS) and the two spines (S). The marks go forward. Note that the spines go under the chine at the front. All spines should be flush with the bulkheads.
- Page 21 P R O V E E Fiberglassing seam Use the supplied fiberglass cloth, and some epoxy finishing resin. Mix 2-4 ounces of finishing resin. Brush resin onto the center seam and lay the cloth down, centered on the seam. Brush in a very heavy coat of resin, so that the cloth is completely wetted.
-
Page 22: Fuel System
P R O V E E Floatation Now is the time to put floatation in the hull. DO NOT OMIT THIS STEP! Without floatation YOU WILL LOSE YOUR BOAT! Don’t ask me how I know… Find a pool noodle and cut it into sections that will fit between bulkheads 1 and 2. - Page 23 P R O V E E Hatches There are quite a few parts to the two hatches, but they are all precision laser cut for exact fit. We used Titebond lll for most of the hatches, and medium CA for the hatch sheeting. Glue in 2 of the H10 parts.
- Page 24 P R O V E E Glue both H4 parts into place. Make sure there is Be sure to put wax paper at all glue joints, otherwise this will be a display only boat. Glue both H1 parts (H1 marks forward). Glue in both H3 with the tops flush.
- Page 25 P R O V E E Put waxed paper in as you did before. Clamp 5A against the transom with the notches up. Glue in both H7 parts. Again, be sure that they are parallel with the deck supports on each side. All parts are marked at the front.
- Page 26 P R O V E E The bottom (inside) of the deck pieces should have 2 coats of epoxy finishing resin on them by now. If not, get it done first and allow to cure. Sand or scrape the underside of all decks. Mix about 1/2 ounce of 30 minute epoxy.
- Page 27 P R O V E E Hatch Sheeting Test fit each sheet in place, before gluing. Rear hatch: Using medium CA or Titebond lll, glue (1/16 ply) H14 in place on the center of the rear hatch. Clamp until cured. Use medium CA to glue the (1/32 ply) H15’s in place as follows.
- Page 28 P R O V E E Put the front hatch on a flat surface while we finish the sheeting. When cured, glue H16 (1/32 ply scoop top) in place the same way. We recommend not spraying H16 with accelerator until after you glue it. That way, you can make sure that it is positioned correctly before you spray it.
- Page 29 P R O V E E Keep the gaps small. We like about 1/32 all around, to allow for paint and clear coat. Drill a 1/8 inch hole in the transom at the location marked for the hatch latch (Zipp 3451). Carefully drill through the transom and hatch.
- Page 30 P R O V E E Mount the engine with all four mounts, and check the cable fit to the collet. Bend tube as needed. When you can easily slide the cable in and out of the collet, it’s time to secure the stuffing tube to the hull.
- Page 31 P R O V E E Trim Tabs Mount your trim tabs to the transom so that they are flush or just a hair up from the bottom. Use the pre-drilled holes. We like to use 6-32x1/2 bolts and blind nuts. Use a grinder or disk sander to remove part of the blind nut, so that it won’t interfere with the hull bottom.
- Page 32 P R O V E E Stinger Drive Mount the stinger to the transom using the pre- drilled holes. We like to use 6-32x1/2 bolts and blind nuts. Loosen all adjustment screws slightly. Adjust the stinger so that the flex shaft slides in without any resistance.
-
Page 33: Flex Cable
P R O V E E Flex cable Get the flex cable, drive dog, prop and prop nut. Put the drive dog on the stub shaft, then the prop. Engage the drive dog into the prop, and slide this assembly back until there are about ½ inch of threads on the stub shaft. - Page 34 P R O V E E Measure from the back of the stinger to the drive dog. Subtract 3/8 inch. This is the length to be cut from the cable. When we are done, with the cable fully seated in the collet, the drive dog will have a 3/8 inch gap from the stinger.
- Page 35 P R O V E E Glue the doubler S1A to the bottom of the mount. TS gets laminated into two pieces. When all parts are cured, set your ¼ scale servo into the mount and slide the locknut into its slot (you may need pliers to press it in).
- Page 36 P R O V E E Set the radio box between the ply rails, about 1 inch behind bulkhead 4. Sand the insides of the rails where the radio box goes. Set the radio box in place, ½ inch behind bulkhead Make sure the box is in correctly (rudder servo in rear).
- Page 37 P R O V E E After the radio box is cured, make the rudder pushrod. You have several options as to what to make it out of. Just make sure it’s strong and stiff We like to use a 4-40 pushrod, which is threaded on one end.
- Page 38 P R O V E E Exhaust There are a few options for tuned exhaust for the Our Super Tuned pipe is one of the best pipes you can buy for this application. It has won many races and holds several records in this class (gas mono). You can run the entire system inside the boat (recommended), or you can bring the pipe up thru the rear hatch.
-
Page 39: Water Cooling
P R O V E E Carefully drill a hole. Double check the position and keep drilling or file the hole to size. You want the hole to be just big enough for the end of the pipe, with silicone tubing around it. This is the ½... - Page 40 P R O V E E Surface Prep Sand the entire hull with 150. Fill any dings, dents, craters, valleys or chips with wood filler. When dry, sand again with 150. Check to make sure that all imperfections are filled. If not, fill and sand again.
- Page 41 P R O V E E Sealing Finishing Mix about 1 ounce of finishing resin. Use a credit card to spread out the resin on the top and sides. Once the hull is dry, wipe it down with alcohol. Use Squeegee as much as you can.
-
Page 42: Final Assembly
P R O V E E Final assembly Put the boat on your stand. This is where it will live, when it’s not in the water. Install everything. It may be necessary to clean out paint from some of the holes. Install the aluminum pushrod seal mounts through the radio box and stretch on the rubber seals. - Page 43 P R O V E E Grease the flex cable. Slide the cable through the stinger, into the engine collet. Leave a 3/8 inch gap between the drive dog and stinger. Tighten the collet. Wrap your battery pack in foam rubber. You can wrap the receiver in foam rubber or you can use double sided tape to attach it to the underside of the radio box lid.
- Page 44 P R O V E E Running At the pond Make sure your transmitter and receiver batteries If you are using a new engine, you should run it on the are fresh, or fully charged. stand before going to the pond. Do a range check with your transmitter antenna This will do several things;...
- Page 45 P R O V E E Troubleshooting Boat bounces in the straights- Stinger angled up CG too far back Speed too slow Boat blows over at high speed- CG too far back Stinger angled up Inner tabs too high Boat “plows”- CG too far forward Stinger angled down Inner tabs too low...
Need help?
Do you have a question about the PRO VEE Full Race Mono Hull and is the answer not in the manual?
Questions and answers