
Related Manuals for Brightwell Quantura 200


Summary of Contents for Brightwell Quantura 200
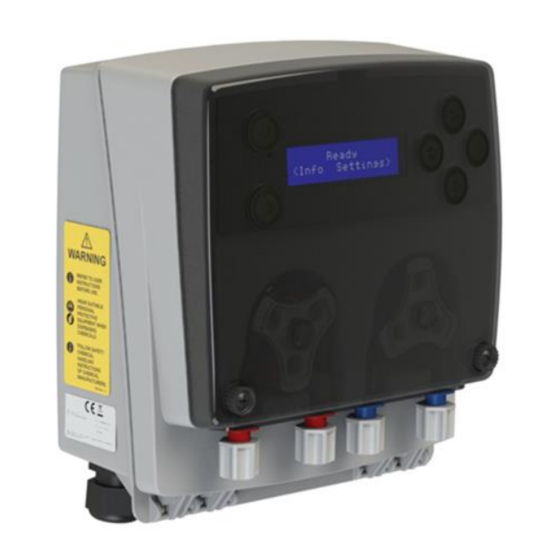
- Page 1 Quantura Warewash Dosing System Instruction Manual Quantura 200 & Quantura 200S Quantura 300 & Quantura 300S www.Brightwell-Inc.com M0001 US – Revision 3.0...
-
Page 2: Table Of Contents
Service Intervals Maintenance: Cleaning Maintenance Replacing Peristaltic Tubing Troubleshooting Troubleshooting How to connect a third pump 38-39 How to connect a probe Technical Specification Technical Specifications Dimensions Approvals Compliance with EU Regulations Worldwide Regulatory & Certificates © 2019 Brightwell Dispensers Limited. -
Page 3: Important Safety Notes
National Electrical Code, NFPA 70, Canadian Electrical Code (CEC), Part 1, CSA C22.1, and Standard for Ventilation Control and Fire Protection of Commercial Cooking Operations, NFPA 96. © 2019 Brightwell Dispensers Limited. -
Page 4: Warranty
Your product comes as standard with a 2 year warranty from the date of manufacture, against manufacturing fault or defects and mechanical or electrical breakdown. Please visit our website for full terms and conditions. www.Brightwell-inc.com © 2019 Brightwell Dispensers Limited. - Page 5 1 Product add on peristaltic dosing pump for the delivery of Sanitizer chemical to commercial Dishwashing machines. Q100 Only to be used in conjunction with Q200 or Q200S. Note: A Q300 is made up of Q200 & Q100 © 2019 Brightwell Dispensers Limited.
-
Page 6: Before Installation
IP55 rated however it is recommended that it is kept away from extreme sources of heat 6 ft. and steam as this may damage the unit over time. Access will be required for general maintenance by your service technician © 2019 Brightwell Dispensers Limited. -
Page 7: Mounting The Unit
IMPORTANT INFORMATION Brightwell Dispensers Ltd (manufacturer) accepts no responsibility and/or damages caused to either the product or premises if the installation process is not complied with in full. © 2019 Brightwell Dispensers Limited. -
Page 8: First Installation Of Peristaltic Tube
Step 4 Slot the other end of the tube as shown. Repeat steps 2 to 4 for the other pump head. Step 5 Refit the outer lid and tighten the screws until secure. © 2019 Brightwell Dispensers Limited. - Page 9 Should a signalled Initial charge be required simply move the red and black core from the detergent input to the Initial charge input. When LINK rinse & det option selected, rinse signal will operate both Detergent and Rinse © 2019 Brightwell Dispensers Limited.
- Page 10 Info screen. This feature allows you to quickly see that the dish machine is keeping to titration when in probeless mode and also allows you to ensure the temperature of the tank is correct. © 2019 Brightwell Dispensers Limited.
-
Page 11: Probe Mode
Should a Signalled Initial Charge be required, a signal between 24V and 240V AC or DC can be applied to the Initial charge input of the PCB (see page 9 for board diagram) White: Rinse Trigger Yellow: Rinse Trigger Black: Detergent or Probe Trigger Red: Detergent or Probe Trigger © 2019 Brightwell Dispensers Limited. -
Page 12: Probeless Door Mode
PCB. Sanitizer options are to operate for a programmable run time with optional delay time. Sanitizer options are only applicable when a 3rd pump (Q100) is connected to a Q200. White: Rinse Trigger Yellow: Rinse Trigger Black: Detergent or Probe Trigger Red: Detergent or Probe Trigger © 2019 Brightwell Dispensers Limited. -
Page 13: Probeless Conveyor Mode
Sanitizer options are only applicable when a 3rd pump (Q100) is connected or when using a 3 pump system (Q300 or Q300S). White: Rinse Trigger Yellow: Rinse Trigger Black: Detergent or Probe Trigger Red: Detergent or Probe Trigger © 2019 Brightwell Dispensers Limited. -
Page 14: Connecting Chemical Supplies
(d) to the rinse aid delivery tube, the other end of this tube is to be connected to your rinse injector. Rinse chemical to dishwasher Detergent chemical to dishwasher Less than 6ft Detergent Rinse supply supply from from container container © 2019 Brightwell Dispensers Limited. -
Page 15: Initial Set Up & Operation
This menu will allow you to select on of three Probe Mode operating modes; use the Plus + or Minus – buttons to scroll up and down, press the RIGHT Button> to confirm Conveyor Mode your selection. Door Mode © 2019 Brightwell Dispensers Limited. - Page 16 Unscrew the head of the probe by turning it anti-clockwise. Step 3: Feed the body of the probe through the hole. Step 4: Replace the head of the probe and tighten in a clockwise direction. © 2019 Brightwell Dispensers Limited.
-
Page 17: Operation
Step 3: Operation Operation: Choose between ‘Signal Signal Operation’ or ‘Auto Operation’ by using the Plus + or Minus – buttons. Confirm your selection by pressing the Operation RIGHT > button. Auto © 2019 Brightwell Dispensers Limited. - Page 18 Plus + or Minus – buttons to select, (this is shown as a percentage %). Confirm your selection by Rinse Speed pressing the RIGHT > button. TIP By pressing prime button you can simulate the setting. © 2019 Brightwell Dispensers Limited.
- Page 19 Plus + or Minus – buttons. Confirm your 00min 00sec selection by pressing the RIGHT > button, repeat Rinse Run Time for changing the seconds. Go to Step 15 if you are 00min 05sec not connecting a 3rd Pump. © 2019 Brightwell Dispensers Limited.
- Page 20 Plus + or Minus – buttons changes the screen to show Hours, Minutes & Seconds. Sanitizer Counter 00hr 00min 00sec Note: Holding either the Plus + or Minus – buttons will reset the counters. © 2019 Brightwell Dispensers Limited.
- Page 21 Enable Standby? Yes NO, standby mode is disabled. Step: 20b : De Lime time can be adjusted by pressing De Lime Time 10min the UP+ or DOWN- buttons. Confirm your selection by press the RIGHT > button. © 2019 Brightwell Dispensers Limited.
- Page 22 YES or NO. Confirm your selection by American pressing the RIGHT > button. Step: 23b : Language Language can be changed by pressing English the UP+ or DOWN- buttons. Confirm your selection by press the RIGHT > button. © 2019 Brightwell Dispensers Limited.
-
Page 23: Probeless Door Mode
Probeless Door Mode Warning if you do change modes it will reset all settings to the default settings. This Concludes Probe Mode Programming. © 2019 Brightwell Dispensers Limited. -
Page 24: Quick Set-Up Programming Probeless Door Mode
IC set up time: to set the time, IC Setup Time use the Plus + or Minus – buttons. Confirm 00min 20sec your selection by pressing the RIGHT > IC Setup Time button. 00min 10sec © 2019 Brightwell Dispensers Limited. - Page 25 – Adjustable rinse pump speed option in increments of 5%. Step 10: Rinse speed: to set the Recharge Rinse Speed speed, use the Plus + or Minus – buttons. Confirm your selection by pressing the Rinse Speed RIGHT > button. © 2019 Brightwell Dispensers Limited.
- Page 26 Plus + or Minus – buttons to select, this Sanitizer Speed is shown as a percentage (%). Confirm your selection by pressing the RIGHT > button. © 2019 Brightwell Dispensers Limited.
- Page 27 (if you Change Access Code? Yes answer YES follow Steps 1-4 on page 16 on how to do this). If NO, skip to Step 22 © 2019 Brightwell Dispensers Limited.
-
Page 28: G Probeless Conveyor Mode
Probeless Conveyor Warning if you do change modes it will reset all Mode settings to the default settings. This Concludes Probeless Door Programming. © 2019 Brightwell Dispensers Limited. -
Page 29: Quick Set-Up Programming Probeless Conveyor Mode
IC Run time Step 5: IC run time: to set the run time, 00min 00sec use the Plus + or Minus – buttons. Confirm your selection by pressing the RIGHT > IC Run time button. 00min 20sec © 2019 Brightwell Dispensers Limited. - Page 30 Step 11: Rinse delay: to set the delay Rinse Delay time of Rinse, use the Plus + or Minus – 00min 00secs buttons. Confirm your selection by pressing Rinse Delay the RIGHT > button. 00min 03sec © 2019 Brightwell Dispensers Limited.
- Page 31 Plus + or Minus – buttons changes the 000000 Cycles screen to show Hours, Minutes & Seconds. Rinse Counter Note: Holding either the Plus + or Minus – buttons 00hr 00min 00sec will reset the counters. © 2019 Brightwell Dispensers Limited.
- Page 32 YES or NO. Confirm your selection by pressing the RIGHT > button. Step: 21b : Language can be changed by pressing Language English the UP+ or DOWN- buttons. Confirm your selection by press the RIGHT > button. © 2019 Brightwell Dispensers Limited.
- Page 33 Probeless Door Mode Warning if you do change modes it will reset all settings to the default settings. This Concludes Probeless Conveyor programing. © 2019 Brightwell Dispensers Limited.
-
Page 34: Cleaning The Device
3. Pump tube replacement. As a guide it is recommended the tube is replaced for a new piece once every 6 months, or as needed. Cleaning the Device Wipe the unit with a soft damp cloth; avoid using harmful chemicals as this could potentially damage the housing or safety labels. © 2019 Brightwell Dispensers Limited. -
Page 35: Replacing Peristaltic Tubing
(Repeat steps 1-3 for the other pump head). Replace the outer lid in the reverse order as shown in step 1 and reconnect your container tubing. © 2019 Brightwell Dispensers Limited. -
Page 36: Troubleshooting
Change out interface board Ensure you have the correct code and re-try Pin code not accepted Contact Brightwell Customer service with your serial number for back up code Check power supply Check display for probe alarm if using a probe... -
Page 37: How To Connect A Third Pump
Then push together the two units making sure the locating pin at the top lines up with the receiving hole (b), push until they click together. Step 3: Now connect this cable to the PCB board (shown right). © 2019 Brightwell Dispensers Limited. - Page 38 Green Blue Step 3: Connect the buzzer provided in the kit to the Probe buzzer connector. Using the Velcro pad provided with the buzzer attach the buzzer above the probe cable entry gland as shown. © 2019 Brightwell Dispensers Limited.
- Page 39 Connecting the Probe to the Machine inch © 2019 Brightwell Dispensers Limited.
-
Page 40: Technical Specifications
Rinse: 0.1 – 1 fl.oz (BrightChem tube) Sanitizer 0.2 – 2.7 fl.oz (BrightChem tube) LG Lupol GP 3156F. White RAL9003 IP55 Rated. Enclosure Q200 4.5 lb Q200S 4.5 lb Weight Q300 6.6 lb Q300S 6.6 lb © 2019 Brightwell Dispensers Limited. - Page 41 Dimensions: Foot Print Q200 & Q200S 4 ½” 7 ¼” 8 ¼” Q300 & Q300S 4 ½” 10 ¾” 8 ¼” © 2019 Brightwell Dispensers Limited.
- Page 42 BS EN 62311: 2008 EMF Testing BS EN 62233: 2008 EMF Testing CSA Group Certificate of Compliance – Certificate Number 70123126 The Products Covered by this Certificate Quantura Q100 Quantura Q200 Quantura Q300 Quantura Q200S Quantura Q300S © 2019 Brightwell Dispensers Limited.
- Page 43 W tym celu należy je dostarczyć do wyznaczonego punktu zbiórki. Podilejme se na ochrane životniho prostředi ! Váš přístroj obsahuje četné zhodnotitelné nebo recyklovatelné materiály. Sveřte jej sbernému mistu nebo, neexistuje-li, smluvnimu servisnimu středisku, kde a nim bude naloženo odpovidajicim způsobem. © 2019 Brightwell Dispensers Limited.
- Page 44 Brightwell Dispensers Inc. 9567 Alden Street, Lenexa, Kansas, 66215, USA T (+1) 913-956-4909 F +(+1) 913-948-9470 E sales@Brightwell-inc.com W Brightwell-inc.com Registered in the USA...