
Related Manuals for Brightwell ECOMULTI STANDARD 4


Summary of Contents for Brightwell ECOMULTI STANDARD 4
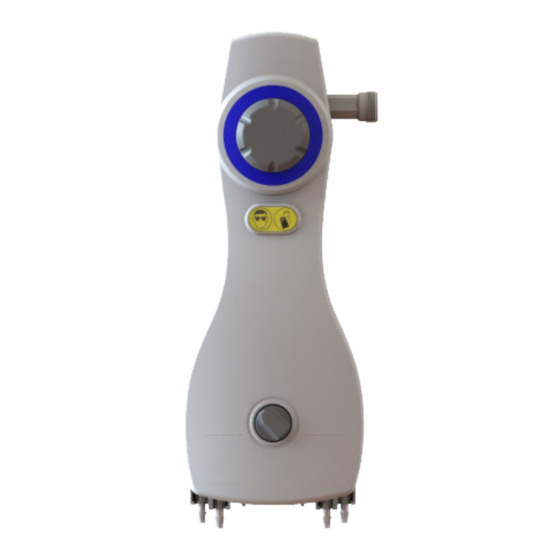
- Page 1 ECOMULTI STANDARD 4 CHEMICAL DISPENSER Instruction Manual www.brightwell.co.uk B1014- Revision 1.4 ECOMULTI STANDARD...
- Page 2 ECOMULTI STANDARD...
- Page 3 Table of contents Exploded Diagram ECOMULTI................................4 -7 Fix the dispenser to the wall.................................8- 9 Adjust the water inlet direction..................................10 Adjust the chemical dilution ..................................11 Select chemical entry....................................12 Finalise installation .....................................13- 14 Optional Configuration (Container/Cabinet).............................15 - 19 Warranty......................................20 - 21 Compliance/Maintenance..................................22 - 23 Troubleshooting....................................24- 26 Table des matières Schéma ECOMULTI......
- Page 4 Exploded diagram - ECOMULTI STANDARD ECOMULTI STANDARD...
- Page 5 Exploded diagram - ECOMULTI STANDARD Item Number Description Material Part Number No. pièce Description Matériau Numéro de pièce Artículo n.º Descripción Artículo n.º Número de pieza Teile Beschreibung Material Teilenummer Parte n° Descrizione Parte n° Codice articolo Dilution Pin Acetal Broche de dilution Disco de dilución Stellrädchen...
- Page 6 Exploded diagram - ECOMULTI STANDARD Item Number Description Material Part Number No. pièce Description Matériau Numéro de pièce Artículo n.º Descripción Artículo n.º Número de pieza Teile Beschreibung Material Teilenummer Parte n° Descrizione Parte n° Codice articolo Proportioner Pusher Poussoir du doseur Botón del dosificador Spenderdruckknopf Pulsante dosatore proporzionale...
- Page 7 Exploded diagram - ECOMULTI STANDARD Part Number Item Number Description Material No. pièce Description Matériau Numéro de pièce Artículo n.º Descripción Artículo n.º Número de pieza Teile Beschreibung Material Teilenummer Parte n° Descrizione Parte n° Codice articolo SBW8222 (x1) Proportioner Valve Acetal Vanne du doseur SBW8223 (x10)
- Page 8 Step 1 - Fix the dispenser to the wall Étape 1 - Pose du distributeur au mur Paso 1 - Colgar el dispensador en la pared Schritt 1 - Anbringen des Spenders an der Wand Fase 1 - Fissare l’erogatore alla parete To mount the unit, first remove the cover using the key provided (1.2), then unclip the non-return valves (1.3), release the retaining clips (1.4), and remove the venturi internals (1.5).
- Page 9 Step 1 - Fix the dispenser to the wall Étape 1 - Pose du distributeur au mur Paso 1 - Colgar el dispensador en la pared Schritt 1 - Anbringen des Spenders an der Wand Fase 1 - Fissare l’erogatore alla parete A drilling template is provided in the box for guidance on where to drill holes into the wall.
- Page 10 Step 2 - Adjust the water inlet direction Étape 2 - Ajustement de la direction de l’arrivée d’eau et combinaison des unités Paso 2 - Ajustar la dirección de entrada del agua y combinar las unidades Schritt 2 - Anpassung der Richtung für den Wasserzulauf Fase 2 - Regolare la direzione dell’ingresso dell’acqua e assemblare le unità...
- Page 11 Step 3 - Adjust the chemical dilution Étape 3 - Ajuster la dilution de produit Paso 3 - Ajuste la dilución química Schritt 3 - Position des Chemikalienzulaufs wählen Fase 3 - Selezionare l’ingresso del prodotto chimico Adjust the dilution using the corresponding referencing chart (B976) Réglez la broche de dilution en utilisant le tableau de référence correspondant (B976) Ajuste el disco de dilución usando el diagrama de referencia que corresponda (B976) Passen Sie das Verdünnungsverhältniss unter Berücksichtigung von Tabelle (B976) an...
- Page 12 Step 4 - Select chemical entry Étape 4 - Sélectionnez l’arrivée du produit chimique Paso 4 - Elija la entrada de producto químico Schritt 4 - Entscheiden Sie, wo sich der Chemikalieneingang befinden soll Fase 4 - Selezionare l’ingresso del prodotto chimico Chemical entry can be set from the bottom or sides.
- Page 13 Step 5 - Finalise Installation Étape 5 - Pour finaliser l’installation Paso 5 - Finalizar la instalación Schritt 5 - Abschluss der Installation Fase 5 - Finalizzare l’installazione Outlet tube / Tube de sortie / Tubo de salida / Outlet tube / Tube de sortie / Tubo de salida / Auslassschlauch / Tubo di uscita Auslassschlauch / Tubo di uscita...
- Page 14 Step 5 - Finalise Installation Turn & lock Push to release Push Tournez et Poussez pour libérer Poussez verrouillez Para soltarlo, vuelva Apriete el Gírelo para a apretarlo. botón hacia bloquear Drücken, um adentro Drehen und Arretierung zu lösen Drücken arretiere Premere per Spingere...
- Page 15 Step 6 - Optional Configuration Étape 6 - Configuration originale Paso 6 - Configuración opcional Schritt 6 - Optionale Konfiguration Fase 6 - Configurazione opzionale Drip Tray / Bucket Hook / Plateau d’égouttage / Bandeja antigoteo / Suspension pour seau / Gancho para Abtropfschale / Vaschetta raccogligocce cubos/ Eimerhaltehaken / Gancio per secchio Vaschetta If you are using the system for high flow rates,...
- Page 16 Step 7 - Configure a 5 - 20ltr container Étape 7 - Branchement d’un conteneur de 5 à 20 litres Paso 7 - Conectar un contenedor de 5 a 20 litros Schritt 7 - Anschluss eines Kanisters mit einem Fassungsvermögen von 5 - 20 Litern Fase 7 - Collegare un contenitore da 5-20 litri For containers, connect the...
- Page 17 Step 8 - Configure a Cabinet Étape 8 - Branchement du cabinet Paso 8 - Conectar un armario Schritt 8 - Anschluss eines Gehäuses Fase 8 - Collegare un armadietto To deliver chemical from the sides, drill out the optional side-entry holes on the cover and backplate.
- Page 18 Step 9 - Configure a Jerry Can Cabinet Étape 9 - Configuration d’un cabinet avec un jerrycan Paso 9 - Configurar un armario para bidones Schritt 9 - Kanister anbringen Fase 9 - Configurare un armadietto a tanica The clear PVC chemical suction tubes can go through either side of the cabinet. To change its direction, pull down gently on the tube connector, turn the tube around to the other side and clip back into place.
- Page 19 Step 10 - Configure a Pouch Cabinet Étape 10 - Pour configurer un cabinet avec une poche Paso 10 - Configurar un armario para bolsas Schritt 10 - Beutel anbringen Fase 10 - Configurare un armadietto a sacchetto 10.1 Angle Connector Raccord coudé...
- Page 20 La garantie ci-dessous est accordée par Brightwell Dispensers sous réserve des conditions suivantes : Brightwell Dispensers ne peut pas être tenu responsable d’aucun défaut sur un produit lié à un élément d’un concept/ dessin et/ou une spécification fourni(s) par l’acheteur.
- Page 21 La presente garanzia è fornita da Brightwell subordinatamente alle seguenti condizioni: Brightwell Dispensers non si assume alcuna responsabilità in merito a qualsiasi difetto derivante dai progetti, dai disegni e dalle specifiche tecniche forniti dal cliente. Brightwell Dispensers non si assume alcuna responsabilità in merito a qualsiasi difetto derivante da: normale deterioramento, danni intenzionali, incuria, condizioni operative anomale, mancato rispetto delle istruzioni di Brightwell Dispensers (verbali o scritte) o delle normali prassi del settore, uso improprio, alterazione o riparazione delle merci senza l’approvazione di Brightwell...
- Page 22 La responsabilité des installations et des taux de dilution corrects incombe à l’installateur. Se debe cumplir la normativa local de aguas sobre prevención de retroceso del flujo. Brightwell Dispensers no aceptará ninguna responsabilidad por la contaminación del agua, inundaciones o cualquier otro tipo de problema ocasionado por proporciones de dilución o instalaciones incorrectas.
- Page 23 Leistungsfähigkeit und/oder die Lebensdauer dieser Geräte auswirken, zudem können dadurch ausgestellte Garantien erlöschen. Per avere prestazioni efficienti continue è essenziale una manutenzione corretta e periodica dei nostri prodotti. Brightwell Dispens- ers raccomanda vivamente di pulire periodicamente la struttura interna del sistema con acqua calda. Verificare periodicamente l’eventuale presenza di tubi piegati.
- Page 24 Approvals Agréments / Homologaciones/ Zulassungen / Approvazioni Certificate Number 1311065 Installing in Australia or New Zealand All installations should be in accordance with AS/NZS 3500.1 Licence No. WMK25899 Specification: ATS5200.101 - 2005 Troubleshooting Issue Reason Solution No Water Flow Water not connected Check water connection Water valve has malfunctioned Replace valve...
- Page 25 Dépannage / Resolución de problemas Problème Motif Solution L’eau ne coule L’alimentation d’eau n’est pas Vérifiez l’arrivée d’eau. branchée. Remplacez la vanne. La vanne d’eau ne fonctionne pas Débloquez ou remplacez la pièce. correctement. Installez un régulateur sur l’alimentation d’eau. La sortie est bouchée.
- Page 26 Fehlerbehebung / Risoluzione dei problemi Problem Ursache Lösung Kein Kein Wasseranschluss Wasseranschluss überprüfen Wasserdurchfluss Wasserventil funktioniert nicht Ventil austauschen Ausgabeöffnung ist verstopft Verstopfung im Teil entfernen oder Teil Wasserdruck höher als 5 bar austauschen Wasserregler an Wasserleitung anpassen Einheit lässt sich nicht Arretierungsvorrichtung der Einheit wird Bedienknopf drücken, um abschalten...
- Page 27 1 Chemical Dispenser ECOMULTI COMPACT ECOMIX COMPACT 5 Chemical Dispenser 2 Chemical Dispenser Contact us / Contactez-nous / Póngase en contacto / Wenden Sie sich an uns / Contattateci sales@brightwell.co.uk www.brightwell.co.uk +44 (0)1273 513566 @brightwell_disp Brightwell Dispensers Ltd ECOMULTI STANDARD...
- Page 28 Head Office Brightwell Dispensers Ltd Brightwell Industrial Estate Norton Road Newhaven East Sussex BN9 0JF Tel: +44 (0)1273 513566 Fax: +44 (0)1273 516134 sales@brightwell.co.uk www.brightwell.co.uk A Bright-Tech Investments Company...