Table of Contents
Advertisement
• Atari VCS Video Computer System Manual
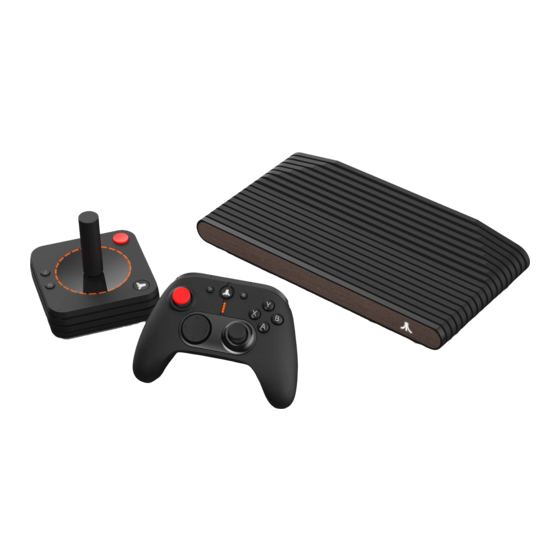
• Atari VCS Video Computer System
• Power supply
• Power cord
• HDMI cable
Atari VCS bundles may also include an Atari Wireless Modern Controller and/or an Atari
Wireless Classic Joystick. You may also use third-party controllers that are Xbox or PC
compatible, as well as a keyboard and mouse.
In order to set-up the Atari VCS for the first time we recommend using a compatible
controller.
Advertisement
Table of Contents

Related Manuals for Atari VCS


Summary of Contents for Atari VCS
- Page 1 Atari VCS bundles may also include an Atari Wireless Modern Controller and/or an Atari Wireless Classic Joystick. You may also use third-party controllers that are Xbox or PC compatible, as well as a keyboard and mouse. In order to set-up the Atari VCS for the first time we recommend using a compatible controller.
- Page 2 Atari VCS on top of something that generates heat. And avoid putting anything directly behind the vents at the back corners of the Atari VCS. The Atari VCS is designed to be displayed openly and device performance will also benefit from placement in a well- ventilated location.
- Page 3 3. Plug the other end of the power cord into an electrical outlet. Press and hold the power button on the rear left of the Atari VCS until the Atari Fuji logo on the right of the front panel is illuminated.
- Page 4 1. L’appareil ne doit pas produire de brouillage; 2. L’appareil doit accepter tout brouillage radioélectrique subi, même si le brouillage est susceptible d’en compromettre le fonctionnement. • Atari VCS Wireless Classic Joystick User Manual • Atari VCS Wireless Classic Joystick • USB Play/Charge Cable...
- Page 5 • Bluetooth wireless • Rechargable • PC/Mobile compatible • Rumble...
- Page 6 1. Power on your Atari VCS. 2. Wait for the Atari logo animation to finish playing. 3. You will see a flashing blue icon on the screen to indicate that the VCS is seeking a connection. 4. Press and Hold the Atari Fuji logo button on the joystick until the Fuji flashes quickly indicating it is pairing, after a few seconds you will see a message on your monitor that the Atari VCS has recognized and connected to the joystick.
- Page 7 USB Play/Charge cable. Plug the male mini-USB connector into the controller, and plug the male USB connector into any available USB port on the Atari VCS. You can also charge the controller via the USB port on a computer, and most standard USB wall chargers.
- Page 8 Playing video games can make your muscles, joints, skin or eyes hurt. Follow these instructions to avoid problems such as tendinitis, carpal tunnel syndrome, skin irritation or eye strain: • Avoid excessive play. Take a 10 to 15 minute break every hour, even if you don’t think you need it.
- Page 9 1. L’appareil ne doit pas produire de brouillage; 2. L’appareil doit accepter tout brouillage radioélectrique subi, même si le brouillage est susceptible d’en compromettre le fonctionnement. • Atari Wireless Modern Control User Manual • Atari VCS Wireless Modern Controller • USB Play/Charge Cable •...
- Page 11 1. Power on your Atari VCS. 2. Wait for the Atari logo animation to finish playing. 3. You will see a flashing blue icon on the screen to indicate that the VCS is seeking a connection. 4. Press and Hold the Atari Fuji logo button on the controller until you see a message on your monitor that the Atari VCS has recognized and connected to the controller.
- Page 12 The Atari VCS Wireless Modern Controller is designed to work with the Atari VCS, but is also compatible with most PCs, mobile devices and Xbox consoles. The Atari VCS Modern Controller can also emulate an Xbox One controller. To enter Xbox Mode press and hold the BACK and CONTEXT MENU buttons simultaneously for five seconds.
- Page 13 5. Press the left trigger all the way down three times. PRess the right trigger all the way down three times. 6. Press both the "D-PAD Down" and "Y" button at the same time to save and exit the calibrate mode. Playing video games can make your muscles, joints, skin or eyes hurt.
- Page 14 • Connect the equipment into an outlet on a circuit different from that to which the receiver is connected. • Consult the dealer or an experienced radio/ TV technician for help. This Class B digital apparatus complies with Canadian ICES-003. This device contains license-exempt transmitter(s)/receiver(s) that comply with Innovation, Science and Economic Development Canada’s licence-exempt RSS(s).
Need help?
Do you have a question about the VCS and is the answer not in the manual?
Questions and answers