Table of Contents
Advertisement
Advertisement
Table of Contents

Related Manuals for Atari THE 400 MINI


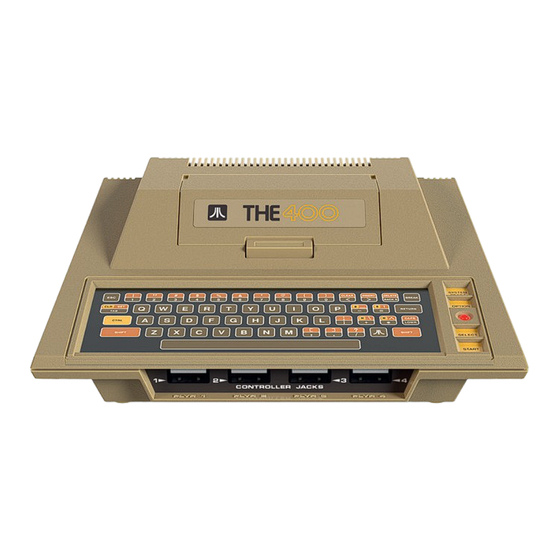
Summary of Contents for Atari THE 400 MINI
- Page 1 USER MANUAL...
- Page 2 THE400 is a registered trademark of Retro Games Ltd. THE400 © 2024 Retro Games Ltd. © 2024 Atari Interactive, Inc. ATARI, the ATARI logo and all individual Atari game names and logos are trademarks of Atari Interactive, Inc. in the U.S. and other countries.
-
Page 3: Table Of Contents
Atari model ........ - Page 4 Configuring games that use joysticks ........23 Assigning joystick actions .
-
Page 5: Precautions
• Do not touch THE400 Mini or any tures may be different from when To reduce the chance of injury due to connected cables during an electri- originally played on an Atari 8-bit repetitive motion: cal storm. computer. • Do not power off THE400 Mini •... - Page 6 POWER INDICATOR PLAYER ONE USB PORT PLAYER TWO USB PORT PLAYER THREE USB PORT PLAYER FOUR USB PORT...
-
Page 7: Introduction
Atari 8-bit range, plus you can easily play any Atari 8-bit games you own from a USB stick. So whether you are new to Atari 8-bit gaming or a seasoned pro, with THE400 Mini it has never been so much fun! -
Page 8: Setting Up The400 Mini
SETTING UP THE400 MINI UNPACKING THE BOX Before connecting any cables, check the contents of the packaging: • THE400 Mini • THECXSTICK USB joystick • HDMI cable • USB power cable • THE400 Mini Quick Guide QRCode You will also need to have the following items available (not included): •... -
Page 9: First-Time Setup
FIRST-TIME SETUP The first time you turn on THE400 Mini you will be asked a few questions about some essential settings needed to get you going with your new THE400 Mini. To navigate these menus, use THECXSTICK and follow the on-screen prompts and button hints displayed at the bottom of the screen. -
Page 10: Television Settings
TELEVISION SETTINGS To complete the set up, THE400 Mini will ask you to choose the video output requirement of your television, either 50 or 60 Hz. Move the selector to the required video output mode and select it by pressing Before you can proceed, you must test and confirm that your TV will work with the chosen video output mode by pressing . -
Page 11: The Game Carousel
THE GAME CAROUSEL Current game title Current game description Current game information icons Number of players icon This shows for single player games, for two player games, and for games that can have more than two players. Favourite stars This shows the number of favourite stars you have given this game. Saved games indicator This shows whether any saved games have been stored for this game. -
Page 12: Selecting A Game
SELECTING A GAME to scroll through the carousel and select the game you want. As each game is selected, the game title, description and information icons displayed at the top-left of the screen will update accordingly. GIVE A GAME A FAVOURITE RATING Press to add a favourite star to the current game. -
Page 13: Exiting And Suspending A Game
EXITING AND SUSPENDING A GAME To suspend a game and return to the Game carousel, press or the power button once. A miniaturised view of the suspended game will appear floating in the top-right corner of the screen. Tip: Try not to suspend a game while in the middle of an intense action phase, as this can result in a game that is difficult to play when resumed. -
Page 14: Using The Virtual Keyboard
H + M of the screen. This allows you to virtually press any of the standard Atari 8-bit keyboard keys. While the virtual keyboard is in operation the game will not respond to THECXSTICK. This is most useful for typing, for example entering your name for a high score table. -
Page 15: Saving And Loading Suspended Games
SAVING AND LOADING SUSPENDED GAMES Pressing will show the Saved game slots for the current game, where you can save a suspended game or resume a previously saved game. Each game has four slots for saved games, represented by four cartridges. Filled saved game slot Empty saved game slot Elapsed game time... -
Page 16: Locking/Unlocking A Saved Game Slot
If the current game is not suspended, the selector will automatically move down to one of the occupied game slots. Press to select the saved game you wish to resume, and press to load it. Note: Loading a previously saved game will discard a suspended game that is unsaved. LOCKING/UNLOCKING A SAVED GAME SLOT Move the selector to one of the occupied saved game slots and press to lock that slot. -
Page 17: Options
OPTIONS Press on the game carousel to show the Options menu. These options control the operation of the entire console. Move the selector with and press to select a menu option. Press to back out of any menu. -
Page 18: Display Options
DISPLAY OPTIONS This menu contains options to control how a game’s image is displayed on the TV. Choose one of these two display modes to change how THE400 Mini displays the game image. 4:3 / Pixel perfect This presents the gameplay with the same aspect ratio seen on an original television display, where pixels are slightly taller than they are wide. -
Page 19: Choose Frame
CHOOSE FRAME To remove the black border surrounding the gameplay area, you can choose to have the gameplay displayed within an attractive background. Select Choose frame to reveal a carousel of frame images that you can browse using Press to select an image, which will change the frame around the example screenshots shown above. When you are happy with your chosen frame, press to return to the Display options menu. -
Page 20: Language
LANGUAGE This menu allows you to change the language THE400 Mini uses to display the game descriptions and menus. The choices are English, Deutsch, Français, Italiano, Español and Polski. It does not affect the 25 included games, which are in English. ADVANCED OPTIONS This menu contains options for more advanced users and rarely used functions. -
Page 21: System Options
SYSTEM OPTIONS This menu controls system settings, and allows you to adjust the volume level of the menu music. This does not affect the volume of a game’s audio. To increase the level of the volume slider press , and to decrease the volume slider press SYSTEM INFORMATION This shows THE400 Mini’s current firmware build, and will also allow you to upgrade to a newer firmware build if one is present on an inserted USB stick (see “Updating the firmware”... -
Page 22: Loading Your Own Programs
Selecting the USB Media Access carousel item will launch a file browser that you can use to navigate to and load your own program files. Folders and files with the following Atari media file extensions will be shown: Type File extension .cas... -
Page 23: Cartridge File Support
Current media filename. CARTRIDGE FILE SUPPORT Software cartridges produced for the Atari 8-bit computer range often had different extended capabilities, such as more memory or other features. When loading a cartridge file, THE400 Mini will automatically detect the type of cartridge to enable these capabilities. -
Page 24: Saving Or Loading A Suspended Usb Stick Program
Being relative paths, you can move this around easily so long as the example ATR Files folder stays at the same level as the playlist file. Note: The playlist file paths use forward-slash (‘/’) as the path separator, not the Windows backslash (‘\’). To launch a game through its playlist, choose it in the usual way by navigating to it with , select it with and then launch... -
Page 25: Atari Model
ATARI MODEL This option allows you to select the Atari home computer model on which you wish to run the selected program. The default is the Atari 800, as a great many programs will run on this model. Changing computer model will affect the control type options that are available. -
Page 26: Configure The Control Ports
CONFIGURE THE CONTROL PORTS The original Atari 8-bit computers supported joysticks and paddles, with the last in the series, the 5200, using its own proprietary analog stick controller. The Game settings menu allows you to specify the controller type expected by the program, and is applied to all four joystick ports. -
Page 27: Configuring Games That Use Joysticks
Assigning keyboard actions to THECXSTICK follows the same process as assigning joystick actions. THE400 Mini will display a representation of an Atari keyboard and allow keys to be assigned to THECXSTICK buttons. Note: You can only assign a single key to a stick button. -
Page 28: Configuring Games That Use Paddles
CONFIGURING GAMES THAT USE PADDLES For games that are played with an Atari Paddle, select Paddle for the Control type option. THE400 Mini will automatically assign joysticks connected to player ports 1, 2, 3 and 4 to paddle inputs 1, 2, 3 and 4. -
Page 29: Assigning Paddle Actions
Assigning keyboard actions to THECXSTICK follows the same process as assigning joystick actions. THE400 Mini will display a representation of an Atari keyboard and allow keys to be assigned to the THECXSTICK buttons. Note: You can only assign a single key to a stick button. -
Page 30: Configuring 5200 Games
CONFIGURING 5200 GAMES When running games for the Atari 5200 console, the Control type option will automatically be set to 5200 stick. Since the 5200 only supported two controllers, only player ports 1 and 2 will be used. ANALOG SPEED When the player is using a non-analog controller, this option sets how quickly the emulated 5200 stick moves in any direction when the controller is pushed in a direction. -
Page 31: Assigning 5200 Controller Actions
ASSIGNING 5200 CONTROLLER ACTIONS While editing, THE400 Mini positions a light blue indicator over the THECXSTICK button currently being assigned. For this button: • To change the assigned action, use to select the 5200 controller action or button you want to assign and press •... -
Page 32: Thecxstick
THECXSTICK SWITCHING TO LEFT HANDED MODE To switch THECXSTICK into left handed mode, simultaneously press . This will change the directions of M + S + L the control stick so you can rotate the THECXSTICK 90 degrees clockwise and hold it with your right hand, with the red fire button with your right thumb. -
Page 33: Advanced Features
(See “Loading your own programs” [page 18]). THE400 Mini will have written a special disk file named THE400_BASIC onto the USB stick, which when launched will give you a BASIC prompt, Atari DOS and a disk onto which you can save and load programs. -
Page 34: To Update The Firmware
TO UPDATE THE FIRMWARE 1 Visit retrogames.biz/support/the400-mini/upgrade and check if the latest version on the website is greater than that reported by THE400 Mini. 2 If a later firmware is available, download it. 3 Copy the firmware onto the root folder of a FAT32 MBR formatted USB stick. Do not place it in a folder. 4 Insert the USB stick into your THE400 Mini. -
Page 35: Using Your Own Peripherals
If you plug any standard USB keyboard into one of THE400 Mini’s USB ports, that keyboard will function much like an original Atari 8-bit keyboard. Some Atari 8-bit keyboard keys do not exist on a modern USB keyboard, so are mapped to an alternative key as listed here: Atari 8-bit key... -
Page 36: Troubleshooting
TROUBLESHOOTING POWER INDICATOR DOES NOT LIGHT To turn on THE400 Mini, press the power button once. If after a few seconds the power indicator does not light and you see nothing on the TV, check that you are using a suitable 5V/1A (5W) USB power adapter, and that the power adapter is working. -
Page 37: I Have Chosen A Video Output Mode That Is Not Supported By My Tv
This is normal. THE400 Mini contains a powerful processor that works very hard to recreate the authentic gaming experi- ence of the original Atari 8-bit computer, and in doing so it generates a little heat. THE400 Mini contains a lot of vents on the upper, rear, and lower surfaces of the case for this reason, and it is important not to block or impede this ventilation (see “Ventilation”... - Page 38 Copyright © 2024 Retro Games Ltd. THE400 Mini User Manual – v1.0.0...
Need help?
Do you have a question about the THE 400 MINI and is the answer not in the manual?
Questions and answers