Table of Contents
Advertisement
Quick Links
Advertisement
Table of Contents
Troubleshooting

Related Manuals for Vollrath STOELTING CF101


Summary of Contents for Vollrath STOELTING CF101
- Page 1 Model CF101 SERVICE MANUAL Manual No. 513644 Mar. 2009...
- Page 3 This manual provides basic information about the machine. Instructions and suggestions are given covering its operation and care. The illustrations and specifi cations are not binding in detail. We reserve the right to make changes to the machine without notice, and without incurring any obligation to modify or pro- vide new parts for machines built prior to date of change.
- Page 4 A Few Words About Safety Safety Information Safety Alert Symbol: Read and understand the entire manual before This symbol Indicates danger, warning or caution. operating or maintaining Stoelting equipment. Attention is required in order to avoid serious per- sonal injury. The message that follows the symbol This manual provides the operator with information contains important information about safety.
-
Page 5: Table Of Contents
TABLE OF CONTENTS Section Description Page Description and Specifications Description ....................1 Specifications ..................... 2 Installation Instructions Safety Precautions ..................3 Shipment and Transit ................. 3 Machine Installation ................... 3 Initial Set-Up and Operation Operator’s Safety Precautions ..............5 Operating Controls and Indicators ............. 5 Sanitizing .................... - Page 6 Section Description Page Refrigeration System Refrigeration System ................. 17 Refrigerant Recovery and Evacuation ............17 Refrigerant Charging .................. 18 Compressor ....................19 Condenser ....................20 Evaporator ....................20 Valves ......................20 Thermostatic Expansion Valve (TXV) ..............20 Check Valve ......................21 High Pressure Cutout ..................
-
Page 7: Description And Specifications
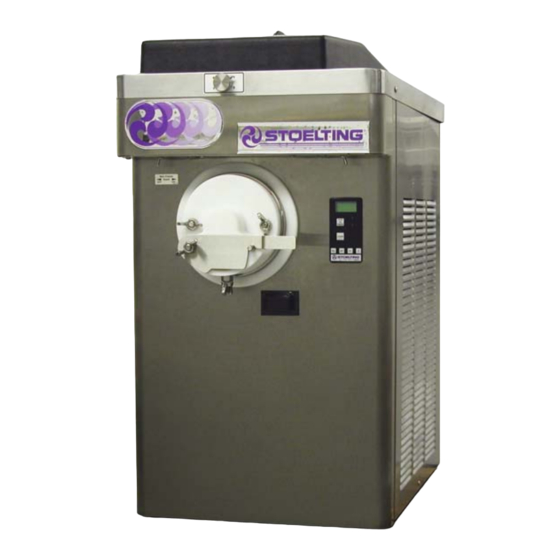
SECTION 1 DESCRIPTION AND SPECIFICATIONS DESCRIPTION The CF101 is a counter top continuous flow custard machine. It is equipped with fully automatic controls to provide a uniform product and features Quick-Freeze technology. This manual is designed to assist qualified service personnel and operators in the installation, opera- tion and maintenance of the CF101 frozen custard ma- chine. -
Page 8: Specifications
SPECIFICATIONS CF101 Dimensions Machine with crate 19-1/2'' (49,5 cm) 38-3/4'' (98,4 cm) width 37-3/4'' (95,9 cm) 28-3/4'' (73,0 cm) height 28'' (71,1 cm) 43'' (109,2 cm) depth Weight 310 lbs (140,6 kg) 380 lbs (172,3 kg) Electrical 1 Phase, 208-240 VAC, 60Hz NEMA6-20P power cord provided connection type Compressor... -
Page 9: Installation Instructions
SECTION 2 INSTALLATION INSTRUCTIONS 2.1 SAFETY PRECAUTIONS Do not attempt to operate the machine until the safety precautions and operating instructions in this manual are read completely and are thoroughly understood. Take notice of all warning labels on the machine. The labels have been put there to help maintain a safe working environment. -
Page 11: Initial Set-Up And Operation
SECTION 3 INITIAL SET-UP AND OPERATION 3.1 OPERATOR’S SAFETY PRECAUTIONS 3.2 OPERATING CONTROLS AND INDICATORS SAFE OPERATION IS NO ACCIDENT; observe these Before operating the machine, it is required that the rules: operator know the function of each operating control. Refer to Figure 3-1 for the location of the operating Know the machine. -
Page 12: Sanitizing
Product Selector Switch Push to Freeze The product selector switch changes the Green LED refrigeration profile to allow two different products to be made. Before the machine is in ready mode, Amber LED this switch can be moved to the desired profile. Purge/Clean PUSH TO FREEZE Button Button... -
Page 13: Freeze Down And Operation
Mix sanitizer according to manufacturer’s instructions to When the sanitizer has drained from the hopper, provide a 100 parts per million strength solution. Mix press and hold the PURGE/CLEAN button for 3 sanitizer in quantities of no less than 2 gallons (7.5 liters) seconds to stop the beater shaft. -
Page 14: Mix Information
position. A small amount of mix and remaining 3.6 REMOVING MIX FROM MACHINE sanitizer will drain from the machine. To remove the mix from the machine, refer to the following Turn the flow control knob between the 1:00-2:00 steps. Make sure the gate on the faceplate is open. position for vanilla or between the 5:00-6:00 for Press the PURGE/CLEAN button. -
Page 15: Cleaning The Machine Parts
To disassemble the machine, refer to the following steps: NOTE The United States Department of Agriculture and the Food and Drug Administration require that lu- CAUTION bricants used on food processing equipment be cer- tified for this use. Use lubricants only in accordance Hazardous Moving Parts with the manufacturer’s instructions. -
Page 16: Routine Cleaning
IT IS BEST TO CONTROL MILKSTONE ON A DAILY BASIS BEFORE IT CAN BECOME A SIGNIFICANT FOOD SAFETY PROBLEM. In addition to food safety, milkstone can cause premature wear to machine parts which can add to costs for replace- ment parts or possibly more expensive repairs if worn machine parts are not replaced once they have become excessively worn. - Page 17 solution soak in the machine for an extended The ideal concentration of chlorine needs to be 100 ppm period. Individual parts are also soaked in a (as stated by the FDA). deliming solution for an extended period (more NOTE about delimers in Additional Information). Follow the directions on the container for proper con- SANITIZING –...
-
Page 19: Maintenance And Adjustments
SECTION 4 MAINTENANCE AND ADJUSTMENTS MACHINE ADJUSTMENT Modifying Control Settings To change the value of a setting, locate it on the IntelliTec This section is intended to provide maintenance person- Menu Settings sheet and follow the steps below. nel with a general understanding of the machine adjust- ments. -
Page 20: Settings (Service Personnel Only)
Supply V (VAC) SETTINGS (SERVICE PERSONNEL ONLY) The input voltage is recorded. Changing any setting on the IntelliTec control will alter ERROR CODE READINGS machine operation and affect the product temperature, The following details are recorded under the ERRCODES consistency, or life. Refer to the IntelliTec Menu Settings menu for each of the last 25 error codes received: sheet located in the information pouch behind the header Err1 (hours) -
Page 21: Drive Belt Tension Adjustment
STAND BY MENU: PREVENTATIVE MAINTENANCE Cut In T (°F) It is recommended that a maintenance schedule be fol- lowed to keep the machine clean and operating properly. This setting determines when refrigeration will start during Stand By Mode. A. DAILY Cut Out T (°F) The exterior should be kept clean at all times to preserve the luster of the stainless steel. -
Page 22: Extended Storage
Clean Condenser and Filter D. SEMI-ANNUALLY The air-cooled condenser is a copper tube and aluminum fin type. Condensing is dependent upon airflow. A plugged WARNING condenser filter or restrictions in the louvered panel will High voltage will shock, burn or cause death. Turn restrict airflow. -
Page 23: Refrigeration System
SECTION 5 REFRIGERATION SYSTEM 5.1 REFRIGERATION SYSTEM The CF101 refrigeration system has two functions: WARNING Medium-Temperature - Maintaining product temperature in the hopper. Hazardous voltage The Main Freezer Power switch must be placed in Low-Temperature - Producing and maintaining the OFF position when disassembling for servic- high quality custard in the freezing cylinder. -
Page 24: Refrigerant Charging
Turn the Main Power OFF/ON switch and Freezing 5.3 REFRIGERANT CHARGING Cylinder OFF/ON switches to the ON position. Refer to the following procedures to properly charge the Press the Push To Freeze button on the IntelliTec refrigeration system. Stoelting recommends liquid refrig- control. -
Page 25: Compressor
5.4 COMPRESSOR B. COMPRESSOR REMOVAL Disconnect the machine from electrical supply The CF101 has a hermetic reciprocating compressor before removing any panels for servicing. (Refer to Figure 5-3). Gently pry the white plastic ring off of the freezing cylinder on the front of the machine. Remove the front panel screws. -
Page 26: Condenser
Install the four rubber mounts on the compressor. 5.7 VALVES Install the compressor into the machine, fitting the A. Thermostatic Expansion Valve (TXV) base over the four bolt holes. The Thermostatic Expansion Valve (TXV) is used to meter Install the four washers and nuts onto the bolts the refrigerant to the evaporator. -
Page 27: Check Valve
TXV Removal NOTE Disconnect the machine from electrical supply Good contact between the bulb and the suction line before removing any panels for servicing. is necessary for proper operation of the valve. The bulb must also be well insulated. Gently pry the white plastic ring off of the freezing cylinder on the front of the machine. -
Page 28: High Pressure Cutout
C. High Pressure Cutout The high pressure cutout stops the compressor if the discharge pressure reaches 445 psig (Refer to Figure 5- Figure 5-7 High Pressure Cutout Figure 5-8 Hot Gas Bypass High Pressure Cutout Test Connect a gauge to the access fitting on the Hot Gas Bypass Adjustment discharge line. -
Page 29: Evaporator Pressure Regulator (Epr)
Leave the suction and discharge ports open to EPR Removal prevent pressure buildup during hot gas bypass Remove the side panel. removal. Recover refrigerant charge per instructions in Apply a heat sink (wet cloth) to the hot gas bypass. Section 5.2. Unsweat the hot gas bypass and remove. - Page 30 Connect power to the machine. Solenoid Magnetic Coil Installation Turn the Main Power OFF/ON switch to the ON To replace the magnetic coil, perform the following proce- position. dures: Press the Push To Freeze button the IntelliTec Connect the two electrical wires to the magnetic control.
-
Page 31: Filter Drier
5.9 FILTER DRIER The filter drier must be replaced every time the refrigera- tion system is opened for service. A new filter drier improves operation of the entire refrigeration system by stopping the circulation of moisture and by removing harmful contaminants (Refer to Figure 5-11). Figure 5-12 Capillary Tube Remove foam insulation from the capillary tube at the evaporator inlet. -
Page 33: Electrical And Mechanical Control Systems
SECTION 6 ELECTRICAL AND MECHANICAL CONTROL SYSTEMS NOTE The wiring diagram is available in Section 8. INTELLITEC CONTROLLER The IntelliTec control is Stoelting’s most advanced con- troller. It combines all of the best features of previous controllers with advanced sensing and troubleshooting capabilities. -
Page 34: Drive Motor
A. CONTACTOR TESTS Remove the rear panel and the left side panel. The following tests will show if a contactor is working Remove the belt tension adjustment nut and properly. remove the belt. Remove the right panel and visually check the Remove the two bolts on the motor mounting IntelliTec control board. -
Page 35: Capacitors
Test for proper belt tension by pressing firmly on Disconnect the bleeder resistor from the circuit. the belt with an index finger. When the tension is Measure capacitance across the terminals. The properly adjusted, the belt should depress results should be as follows: approximately 3/8”... -
Page 36: Condenser Fan Motor
CONDENSER FAN MOTOR A. FAN MOTOR REPLACEMENT Mounting Brackets Disconnect machine from electrical supply before removing any panels for servicing. WARNING Tighten to 25 ft-lb Hazardous voltage The Main Freezer Power switch must be placed in the OFF position when disassembling for servic- ing. -
Page 37: Troubleshooting Error Codes
SECTION 7 TROUBLESHOOTING 7.1 ERROR CODES Error Code 3 - Run Time When the machine experiences a problem, one of the The Run Time Error (E3) occurs when the following error codes will be displayed on the control panel. compressor runs continuously for an extended Each error code directs you to the system location of the period. - Page 38 Error Code 5 - Freezing Cylinder Sensor the resistance of the sensor, place a thermocouple on the suction line at the exit of the freezing The Freezing Cylinder Sensor Error (E5) indicates cylinder. Compare temperature and sensor a failure of the freezing cylinder sensor or if the resistance with the table as reference.
-
Page 39: Troubleshooting Tables
7.3 TROUBLESHOOTING PROBLEM POSSIBLE CAUSE REMEDY 1. Flow is not high enough. 1. Increase the flow. Machine needs to run for at least a minute before you see a change in the Custard is running too cold or beater product. shaft blades 2. -
Page 41: Replacement Parts
SECTION 8 REPLACEMENT PARTS 8.1 DECALS AND LUBRICATION Part Description Quantity C-2000-57 Wrench - Beater Shaft O-Ring Pick 208135 Brush - 4" X 8" X 16" (Barrel) 208401 Brush - 1" X 3" X 10" 236048 Card - Cleaning Instruction 396243 Gasket - Freezer Base 490716... -
Page 42: Beater Shaft And Faceplate Parts
8.3 BEATER SHAFT AND FACEPLATE PARTS M-MC101-09 SL-0010 M-MC101-06 2187602 625140 C-4000-20 149003 149014 149015 336562 NT-0010 2183948 Part Description Quantity C-2000-40 Wearguard - Beater Shaft (Ser. #0 - #26918) C-4000-19 Slide - Long (Chute) C-4000-20 Slide - Short (Chute) M-MC101-06 Spring - Auger Blade M-MC101-09... -
Page 43: Hopper Parts And Trays
8.4 HOPPER PARTS AND TRAYS 314484 630049-SV 754038 744276 Part Description Quantity 314484 Cover - Hopper 417010 Grid - Drip Tray 630049-SV Rod - Flow Control 744276 Tray - Drain 744287 Tray - Drip 754038 Tube - Flow Control (Hopper) -
Page 44: Electrical Panel
8.5 ELECTRICAL PANEL 618142 230633 295112 231079 744142 521686-CUS Part Description Quantity 230633 Capacitor - Run (60 Hz Compressor) 231046 Capacitor - Start (50 Hz Compressor) 231047 Capacitor - Run (50 Hz Compressor) 231079 Capacitor - Start (60 Hz Compressor) 295112 Contactor 521686-CUS... -
Page 45: Front
8.6 FRONT 718532 C-9000-54 332541 2187014 719098-SV 762481 608011 282055 Part Description Quantity C-9000-54 Shim - Gearbox 282055 Compressor - Copeland (60 Hz) 282056 Compressor - Copeland (50 Hz) 332541 Board - Display Module 608011 Receiver (Ser. #26919 Plus) 718532 Switch - Toggle 719098-SV Switch - Membrane Strip... -
Page 46: Rear
8.7 REAR 614219 284084 598632 152307 522797 162077 598103 430119 522861 Part Description Quantity 152307 Belt - AX38 (60 Hz) 152323 Belt - Gripnotch (AX39) (Each) (50 Hz) 162077 Blade - Fan (Air-Cooled Condenser) 284084 Condenser (Air-Cooled) 368140 Filter - Air 430119 Cord - Power 522797... -
Page 47: Left Side
8.8 LEFT SIDE 2183925 762978 718794 763423 458003 231108 763017 763422 763482 324004 Part Description Quantity C-5000-66 Flange - Bushing (Ser. #27432 - #27788) C-5000-67 Nut - Flange Bushing (Ser. #27432 - #27788) 231108 Cap Tube Only 342004 Drier 458003 Indicator - Liquid Line 718794 Switch - High Pressure... - Page 49 WARRANTY CUSTARD EQUIPMENT AND BATCH EQUIPMENT 1. Scope: PW Stoelting, L.L.C. (“Stoelting”) warrants to the first user (the “Buyer”) that the freezing cylinders, hoppers, compressors, drive motors, speed reducers, beaters, and auger shafts of Stoelting custard equipment and batch equipment will be free from defects in materials and workmanship under normal use and proper maintenance appearing within two (2) years, and that all other components of such equipment manufactured by Stoelting will be free from defects in material and workmanship under normal use and proper maintenance appearing within twelve (12) months after the date that such...
Need help?
Do you have a question about the STOELTING CF101 and is the answer not in the manual?
Questions and answers