Advertisement
Table of Contents
- 1 I N S T a L L a T I O N a N D S E C U R I T y
- 2 Starting up the Unit
- 3 O P E R a T I N G T H E C O N T R O L U N I T
- 4 " T E M P E R a T U R E " M E N U
- 5 " B O O S T " M E N U
- 6 " W E E K T I M E R " M E N U
- 7 Alarms Menu
- 8 Settings Menu
- 9 Other Functions
- 10 Technical Data
- 11 Sound Data
- 12 Spare Parts
- 13 Error Detection
- 14 Ec Declaration of Conformity
- Download this manual
Advertisement
Table of Contents

Related Manuals for OSTBERG HERU 62 T


Summary of Contents for OSTBERG HERU 62 T
- Page 1 Bruksanvisning Directions for use HERU 62 T, HERU 90 T, HERU 90 T EC 2 ® ® ® HERU ® 115 T, HERU ® 130 T EC, HERU ® 140 T HERU ® 50 S 2A, HERU ® 75 S 2A, HERU ®...
- Page 2 I N N E H Å L L C O N T E N T S AGGREGATBESKRIVNING ....3 UNIT DESCRIPTION ..... . .71 INSTALLATION OCH SÄKERHET .
- Page 3 This ”Direction for use” contains following products: HERU 62 T, HERU 90 T, HERU 90 T EC 2, HERU 115 T, ® ® ® ® HERU ® 130 T EC, HERU ® 140 T, HERU ® 50 S 2A, HERU ®...
-
Page 4: I N S T A L L A T I O N A N D S E C U R I T Y
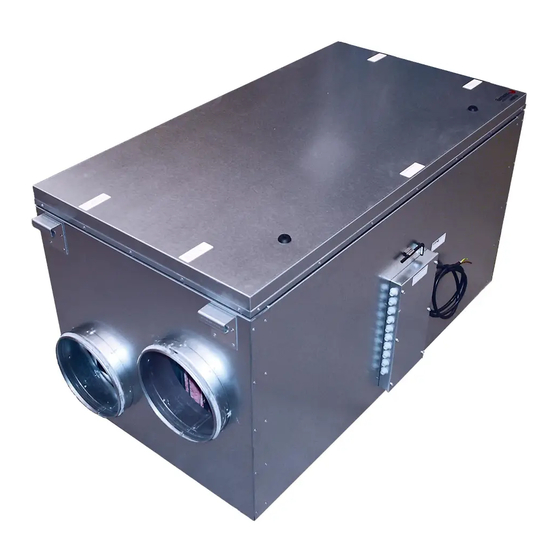
I N S T A L L A T I O N A N D S E C U R I T Y U S E • Use duct clamp or flange with encompassing insu- • When installing HERU ® consideration must be lation when connecting to duct. - Page 5 P L A C I N G T H E H E R U ® T U N I T ® The HERU T should be installed with the duct connections upwards (A) but can also be placed decumbently (B). We do not recommend installing the unit on one side (C), with the duct connections (D) or lid downwards (E).
- Page 6 S C H E M AT I C D I A G R A M F O R H E R U ® T E C P L A C E D I N A W A R M S PA C E S C H E M A T I C D I A G R A M F O R H E R U ®...
- Page 7 A S S E M B L Y I N S T R U C T I O N F O R H E R U ® 9 0 T E C 2 Mount the unit with concomitant rubber cushions and adequate screws for the foundation. NB! The concomitant rubber cushions can be compressed to a thickness of maximum 10 mm.
- Page 8 A S S E M B L Y I N S T R U C T I O N F O R H E R U 1 3 0 T E C ® Mount the unit with concomitant rubber cushions and adequate screws for the foundation. NB! The concomitant rubber cushions can be compressed to a thickness of maximum 10 mm.
- Page 9 A S S E M B L Y I N S T R U C T I O N F O R H E R U ® INSULATING BOARD min. 50 mm E.G. PLYWOOD TIGHTENED TO JOISTS...
-
Page 10: Starting Up The Unit
S T A R T I N G U P T H E U N I T NB! Important information before starting! Carefully read through the manual before starting • Important when adjusting the flow: Go to Service up the unit. Menu (password 1199), choose “AC -motor setup”... - Page 11 C O N T R O L D I A G R A M H E R U ® T shows all sensors H E R U ® 9 0 T E C 2 : H E R U ® 6 2 T , H E R U ®...
- Page 12 C O N T R O L D I A G R A M H E R U S shows all sensors ® W I R I N G D I A G R A M for electrical duct heater Duct heater 2-phase 400 V.
- Page 13 W I R I N G D I A G R A M 4 0 4 0 1 1 8 HERU ® 62 T/90 T...
- Page 14 W I R I N G D I A G R A M 4 0 4 0 1 4 1 HERU ® 90 T EC 2...
- Page 15 W I R I N G D I A G R A M 4 0 4 0 1 2 0 HERU ® 115 T/140 T...
- Page 16 W I R I N G D I A G R A M 4 0 4 0 1 3 6 HERU ® 130 T EC...
- Page 17 W I R I N G D I A G R A M 4 0 4 0 1 0 6 HERU ® 50 S A2/75 S 2A...
- Page 18 W I R I N G D I A G R A M 4 0 4 0 1 3 4 HERU ® 90 S EC 2A...
- Page 19 W I R I N G D I A G R A M 4 0 4 0 1 0 7 HERU ® 130 S 2A...
- Page 20 W I R I N G D I A G R A M 4 0 4 0 1 1 9 HERU ® 130 S EC 2A...
- Page 21 W I R I N G D I A G R A M 4 0 4 0 1 4 6 HERU ® 180 S 2A...
- Page 22 W I R I N G D I A G R A M 4 0 4 0 1 3 3 HERU 180 S EC 2A ®...
- Page 23 R E G U L A T I O N F U N C T I O N S R E G U L A T E T H E T E M P E R A T U R E F A N C A P A C I T Y The air temperature can be regulated either for con- Airflow (fan speed) is regulated via the week timer...
-
Page 24: O P E R A T I N G T H E C O N T R O L U N I T
O P E R A T I N G T H E C O N T R O L U N I T Information of the units current status such as temperature, fan speed, the rotor temperature efficiency when operating, heat respectively cooling needs is shown in the VIEW MODE 1, 2, 3 and 4. These menus is normally not lit up for battery-saving purposes but is lit up after the first press of the button and is switched off after about 2 minutes of not being in use. - Page 25 V I E W M O D E 1 SYMBOLS THAT CAN BE DISPLAYED IN VIEW MODE 1: = Indicates that the rotor is operating. = Function of B-key. In order to go + + = heat recovery Press B-key to choose - = cooling recovery ”Away”...
-
Page 26: " T E M P E R A T U R E " M E N U
” M A I N M E N U ” In order to go forward in the menu from the View mode to the Main Menu press In the Main Menu is used to select the desired menu, after the choice is made with The procedure is the same in the submenu. -
Page 27: " W E E K T I M E R " M E N U
“ O V E R P R E S S U R E ” M E N U In this menu Overpressure On/Off is chosen. The time has the factory setting of 15 min. To adjust the time, see page 100. Overpressure is activated/disable (On/Off) with the key. -
Page 28: Alarms Menu
“ U N I T O N / O F F ” M E N U In the ”Unit On/Off” Menu you have the possibility of turning off the unit via the wireless control unit. NB! The unit must be currentless during service and maintenance. Press in order to go forward from the Main Menu. -
Page 29: Settings Menu
“ S E T T I N G S ” M E N U In this menu settings for weekday, time and what language is made. Press in order to go forward from the Main Menu. Press again and then in order to choose weekday. - Page 30 S E R V I C E M E N U : “ C O N S T A N T P R E S S U R E (Only for Heru ® CPC (Constant Pressure Control) is set by the installer and should not be change. CPC can only be used with pressure sensonr in the supply and exhaust duct.
- Page 31 S E R V I C E M E N U : “ F I L T E R M E A S U R E M E N T ” HERU ® EC: The filter measurement can only be activated if pressure sensor is installed and CPC (Constant Pressure Control) is activated.
- Page 32 S E R V I C E M E N U : “ D I S P L A Y C O N T R A S T ” Display contrast setting. The contrast can be set between 0-63. E E C fan setup AC fan setup S E R V I C E M E N U : “...
- Page 33 S E R V I C E M E N Y : “ A L A R M ” In this menu alarm limits is set for Filter timer, Low temperature and setting for Fire sensor. ”Filter timer” can be set from ”Off” to ”6-12 months” and generates alarm for filter change. Filter timer can not be used in combination with another filter measurement, see page 73.
- Page 34 S E R V I C E M E N Y : “ R H ” Relative air humidity in percent In this menu settings are made for regulation with installed RH sensor. Press again and then in order to choose the Limit value of boost (50%-100%). HERU ®...
- Page 35 S E R V I C E M E N Y : “ S U P P L Y L I M I T S ” In this menu the upper and lower limit value for the supply air temperature at room or exhaust air regulation is set. Press again and then in order to choose a minimum limit value (15°C-19°C).
- Page 36 S E R V I C E M E N Y : “ F R E E Z E P R O T E C T I O N ” Setting of limit value when freeze protection sensor is installed. The sensor (GT5) is installed on the return pipe from the heating coil.
-
Page 37: Other Functions
S E R V I C E M E N Y : “ D E V I C E P A I R S ” In this menu, looking for the wireless control unit the frequency control unit on the unit uses. This procedure must be used e.g. - Page 38 D I M E N S I O N S H E R U ® 9 0 T E C H E R U ® 1 3 0 T E C...
- Page 39 D I M E N S I O N S H E R U ® 5 0 S / 7 5 S / 9 0 S E C 1077 Ø 160 H E R U ® 1 3 0 S / 1 3 0 S E C 1237 1131 Ø...
-
Page 40: Technical Data
T E C H N I C A L D A T A Data stated at 100 Pa external pressure drop. See below for explanation of Sound pressure level. H E R U 6 2 T ® Voltage Fan Current Total Current Fan input Total input... -
Page 41: Sound Data
S O U N D D A T A H E R U ® 6 2 T 230 V / 63 l/s Total (L 63 Hz 125 Hz 250 Hz 500 Hz 1k Hz 2k Hz 4k Hz 8k Hz Surrounding Supply Exhaust... - Page 42 S O U N D D A T A H E R U ® 9 0 T 230 V / 83 l/s Total (L 63 Hz 125 Hz 250 Hz 500 Hz 1k Hz 2k Hz 4k Hz 8k Hz Surrounding Supply Exhaust...
- Page 43 S O U N D D A T A H E R U ® 9 0 T E C 2 10 V / 80 l/s Total (L 63 Hz 125 Hz 250 Hz 500 Hz 1k Hz 2k Hz 4k Hz 8k Hz Surrounding Supply...
- Page 44 S O U N D D A T A H E R U ® 1 1 5 T 230 V / 100 l/s Total (L 63 Hz 125 Hz 250 Hz 500 Hz 1k Hz 2k Hz 4k Hz 8k Hz Surrounding Supply Exhaust...
- Page 45 S O U N D D A T A H E R U ® 1 3 0 T E C 10 V / 132 l/s Total (L 63 Hz 125 Hz 250 Hz 500 Hz 1k Hz 2k Hz 4k Hz 8k Hz Surrounding Supply...
- Page 46 S O U N D D A T A H E R U ® 1 4 0 T 230 V / 126 l/s Total (L 63 Hz 125 Hz 250 Hz 500 Hz 1k Hz 2k Hz 4k Hz 8k Hz Surrounding Supply Exhaust...
- Page 47 S O U N D D A T A H E R U ® 5 0 S 2 A 230 V / 52 l/s Total L 63 Hz 125 Hz 250 Hz 500 Hz 1k Hz 2k Hz 4k Hz 8k Hz Surrounding Supply...
- Page 48 S O U N D D A T A H E R U ® 9 0 S E C 2 A 10 V / 87 l/s Total (L 63 Hz 125 Hz 250 Hz 500 Hz 1k Hz 2k Hz 4k Hz 8k Hz Surrounding...
- Page 49 S O U N D D A T A H E R U ® 1 3 0 S 2 A 230 V / 119 l/s Total L 63 Hz 125 Hz 250 Hz 500 Hz 1k Hz 2k Hz 4k Hz 8k Hz Surrounding Supply...
- Page 50 S O U N D D A T A H E R U ® 1 3 0 S E C 2 A 10 V / 137 l/s Total (L 63 Hz 125 Hz 250 Hz 500 Hz 1k Hz 2k Hz 4k Hz 8k Hz Surrounding...
- Page 51 S O U N D D A T A H E R U 1 8 0 S 2 A ® 230 V / 185 l/s Total L 63 Hz 125 Hz 250 Hz 500 Hz 1k Hz 2k Hz 4k Hz 8k Hz Surrounding Supply...
- Page 52 P R E S S U R E / F L O W D I A G R A M H E R U ® 6 2 T H E R U ® 9 0 T P R E S S U R E / F L O W S U P P L Y P R E S S U R E / F L O W S U P P L Y P R E S S U R E / F L O W E X H A U S T P R E S S U R E / F L O W E X H A U S T...
- Page 53 P R E S S U R E / F L O W D I A G R A M The pressure/flow diagrams applies to both supply and exhaust air. Indicated power and SFP applies to both fans together. H E R U ®...
- Page 54 P R E S S U R E / F L O W D I A G R A M H E R U ® 1 1 5 T H E R U ® 1 4 0 T P R E S S U R E / F L O W S U P P L Y P R E S S U R E / F L O W S U P P L Y P R E S S U R E / F L O W E X H A U S T P R E S S U R E / F L O W E X H A U S T...
- Page 55 P R E S S U R E / F L O W D I A G R A M H E R U ® 5 0 S 2 A H E R U ® 7 5 S 2 A P R E S S U R E / F L O W P R E S S U R E / F L O W F A N P O W E R / F L O W...
- Page 56 P R E S S U R E / F L O W D I A G R A M H E R U ® 1 3 0 S 2 A H E R U ® 1 8 0 S 2 A P R E S S U R E / F L O W P R E S S U R E / F L O W F A N P O W E R / F L O W...
- Page 57 S E R V I C E H E R U ® CLEANING/FILTER CHANGE • Always disconnect the power and make sure that it Dismount the motor plate from the fan housing can not be connected. (the outer screws) and lift out the motor with the •...
- Page 58 S E R V I C E H E R U ® CLEANING/FILTER CHANGE • The filters should be changes once a year or at alarm for filter change. At alarm for Filter Change, this should be done as soon as possible; as there otherwise is a risk that the adjusted flow is not obtained.
- Page 59 S E R V I C E H E R U ® BELT/TIGHTENING MATERIAL CHANGE E Q U I P M E N T - Screwdriver TX20 or screwdriver 1x5 (0,8x4) - Screwdriver PH 1 - 2 Allen keys 6 mm (preferably with round head) - Service kit 6000102 for HERU ®...
- Page 60 S K I F T E A V E L E K T R I S K E F T E R V Ä R M A R E H E R U ® Heru S is when delivered equipped with an eletrical heater which is mounted and connected for right handing application.
- Page 61 A C C E S S O R I E S Duct sensor (GT8 och GT7) ............4020286 Room sensor (GT8) .
-
Page 62: Spare Parts
S P A R E P A R T S Rotor motor, complete, HERU ® 62 T/90 T/90 T EC 2/90 S EC ......6000212 Rotor motor, complete, HERU ®... -
Page 63: Error Detection
E R R O R D E T E C T I O N Type of fault Check... Remedy Nothing shows at the display..The batteries. Change the 3 AA batteries. Can’t enter the menus, ...If keylock is activated. Disable, push the left buttom down for 3 seconds. - Page 66 I N T E R N A L S E T T I N G S A C Limit: ......F F an speed: (500-1400 PPM) Default: 900 PPM .
- Page 67 I N T E R N A L S E T T I N G S E C Limit: ......T T emperature: (500-1400 PPM) Default: 900 PPM .
-
Page 68: Ec Declaration Of Conformity
Manufacturer: AB C.A. ÖSTBERG Industrigatan 2, SE-774 35 Avesta, Sweden Tel.No +46 226 860 00 Fax.No +46 226 860 05 http://www.ostberg.com info@ca-ostberg.se VAT No SE5563012201 Low Voltage Directive (LVD) 2006/95/EG Harmonised standards: • EN 60335-1:2002 Household and similar electrical appliances - Part 1: General requirements. - Page 69 AB C.A. ÖSTBERG Industrigatan 2, SE-774 35 Avesta, Sweden Tel: +46 226 860 00. Fax: +46 226 860 05 Email: info@ca-ostberg.se www.ostberg.com...
Need help?
Do you have a question about the HERU 62 T and is the answer not in the manual?
Questions and answers