Table of Contents
Advertisement
Advertisement
Table of Contents

Related Manuals for Perfect Prime TC0378 K


Summary of Contents for Perfect Prime TC0378 K
- Page 1 Datalogger Thermometer TC0378 Instruction Manual...
-
Page 2: Table Of Contents
CONTENTS 1. General Description ................2 2. Safety Information .................. 2 3. Feature ...................... 3 4. Specifications ................... 4 5. Symbol Definition and Button Location ..........5 - 6 6. Operation Instructions 6.1 Power ON/OFF & Backlight Operation ..........7 - 8 6.2 REC button .................... -
Page 3: General Description
1. GENERAL DESCRIPTION 2. SAFETY INFORMATION INTRODUCTION Thank you for choosing our Data Logger thermometer. To ensure the safety and the best performance of this instrument, we recommend you to read and follow the manual carefully before operation. Test reading and measurement settings are shown on the backlit LCD panel. -
Page 4: Feature
3. FEATURE Four channel reading LCD display • 16,000 Records Data Logger • PC Interface • With Windows software • Auto power o for battery saving • Isolated input protection up to 250Vac between any two inputs •... -
Page 5: Specifications
4. SPECIFICATIONS Measurement range : K: -200 ~1372°C (- 328 ~ 2501°F) J: -150°C~1000°C (- 238 ~ 1832°F) E: -150°C~750°C (- 238 ~ 1382°F) T: -180°C~400°C (- 292 ~ 752°F) Resolution : 0.1°C/°F < 1000°, 1°C/°F ≥1000° Accuracy : ±(0.1% of reading+0.7°C) ±(0.1% of reading+1.4°F) Below -100°C (-148°F) ±(0.4% of reading +0.7°C) ±(0.4% of reading +1.4°F) Temperature coefficient:... -
Page 6: Symbol Definition And Button Location
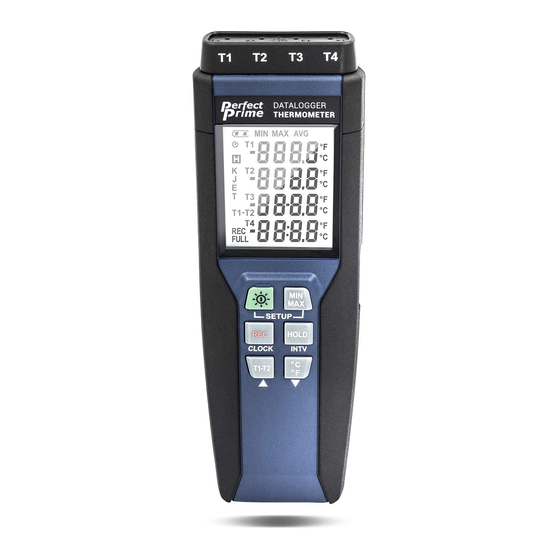
5. SYMBOL DEFINITION AND BUTTON LOCATION : Battery condition : Memory full indicator FULL indicator : Thermocouple type K.J.E.T : Minimum indicator : Temperature reading : Maximum indicator : Temperature measure- : Average indicator ment units : This indicates Auto Power : Data hold indication O is enabled : Recording data logger... - Page 7 5. SYMBOL DEFINITION AND BUTTON LOCATION Thermocouple input DATA HOLD button Display screen °C , °F button Power ON/OFF and Back PC Interface light button External DC 9V power supply REC button jack T1-T2 button Tilt stand MAX MIN button Battery Compartment...
-
Page 8: Operation Instructions
6. OPERATION INSTRUCTIONS 6.1 POWER ON/OFF & BACKLIGHT OPERATION 6.1.1 Power on/off: Press the button to turn on the meter. To turn the unit o , press and hold button down until the screen shows “OFF 3, 2, 1, ” then the LCD screen goes o . -
Page 9: Rec Button
6. OPERATION INSTRUCTIONS 4. The LCD shows the initial information and then enters main function. 5. Release button. 6. Make sure the auto power o symbol disappears from display screen. 6.2 REC BUTTON Press button to start recording data. The REC symbol will display on the screen. -
Page 10: Data-Hold Mode
6. OPERATION INSTRUCTIONS 3. Press button again to show average data; the AVG symbol lights up on LCD. 4. Press button again, the MAX and MIN symbol blinks together. The reading shows present T1 temperature. 5. Press button again, will circular the whole process again. To exit MAX/MIN mode: Press and hold button for 2 seconds to exit MAX/MIN mode. -
Page 11: Using The O Set To Compensate For Probe Errors
6. OPERATION INSTRUCTIONS 6.9 USING THE OFFSET TO COMPENSATE FOR PROBE ERRORS The user can adjust the readings of the thermometer to compensate for the errors against a speci c thermocouple. 1. Plug the thermocouple into a desired input terminal (T1 ~ T4). 2. -
Page 12: Select Thermocouple Type: K, J, E, Or T
6. OPERATION INSTRUCTIONS 6.10 SELECT THERMOCOUPLE TYPE: K, J, E, OR T 1. Power o the meter rst. Press and hold button, then press button to power on and enter setting mode. Release all buttons, the LCD blinks “SEt”. 2. Press ▼ ( ) button to Selecting Thermocouple type (see Fig.4) 3. -
Page 13: Data Logger
7. DATA LOGGER This section will explain how to store data (data logger) in memory and how to recall data from memory. 7.1 SETTING INTERVAL TIME FOR DATA STORING 1. Turn o the unit. 2. Enter SETUP mode by pressing and holding button and then press power button to turn on the unit. - Page 14 7. DATA LOGGER Note: Note: When the memory is full (16000 recorders), FULL symbol will blink on the LCD screen. The data logger stops. Note: When battery power is low ( symbol lights up on the screen), data logger cannot be started. If during data logger, the battery starts running low, data logger will stop automatically.
-
Page 15: Setting The Time
8. SETTING DATE AND TIME The unit incorporates a clock so that the data logger function can also record the data and time along with the measurement value in the memory. 8.1 SETTING DATE AND TIME 1. Turn o the unit. 2. -
Page 16: Power Preparation8
9. POWER PREPARATION 9.1 BATTERY LOADING Remove the battery cover on the back and insert one 9V battery. 9.2 BATTERY CAPACITY INDICATOR When operating the unit on batteries, periodically check this indicator to determine the remaining battery capacity. 9.3 AC ADAPTER CONNECTION When the AC adapter is used, insert the plugs of the adapter into the DC9V connector on the side panel. -
Page 17: Testlink Se-378 Software
10. TESTLINK SE 378 SOFTWARE 10.1 THE SE 378 PACKAGE CONTAINS • Software CD disk • Custom designed USB cable for SE378 10.2 SYSTEM REQUIRED Windows NT 4.0/ NT2000/ XP/ VISTA/ Windows 7/ Windows 8 10.3 MINIMUM HARDWARE REQUIRED • PC or NoteBook with Pentium 800MHz or higher, 512 MB RAM •... - Page 18 10. TESTLINK SE 378 SOFTWARE Fig.8 Fig.9 7. Click Install. 8. After nish installing USB-120 connector driver, it will install SE378 software automatically. It will copy SE378.exe ( executable le ) and help le to your hard disk ( default location is c:\program les\SE378) 9.
- Page 19 10. TESTLINK SE 378 SOFTWARE Fig.10 Fig.11 10.5 TUTORIAL QUICK START TO USE TESTLINK SE378 1. Recording real time data in waveform. 2. Power on the 4 Channel Thermometer rst and connect it to a PC RS-232 serial port with the cable(USB-120), 3.
- Page 20 10. TESTLINK SE 378 SOFTWARE Note: If PC speed is slow , select sampling rate above 1 second. And if it is going to sample a large amount data(more than 5000), at least 512 mega bytes ram is recommended to keep PC running in good performance working well.
- Page 21 10. TESTLINK SE 378 SOFTWARE Note: If decimal separator is comma in your country, this le format will be disabled, because .CSV le also use comma to be data separator. For example 78,6 will become 78 and 6 in EXCEL) 10.7 HOW TO LOAD THE RECORDED DATA FROM THE MEMORY OF 4 CHANNEL THERMOMETER AND SAVE IT TO A FILE? 1.
- Page 22 10. TESTLINK SE 378 SOFTWARE 10.8 MAIN MENU File | Open: Retrieve les from the disk. Save: Save the active window (when the caption bar is highlighted) data to the disk. Print: Print the data of the acitve window (graph or list). Printer Setup: Select printer.
- Page 23 10. TESTLINK SE 378 SOFTWARE 10.9 DATALOGGER: When you have the thermometer connected to PC, select "DataLogger" from main menu or click Datalogger icon from tool bar to load recorded data from the meter and there will be a progress indicator to show the loading status. If error occurs, just click "DataLogger icon"...
- Page 24 10. TESTLINK SE 378 SOFTWARE It will transfer rst data set to graph on the right hand side. The user can also click at any other data set to choose that set for graph. Graph: Tool Bar: - Display or hide Statistic1. - Display or hide Statistic2.
- Page 25 10. TESTLINK SE 378 SOFTWARE - Seperate the four channel. - Combine the four channel. - Graph Customization. - Change the Y axis extention. P.24...
- Page 26 10. TESTLINK SE 378 SOFTWARE Note: When the Split is unchecked, graph will use T1 as the Y axis display range. - To Undo the Zoom You can Zoom this graph by using mouse: To Zoom: 1. Press the left mouse button and drag the cursor to select the new extents.
- Page 27 10. TESTLINK SE 378 SOFTWARE 2. How can I save the graph to a le which can be used in EXCEL? Answer: When you save a graph to a le, the default le format is "*.ghf" and you can select *.csv to save les. CSV is an EXCEL le format.You can open it in EXCEL.
- Page 28 10. TESTLINK SE 378 SOFTWARE 5. How to zoom the graph? Answer: Press the left mouse button and drag the cursor to select the new extents, then release the mouse button. 6. When I setup the real time sampling with a fast rate(eg. 1 sec), Some of the sampling data might be lost.
-
Page 29: Maintenance
11. MAINTENANCE In order to ensure the accuracy of the thermometer for a longer period of time you should calibrate it once a year. Clean the device and the window of the display with a clean, lint-free, antistatic and dry cleaning cloth. Do not use cleaning agents that contain carbon or benzenes, alcohol or anything similar to clean the product since these substances damage the surface... - Page 30 CUSTOMER SERVICE INQUIRIES Your emails are important to us so we strive to reply all hours. In exceptional cases, inquiries and emails within we may require more time to respond. Thank you for your understanding. For more information about our products and services, please send us an email: cs@perfectprime.com For B2B or project-based application, please send an email:...
- Page 31 HORMES LIMITED Retailer cs@perfectprime.com Email G/F UNIT 3, 61 GLENTHORNE ROAD, Address LONDON W6 0LJ UNITED KINGDOM +44 203 7695377 Telephone...