Table of Contents
Advertisement
Quick Links
English
Diagram Reference
EN50131-1:2006+A2:2017
Components and Indication
EN50131-3:2009E
1
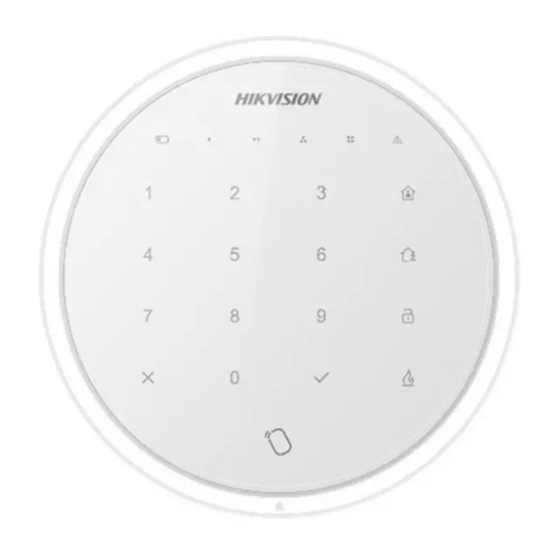
Wireless Alarm Keypad
N50131-5-3:2017
1. Indicator
Security Grade 2
UD15019B
Environmental Class II
Product Information
COPYRIGHT ©2019 Hangzhou Hikvision Digital Technology
Co., Ltd.
ALL RIGHTS RESERVED.
Any and all information, including, among others, wordings,
pictures, graphs are the properties of Hangzhou Hikvision
Digital Technology Co., Ltd. or its subsidiaries (hereinafter
referred to be "Hikvision"). This user manual (hereinafter
referred to be "the Manual") cannot be reproduced,
changed, translated, or distributed, partially or wholly, by
any means, without the prior written permission of
Hikvision. Unless otherwise stipulated, Hikvision does not
Keypad Backlight White
make any warranties, guarantees or representations,
2. Tag Area
express or implied, regarding to the Manual.
3. TAMPER Switch (on the board)
About this Manual
Buzzer
This Manual is applicable to Alarm Keypad.
Present Tag/Tap Key/Armed
The Manual includes instructions for using and managing
Disarmed
the product. Pictures, charts, images and all other
Operation Failed
information hereinafter are for description and explanation
Keypad Tampered
only. The information contained in the Manual is subject to
change, without notice, due to firmware updates or other
Tag Enrolled
reasons. Please find the latest version in the company
Zone Tampered
website (http://overseas.hikvision.com/en/).
Fire Alarm
Please use this user manual under the guidance of
Formatting
professionals.
Remove the battery. Hold the TAMPER button (with slend rod) and power
the keypad on at the same time. Release the button when any of the
Trademarks Acknowledgement and other
power, alarm, or fault indicators starts flash. The four indicators flash 4
Hikvision's trademarks and logos are the properties of
time after the formatting is completed.
Power On
Hikvision in various jurisdictions. Other trademarks and
2
logos mentioned below are the properties of their
1. Loosen the set screws on bottom of the keypad.
2. Remove the mounting plate.
respective owners.
3. Install four AA batteries according to the polarity mark.
This product and - if applicable - the supplied
Note: Do not reverse the polarity of the battery.
Enrollment
accessories too are marked with "CE" and comply
3
therefore with the applicable harmonized European
Local Enrollment
Power on the security control panel.
standards listed under the RE Directive 2014/53/EU,
Make the control panel enter the
the EMC Directive 2014/30/EU, the LVD Directive
enrollment mode. Press the tamper
switch (on the board) of the keypad. The
2014/35/EU, the RoHS Directive 2011/65/EU.
partition indicators flashes 4 times when
the keypad is enrolled and ready for
The Input voltage should meet both the SELV (Safety
work.
Extra Low Voltage) and the Limited Power Source
Note: The distance between the security
control panel and the keypad should be
according to the IEC60950-1 standard. Please refer
less than 50 cm.
to technical specifications for detailed information.
4
2012/19/EU (WEEE directive): Products marked
Check Signal Strength
Enter the signal checking mode by operating on the control panel.
with this symbol cannot be disposed of as unsorted
Trigger the tamper alarm.
municipal waste in the European Union. For proper
Power indicator flashes 3 times - Strong Signal
recycling, return this product to your local supplier
Fault indicator flashes 3 times - Weak Signal
upon the purchase of equivalent new equipment, or
1. Loosen the set screws on bottom of the keypad.
dispose of it at designated collection points. For
2. Rotate anti-clockwise to remove the mounting plate.
more information see: www.recyclethis.info
3. Secure the mounting plate on the wall with four supplied screws.
Legal Disclaimer
4. Rotate the keypad body clockwise to fasten the body on the plate.
TO THE MAXIMUM EXTENT PERMITTED BY APPLICABLE LAW,
5. Tighten the screw on the bottom to fix the keypad on the mounting
THE PRODUCT DESCRIBED, WITH ITS HARDWARE, SOFTWARE
plate and complete the installation.
Operation
5
AND FIRMWARE, IS PROVIDED "AS IS", WITH ALL FAULTS AND
ERRORS, AND HIKVISION MAKES NO WARRANTIES, EXPRESS
Tag Operation
OR IMPLIED, INCLUDING WITHOUT LIMITATION,
MERCHANTABILITY, SATISFACTORY QUALITY, FITNESS FOR A
PARTICULAR PURPOSE, AND NON-INFRINGEMENT OF THIRD
PARTY. IN NO EVENT WILL HIKVISION, ITS DIRECTORS,
Other
OFFICERS, EMPLOYEES, OR AGENTS BE LIABLE TO YOU FOR
Operation
ANY SPECIAL, CONSEQUENTIAL, INCIDENTAL, OR INDIRECT
DAMAGES, INCLUDING, AMONG OTHERS, DAMAGES FOR
LOSS OF BUSINESS PROFITS, BUSINESS INTERRUPTION, OR
LOSS OF DATA OR
DOCUMENTATION, IN CONNECTION WITH THE USE OF THIS
PRODUCT, EVEN IF HIKVISION HAS BEEN ADVISED OF THE
POSSIBILITY OF SUCH DAMAGES.
Specification
REGARDING TO THE PRODUCT WITH INTERNET ACCESS, THE
USE OF PRODUCT SHALL BE WHOLLY AT YOUR OWN RISKS.
HIKVISION SHALL NOT TAKE ANY RESPONSIBILITES FOR
ABNORMAL OPERATION, PRIVACY LEAKAGE OR OTHER
DAMAGES RESULTING FROM CYBER ATTACK, HACKER
ATTACK, VIRUS INSPECTION, OR OTHER INTERNET SECURITY
RISKS; HOWEVER, HIKVISION WILL PROVIDE TIMELY
TECHNICAL SUPPORT IF REQUIRED.
SURVEILLANCE LAWS VARY BY JURISDICTION. PLEASE CHECK
ALL RELEVANT LAWS IN YOUR JURISDICTION BEFORE USING
THIS PRODUCT IN ORDER TO ENSURE THAT YOUR USE
CONFORMS THE APPLICABLE LAW. HIKVISION SHALL NOT BE
LIABLE IN THE EVENT THAT THIS PRODUCT IS USED WITH
ILLEGITIMATE PURPOSES.
IN THE EVENT OF ANY CONFLICTS BETWEEN THIS MANUAL
AND THE APPLICABLE LAW, THE LATER PREVAILS.
Power
Normal Battery: Solid green for 2s (keypad waked up)
Indicator Green
Low Battery:Flashing green flashes 3 times (keypad waked up)
Patrol tag presented: Power and Fault LEDs flashes 2 times
Strong Signal Strength:Flashes 3 times
Armed: Related LED flashes once, and light on 2 s while
the keypad is waked up
Partition
Disarmed/Alarm Cleared:Related LED flashes twice
Blue
Indicator
Operation failed: Related LED flashes 3 times
Alarm: Related LED flashes 30s
Enrolled and Starts work: 4 LEDs flashes 4 times together
Fault
Weak Signal Strength:Flashes 3 times
Orange
Indicator
Patrol tag presented: Power and Fault LEDs flashes 2 times
Alarm
Zone/ Fire Alarm Triggered:Flashes 30s
Red
Indicator
No Alarm or Alarm Restored:Off
Keypad locked: flashes 2 times
Turn off if no operation for 5 s, turn on when touched
Beep
Beep Beep
Beep Beep Beep
Beep Beep Beep Beep Beep
Beep
Long Beep (30 s)
Long Beep (30 s)
APP Enrollment
1. Log in to the APP Store. Search for
"Hik-Connect" .Download and install the
client to your phone. Run the client.
2. Power on the security control panel.
3. Log in the client and tap the icon "+"
to add the control panel. Scan the QR
code or input the device serial No.
(serial No. is not supported by device
with 868 RF frequency). to add the
device( in the registration mode).
4. Tap the "+" icon on the device page
to add the peripherals.
It is required to insert the screw for tamper alarm.
1
Away Arming
2
Stay Arming
3
Disarming
Operation
Tasks
1. Enter the user password.
All Partition
2. Tap the stay/away/disarm key.
3. The buzzer indicates the
operation status
Global Keypad
1. Tap the user password.
2. Tap the √ key.
Specified
Stay/Away Arming
3. Enter the partition No.(1/2/3/4).
Partition
4. Tap the stay/away/disarm key.
Disarming
5. The buzzer indicates the
operation status
Partition
1.Enter the user password.
Keypad
2.Tap the stay/away/disarm key.
Hold the fire alarm key for 3 s.
Fire Alarm
The buzzer indicates the operation status
Hold the disarming key for 3 s.
Panic Alarm
The buzzer indicates the operation status
Confirm
Tap the √ key.
Delete
Delete the latest key operation
Wireless Keypad
RF speed
10.0kbps/4.8kbps
RF frequency
433.6MHz/868.05MHz
RF
RF method
2GFSK
Transmission distance
800m (open area)
Power
10dBm
Tamper-proof
1 tamper switch, front and rear tamper-proof
Wireless Module
Communicates with control panel
Card reader
Supports standard IC card
Buzzer
1
Serial port
1, reserved
Interface and
3 status indicators: power (green), fault (red), and alarm (red)
Component
Indicator
4 partition indicators: armed/disarmed (blue)
Backlight
1 group, white
Numeric key
10, 0 to 9
Function key
6, fire, away arming, stay arming, diarming, deleting, and OK
Electrical & Battery
Power
4 AA Batteries,3V DC,≥ 2 years standby
Operation humidity
10% to 90%
﹣10℃ to +55℃
Operation temperature
Color
White/Black
Others
Installation
Wall mounting with screws
Dimension
Diameter: 132 mm (52"), Deep: 23 mm(9")
Weight
165 g (without battery)
1
1
1
2
2
1
2
Do not mix batteries of
different brands.
Do not mix old and new
batteries.
3
5
1
Beep
Tag Sensed
Present
Remove
2
Beep
Tag Sensed
Present
Hold 3s,
remove after a beep
3
System
Beep
Armed
Tag Sensed
Present
3
3
4
1
Refer to the Components
and Indication
section for indicator and
buzzer description.
3 failed attempts
(different unregistered
tag or different
password) will cause
the keypad lock (90 s).
Remove
Control
Panel
Tamper Screw
3
2
4
5
Advertisement
Table of Contents

Related Manuals for HIKVISION DS-PKA-WLM-868


Summary of Contents for HIKVISION DS-PKA-WLM-868
- Page 1 Panic Alarm DOCUMENTATION, IN CONNECTION WITH THE USE OF THIS The buzzer indicates the operation status Confirm Tap the √ key. PRODUCT, EVEN IF HIKVISION HAS BEEN ADVISED OF THE Delete Delete the latest key operation POSSIBILITY OF SUCH DAMAGES. Specification...
- Page 2 Français Português Italiano Español Références du schéma Referências do diagrama Riferimenti agli schemi Diagrama de referencia Composants et indication Componentes e indicação Componenti e indicazioni Componentes e indicación 1. Voyant 1. Indicador 1. Indicatore LED 1. Indicador Piles normales : le voyant est vert continu pendant 2 s (clavier réactivé) Carga normal de las pilas: Verde fijo durante 2 s (teclado numérico activado) Batteria normale: Verde acceso per 2 secondi (la tastiera si riattiva) Indicador...
- Page 3 Русский Deutsch Polski Пояснения к схемам Verweis auf Schaubild Opis diagramu Компоненты и индикаторы Bestandteile und Anzeige Składniki i wskaźniki 1. Индикатор 1. Statusleuchte 1. Wskaźnik Нормальное состояние батарей: зеленый индикатор непрерывно светится 2 сек. (клавиатура Normalny stan baterii: włączony (zielony) przez 2 s (panel sterowania Batterie normal: Dauerhaft grün für 2 s (Tastenfeld aufgeweckt) Wskaźnik Индикатор...
Need help?
Do you have a question about the DS-PKA-WLM-868 and is the answer not in the manual?
Questions and answers