Quasonix RDMS Installation And Operation Manual
Status logger
Hide thumbs
Also See for RDMS:
- Installation and operation manual (253 pages) ,
- Technical manual (75 pages) ,
- Firmware update procedure (16 pages)
Table of Contents
Advertisement
Quick Links
ISO 9001:2015
Certified
Installation and Operation Manual
RDMS™ Status Logger
Quasonix, Inc.
6025 Schumacher Park Dr.
West Chester, OH 45069
05 August, 2019
*** Revision 2.1.1 ***
Applies to RDMS Status Logger Software Version 1.0.36 (2019 01-08)
Specifications subject to change without notice.
All Quasonix products are under U.S. Department of Commerce jurisdiction; not covered by ITAR
No part of the document may be circulated, quoted, or reproduced for distribution without prior written approval from
Quasonix, Inc.
Copyright Quasonix, Inc., All Rights Reserved.
Advertisement
Table of Contents

Related Manuals for Quasonix RDMS


Summary of Contents for Quasonix RDMS
- Page 1 Applies to RDMS Status Logger Software Version 1.0.36 (2019 01-08) Specifications subject to change without notice. All Quasonix products are under U.S. Department of Commerce jurisdiction; not covered by ITAR No part of the document may be circulated, quoted, or reproduced for distribution without prior written approval from Quasonix, Inc.
-
Page 2: Table Of Contents
1U Status Logger Interface ......................1 RDMS Serial Interface Module (SIM) ..................1 Initial Set Up ............................2 1U Integrated Controller Set Up ....................2 RDMS Serial Interface Module (SIM) Set Up ................2 2.2.1 Install the Windows Application ....................2 2.2.1.1 Hardware Connection ...................... - Page 3 RDMS™ Status Logger 3.3.2.5 PCM Frame Detection....................... 26 3.3.2.6 Advanced Control ......................27 3.3.3 RDMS Rack RDMS Control ....................27 3.3.3.1 RDMS Identification ......................28 3.3.3.2 Settings ..........................28 3.3.3.2.1 Presets ........................29 3.3.4 RDMS Rack Terminal ......................32 3.3.5 RDMS Rack Tools .........................
- Page 4 PreState All Connected ..................... 53 3.7.4.4 Annotate All ........................54 Maintenance Instructions ........................55 Product Warranty ..........................56 Quasonix Limited Warranty Statement ..................56 5.1.1 Extended Warranties ......................57 Technical Support and RMA Requests....................58 Appendix A – Status File Definitions ....................59 State Report ..........................
- Page 5 Figure 6: Quasonix Status Logger Setup Menu .................... 4 Figure 7: Quasonix Status Logger Connection Manager, Licenses Available ..........5 Figure 8: RDMS Connection Manager, Connect/Disconnect Status Logger Connection Manager ..... 5 Figure 9: RDMS Connection Manager, Library Tab Selection ..............6 Figure 10: RDMS Connection Manager, Library Tab ...................
- Page 6 Figure 30: Attempting to Connect Message ....................18 Figure 31: Auto Connect, Unit Located Message ..................19 Figure 32: Status Logger Connection Manager, Connect Using IP Address-RDMS Not in Library ... 19 Figure 33: Connect Using IP Address, Add RDMS to Library List Message ..........20 Figure 34: Status Logger Connection Manager, RDMS Added to Library ..........
- Page 7 Figure 65: RDMS Rack Tools Screen ......................33 Figure 66: Status Logger Control Section ....................34 Figure 67: RDMS Rack Main Screen, Start Logger and Single Buttons ............ 34 Figure 68: Regular Logging Started, Indicator Lights Green ..............34 Figure 69: RDMS Rack Main Screen, Pre-log State Button ............... 35 Figure 70: RDMS Rack Main Screen, Annotate Button Circled ..............
- Page 8 Figure 102: Logging Menu .......................... 53 Figure 103: Example status_log.csv File with Event Annotations .............. 54 Figure 104: Example State Report Format ....................60 Figure 105: RDMS Simplified Block Diagram ..................... 61 Figure 106: BEP Measurements ......................... 62 Figure 107: BER Measurements ......................... 63 List of Tables Table 1: Status Logger Files ........................
-
Page 9: Status Logger Interface To The Rdms
The RDMS Serial Interface Module (SIM), shown in Figure 2, provides an interface between an available USB port on your PC to the 25 pin control port on the rear panel of the RDMS receiver. The RDMS SIM integrates a security device that activates a license to use the Status Logger application. -
Page 10: Initial Set Up
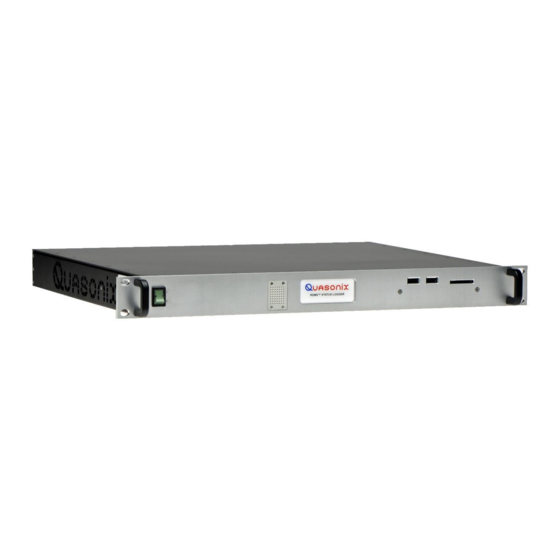
2 Initial Set Up 2.1 1U Integrated Controller Set Up Connect up to four 25 pin cable(s) from the Status Logger to the RDMS receiver(s). Power up the Status Logger and the connected receivers. No software installation is necessary. The 1U unit is shipped with software preinstalled. To upgrade software, or add licenses, contact Quasonix. -
Page 11: Hardware Connection
25 pin cable from the SIM to the back of the RDMS. Figure 5: Serial Interface Module with Supplied 25 pin Cable If a network connection is possible, connect the RDMS Ethernet port to the same network as the Windows PC. Quasonix, Inc. -
Page 12: First Time Install
When the Windows software is installed for the first time, the SIM must detect the license information. Click on the Setup Menu in the Quasonix Status Logger application. Select Refresh License Info from the drop down menu, as shown in Figure 6. -
Page 13: Identify Rdms Rack
On power up, the Status Logger Connection Manager displays, as shown in Figure 8. If the window is closed, open the RDMS Connection Manager by clicking on the shortcut on your PC desktop. Figure 8: RDMS Connection Manager, Connect/Disconnect Status Logger Connection Manager... -
Page 14: Add An Rdms Receiver To The Library
2.3.1 Add An RDMS Receiver to the Library If the RDMS is not available in the RDMS Library list, you may add it to the library. Click on the Library tab, as shown in Figure 9. Figure 9: RDMS Connection Manager, Library Tab Selection The top window of the Library screen provides the ability to add, delete, or edit RDMS receivers in the local library list. -
Page 15: Figure 10: Rdms Connection Manager, Library Tab
Figure 10: RDMS Connection Manager, Library Tab To add an RDMS, click on the Add Unit button. A new row displays in the Library window, as shown in Figure 11. If the Library already contains entries, a new row displays at the bottom of the list, as shown in Figure 12. -
Page 16: Figure 12: Library Tab, New Row Added To The Bottom Of Existing Library List
The Serial Number and IP address display on the screen. Figure 13: Library Tab, New Serial Number Typed in Library List Type a name for the RDMS that makes it easily identifiable, as shown in Figure 14. This field can be any alphanumeric text. -
Page 17: Figure 15: Library Tab, Channel Serial Numbers Added To Library List
Figure 15: Library Tab, Channel Serial Numbers Added to Library List Type the IP Address for the RDMS, as shown in Figure 16. This is optional (not required for logging), but it allows control of the RDMS using the Quasonix API. You MUST include the periods between the digits, such as “192.168.3.22”. -
Page 18: Scan Ports Function
Figure 17: Connect/Disconnect Tab, RDMS Library Entry Added Note that this library information is a local database for this Status Logger System. To use the RDMS on other Status Logger systems, the information must be added to their local Libraries. If the Library contains many receivers, contact Quasonix for assistance copying the Library to another system. -
Page 19: Figure 18: Rdms Connection Manager, Library Tab, Scan Ports Button
The application attempts to communicate with any connected channels and provide basic state information. The RDMS receiver serial number is not known at the channel level. To properly associate the channel “bricks” with the RDMS if multiple receivers are connected, it is helpful to set the receivers to different modes, bit rates, or frequencies. -
Page 20: Set Up Api Permissions
IP Address field(s) – Type a single IP address for an RDMS receiver to be controlled by tabbing from field to field. Use the Add button to include the IP address in the Enabled Addresses list. Pay close attention to the numbers typed for the IP address since it will accept invalid addresses. -
Page 21: Figure 20: Api Permissions Tab With Ip Addresses Added
RDMS™ Status Logger Figure 20: API Permissions Tab with IP Addresses Added If API Control is disabled (checked), and if a connection attempt was made (from the Status Logger Connection Manager) with an IP Address that was not added to the Enabled Addresses list on the API Permissions tab, an Auto connect error message displays, as shown in Figure 21. -
Page 22: Status Logger Operation
Figure 22: Status Logger Connection Manager, Available Licenses In the RDMS Library list, click anywhere in a line for the RDMS receiver to be connected, as shown in Figure 23. For example, if the user clicks on the IP Address, the row number changes to bold text to show it is selected. The Serial Status and the IP Status both indicate “NC”... -
Page 23: Rack Connection Error
In the example in Figure 25, someone typed 2044 instead of 3044 in the RDMS S/N field. Since there is no IP address for the receiver, the Status Logger software searched for valid Channel 1, 2, and 3 bricks. Upon finding them, a serial connection was made, the Serial Status field in the Library list item changed to “Ok,”... -
Page 24: Figure 25: Status Logger Connection Manager With Valid Serial Connection, Bad Serial Number
RDMS serial number in the status window, as shown in Figure 27. To fix the serial number, click on the Library tab, edit the RDMS S/N field, and click on the Submit button. -
Page 25: Connect Using Ip Address
Figure 27: Status Logger Connection Manager with Serial Number Error 3.2 Connect Using IP Address The Status Logger may be connected to an RDMS receiver via the Connect Using IP Address fields on the Status Logger Connection Manager. Type the IP address into the IP Address fields, as shown in Figure 28. The size of the entry boxes may vary depending on the screen resolution. -
Page 26: Figure 29: Auto Connect Error Message-No Unit
An Auto Connect message displays, as shown in Figure 30. It indicates the serial number and location alias for the RDMS receiver to be connected. This message is an attempt to keep users from appropriating a receiver that someone else is using, possibly resulting in mission delays. -
Page 27: Figure 31: Auto Connect, Unit Located Message
Figure 31: Auto Connect, Unit Located Message If the desired receiver was not originally added to the RDMS Library list, as shown in Figure 32, but is found during the Auto Connect process, a message displays asking whether to add it to the Library, as shown in Figure 33. -
Page 28: Figure 33: Connect Using Ip Address, Add Rdms To Library List Message
After the RDMS receiver is connected to the Status Logger, the RDMS Library displays the “found” receiver in the list. The RDMS Name is listed as “rdms3.” This should be edited on the Library tab to provide a more descriptive name. -
Page 29: Rdms Rack Connection Screen
Rack screen. The RDMS Rack Connection screen is made up of two sections. The top section shows the RDMS name, date, and time, and provides clickable buttons to select functions, as shown in Figure 36. Since the top section displays the RDMS name, it is helpful to have descriptive names for the receivers, especially for multi-unit applications. -
Page 30: Rdms Rack Status Logger
It does show the Channel number, mode, frequency, and bit rate for each channel. The padlock icon functions like the signal lock icon on the RDMS receiver. PCM is short for PCM Framelock. If detected, the indicator turns green. It will not detect encrypted data. For detailed information about the PCM Framer/Deframer, refer to the Installation Generation Rack Mount RDMS™... -
Page 31: Rdms Rack Settings
3.3.2 RDMS Rack Settings The second selection button accesses the RDMS Rack Settings screen. This screen enables changes to the Setup Name, Channels, Bit Error Rate Tester (BERT), PCM Frame Detection, and Advanced Control, as shown in Figure It is not necessary to modify the setup to begin logging. However, for BER testing, or to set the PCM framing parameters, setup information is required. -
Page 32: Buttons
RDMS™ Status Logger Figure 40: RDMS Rack Settings Screen 3.3.2.1 Buttons The Save Settings button saves a group of settings so they may easily be reused. Previously saved settings can be retrieved using the Load Settings button. Note that saving to Location 0 loads the settings at initial connection to the receiver. -
Page 33: Figure 41: Select Settings
RDMS™ Status Logger Figure 41: Select Settings Figure 42: Select Settings Drop Down Menu To add a new profile name, select one of the empty lines, then click on the OK button, as shown in Figure 43. The name changes to Settings #, depending on the profile slot, as shown in Figure 44. -
Page 34: Channels
Bit Error Rate Tester (BERT) The RDMS integrates an internal BERT. In order to log information for this BERT, setup information is necessary to identify the PN sequence. Use the drop down menu to select the desired pattern, as shown in Figure 48. The check box enables or disables the BERT option. -
Page 35: Advanced Control
Figure 51: Settings, Advanced Control with Status Period Drop Down Menu 3.3.3 RDMS Rack RDMS Control The third selection button accesses the RDMS Rack RDMS Control screen, if a successful Ethernet connection is made, as shown in Figure 52. Quasonix, Inc. -
Page 36: Rdms Identification
RDMS, such as mode, frequency, bit rate, and combiner control. For the most part, features that are available from the RDMS front panel, or via the Browser Interface are accessible. This provides a lightweight control interface. -
Page 37: Presets
After changing receiver settings as desired, use the drop down menu to select a specific preset slot, or use the default empty position. Click on the Save Preset button. Figure 54: RDMS Control, Settings-Preset Drop Down Menu In the Preset Name window, shown in Figure 55, type a name for the new preset. Click on the OK button. The name in the Presets drop down menu now shows the slot number and the new name. -
Page 38: Figure 55: Preset Name
Click on the Submit button to update the connected receiver with the new settings. If you get the error message shown in Figure 57, it means that the RDMS serial number (shown in the RDMS Identification section, Figure 58) does not match the serial number of the RDMS selected from the Library list (Figure 59). -
Page 39: Figure 58: Rdms Rack Serial Number
RDMS™ Status Logger Figure 58: RDMS Rack Serial Number Figure 59: RDMS Serial Number Typed Into Library List Refresh Button Click on the Refresh button to update multiple connected receivers. Clear Presets The Clear Preset button deletes saved presets. To clear/delete a preset, use the Presets drop down menu to select the preset to remove, as shown in Figure 60. -
Page 40: Rdms Rack Terminal
RDMS inoperable until the state is restored or power is cycled. Further, the controller at the RDMS unit level is unaware of commands or mode changes sent to the bricks using the serial interface. It is NOT recommended that the Terminal be used unless the user has some experience with the protocol. -
Page 41: Log Status
Users have requested the ability to automatically detect the bit rate, given the mode and frequency. The RDMS Tools screen incorporates an automatic bit rate detection function. -
Page 42: Figure 66: Status Logger Control Section
This status is not saved to disk, but does update the displayed measurements. It is provided to confirm proper receiver and logger setup. Figure 67: RDMS Rack Main Screen, Start Logger and Single Buttons The Start Logging button starts a regular logging operation, as shown in Figure 68. The three indicator lights display green as data is captured from each channel. -
Page 43: Figure 69: Rdms Rack Main Screen, Pre-Log State Button
RDMS™ Status Logger Figure 69: RDMS Rack Main Screen, Pre-log State Button To stop logging, click on the Stop Logging button, as shown in Figure 68. The Status Logger runs a post-log state report and saves all files for the log operation. -
Page 44: Figure 71: Example Status_Log.csv File With Event Annotations
RDMS™ Status Logger Figure 71: Example status_log.csv File with Event Annotations The diagram in Figure 72 shows the files and folders created for each session. For additional details about session log management, refer to section 3.7.3.4. Figure 72: Session File and Folder Creation... -
Page 45: Real-Time Measurements
To the right of the title are icons for Lock and PCM lock. The lock indicator mirrors the bit lock indication on the front panel of the RDMS receiver. The PCM lock indicator turns green if the PCM frame header is found, as set on the RDMS Rack Settings screen. -
Page 46: Terminal Mode
On the menu bar select Terminal -> User Terminal. The Terminal screen displays, as shown in Figure 75. Commands or queries can be sent directly to the receiver brick, bypassing the RDMS front panel controls. This gives access to a large number of commands and queries that are not available through the browser or front panel. -
Page 47: Figure 75: Rdms Rack Terminal Screen
RDMS™ Status Logger Figure 75: RDMS Rack Terminal Screen Check boxes are provided to show/hide channels in the terminal. Click on the Sync Channels check box to send the same command to displayed channels. To send a single command: Type the command for the appropriate channel using the single line text box beneath the channel title, as shown in Figure 76. -
Page 48: Figure 76: Terminal Screen, Text Command
RDMS™ Status Logger Figure 76: Terminal Screen, Text Command Figure 77: Terminal Screen, Text Command with Response The Terminal maintains a stack of previously entered commands that can be recalled using the up and down arrows or scroll bar, similar to many terminal applications. For example, the command “fr” in the previous example can be recalled by clicking on the up arrow or scrolling up, as shown in Figure 78. -
Page 49: Scripting Mode
3.6.1 Scripting Mode The RDMS Rack Terminal screen also supports scripting. To run a script: Type the script into the larger text box below the channel title, as shown in Figure 79. Click on the Run Script button. (The keyboard Enter button will not send the script as it is used to enter a new line in the script). -
Page 50: Figure 79: Rack Rdms Terminal Screen With Script Command Window
RDMS™ Status Logger Figure 79: Rack RDMS Terminal Screen with Script Command Window An example script to display the frequency and bit rate is shown in Figure 80. Figure 80: Terminal Screen with Example Response Quasonix, Inc. -
Page 51: Additional Main Menu Options
RDMS™ Status Logger 3.7 Additional Main Menu Options The Main Menu bar provides the following options: Exit, Setup, View, and Logging, as shown in Figure 81. Figure 81: Main Menu Bar 3.7.1 Exit Menu The Exit Menu consists of one selection, Exit Application, as shown in Figure 82. Select Exit Application to close the Status Logger software. -
Page 52: Refresh License Info
RDMS™ Status Logger Figure 84: Status Logger Connection Manager 3.7.2.2 Refresh License Info Refresh License Info updates the contents of the Status Logger Connection Manager status window, as shown in Figure 85. This selection is discussed in section 2.2.1.1.2 in the context of a first time install, however it may be used at any time to display available license information. -
Page 53: Add License Key
Status Logger, or when someone using a 1U Status Logger only purchased one channel license and wants to add more licenses. Upon purchase, Quasonix provides the license key to type in the License Key window. Figure 86: Setup, License Key Window 3.7.2.4... -
Page 54: View Menu
RDMS™ Status Logger Figure 88: Setup, Set Date and Time Window 3.7.3 View Menu The View Menu provides five options: Tile Windows, Cascade Windows, Show Connection Manager, Show Session Manager, and Show Chart. Figure 89: View Menu 3.7.3.1 Tile Windows The Tile Windows option is only used when multiple receivers are connected. -
Page 55: Show Connection Manager
RDMS™ Status Logger Figure 90: Status Logger with Cascade Windows Selected 3.7.3.3 Show Connection Manager The Show Connection Manager option enlarges a minimized Connection Manager window or moves it to the front of the Status Logger application desktop (displaying the window on top of other open windows). -
Page 56: Show Session Manager
RDMS™ Status Logger Figure 91: Status Logger Connection Manager 3.7.3.4 Show Session Manager The Show Session Manager option opens the Session Manager screen, as shown in Figure 92. This screen shows names of the logged session folders and their storage location on the connected PC. -
Page 57: Session File And Folder Hierarchy
Figure 93: Session File and Folder Creation The status files are saved to a folder on the selected drive (default is C:\Quasonix\RDMS Status Logger\log). Note the folder with the Rack Serial Number and date stamp. The folder contains the log files shown in Table 1. -
Page 58: Figure 94: Session Manager, Session Id File Selected
RDMS™ Status Logger Figure 94: Session Manager, Session ID File Selected Figure 95: Session Manager, Session Details The Export Session button provides the ability to save the contents of a session folder in a different location. The Delete Session button completely removes a session folder and its contents. A Delete Session message allows the user to verify deletion or cancel without deleting anything. -
Page 59: Show Chart
RDMS™ Status Logger The Rack_3044 folder (named with the receiver serial number, date, and time of the session) contains files describing Pre- and Post- log states, and spreadsheet files containing logs and other report data, as shown in Figure Figure 97: Session Rack Folder with Associated Files Shown in Windows Explorer A fragment of an example status log file is shown in Figure 98. -
Page 60: Figure 99: Mission Response Screen
RDMS™ Status Logger Figure 99: Mission Response Screen Figure 100: Mission Response, Log Data Drop Down Menu After selecting the desired Log Folder and Log Data, click on the Plot Data button to create a graph, as shown in Figure 101. -
Page 61: Logging Menu
RDMS receivers is accomplished via the Start Logging button on the RDMS Rack Status Logger screen. 3.7.4.2 Stop All Active The Stop All Active option stops all active RDMS logging. Logging for a single RDMS receiver may be stopped by using the Stop Logging button on the RDMS Rack Status Logger screen. 3.7.4.3... -
Page 62: Annotate All
Annotate All The Annotate All option allows the user to mark a “footnote” in the log file for each logged RDMS receiver. Often while observing a mission, it is necessary to make note of significant events. The annotation value (sequential number) is recorded in the log file with the corresponding sample. -
Page 63: Maintenance Instructions
RDMS™ Status Logger 4 Maintenance Instructions The RDMS Status Logger requires no regular maintenance, and there are no user-serviceable parts inside. Quasonix, Inc. -
Page 64: Product Warranty
RDMS™ Status Logger 5 Product Warranty The RDMS Status Logger carries a standard parts and labor warranty of one (1) year from the date of delivery. 5.1 Quasonix Limited Warranty Statement This Limited Warranty Statement (this “Limited Warranty”) applies to all hardware and software products and internal components of such products (the “Products”) sold by Quasonix, or its representatives, authorized resellers,... -
Page 65: Extended Warranties
Products; (c) as a result of a failure to follow the instructions in the Operations & Maintenance Manual (d) by the use of parts not manufactured or sold by Quasonix; or (e) by modification or service by anyone other than (i) Quasonix, (ii) an Quasonix authorized service provider, or (iii) your own installation of end-user replaceable Quasonix or Quasonix approved parts if available for the Products in the servicing country. -
Page 66: Technical Support And Rma Requests
RDMS™ Status Logger 6 Technical Support and RMA Requests In the event of a product issue, customers should contact Quasonix via phone (1-513-942-1287) or e-mail (support@quasonix.com) to seek technical support. If the Quasonix representative determines that the product issue must be addressed at Quasonix, a returned materials authorization (RMA) number will be provided for return shipment. -
Page 67: Appendix A - Status File Definitions
RDMS™ Status Logger 7 Appendix A – Status File Definitions This section defines the outputs generated by the RDMS Status Logger. Each time a log is started, the following files are generated. Table 2: Status Logger Files File Name File Description pre_log_state.txt... -
Page 68: State Report Queries
RDMS™ Status Logger Figure 104: Example State Report Format 7.1.3 State Report Queries • The State Report queries a variety of states directly from the receiver bricks. The list of queries include: • • Description of this Serno Power Level Detail •... -
Page 69: Status Logger Status File
7.2 Status Logger Status File The Status Logger captures metrics from the three bricks in the RDMS receiver. These are stored in a file named status_log.csv. The data in this file are the values as they are received, with very little formatting or calculation. The values in the Working Log are determined from these data. -
Page 70: Figure 106: Bep Measurements
RDMS™ Status Logger Figure 106: BEP Measurements The measurement at point A appears in the status log as the name with the suffix “_dp”, for example “dqm_errs_dp”. The measurement at point B appears in the status log as the name with the suffix “_decode”, for example “dqm_errs_decode”. -
Page 71: Bit Error Rate (Ber) Measurements
PCM Framing Measurements If the proper header information and minor frame size is declared prior to logging, the RDMS bricks perform frame metrics. Frame counts and the number of frames meeting the lock criteria are logged. The appearance of the PCM lock indication is an excellent indication that the telemetry is being properly received. -
Page 72: Best Channel Selector (Bcs) Metric
Best Channel Selector (BCS) Metric The RDMS Best Channel Selector determines the channel(s) with the highest probability of good data using the BEP calculated for the three channels. The brick firmware produces a metric to determine the state of the BCS correlator. - Page 73 RDMS™ Status Logger Column Definition Notes bitrate Measured bitrate in MBPS lock Bit sync Lock state, 0 = unlocked, 1 = locked ebno Estimated EbN0 in dB. Note that this is quite accurate for AWGN, but it not as reliable with other impairments.
- Page 74 PCM Framing lock state, 0=unlocked, 1=locked pcm_subframe PCM Sub Frame-- not used pcm_frame_count PCM Frame count-- kept by RDMS pcm_frame_locks PCM Frame locks-- kept by RDMS mod_index Modulation Index PCM/FM only mod_index_mode Modulation Index mode (off, hold, track,...
-
Page 75: Working Log File
RDMS™ Status Logger Column Definition Notes bcs_ch1 State of the BCS input for channel 1; Combiner only-- Not useful for Ch1 or Ch2 bricks 0 = Off, 1 = Uncorrelated, 2 = Correlated, 3 = Reference bcs_int State of the BCS input for combiner;... -
Page 76: Working Log Calculations
RDMS™ Status Logger 7.3.1 Working Log Calculations 7.3.1.1 User Reset Function To facilitate BER (bit error rate), BEP (bit error probability), and FER (PCM frame error rate) long-term averages, the Working Log calculations include accumulated totals for bits, bit errors, probable bit errors, PCM frames, and PCM frame errors. -
Page 77: Link Availability Calculation
RDMS™ Status Logger freq_offset = afc_compensated + fed_offset 7.3.1.6 Link Availability Calculation The link availability is often used as a figure of merit to determine usability of the link. In the past, BER was the only reliable method to measure and calculate link availability. This was only possible when testing a link using a PN sequence (or other known transmission). - Page 78 RDMS™ Status Logger Column Definition Notes pcm_frame_count PCM Frame count - reset to zero on Restart pcm_frame_locks PCM Frame locks - reset to zero on Restart pcm_fer PCM Frame Error Rate Uses “dqm_bits_out” and Bit Error Probability, based on DQM, e.g. 1e- “dqm_errs_out”...
-
Page 79: Appendix B - Acronym List
RDMS™ Status Logger 8 Appendix B – Acronym List Acronym Description Automatic Gain Control Amplitude Modulation AQPSK Variant of Quadrature Phase Shift Keying ARTM Advanced Range Telemetry AUQPSK Variant of Quadrature Phase Shift Keying Bit Error Rate Bayonet Neill-Concelman Connector (RF Connector) - Page 80 RDMS™ Status Logger Acronym Description Phase Shift Keying QPSK Quadrature Phase Shift Keying RDMS Receiver DeModulator Synchronizer Radio Frequency RJ-45 Ethernet Connection Jack Rack Mount Remote RDMS Client RS-232 Recommended Standard 232 (Serial Communications) Sawtooth Wave System Degradation Indication SOQPSK Shaped Offset Quadrature Phase Shift Keying Shaped Offset Quadrature Phase Shift Keying –Telemetry...
Need help?
Do you have a question about the RDMS and is the answer not in the manual?
Questions and answers