Quasonix RDMS Installation And Operation Manual
Hide thumbs
Also See for RDMS:
- Installation and operation manual (253 pages) ,
- Technical manual (75 pages) ,
- Firmware update procedure (16 pages)
Table of Contents
Advertisement
Quick Links
ISO 9001:2015
Certified
Installation and Operation Manual
3
Generation Rack-Mount RDMS™ Telemetry Receiver
rd
Quasonix, Inc.
6025 Schumacher Park Dr.
West Chester, OH 45069
01 May 2022
Revision 3.7.5
TM
Applies to RDMS
System Version 19.3
Specifications subject to change without notice.
All Quasonix receiver products are under U.S. Department of Commerce jurisdiction categorized as
5A991; not covered by ITAR
No part of the document may be circulated, quoted, or reproduced for distribution without prior written approval from
Quasonix, Inc.
Copyright Quasonix, Inc., All Rights Reserved.
Advertisement
Table of Contents

Related Manuals for Quasonix RDMS


Summary of Contents for Quasonix RDMS
- Page 1 System Version 19.3 Specifications subject to change without notice. All Quasonix receiver products are under U.S. Department of Commerce jurisdiction categorized as 5A991; not covered by ITAR No part of the document may be circulated, quoted, or reproduced for distribution without prior written approval from Quasonix, Inc.
-
Page 2: Table Of Contents
Generation Rack-Mount RDMS™ Table of Contents Introduction ............................1 Description ........................... 1 Nomenclature ..........................2 1.2.1 Options ............................ 2 1.2.2 Detailed Option Descriptions ....................3 SAW Filter Option – 14 ....................... 3 1.2.2.1 Cybersecurity – CS, CS1, CS2 ................... 3 1.2.2.2... - Page 3 Generation Rack-Mount RDMS™ Operating Instructions .......................... 19 Operational Priority ........................19 Front-Panel Control ........................20 4.2.1 1U Front Panel Control ......................20 4.2.2 3U Front Panel Control ......................20 Waveform Graphics ........................21 Navigation ..........................22 4.4.1 Selecting a Receiver Channel ....................23 4.4.2...
- Page 4 Generation Rack-Mount RDMS™ 4.4.2.16.2 AGC Scale ......................43 4.4.2.16.3 AGC Time Constant ....................43 4.4.2.16.4 AGC Freeze ......................44 4.4.2.16.5 AGC Zero Mode..................... 45 4.4.2.16.6 Zero AGC ....................... 46 4.4.2.17 AM Menu ........................47 4.4.2.17.1 AM Bandwidth ......................48 4.4.2.17.2 AM Polarity ......................
- Page 5 System Info ......................92 4.4.2.27.2 Ethernet ......................... 95 4.4.2.27.3 Web Server ......................98 4.4.2.27.4 Fan Control ......................106 4.4.2.27.5 System Update (RDMS Local Update) ..............106 4.4.2.28 Graphics Menu ......................109 4.4.2.28.1 Graph Type ......................109 4.4.2.28.2 Signal Strength ....................112 4.4.2.29 EVTM Menu ........................
- Page 6 Generation Rack-Mount RDMS™ 4.5.3.3.12 Channel B Video Scale ..................137 4.5.3.3.13 Tape Output Frequency ..................137 4.5.3.3.14 FM De-emphasis (PCM/FM Mode Only) ............. 137 4.5.3.4 Forward Error Correction ....................138 4.5.3.5 Advanced PCM/FM Settings ................... 139 4.5.3.5.1 Modulation Index Scaling Mode ................139 4.5.3.5.2...
- Page 7 4.11.1 Additional Band Codes ......................177 Maintenance Instructions ........................178 Product Warranty ..........................179 Quasonix Limited Warranty Statement ..................179 6.1.1 Extended Warranties ......................180 Technical Support and RMA Requests....................181 Appendix A – Recommended AM and AGC Settings for ACU Interfaces ......... 182 AM and AGC ..........................
- Page 8 Notes ........................... 191 11.3 3U Connectors ......................... 191 11.4 Troubleshooting ........................193 Appendix E – Factory Reset Values ....................194 Appendix F - RDMS with -IP Option ....................198 14.1 Overview ..........................198 14.2 Hardware ..........................198 14.3 Set Up TMoIP IP Address ......................200 14.4...
- Page 9 Generation Rack-Mount RDMS™ 16.1 Firefox ............................210 16.2 Edge, Internet Explorer, and Chrome ..................213 Appendix I – RDMS with -EN Option ..................... 219 17.1 Overview ..........................219 17.2 Hardware ..........................220 17.3 Browser Interface ........................222 17.3.1 EVTM Embedded Transmitter Settings ................222 17.3.2...
- Page 10 Generation Rack-Mount RDMS™ Figure 18: Active Main Menu Settings LCD ....................23 Figure 19: Mode Display with Wait Message ....................24 Figure 20: Front Panel Keypad ........................25 Figure 21: Frequency Key on Front Panel ....................25 Figure 22: Main Menu, Frequency Setting ....................26 Figure 23: Frequency Entry Screen ......................
- Page 11 Generation Rack-Mount RDMS™ Figure 55: Main Menu, HyperTrack ......................42 Figure 56: Main Menu, AGC Menu Selection ..................... 42 Figure 57: AGC Menu, Polarity Highlighted ....................43 Figure 58: AGC Menu, AGC Scale Selection and Entry Screens............... 43 Figure 59: Time Constant Selection and Time Constant Entry Screens ............ 44 Figure 60: AGC Menu, AGC Freeze Selection ...................
- Page 12 Generation Rack-Mount RDMS™ Figure 92: Mod Scale Index Entry ....................... 62 Figure 93: Advanced Menu, Best Channel Selector ................... 62 Figure 94: System Block Diagram with Best Channel Selector ..............63 Figure 95: Best Channel Indicator Example ....................64 Figure 96: Best Channel Indicator-Combiner ....................65 Figure 97: Best Channel Indicator-Ch 1 ......................
- Page 13 Generation Rack-Mount RDMS™ Figure 129: Clk/Data Output Menu, Channel A Output Selection............... 81 Figure 130: Clk/Data Output Menu, Channel B Output Selection............... 81 Figure 131: Clk/Data Output Menu, Four Channel Parameters ..............82 Figure 132: Advanced Menu, Test Utilities ....................82 Figure 133: Noise Generator, Test Noise ....................
- Page 14 Figure 196: RDMS™ Browser Interface Tool Bar ..................116 Figure 197: Browser Interface Monitor Screen ..................117 Figure 198: Monitor Screen for RDMS™ with Only One Channel Available ..........118 Figure 199: Monitor Screen Partial Status Information Block when Combiner On ........118 Figure 200: Monitor Screen Partial Status Information Block when Combiner Off ........
- Page 15 Figure 209: Monitor Combiner Display Only ..................... 124 Figure 210: Monitor Update Rate Adjustment................... 125 Figure 211: RDMS™ Browser Interface Header Tool Bar ................ 125 Figure 212: Configure Screen, Combiner Section ..................125 Figure 213: Configuration Screen with Combiner On, Channel 1 Displays ..........126 Figure 214: Configuration Screen with Combiner Off, Channel 1 and Channel 2 Display .......
- Page 16 Generation Rack-Mount RDMS™ Figure 240: Mod Index Scaling Mode/Hold, Modulation Scale Index with Edit Field........ 142 Figure 241: Advanced PCMFM Settings Window, Phase Noise Compensation Drop Down Menu ..142 Figure 242: System Settings Window ....................... 142 Figure 243: System Settings, Antenna Controls ..................143 Figure 244: Antenna Controls Window, HyperTrack Selection ..............
- Page 17 Figure 310: 3U Rear Panel ........................192 Figure 311: 3rd Generation RDMS 3U Back Panel Connectors ............... 198 Figure 312: 3rd Generation RDMS 3U Back Panel Connectors-Right Side ..........199 Figure 313: Browser Window with an Incorrect IP Address ..............200...
- Page 18 Figure 341: 3rd Generation RDMS 3U Three Channel Receiver ............. 219 Figure 342: 3rd Generation RDMS 3U Three Channel Receiver with the EN Option ......219 Figure 343: 3rd Generation RDMS 3U Three Channel Transceiver with the EN Option ......220 Figure 344: 3rd Generation RDMS 3U Back Panel Connectors ...............
- Page 19 Table 8: Modulation Naming Convention ....................28 Table 9: Normal (Default) Video Output Signals ..................77 Table 10: Normal (Default) Video Output Signals ..................136 Table 11: RDMS™ BER Specifications ....................173 Table 12: Band Configuration Codes ......................176 Table 13: Recommended AM/AGC Settings .................... 182 Table 14: 1U Tape Output Connectors .....................
- Page 20 Table 18: Multi-h CPM Factory Reset Values ................... 196 Table 19: QPSK Factory Reset Values ..................... 197 Table 20: Reference Documents ......................198 Table 21: 3U Rack-Mount RDMS TMoIP Ports ..................199 Table 22: 3U Rack-Mount RDMS EVTM Ports ..................221 Quasonix, Inc.
-
Page 21: Introduction
SOQPSK/LDPC • STC/LDPC Of the aforementioned, RDMS™ provides true multi-symbol trellis demodulation in all three ARTM modes, PCM/FM, SOQPSK-TG, and Multi-h PCM. It also provides a clock signal, obviating the need for any outboard bit synchronizer. Modes that support LDPC use IRIG-standard low-density parity check coding to dramatically improve link margin by up to 9 dB. -
Page 22: Nomenclature
Generation Rack-Mount RDMS™ 1.2 Nomenclature The Rack-Mount RDMS™ (hereafter referred to as “RM RDMS™”) is available in a plethora of variations based on the number of channels, frequency bands, demodulation methods, options, etc. The features and modes installed in each unit are identified in the model number, as depicted in Figure 1. -
Page 23: Detailed Option Descriptions
Ethernet (EVTM) Payload, Receive Only – EN 1.2.2.3 When the EN option is enabled, the RDMS will recover EVTM encoded data and convert it from Serial Streaming Telemetry back to the original Ethernet packets. Standard SST operation is not replaced, and can still be used. This hardware must be paired with an -EN enabled transmitter for proper data recovery. -
Page 24: Telemetry Over Ip - Ip
LDPC codes, and its error-correcting performance is inferior to LDPC. Therefore, LDPC is the preferred forward error correction if possible. The Viterbi Decoder control requires the K7 option, and the RDMS must be set to one of the following PSK modes: BPSK, QPSK, AQPSK, AUQPSK, OQPSK, or UQPSK. -
Page 25: Band Configurations
Generation Rack-Mount RDMS™ 1.2.3 Band Configurations Band configuration codes are listed in Table 2. Two additional band codes are described in section 1.2.3.1. Table 2: Band Configuration Codes Extended Extended Extended Extended 1415.0 1585.0 1650.0 1855.0 2185.0 2500.0 5250.0 200.0... -
Page 26: Additional Band Codes
Generation Rack-Mount RDMS™ 1.2.3.1 Additional Band Codes Two additional band codes are available: • Band Code 7: 70 MHz standard range, 0.075 MHz-20 MHz, 70 MHz extended range • Band Code T: 2025.0 MHz to 2110.0 MHz standard range 1.3 Package Contents The contents of the box include the following: •... -
Page 27: Specifications
(AGC mode) -15 dBm Combiner: -5 dBm Channel 1 and 2 Mod Out: -5 dBm (3U RDMS only) IF output impedance 50 ohms VSWR 2:1 Max; 1.5:1 Typical 250 kHz, 500 kHz, 1 MHz, 2 MHz, 4.5 MHz, 10 MHz, 20 MHz, 40 MHz. Automatic selection based on modulation type and data rate, with manual override. - Page 28 Generation Rack-Mount RDMS™ Characteristic Specification Demodulator Section ARTM Tier 0 (PCM/FM), ARTM Tier I (SOQPSK-TG), ARTM Tier II (Multi-h CPM), Space Time Coding (STC); Legacy suite: Analog FM, BPSK, QPSK, Offset QPSK (OQPSK), Demodulator type Asymmetric QPSK (AQPSK), Unbalanced QPSK (UQPSK), Asymmetric Unbalanced...
-
Page 29: Installation Instructions
3.1.1 1U Rack-Mount The 1U RM RDMS™ Telemetry Receiver’s enclosure fits in a standard 19” rack, occupying just 1U of rack space. Mechanical layouts are provided in Figure 2 and Figure 3. Figure 2: Mechanical Drawing – 1U Front View Figure 3: Mechanical Drawing –... -
Page 30: Touchscreen
Generation Rack-Mount RDMS™ 3.1.2 3U Touchscreen The 3U RM RDMS™ Telemetry Receiver’s enclosure fits in a standard 19” rack, occupying 3U of rack space. Mechanical layouts are provided in Figure 4 and Figure 5. Figure 4: Mechanical Drawing – 3U Front View Figure 5: Mechanical Drawing –... -
Page 31: Thermal
3.2 Thermal The storage temperature of the RM RDMS™ unit is rated for 0°C to +70°C, while the operating temperature is rated for 0°C to +50°C. It is recommended that the unit be kept in a temperature controlled environment to minimize the risk of operating (or storing) outside the ranges specified. -
Page 32: Rear Panel Connections
Generation Rack-Mount RDMS™ Name Description Ethernet (J35) Enables network access Power Supplies AC power to the unit 3.3.2 3U Rear Panel Connections Rear panel connectors are the same for all receivers; however, in a single-channel configuration all connectors are not active. -
Page 33: Table 4: Additional 3U Rear Panel Connectors
Supplies AC power to the unit Note that AQPSK mode results in two independent bit streams out of the RDMS. The I data is available on the normal clock and data outputs, but the Q data is only available on an MDM connector unless the user has a 3U receiver. -
Page 34: Table 5: 1U And 3U Rear Panel Connector Specifications
Generation Rack-Mount RDMS™ Table 5: 1U and 3U Rear Panel Connector Specifications Channel 1 Channel 2 Combiner Channel 1 Channel 2 Combiner Receiver Connector Connector Connector Connector Connector Connector Nomenclature Number/pin Number/pin Number/pin Number/pin Number/pin Number/pin Clock A Data A... -
Page 35: Digital Output Mdm-25 D-Sub Pinout-J9
Generation Rack-Mount RDMS™ 3.3.2.1 1U Digital Output MDM-25 D-Sub Pinout-J9 The pinout for the 1U J9, an MDM-25 D-sub connector, is shown in Table 6. Pin locations are illustrated in Figure Table 6: 1U Digital Output MDM-25 D-Sub Pinout (J9) Electrical Char. -
Page 36: Figure 8: 1U Mdm-25 D-Sub Pin Locations For J23 And J9
Generation Rack-Mount RDMS™ Figure 8: 1U MDM-25 D-Sub Pin Locations for J23 and J9 Quasonix, Inc. -
Page 37: Electrical Signals
By default, the output data is valid on the falling edge of the clock, as shown in Figure 9. The polarity of the output clock may be inverted by toggling the Clock Polarity setting in either user interface. The RM RDMS™ can be operated through its front panel interface or web-based browser interface (RDMS™... - Page 38 X’s represent the IP address of the rack. The main Browser Interface web page displays in the browser window and the user has control of the rack. For issues that occur during installation, call Quasonix Technical Support at 513-942-1287. Quasonix, Inc.
-
Page 39: Operating Instructions
Generation Rack-Mount RDMS™ 4 Operating Instructions The RM RDMS™ can be operated through its front panel interface or via the web-based browser interface (RDMS Browser Interface). The browser interface is capable of configuring, maintaining, and monitoring multiple receivers within a network. -
Page 40: Front-Panel Control
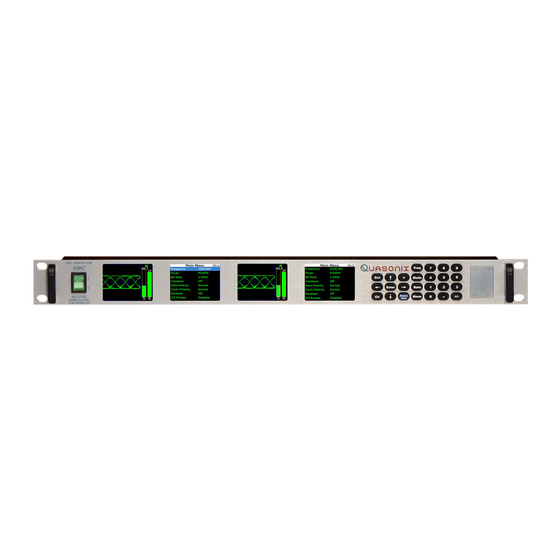
In a single-channel configuration, waveform graphics are displayed on the left-most LCD and receiver settings are on the second LCD from the left. A static Quasonix logo is shown on the two right-most LCDs. In a dual-channel receiver, the two LCDs located to the right of the power switch are designated for Channel 1, while the other two LCDs are designated for Channel 2. -
Page 41: Waveform Graphics
Generation Rack-Mount RDMS™ Figure 12: 3U Front Panel Graphics, DQM, Main Menu, and Virtual Keypad 4.3 Waveform Graphics Each channel’s waveform graphics display provides a real-time visual representation of the received signal’s constellation, or eye pattern in the case for PCM/FM. -
Page 42: Navigation
Generation Rack-Mount RDMS™ Figure 15: Waveform Graphics LCD with Locked PCM/FM Signal The signal strength bar, the left of the two with the letter “S” below it, transitions from red at 0 dB Eb/N0 to green at 10 dB Eb/N0 and greater. The level in dBm is indicated above the bar. -
Page 43: Selecting A Receiver Channel
Figure 18: Active Main Menu Settings LCD The Please Wait message, shown in Figure 19, displays whenever the RDMS™ is busy—generally when processing a command for longer than one second. This usually occurs during a Mode change, Ethernet configuration, or due to configuration via the Browser Interface. -
Page 44: Main Menu Settings
Generation Rack-Mount RDMS™ Figure 19: Mode Display with Wait Message 4.4.2 Main Menu Settings The available options from the Main Menu screen include the following: • Frequency • Frequency Diversity (Diversity Combiner On) • Mode • Bit Rate • Power Ratio (UQPSK mode only) •... -
Page 45: Frequency
Figure 20. Depending on the number of options provided with the RDMS™, some menu items may not display when the RDMS™ is powered on. To see additional LCD menu options, use the arrow keys to scroll up or down. The complete list redisplays continuously forward or backward, depending on which arrow key is pressed. -
Page 46: Figure 22: Main Menu, Frequency Setting
Generation Rack-Mount RDMS™ Figure 22: Main Menu, Frequency Setting Either method displays a frequency entry screen prompting the operator to type a frequency using the rack’s front panel keypad. Figure 23: Frequency Entry Screen The default frequency is highlighted. The user can use the front panel keypad to:... -
Page 47: Playback Demodulator
When the RDMS™ Frequency is set to 75 kHz to 20 MHz, or 70 MHz with a selectable SAW filter (which is well below the standard 200.0 MHz-5250.0 MHz range), the RF downconverter is bypassed and demodulator IF input... -
Page 48: Mode
Generation Rack-Mount RDMS™ Figure 25: Main Menu, Frequency Diversity Setting 4.4.2.3 Mode To set the mode, or modulation, press the Mode key on the front panel keypad for a display of the available choices. Use the keypad arrows to navigate to the desired mode, and then press the Enter key. -
Page 49: Aqpsk Mode
AQPSK Mode Note that AQPSK mode results in two independent bit streams out of the RDMS. The I data is available on the normal clock and data outputs, but the Q data is only available on an MDM connector unless the user has a 3U receiver. -
Page 50: Figure 28: Rate Key On Front Panel
Generation Rack-Mount RDMS™ Figure 28: Rate Key on Front Panel Figure 29: Main Menu, Bit Rate Setting Either method displays a bit rate dialog screen prompting the operator to enter a bit rate using the rack’s front panel numeric keypad, in Mbps. A decimal point is only needed for bit rates with fidelity down into the kilobits per second range. -
Page 51: Power Ratio (Uqpsk Mode Only)
Figure 33: Power Ratio Entry Screen 4.4.2.6 Combiner (Optional) A pre-detection diversity combiner is available as an option for dual-channel receivers. If diversity combining is installed on the RDMS™, it can be enabled through the Main Menu > Combiner option. Quasonix, Inc. -
Page 52: Data Polarity
Generation Rack-Mount RDMS™ Figure 34: Main Menu, Combiner Setting When the combiner is enabled on one channel, the second channel automatically reflects this change. Additionally, any parameter changes made by the user in one channel will automatically be made for the second channel, from which the combined signal is partially derived. -
Page 53: Clock Polarity
Generation Rack-Mount RDMS™ 4.4.2.8 Clock Polarity The Clock option on the Main Menu is for adjusting the clock polarity. The parameter options are Normal and Inverted. To change the polarity, press the Enter key on the front panel keypad when the parameter is highlighted on the Main Menu. -
Page 54: Figure 38: Dqm Calibration Fixture Process
(BEP) allows DQE from multiple vendors to interoperate. The Quasonix DQM is based on statistics developed deep inside the demodulator. Bit Error Probability (BEP) is the calculated likelihood that a bit is in error. A very low BEP can be determined from only a few bits. BEP does not require any known data and can be determined quickly and accurately from demodulator statistics. -
Page 55: Figure 39: Dqe Format
Generation Rack-Mount RDMS™ • 16-bit sync pattern (0xFAC4) MSB first: 1111101011000100 0.00 1.00 • 16-bit ID word (format TBD) 0.95 1E-01 1.11111E-01 5211 • 16-bit DQM = min(round(-log10(LR) / 12 * 2.00 1E-02 1.01010E-02 10899 (2^16)), 2^16 -1) 3.00 1E-03 1.00100E-03... -
Page 56: Derandomizer
(0-10). 4.4.2.11 Derandomizer The RM RDMS™ includes a derandomizer, which can be enabled (two modes) or disabled by selecting the parameter from the Main Menu and pressing the Enter key on the front panel keypad. The default setting for the derandomizer is Off. -
Page 57: Modulation Scaling (Pcm/Fm Mode Only)
4.4.2.12.1 Modulation Scaling – Tracking When the RDMS™ is powered on, the default setting is Acquire, unless the unit was powered off from a preset condition. If the unit was powered off from an unmodified preset setting, then the default condition of Modulation Scaling is as defined in the preset. -
Page 58: Modulation Scaling - Hold
4.4.2.12.2 Modulation Scaling – Hold When the RDMS™ has a good lock on the target transmitter, Modulation Scaling should be set to Hold by highlighting the Mod Scaling option on the Main Menu and then pressing the Enter key on the keypad. -
Page 59: Modulation Scaling - Off
4.4.2.12.4 Modulation Scaling – Acquire When the RDMS™ is powered on, the default setting is Acquire, unless the unit was powered off from a preset condition. Acquire mode has two states: Armed and Triggered. When Modulation Scaling is set to Acquire, in the absence of signal, the eye pattern will turn Yellow, as shown in Figure 51, the state is set to Armed. -
Page 60: Modulation Persistence (Pcm/Fm Mode Only)
Generation Rack-Mount RDMS™ If the receiver is locked and the delta h (the change in modulation index) has settled below the delta h threshold for the specified settling time, the state changes to Triggered, and the eye pattern will turn Green. In Triggered mode, the estimated h (modulation index) is monitored but the scale is not updated. -
Page 61: Hypertrack
The lock detect output defaults to fixed 0 if the HyperTrack™ back panel is present. Refer to the Digital Status Output (DSO) command in the RDMS™ Access via Telnet and Serial Control Protocol Technical Guide for additional information. -
Page 62: Agc Menu
Generation Rack-Mount RDMS™ Figure 55: Main Menu, HyperTrack 4.4.2.16 AGC Menu Access the Automatic Gain Control (AGC) menu from the front panel Main Menu. Select the AGC Menu, and then press the Enter key on the front panel keypad. Figure 56: Main Menu, AGC Menu Selection The AGC (Automatic Gain Control) menu, shown in Figure 57, includes the following parameters: •... -
Page 63: Agc Scale
Generation Rack-Mount RDMS™ Figure 57: AGC Menu, Polarity Highlighted 4.4.2.16.2 AGC Scale The AGC Scale option, shown in Figure 58, adjusts the voltage of the AGC back panel BNC output. The scale can be set in units of dB/V (decibels per volt). The higher the scale is set, the more dynamic range the AGC output can represent, but the lower its resolution will be. -
Page 64: Agc Freeze
Generation Rack-Mount RDMS™ Because the AM back panel BNC output tracks any input signal level changes that are not tracked by the AGC, the AM output will include any signal amplitude frequency content from (approximately) the inverse of the AGC time constant up to the AM bandwidth limit. -
Page 65: Agc Zero Mode
Figure 60: AGC Menu, AGC Freeze Selection 4.4.2.16.5 AGC Zero Mode The AGC Zero Hold (On/Off) option from the 2 Generation RDMS was replaced by AGC Zero Mode. There are three available settings, Manual, Hold, or Hold and Save. •... -
Page 66: Zero Agc
Generation Rack-Mount RDMS™ 4.4.2.16.6 Zero AGC Zero AGC is used to set a baseline for background radio noise levels. The front panel displays provide visual indications whether the AGC is zeroed or not. If Zero AGC has not been set, the signal strength bar displays in gray and lacks the blue zero indication line, shown in Figure 62. -
Page 67: Am Menu
Generation Rack-Mount RDMS™ Figure 63: AGC Menu, Zero AGC Highlighted Figure 64: Waveform Graphics After AGC Zero Set The AGC output voltage is set to zero volts DC at a time when the receiver input is at its minimum value. -
Page 68: Am Bandwidth
Generation Rack-Mount RDMS™ Figure 65: Main Menu, AM Menu Selection The AM (Amplitude Modulation) menu includes the following parameters: • AM Bandwidth (00) • AM Polarity (Positive/Negative) • Scale (0.5-2.5) • AGC Comp (Enabled / Disabled) 4.4.2.17.1 AM Bandwidth To change the AM Bandwidth value, select the appropriate option, as shown in Figure 66, then press the Enter key on the front panel. -
Page 69: Am Scale
Generation Rack-Mount RDMS™ Figure 68: AM Menu, AM Polarity Highlighted 4.4.2.17.3 AM Scale To change the AM Scale value, select the Scale option on the AM Menu, as shown in Figure 69, then press the Enter key on the front panel. -
Page 70: Options Menu
4.4.2.18.1 Save Receiver Settings The Save Receiver Settings option, shown in Figure 73, saves the current RDMS parameters. For example, the user may have changed a variety of parameters since the last shutdown/power up of the receiver and does not want to lose the settings in the event of a power outage. -
Page 71: Load Presets Menu
The Load Menu allows previously stored configuration settings from the Save Presets screen, or the system default presets, to be retrieved. (The RDMS ships with predefined presets. Presets are always available even if the user has not created any custom presets. There are no “empty” preset slots.) To load saved presets, select the appropriate option, then press the Enter key on the front panel. -
Page 72: Factory Default
Figure 77: Options Menu, Factory Default Selection and Reset in Process 4.4.2.19 Advanced Menu The Advanced Menu should only be accessed by advanced users. Contact Quasonix customer support before using these options. The Advanced Menu, which is accessed via the Main Menu, as shown in Figure 78, provides access to the following options: •... -
Page 73: Synchronize Bit Rate
Generation Rack-Mount RDMS™ • Mod Scale Index • Best Channel Selector • Time Aligner • AFC Mode • PCM Encoding • • Video Output Menu • Clk/Data Output Menu • Test Utilities Figure 78: Main Menu, Advanced Menu 4.4.2.19.1 Synchronize Bit Rate Synchronize Bit Rate sets the receiver’s commanded bit rate to the value it is currently measuring on the input... -
Page 74: If Filter
Generation Rack-Mount RDMS™ Figure 79: Advanced Menu, Sync Measured Bit Rate Selection To apply the measured bit rate, scroll to the Sync Bit Rate option to highlight it. Then press the Enter key on the front panel keypad. The displayed bit rate value will be set as the new bit rate. -
Page 75: Figure 81: 70 Mhz If Module In 2" X 3" Chassis Saw Filter Responses, Narrow Group (10 Mhz Span)
MHz, 14 MHz, and 28 MHz. The measured responses of the optional filters are shown in Figure 75 and Figure 76. Contact Quasonix for information about the optional filters. Figure 81: 70 MHz IF Module in 2” x 3” Chassis SAW Filter Responses, Narrow Group (10 MHz Span) -
Page 76: Figure 82: Saw Filter Responses, Wide Group (Plotted On 100 Mhz Span)
Generation Rack-Mount RDMS™ Figure 82: SAW Filter Responses, Wide Group (Plotted on 100 MHz Span) Quasonix, Inc. -
Page 77: Figure 83: Optional Saw Filter Responses For 70 Khz To 6 Mhz
Generation Rack-Mount RDMS™ Figure 83: Optional SAW Filter Responses for 70 kHz to 6 MHz Quasonix, Inc. -
Page 78: Phase Noise Comp (Pcm/Fm Mode Only)
The Phase Noise Comp option, shown in Figure 86, is used to set the Phase Noise Compensation (PNC) value to On, Off, or Auto. When set to Auto, the RDMS continuously checks and determines which mode (with PNC or without) has a higher data quality value and automatically sets the unit to that mode. Refer to section 9, Appendix C, for detailed information about Phase Noise Compensation. -
Page 79: Muting Timeout
Generation Rack-Mount RDMS™ Figure 86: Advanced Menu, Phase Noise Compensation Selection The user may toggle the Phase Noise Compensation value by pressing the Enter key on the front panel keypad until the desired value displays. 4.4.2.19.4 Muting Timeout The Muting Timeout option, shown in Figure 87 is used to set a timeout value (in milliseconds). This setting is used to determine when to mute (stop sending data) when the Muting option is set to On. -
Page 80: Output Muting
Generation Rack-Mount RDMS™ Figure 88: Muting Timeout Entry Screen 4.4.2.19.5 Output Muting The Output Muting option, shown in Figure 89, is used to set the muting value to On or Off. When the Output Muting option is set to On, the receiver stops sending clock and data information when the timeout value is reached. -
Page 81: Mod Scale Index
Generation Rack-Mount RDMS™ Figure 90: Advanced Menu, DC Antenna Selection The downconverting antenna has an LO that is used to downconvert C band signals (4400 MHz – 5150 MHz) to a lower frequency range known as P band (400 MHz – 1150 MHz) using an LO frequency of 5550 MHz. This results in two issues that are addressed by the downconverting antenna control. -
Page 82: Best Channel Selector
Generation Rack-Mount RDMS™ To change the Modulation Scale Index, select Mod Scale Index, then press the Enter key on the front panel. A dialog screen displays prompting the operator to enter a new modulation scale index using the rack’s front panel numeric keypad. -
Page 83: Figure 94: System Block Diagram With Best Channel Selector
Generation Rack-Mount RDMS™ The Best-Channel Selector (BCS) is a revolutionary new feature, unique to the Quasonix RDMS™. Its purpose is to ensure that the back-panel data output from the Combiner is always optimal, even in rare cases where the Pre- Detection Diversity Combiner struggles relative to Channel 1 and Channel 2. -
Page 84: Figure 95: Best Channel Indicator Example
BSS designed to handle several seconds of time delay between channels. Driving an external BSS with several RDMS™ BCS outputs leverages the strengths of both. Best Channel Selector Status Best Channel Selector status is only displayed with the Combiner option enabled and set to On. -
Page 85: Figure 96: Best Channel Indicator-Combiner
Generation Rack-Mount RDMS™ • Bright green – Best signal; this signal has the highest data quality of all correlating signals, and its quality is directly reflected in the BCS quality bar • Green – Good signal; this signal correlates sufficiently to the best signal to participate in best-channel selection, but its data quality is not highest •... -
Page 86: Figure 97: Best Channel Indicator-Ch 1
Generation Rack-Mount RDMS™ Figure 97: Best Channel Indicator-Ch 1 Figure 98 illustrates a bad signal for Channel 1, a good signal for the Combiner, with the best signal being selected from Channel 2. This can happen if one received signal is so much better than the other that the combined signal is composed of essentially 100% of the better signal and 0% of the worse signal. -
Page 87: Time Aligner
The Quasonix RDMS™ Combiner can perform both phase alignment and time alignment of the Channel 1 and Channel 2 signals. The Time Aligner is capable of correcting up to ±1300 nanoseconds of time skew between... -
Page 88: Afc Mode
This prevents the AFC from potentially interfering with frequency tracking if AFC is unlikely to be needed. Override may be disabled, and many other detailed AFC parameters may be controlled, via the command line interface. Refer to the RDMS™ Access via Telnet and Serial Control Protocol Technical Guide for AFC command details. -
Page 89: Afc Mode - Off
This mode is best suited for small frequency offsets that are within the amount of frequency offset that the demodulator can natively tolerate. In general, Quasonix recommends setting the AFC Mode to Off. Figure 103: Advanced Menu, AFC Mode – Off 4.4.2.20.2 AFC Mode –... -
Page 90: Pcm Encoding
(i.e., RZ, Biϕ, DM, or M2), the RDMS bit rate must be set to twice the user bit rate. Note that the RDMS output clock will clock at twice the user bit rate in this configuration. -
Page 91: Fec Menu
Generation Rack-Mount RDMS™ Figure 106: Advanced Menu, PCM Encoding Figure 107: PCM Encoding Selections 4.4.2.22 FEC Menu Forward Error Correction (FEC) may be accomplished by using Low-Density Parity Check (LDPC) encoding, in SOQPSK or STC modes, or by using convolutional encoding/Viterbi decoding, and/or ReedSolomon encoding in legacy PSK modes (BPSK, QPSK, OQPSK, AQPSK, AUQPSK, or UQPSK). -
Page 92: Figure 110: Fec Menu, Ldpc Code
LDPC encoding is intended to improve performance specifically under harsh conditions, which might have a negative effect on AFC tracking. In general, Quasonix recommends setting the AFC Mode to Off if possible. This recommendation is especially important for the best LDPC performance. Refer to section 4.4.2.20 for additional information about AFC Mode. -
Page 93: Viterbi Decoder (K7 Option Required) (Legacy Psk Modes Only)
LDPC codes, and its error-correcting performance is inferior to LDPC. Therefore, LDPC is the preferred forward error correction if possible. The Viterbi Decoder control requires the K7 option, and the RDMS must be set to one of the following PSK modes: BPSK, QPSK, AQPSK, AUQPSK, OQPSK, or UQPSK. -
Page 94: Figure 115: I And Q Data Streams Independently Encoded
Generation Rack-Mount RDMS™ Figure 115: I and Q Data Streams Independently Encoded The appropriate decoder for this method is selected by setting Convolutional Symbol to Disabled, as shown in Figure 116. In older releases without the Convolutional Symbol control, this was the only method supported. -
Page 95: Reed-Solomon Decoder (K7 Option Required) (Legacy Psk Modes Only)
The Reed-Solomon control requires the K7 option, and the RDMS must be set to one of the following PSK modes: BPSK, QPSK, AQPSK, AUQPSK, OQPSK, or UQPSK. The RDMS has only one Reed-Solomon decoder. -
Page 96: Interleave Depth (K7 Option Required) (Legacy Psk Modes Only)
Generation Rack-Mount RDMS™ 4.4.2.22.5 Interleave Depth (K7 Option Required) (Legacy PSK modes only) The burst error correction capability of the Reed-Solomon decoder can be extended by interleaving N code blocks, which spreads burst errors out in the decoder. Valid interleave depths range from N = 1 (no interleaving) to N = 8. -
Page 97: Channel A Output
Generation Rack-Mount RDMS™ Figure 121: Advanced Menu, Video Output Menu 4.4.2.23.1 Channel A Output The Channel A Output option, shown in Figure 122, selects what signal appears on the I/Video A output: Normal, Tape Out, or Carrier Only. The Normal output depends on the selected Mode, as shown in Table 9. -
Page 98: Channel B Output
Generation Rack-Mount RDMS™ 4.4.2.23.2 Channel B Output The Channel B Output option, shown in Figure 123, selects what signal appears on the Q/Video B output: Normal, Tape Out, or Carrier Only. The Normal output depends on the selected Mode, as shown in Table 9. Tape Out outputs the Pre-D signal, and Carrier Only outputs an unmodulated carrier;... -
Page 99: Channel B Scale
Generation Rack-Mount RDMS™ 4.4.2.23.4 Channel B Scale The Channel B Scale option, shown in Figure 125, adjusts the peak-to-peak amplitude on the Q/Video B output. By default the video output is 1.0000 V peak-to-peak using a standard deviated NTSC video signal. This setting allows the user to compensate for a system where this is not the case. -
Page 100: Clk/Data Output Menu (1U Receiver)
Generation Rack-Mount RDMS™ Figure 127: Video Output Menu, FM De-emphasis Selection The user may toggle the FM De-emphasis value by pressing the Enter key on the front panel keypad until the desired value displays. 4.4.2.24 Clk/Data Output Menu (1U Receiver) -
Page 101: Channel B Output
Generation Rack-Mount RDMS™ Figure 129: Clk/Data Output Menu, Channel A Output Selection 4.4.2.24.2 Channel B Output The Channel B Output options, shown in Figure 129, select what signals appear on the Channel B clock/data outputs: DQE, No DQE, or Test Data. -
Page 102: Test Utilities
Generation Rack-Mount RDMS™ Figure 131: Clk/Data Output Menu, Four Channel Parameters 4.4.2.26 Test Utilities The Test Utilities selections, accessed via the Advanced Menu, as shown in Figure 132, provide access to the following options: • Noise Generator • Data Generator •... -
Page 103: Data Generator
Generation Rack-Mount RDMS™ Figure 133: Noise Generator, Test Noise • Test Noise – Enables or disables the AWGN generator • Noise Level -Sets the noise level to use in the test in dB E , as shown in Figure 134 Figure 134: Noise Generator, Noise Level Selection 4.4.2.26.2 Data Generator... -
Page 104: Figure 135: Data Generator, Test Data
Generation Rack-Mount RDMS™ Figure 135: Data Generator, Test Data • Data rate in Mbps – Typing a number in this field sets the data rate in Mbps Figure 136: Data Generator, Data Rate • Pattern – Sets the data pattern produced by the data generator; This may be a fixed pattern or a... -
Page 105: Figure 137: Data Generator, Test Pattern Selection
Generation Rack-Mount RDMS™ Figure 137: Data Generator, Test Pattern Selection • User Defined – A unique binary pattern, between 2 and 32 bits, specified by the person running the test; only available when Pattern is “User Defined” Figure 138: Data Generator, User Defined Test Pattern Selection Inversion –... -
Page 106: Bert
Generation Rack-Mount RDMS™ • Randomization – Enable or disable IRIG 106 15-bit randomization; not recommended for PN15 data, due to potential conflict between the sequence generator and the randomizer, both of which are based on the same generator polynomial Figure 140: Data Generator, Randomization 4.4.2.26.3 BERT... -
Page 107: Figure 141: Test Utilities, Bert
Generation Rack-Mount RDMS™ Figure 141: Test Utilities, BERT • Measurement – Enables or disables Bit Error Rate (BER) measurement Figure 142: BERT, Measurement • (Re)Start BERT – Starts (or restarts) the (BER) test measurement with an error count and total bit count of zero;... -
Page 108: Figure 144: Bert, Pattern Selection
Generation Rack-Mount RDMS™ • Pattern – Sets the data pattern used by the bit error rate test; This may be a fixed pattern or a pseudorandom pattern that repeats based on the chosen pattern/sequence (a shorter pattern looks more regular, a longer pattern looks more random) •... -
Page 109: Figure 146: Bert, Type-Continuous Or Limit
Generation Rack-Mount RDMS™ • Type – Selects the BERT measurement type—Continuous or Limited, as shown in Figure 146; Limited tests automatically complete when the selected time limit, total bit limit, or errored bit limit is reached Figure 146: BERT, Type-Continuous or Limit •... -
Page 110: Figure 148: Bert, Bit Limit
Generation Rack-Mount RDMS™ Figure 148: BERT, Bit Limit • Error Limit – (Bits) – Sets a specific number of bit errors; the test completes when the selected number of errored bits has been received Figure 149: BERT, Error Limit •... -
Page 111: System Settings
Generation Rack-Mount RDMS™ Figure 150: BERT, Gating • Restart on Resync – When enabled, automatically clears the bit count and errored bit count to zero whenever the BERT loses pattern sync; this effectively restarts any measurement that may be inaccurate due to BERT synchronization loss Figure 151: BERT, Restart on Resync 4.4.2.27 System Settings... -
Page 112: System Info
Generation Rack-Mount RDMS™ Figure 152: Main Menu, System Settings Selection The System Settings menu includes the following parameters: • System Info • Ethernet • Web Server • Fan Control • System Update Figure 153: System Settings Menu, System Info Highlighted 4.4.2.27.1 System Info... -
Page 113: Figure 154: System Info Menu
Generation Rack-Mount RDMS™ Figure 154: System Info Menu The System Info screens provide all of the pertinent network settings for the rack unit, including: RDMS model number, Serial Number, System Version, the FPGA version number, software version numbers, DHCP status, IP Address, IP Subnet address, MAC address, Alias, and Secure Name. -
Page 114: Figure 156: System Info Menu, System Version Displays
The Gateway address displays the Gateway network IP address. This is the address of the router that allows the RDMS to access networks outside of the network defined by the IP Address and Subnet (the local subnet). The Gateway address must be an address on this network. For example, if the IP Address is 192.168.100.1 and the... -
Page 115: Ethernet
Subnet is 255.255.255.0, the Gateway could be anything in the 192.168.100.X network. If no Gateway is needed (all access to the RDMS comes from the same network it is on), the Gateway can safely be set to 0.0.0.0. The MAC (Media Access Control) is a hardware address uniquely identifying the RDMS™ receiver on the local communication network. -
Page 116: Figure 158: System Settings Menu, Ethernet Selection
Generation Rack-Mount RDMS™ …… Figure 158: System Settings Menu, Ethernet Selection DHCP This is the Dynamic Host Configuration Protocol. On some networks, the DHCP assigns dynamic IP addresses to the devices on the network–in other words, it assigns a new IP address each time the user connects to the network. -
Page 117: Figure 161: Ip Subnet Selection
Figure 163: Gateway Selection Figure 164: Gateway Entry TMoIP Address In an RDMS TMoIP unit, the TMoIP address displays on the Ethernet screen, as shown in Figure 165. The TMoIP address for the rack unit is assigned automatically. Quasonix, Inc. -
Page 118: Web Server
Connection to the RDMS HTTPS server requires a Quasonix Root Authority certificate, obtained from Quasonix. This certificate is generated by Quasonix, and it is used to verify the server certificates presented by the RDMS upon HTTPS connection with a web browser. The Quasonix Root Authority certificate must be imported into the browser prior to making an HTTPS connection to the RDMS. -
Page 119: Figure 167: Firefox Https Connection Without Quasonix Certificate Imported
Generation Rack-Mount RDMS™ Figure 167: Firefox HTTPS Connection Without Quasonix Certificate Imported Figure 168: Edge HTTPS Connection Without Quasonix Certificate Imported Quasonix, Inc. -
Page 120: Figure 169: Chrome Https Connection Without Quasonix Certificate Imported
Figure 170: Internet Explorer HTTPS Connection Without Quasonix Certificate Imported In order to instruct the browser to ‘trust’ the certificate provided by the RDMS, the user must import the Quasonix Root Authority certificate. Instructions for importing the certificate into the browser vary by application and are located in section 16, Appendix J. -
Page 121: Figure 171: Firefox Secure Https Connection
After the Quasonix Root Authority certificate has been imported into the browser, the browser will indicate a secure connection to the RDMS, as seen in Figure 171 though Figure 174. Connect to the HTTPS Browser Interface by entering “https://” followed by the IP address of the RDMS (for example, https://192.168.222.22). When the connection is made, you may operate the interface just as you would with the standard HTTP interface. - Page 122 The HSTS setting stands for HTTP Strict Transport Security and is a web security policy that allows the RDMS web server to declare that web browsers should connect to it using only HTTPS connections.
- Page 123 Generation Rack-Mount RDMS™ Crlnumber = $dir/crlnumber = $dir/crl/ca.crl.pem crl_extensions = crl_ext default_crl_days = 30 # SHA-1 is deprecated, so use SHA-2 instead. Default_md = sha256 name_opt = ca_default cert_opt = ca_default default_days = 375 preserve = no policy = policy_def...
- Page 124 Name, and Email Address for the Certificate Authority. Common Name is required. 4.4.2.27.3.1.1.3 Create Server Certificate and Private Key Next, generate the server certificate and key that will be uploaded to the RDMS and used by it when connections are made to the browser interface over HTTPS.
- Page 125 4.4.2.27.3.1.1.5 Upload Certificate and Private Key to RDMS 4.4.2.27.3.1.1.5.1 Admin User A user named ‘admin’ is provided to allow for uploading of the certificate and private key to the RDMS. This user has very restricted capability and is limited to uploading files and changing its password.
-
Page 126: Fan Control
RDMS (refer to section 4.4.2.27.3.1.1). If HSTS is used on an RDMS, and HTTPS is subsequently turned off on the RDMS, it may be impossible to access the RDMS via a Browser that has previously received the HSTS header (because it will always ask for the HTTPS site). -
Page 127: Figure 176: System Update, Perform Local Update Selection
To perform a local update: Obtain a firmware update file from Quasonix. Transfer the update file to the root directory of a USB thumb drive, then plug the drive into the RDMS via the back port, or via the front port with an adapter. -
Page 128: Figure 178: Rdms3 Local Update Screen
Figure 179. Figure 179: RDMS3 Local Update Screen, Update File Selected Press Enter to start the update. The RDMS copies the update file from the USB drive and begins the update. • Do not power off the RDMS during the update. -
Page 129: Graphics Menu
Generation Rack-Mount RDMS™ Upon completion of the update, the RDMS returns to normal operating mode and all parameters are reset to system defaults. Navigate to the System Settings screen, then select, as shown in Figure 181, to verify that the System Version matches the firmware update version. -
Page 130: Figure 183: Pcm/Fm Eye Pattern
Generation Rack-Mount RDMS™ Examples of the Eye Pattern (PCM/FM) (Figure 183), Constellation (SOQPSK) (Figure 184), Constellation (STC) (Figure 189 and Figure 190), and Spectrum (Figure 185 and Figure 186) are shown in the associated figures. Figure 183: PCM/FM Eye Pattern... -
Page 131: Figure 187: Mhcpm Constellation
While the spectrum display is virtually the same as the SOQPSK spectrum when the RDMS is running in STC mode, the receiver display looks quite different than the usual SOQPSK constellation, as shown in Figure 189. The individual parts of the display are labeled in Figure 190. -
Page 132: Signal Strength
Generation Rack-Mount RDMS™ relative strength of the top antenna, while the length of the green line below the bar represents the strength of the bottom. The small green square within the multicolor bar represents the time difference of arrival in increments of ¼... -
Page 133: Evtm Menu
Figure 191: Main Menu, Graphics Menu Selection and Graphics Menu, Signal Strength 4.4.2.29 EVTM Menu The EVTM Menu is only available with the EN option. Refer to Appendix 17 – RDMS with -EN Option for details. Quasonix, Inc. -
Page 134: Browser Interface
Browser Interface status The RDMS™ Browser Interface consists of a tool bar at the top of the screen, shown in Figure 192, and five selections that display a variety of parameters for each available channel. The Browser Interface defaults to the Network screen. -
Page 135: Figure 193: Network Screen With Multiple Receivers And Active Channels
Generation Rack-Mount RDMS™ Figure 193: Network Screen with Multiple Receivers and Active Channels Figure 194: Network Screen, Closeup of Left Side, Combiners Only Quasonix, Inc. -
Page 136: Monitor Screen
The Monitor screen may be accessed via the Monitor buttons on the Network screen, as described previously, or via the Monitor option on the Tool bar, as shown in Figure 196. Figure 196: RDMS™ Browser Interface Tool Bar The unit information displays in the Monitor view, as shown in Figure 197. -
Page 137: Figure 197: Browser Interface Monitor Screen
Generation Rack-Mount RDMS™ Figure 197: Browser Interface Monitor Screen The Monitor screen provides the user with: • Channel selection • Basic receiver settings, such as frequency, mode, bit rate • Signal indicators, including lock detect, signal strength, signal quality, best channel, combiner link status •... -
Page 138: Figure 198: Monitor Screen For Rdms™ With Only One Channel Available
Generation Rack-Mount RDMS™ Figure 198: Monitor Screen for RDMS™ with Only One Channel Available Additional status information, such as Frequency, Mode, and Bit Rate, is provided at the bottom of the display when the combiner is On, as shown in Figure 199, or displayed in the center of the screen between Channel 1 and Channel 2 when the combiner is Off, as shown in Figure 200. -
Page 139: Signal Graph And Signal Indicators
Generation Rack-Mount RDMS™ 4.5.2.1 Signal Graph and Signal Indicators The Signal Graph, shown in Figure 201, provides a separate window for monitoring the receiver’s constellation or eye pattern. The graphical display, included for each channel, mimics the graphical display on the front panel of the rack-mount receiver. -
Page 140: Spectrum Graph
10 being the best possible quality. Note: The integrated Quasonix demodulator can detect and establish signal lock at very low signal levels. Therefore, it is not uncommon to see a red signal strength bar indicator accompanied with a green signal lock indicator. -
Page 141: Diversity Combiner
Generation Rack-Mount RDMS™ Figure 203: Power Spectral Density Plot Window 4.5.2.3 Diversity Combiner If the optional diversity combiner is installed and enabled between two channels, then a Best Channel Source image and a DQM graph display in the area between the two channels on the Monitor. The Diversity Combiner with a signal lock (green) is shown in Figure 204. -
Page 142: Monitor Selective Display Options
Generation Rack-Mount RDMS™ If the Combiner is On and Frequency Diversity On is selected, the frequency for Channel 2 may be set differently from Channel 1. Best Channel Selector (BCS) status is only displayed with the Combiner option enabled and set to On. This status displays at the bottom of the combiner signal indicator window. -
Page 143: Figure 206: Monitor Full Display (Default)
Generation Rack-Mount RDMS™ Figure 206: Monitor Full Display (Default) Figure 207: Monitor Eye Pattern/Constellation Display Only Quasonix, Inc. -
Page 144: Client Level Update Rate
Generation Rack-Mount RDMS™ Figure 208: Monitor PSD (Spectrum) Only Figure 209: Monitor Combiner Display Only 4.5.2.5 Client Level Update Rate Users may override the receiver level update rate temporarily. The Update Rate buttons at the bottom of the Monitor screen are used to change in increments between low, medium, and high. The user may press the Stop button to temporarily pause the screen transmission. -
Page 145: Configure Screen
Combiner (Optional) A pre-detection diversity combiner is available as an option for dual-channel receivers. If diversity combining is installed on the RDMS™, it can be enabled by clicking on the check box in the Combiner field, as shown in Figure 212. -
Page 146: Frequency Diversity (Available With Diversity Combiner)
Generation Rack-Mount RDMS™ Additionally, any parameter changes made by the user in one channel will automatically be made for the second channel, from which the combined signal is partially derived. The only setting that can still be changed individually when the diversity combiner is turned on is the channel frequency, which allows for frequency diversity to be implemented. -
Page 147: Figure 214: Configuration Screen With Combiner Off, Channel 1 And Channel 2 Display
Generation Rack-Mount RDMS™ Figure 214: Configuration Screen with Combiner Off, Channel 1 and Channel 2 Display The Configure screen includes all of the primary settings related to the receiver, including Frequency, Mode, Bit Rate, Data and Clock Polarity, Equalizer, DQ Encapsulation, and Derandomizer. The Power Ratio control is available for UQPSK mode only. -
Page 148: Data And Clock Polarity Settings
Generation Rack-Mount RDMS™ Figure 216: Configure Basic Settings Window-AQPSK Mode, Two Bit Rates The settings can be adjusted by clicking on a check box (to enable or disable an option), clicking on a drop down menu and making a selection, or, in the case of Frequency and Bit Rate, typing the number directly or using up/down scroll arrows to select the desired value. -
Page 149: Derandomizer Settings
Generation Rack-Mount RDMS™ 4.5.3.2.2 Derandomizer Settings The Derandomizer defaults to Off. Click on the drop down arrow to display the menu, then select the desired option (Figure 219). The standard running mode for non-LDPC, non-Reed-Solomon operation is IRIG. The CCSDS option is only available when an LDPC Mode is enabled (SOQPSKLDPC or STCLDPC) or when Reed-Solomon decoding is enabled. -
Page 150: Configure Advanced Settings
Generation Rack-Mount RDMS™ Figure 220: Configure Basic Settings Window-SOQPSK Mode 4.5.3.3 Configure Advanced Settings The Configure screen also includes a secondary window for Advanced Settings. These include Measured Bit Rate, IF Filter, Output Muting, Muting Timeout, AFC Mode, Best Channel Selector, Time Aligner, and PCM Encoding, as shown in Figure 221. -
Page 151: Measured Bit Rate Setting
Generation Rack-Mount RDMS™ Figure 221: Advanced Settings Window 4.5.3.3.1 Measured Bit Rate Setting Measured Bit Rate displays the receiver’s bit rate on the input signal. This value may be copied and set as the specified bit rate. The purpose of this process is to eliminate unintended bit rate offset error so that the receiver can make full use of its bit synchronizer tracking range, or optionally reduce its tracking range. -
Page 152: Output Muting
The AFC (Automatic Frequency Control) Mode option, shown in Figure 223, compensates for frequency offset in the received signal relative to the expected carrier frequency. Demodulators for all modes in the RDMS™ contain frequency-tracking loops that can accommodate some amount of frequency offset. The amount of offset that can be tolerated depends on the mode and is generally a small percentage of the bit rate. -
Page 153: Best Channel Selector
Generation Rack-Mount RDMS™ be needed. Override may be disabled, and many other detailed AFC parameters may be controlled, via the command line interface. Refer to the RDMS™ Access via Telnet and Serial Control Protocol Technical Guide for AFC command details. -
Page 154: Time Aligner
The Quasonix RDMS™ Combiner can perform both phase alignment and time alignment of the Channel 1 and Channel 2 signals. The Time Aligner is capable of correcting up to ±1300 nanoseconds of time skew between channels (about a quarter mile of free-space propagation). -
Page 155: Pcm Encoding
(i.e., RZ, Biϕ, DM, or M2), the RDMS bit rate must be set to twice the user bit rate. Note that the RDMS output clock will clock at twice the user bit rate in this configuration. -
Page 156: Channel A Video Output
Generation Rack-Mount RDMS™ 4.5.3.3.9 Channel A Video Output The Channel A Video Output option, shown in Figure 227, selects what signal appears on the I/Video A output: Normal, Tape Out, or Carrier Only. The Normal output depends on the selected Mode, as shown in Table 10. Tape Out outputs the Pre-D signal, and Carrier Only outputs an unmodulated carrier;... -
Page 157: Channel A Video Scale
Generation Rack-Mount RDMS™ 4.5.3.3.11 Channel A Video Scale The Channel A Video Scale option, shown in Figure 229, adjusts the peak-to-peak amplitude on the I/Video A output. By default the video output is 1.0000 V peak-to-peak using a standard deviated NTSC video signal. This setting allows the user to compensate for a system where this is not the case. -
Page 158: Forward Error Correction
Generation Rack-Mount RDMS™ Figure 232: Advanced Settings Window, FM De-emphasis 4.5.3.4 Forward Error Correction Forward Error Correction (FEC) may be accomplished by using Low-Density Parity Check (LDPC) encoding, in SOQPSK or STC modes, as shown in Figure 233 and in Figure 234, or by using a convolutional encoding/Viterbi decoding, and/or ReedSolomon encoding in legacy PSK modes (BPSK, QPSK, OQPSK, AQPSK, AUQPSK, or UQPSK), as shown in Figure 235. -
Page 159: Advanced Pcm/Fm Settings
Generation Rack-Mount RDMS™ The Viterbi decoder and Reed-Solomon decoder can be disabled or enabled by clicking on the appropriate check box while a legacy PSK mode is selected (BPSK, QPSK, OQPSK, AQPSK, AUQPSK, or UQPSK). Likewise, the Convolutional Symbol setting for Viterbi decoding can be disabled or enabled by clicking on its check box. -
Page 160: Modulation Persistence
Save Presets option. Refer to section 4.5.4.1. When the RDMS™ is powered on, the default setting is Acquire, unless the unit was powered off from a preset condition. If the unit was powered off from an unmodified preset setting, then the default condition of Modulation Scaling is as defined in the preset. -
Page 161: Mod Scale Index
When the RDMS™ has a good lock on the target transmitter, Modulation Scaling should be set to Hold. Mod Scaling should be turned off when a new generation, digitally synthesized transmitter is the source. Digitally... -
Page 162: Phase Noise Compensation
Generation Rack-Mount RDMS™ Figure 240: Mod Index Scaling Mode/Hold, Modulation Scale Index with Edit Field To clear any held modulation scale index number, go to the Main Menu and toggle the Mod Scaling option back to Tracking. After Mod Scaling is set to Tracking, the modulation index follows the receiver’s present estimate of the mod index. -
Page 163: Antenna Controls
The lock detect output defaults to fixed 0 if the HyperTrack™ back panel is present. Refer to the Digital Status Output (DSO) command in the RDMS™ Access via Telnet and Serial Control Protocol Technical Guide for additional information. -
Page 164: Agc Polarity
Generation Rack-Mount RDMS™ Click on the drop down menu to select Enabled or Disabled, as shown in Figure 244. Figure 244: Antenna Controls Window, HyperTrack Selection 4.5.3.6.3 AGC Polarity The AGC Polarity option is used to set the automatic gain control polarity. Click on the drop down menu to select Positive or Negative, as shown in Figure 245. -
Page 165: Agc Time Constant
The AGC Zero Mode option is shown in Figure 249. The AGC Zero Hold (On/Off) option from the 2 Generation RDMS was replaced by AGC Zero Mode. There are three available settings, Manual, Hold, or Hold and Save. • Manual – Means the AGC must be zeroed manually after any frequency or IF bandwidth change, or after a power cycle Quasonix, Inc. -
Page 166: Agc Compensate
Generation Rack-Mount RDMS™ • Hold – Means the AGC holds its zero level after any frequency or IF bandwidth change but must be zeroed manually after a power cycle • Hold and Save – Means the AGC holds its zero level after any frequency or IF bandwidth change, or after a power cycle The AGC Zero mode (manual, hold, or hold and save) remains set if a waveform mode changes. -
Page 167: Am Scale
Generation Rack-Mount RDMS™ Figure 250: Antenna Controls Window, AM Polarity Drop Down Menu Selections 4.5.3.6.11 AM Scale To change the AM Scale value, type the desired value or use the up/down arrows to scroll to the appropriate value. The AM Scale has a range from -128 to +128. At its default setting of 1, the response is 2V p-p, into a 50 ohm load with a 50% AM. -
Page 168: Clock/Data Output Controls
Generation Rack-Mount RDMS™ frequency is specified since it can be applied to either a C or P band signal. The downconverting antenna setting determines how a specified C band frequency is interpreted in a system where both C and P bands are enabled. -
Page 169: Clock/Data Output Controls (3U Receiver)
Generation Rack-Mount RDMS™ The Channel B Output options, shown in Figure 254, select what signals appear on the Channel B clock/data outputs: DQE, No DQE, or Test Data. • DQE – Selecting DQE enables encapsulation of data on Channel B; if DQE is enabled in the Main Menu, the output is encapsulated, otherwise it is not •... -
Page 170: Test Utilities
Generation Rack-Mount RDMS™ 4.5.3.9 Test Utilities The Test Utilities selections, accessed via the Advanced Menu, as shown in Figure 256, provide access to the following options: • Noise Generator • Data Generator • BERT Figure 256: System Settings, Test Utilities 4.5.3.9.1... -
Page 171: Data Generator
Generation Rack-Mount RDMS™ Figure 257: Test Utilities, Noise Generator-Test Noise Drop Down Menu • Noise Level -Sets the noise level to use in the test in dB E , as shown in Figure 258 Figure 258: Test Utilities, Noise Generator-Noise Level Selection 4.5.3.9.2... -
Page 172: Figure 260: Data Generator, Test Data Drop Down Menu
Generation Rack-Mount RDMS™ Figure 260: Data Generator, Test Data Drop Down Menu • Data rate in Mbps – Typing a number in this field sets the data rate in Mbps, as shown in Figure 261 Figure 261: Data Generator, Data Rate Selection •... -
Page 173: Bert
Generation Rack-Mount RDMS™ • Inversion – Set to Normal or Inverted, as shown in Figure 263; when Inverted the data stream is inverted; useful for patterns that are defined as inverted by certain standards, or to compensate for an inversion... -
Page 174: Figure 266: Test Utilities, Bert Status
Generation Rack-Mount RDMS™ BERT Settings Refer to front panel section 4.4.2.26.3 for detailed information about BERT Settings. BERT Measurement Status BERT Status is only available via the Test Utilities screen in the Browser. The Status information, shown in Figure 266, displays measurements for Channel 1, Channel 2, and the Combiner (if enabled) when a BER test is running. -
Page 175: Zero Agc Button
Generation Rack-Mount RDMS™ Figure 267: Test Utilities, Status During BER Test 4.5.3.10 Zero AGC Button Automatic Gain Control (AGC) may be set to zero (0) by clicking on the green Zero AGC button in the Advanced section, shown in Figure 268. One or two buttons are available depending on the number of channels and the combiner mode. -
Page 176: Figure 269: Monitor Screen, Signal Strength Grey - Agc Not Zero
Generation Rack-Mount RDMS™ Orient the receiving antenna in a direction that is expected to yield the lowest signal level that the receiver is likely to encounter. Activate AGC Zero under this condition by clicking on the Zero AGC button. The AGC output voltage is set to zero volts DC at a time when the receiver input is at its minimum value. This process ensures that the AGC output voltage will not cross through zero volts DC under normal operation. -
Page 177: Signal Strength Display
Figure 271: Signal Graph and Signal Indicators Windows, Zero AGC RSSI Display “Relative” 4.5.3.11 Reset to Factory Defaults Button The Reset to Factory Defaults button, shown in Figure 272, sends a command to reset the RDMS hardware to factory default settings. During the process, the Browser Interface is temporarily unavailable. -
Page 178: Shutdown Hardware Button
Power must be removed and reapplied. If the user intends to immediately restart the RDMS, it is important to wait until the indication that the unit is offline is received. This takes about 30 seconds, and is typically indicated by an “Unable to connect” message in the browser. -
Page 179: Reboot System Button
4.5.3.14 Save Receiver Settings Button The Save Receiver Settings button, shown in Figure 275, saves the current RDMS parameters. For example, the user may have changed a variety of parameters since the last shutdown/power up of the receiver and does not want to lose the settings in the event of a power outage. -
Page 180: Save Presets
Accessed from the Presets option in the Tool Bar, Saved Presets screen, shown in Figure 277, allows the user to save and load settings stored on the RDMS™ receiver. Closeups of the right and left side of the Presets screen are shown in Figure 278 and Figure 279. -
Page 181: Figure 279: Presets Screen, Closeup Of Right Side
Generation Rack-Mount RDMS™ Figure 279: Presets Screen, Closeup of Right Side The Saved Presets screen contains a list of eight (8) saved setup files. Files are accessed by clicking on the View/Modify button next to the desired preset. When the user clicks on a View/Modify button, the Preset: View or Modify Preset screen opens, as shown in Figure 280. -
Page 182: Figure 281: Preset: View Or Modify Preset Screen, Preset Name And Description Fields
Preset names are limited to 20 alphanumeric characters, dots, dashes, and spaces. Longer preset names display in the Browser Interface, but may be truncated on the front panel of the RDMS™ when the preset file name exceeds 14 or 15 characters. This does not affect preset functionality. -
Page 183: Figure 282: Preset: View Or Modify Preset Screen, Information Successfully Saved Message
Generation Rack-Mount RDMS™ Figure 282: Preset: View or Modify Preset Screen, Information Successfully Saved Message When the user clicks on the Presets option in the Menu bar, the Saved Presets screen displays clearly showing the new preset, as shown in Figure 283. -
Page 184: Load Presets
Load Presets Loading a preset configuration is a quick way to set up an RDMS™ with specific settings. The RDMS™ has eight (8) default configurations pre-loaded and ready to use on the receiver. As shown in the previous section, the user may set up and save other configurations for later reuse. -
Page 185: About
Generation Rack-Mount RDMS™ Figure 286: Presets Screen While the preset is loading, the front panel on the receiver displays a wait message, as shown in Figure 287. The preset is finished loading when the wait message no longer displays. Figure 287: Loading Preset Please Wait Message on Front Panel 4.5.5... -
Page 186: Figure 289: System Information Screen
Figure 290: System Information Screen, Additional Information SD Card information displays when the user clicks on the ?, as shown in Figure 291. It provides details about the SD card in the unit that is useful for Quasonix if a receiver update is necessary. Quasonix, Inc. -
Page 187: Monitor Page Default Update Rate
Generation Rack-Mount RDMS™ Figure 291: System Information Screen, SD Card Information 4.5.5.1 Monitor Page Default Update Rate The default receiver level update rate is set by a user from the About screen, Monitor Page Default Update Rate parameter, as shown in Figure 292. The drop down menu provides four update rate settings for all clients connected to the receiver. -
Page 188: Footer Tool Bar
Help The Help option on the Footer Tool bar, provides a link to the Rack-Mount RDMS Installation and Operation manual, an RDMS API User Guide, as well as contact information for Quasonix. The Help screen is shown in Figure 295. -
Page 189: Page Access
As noted earlier, the 3 Generation RDMS receiver uses a built-in web server to provide monitoring and control. Multiple users may access the receiver. To minimize configuration or control conflicts, the Browser Interface alerts users of potential conflicts. -
Page 190: Export
Export Configuration, shown in Figure 298, and Import Configuration provide a way for users to save and retrieve RDMS receiver settings and information. This functionality may be useful to provide a record of settings used during test missions, as a way to quickly switch between receiver setups, or as a way to backup the receiver settings. -
Page 191: Import
Generation Rack-Mount RDMS™ 4.5.6.4 Import The Import Configuration screen, shown in Figure 299, is used to import files that were previously exported (as described in the previous section). Figure 299: Import Configuration Screen Click on the Browse button to open a File Upload window on the desktop. -
Page 192: Figure 300: Import Configuration Selection Window
Generation Rack-Mount RDMS™ Figure 300: Import Configuration Selection Window Quasonix, Inc. -
Page 193: Performance Specifications
The rack-mount receiver requires 100 to 240 VAC, 50/60 Hz power. 4.8 RF Frequency Error By default, the RDMS™ is capable of acquiring a signal with a frequency error of up to ±100 kHz. 4.9 Bit Error Rate The RDMS™ meets the following BER limits, when tested with a signal source, which complies with IRIG 106-17. -
Page 194: Synchronization
Figure 301: BER Performance for Tier 0, I, and II 4.10 Synchronization The RDMS™ offers very fast, reliable acquisition, even at very low signal to noise ratio. Synchronization time is a function of modulation type and IF frequency error. Typical SOQPSK results (from 10,000 synchronization trials) are shown in Figure 302. -
Page 195: Figure 302: Synchronization Time At Various Signal-To-Noise Ratios
Generation Rack-Mount RDMS™ Figure 302: Synchronization Time at Various Signal-to-Noise Ratios Quasonix, Inc. -
Page 196: Rf Input
Generation Rack-Mount RDMS™ 4.11 RF Input Available band configurations are shown in Table 2. Two additional band codes are described in section 1.2.3.1. The input impedance is 50 ohms. Table 12: Band Configuration Codes Extended 1415.0 Extended 1585.0 1650.0 Extended 1855.0... -
Page 197: Additional Band Codes
Generation Rack-Mount RDMS™ 4.11.1 Additional Band Codes Two additional band codes are available: • Band Code 7: Through the IF Input: 70 MHz through SAW filters, 0.075 MHz-20 MHz, 70 MHz • Band Code T: 2025.0 MHz to 2110.0 MHz standard range... -
Page 198: Maintenance Instructions
Generation Rack-Mount RDMS™ 5 Maintenance Instructions The Rack-Mount receiver requires no regular maintenance, and there are no user-serviceable parts inside. Quasonix, Inc. -
Page 199: Product Warranty
Quasonix. Quasonix shall not be liable for a breach of the warranty set forth in this Limited Warranty unless: (i) the customer gives written notice of the defect, reasonably described, to Quasonix’s Contracts Administrator within thirty (30) days of the time when customer discovers or ought to have discovered the defect and obtains a Return Materials Authorizations (“RMA”) number;... -
Page 200: Extended Warranties
Products; (c) as a result of a failure to follow the instructions in the Operations & Maintenance Manual (d) by the use of parts not manufactured or sold by Quasonix; or (e) by modification or service by anyone other than (i) Quasonix, (ii) an Quasonix authorized service provider, or (iii) your own installation of end-user replaceable Quasonix or Quasonix approved parts if available for the Products in the servicing country. -
Page 201: Technical Support And Rma Requests
Generation Rack-Mount RDMS™ 7 Technical Support and RMA Requests In the event of a product issue, customers should contact Quasonix via phone (1-513-942-1287) or e-mail (support@quasonix.com) to seek technical support. If the Quasonix representative determines that the product issue must be addressed at Quasonix, a returned materials authorization (RMA) number will be provided for return shipment. -
Page 202: Appendix A - Recommended Am And Agc Settings For Acu Interfaces
Generation Rack-Mount RDMS™ 8 Appendix A – Recommended AM and AGC Settings for ACU Interfaces 8.1 AM and AGC In a typical flight test scenario, Automatic Gain Control (AGC) tracks out slow variations in received signal strength. Ideally, the net received signal has constant signal strength except for higher-frequency amplitude modulation (AM) induced by the antenna tracking mechanism. - Page 203 Generation Rack-Mount RDMS™ For example, suppose a conical scan system with no undesired low-frequency AM has a scan rate of 30 Hz. This system has a recommended AGC Time Constant of 1000 / 30 = 33.3 ms, and an AM Bandwidth of 5 * 30 = 150 Hz, with AGC Compensation OFF.
-
Page 204: Appendix B - Phase Noise Compensation
Generation Rack-Mount RDMS™ 9 Appendix B – Phase Noise Compensation 9.1 Trellis Demodulation Basics Legacy Single-Symbol Detection: • Uses basic Limiter-Discriminator operation • Frequency in this bit above nominal → data = 1 • Frequency in this bit below nominal → data = 0 •... -
Page 205: Trellis Demodulation Summary
Generation Rack-Mount RDMS™ Figure 304: Phase Trajectory Never Forgets 9.1.1 Trellis Demodulation Summary The basic premise of trellis demodulation is that the signal from the transmitter follows a known path through the phase tree. When the demodulator knows this, it can use a sequence of several symbols to help make better decisions about each individual bit. -
Page 206: Phase Noise Impact
This increase in bandwidth does have a tradeoff. A wider tracking range allows the RDMS to deal with the additional jitter, but it may also increase synchronization times slightly, and slightly increase the minimum SNR at which the RDMS declares lock. -
Page 207: Know Your Transmitter
Generation Rack-Mount RDMS™ Figure 307: "Clean" Eye Pattern 9.5 Know Your Transmitter If you know the brand and type of transmitter, these tips can help determine when to use PNC. If your transmitter was manufactured by these companies, PNC should be Off: •... -
Page 208: Appendix C - Pcm Framer/Deframer Function
10 Appendix C - PCM Framer/Deframer Function Quasonix RDMS™ receivers recognize PCM frames as defined by IRIG 106-17 Chapter 4 and Appendix 4-A. The receiver can provide basic processing of a large subset of possible frame configurations, including sync word detection, subframe ID checking, and data extraction from the frame structure (without decommutation). -
Page 209: Pcm Deframer
SFID (if present) to leave only the frame data. If the fame data is a known pattern, it can be monitored by a BERT to measure link performance. The RDMS™ receiver can output PCM frame lock and/or SFID valid indications on the DEMOD_LOCK and/or ONES_DETECT back-panel outputs. Refer to the RDMS™ data sheet for more information about these outputs. -
Page 210: Appendix D - How To Configure Tape Output
The method for configuring Tape Output has been updated. Refer to section 4.4.2.22 Video Output Menu for front panel control and section 4.5.3.3.9 Channel A Output, etc., for Browser Interface control. This appendix is also available on the Quasonix web site as a stand alone document: How to Configure the Tape Output on a 3 Generation Rack-Mount RDMS Telemetry Receiver. -
Page 211: Commands
Generation Rack-Mount RDMS™ 11.2 Commands After connecting to Channel 1, Channel 2, or Channel 3 (the combiner), the command prompt displays. The following commands configure the Tape Out on Q/Video B. Anything past the ‘#’ is a comment, and can be discarded. -
Page 212: Figure 310: 3U Rear Panel
Generation Rack-Mount RDMS™ Table 15: 3U Tape Output Connectors Output Connector I/Video A Channel 1 Q/Video B Channel 1 Video C Channel 1 Video D Channel 1 I/Video A Channel 2 Q/Video B Channel 2 Video C Channel 2 Video D Channel 2... -
Page 213: Troubleshooting
Generation Rack-Mount RDMS™ 11.4 Troubleshooting If you are still having difficulties at this point, contact Quasonix technical support. Quasonix Technical Support (1-513-942-1287) or email (support@quasonix.com) When calling technical support, it will speed things up if you have the following information handy: •... -
Page 214: Appendix E - Factory Reset Values
Generation Rack-Mount RDMS™ 12 Appendix E – Factory Reset Values When a reset command is activated, the frequency defaults to the lowest valid frequency for the lowest authorized band on the unit. The reset priority is: PCM/FM SOQPSK Multi-h CPM QPSK Reset values for each mode are listed in the following tables. -
Page 215: Table 17: Soqpsk Factory Reset Values
Generation Rack-Mount RDMS™ Table 17: SOQPSK Factory Reset Values Parameter Reset State Bit Rate Modulation Scaling Normal Clock Polarity Normal Data Polarity Disabled Derandomizer Enabled Differential Decoder Auto IF Filter Disabled Downconvert Antenna Manual AGC Zero Mode Convolutional Decoder Active High... -
Page 216: Table 18: Multi-H Cpm Factory Reset Values
Generation Rack-Mount RDMS™ Table 18: Multi-h CPM Factory Reset Values Parameter Reset State Bit Rate Modulation Scaling Normal Clock Polarity Normal Data Polarity Disabled Derandomizer Differential Decoder Auto IF Filter Disabled Downconvert Antenna Manual AGC Zero Mode Convolutional Decoder Active High... -
Page 217: Table 19: Qpsk Factory Reset Values
Generation Rack-Mount RDMS™ Table 19: QPSK Factory Reset Values Parameter Reset State Bit Rate Modulation Scaling Normal Clock Polarity Normal Data Polarity Disabled Derandomizer Differential Decoder Auto IF Filter Disabled Downconvert Antenna Manual AGC Zero Mode Disabled Convolutional Decoder Active High... -
Page 218: Appendix F - Rdms With -Ip Option
14.2 Hardware The 3U Rack-Mount RDMS back panel provides connectors used specifically with the -IP (TMoIP) option. The full back panel is shown in Figure 311. An enlarged view of the right side with TMoIP connectors is shown in Figure 312. -
Page 219: Figure 312: 3Rd Generation Rdms 3U Back Panel Connectors-Right Side
Generation Rack-Mount RDMS™ Figure 312: 3rd Generation RDMS 3U Back Panel Connectors-Right Side The ports used specifically for TMoIP operation are described in Table 21. EVTM ports are NOT enabled when using TMoIP. Table 21: 3U Rack-Mount RDMS TMoIP Ports... -
Page 220: Set Up Tmoip Ip Address
The TMoIP enabled receiver must be accessed directly via a web browser. Refer to the front panel Main Menu > System Settings selection to determine the IP address of the RDMS Control Ethernet interface (J80). Open a browser on the connected PC. -
Page 221: Tmoip Monitor/Configure Screen
Generation Rack-Mount RDMS™ The RDMS™ Browser Interface consists of a tool bar at the top of the screen, shown in Figure 192, with six selections that display a variety of parameters for each available channel. The Browser Interface defaults to the Network screen. -
Page 222: Tmoip Network Screen
Generation Rack-Mount RDMS™ In addition to providing status, a key capability of the TMoIP Monitor/Configure screen is selecting the parameters of TMoIP network output packets. Configuration is accomplished by scrolling to the row of the desired Local (TMoIP) Channel, then clicking on the Local Endpoint field, as shown in Figure 318. Associated configuration and control information displays in the right side pane. -
Page 223: Tmoip Serial I/O Screen
Generation Rack-Mount RDMS™ Figure 319: TMoIP Network Screen 14.4.3 TMoIP Serial I/O Screen The TMoIP Serial I/O screen, shown in Figure 320, updates status and configures serial input channels for TMoIP. Figure 320: TMoIP Serial I/O Screen Quasonix, Inc. -
Page 224: Tmoip Log Screen
Generation Rack-Mount RDMS™ 14.4.4 TMoIP Log Screen The TMoIP Log screen, shown in Figure 321, displays NetAquire server message log entries. Figure 321: TMoIP Log Screen 14.4.5 TMoIP System Screen The TMoIP System screen is shown in Figure 322. It provides links to a variety of configuration and status screens. -
Page 225: Tmoip About Screen
Generation Rack-Mount RDMS™ 14.4.6 TMoIP About Screen The TMoIP About screen, shown in Figure 323, provides NetAcquire® server status information, such as host resources, network interface, and server task status. Figure 323: TMoIP About Window Detailed information about each TMoIP screen is found in the NetAcquire® Telemetry over IP (TMoIP) Option Users Manual (NA-MAN-021). -
Page 226: Appendix G - Rdms Recovery Mode
When the RDMS enters recovery mode, a Recovery App is displayed on the front panel, as shown in Figure 324, and any accesses via the Browser Interface are forwarded to a Recovery Page, as shown in Figure 325. -
Page 227: Option 1 - Boot Existing Version
In Recovery Mode, the RDMS uses the same addressing method (static or dynamic) that it was last configured with to obtain an IP address. If it was configured with a static address, the RDMS will still be addressable via this static address. -
Page 228: Option 2 - Sd Card Update
15.2 Option 2 - SD Card Update If the RDMS cannot be recovered through the use of Option 1, the next best option is to use the SD Card Update process. This method uses an update card, provided by Quasonix, to perform a fresh install of the system firmware. -
Page 229: Figure 329: Browser Interface Recovery Screen, Network Update
Generation Rack-Mount RDMS™ When the RDMS is accessed via a browser directed to its IP address, the Recovery Mode page displays, as shown previously in Figure 325. This method uses a firmware update file, provided by Quasonix, in conjunction with the Browser Interface. -
Page 230: Appendix H - Import Quasonix Root Authority Certificate
16 Appendix H – Import Quasonix Root Authority Certificate In order to instruct the web browser to ‘trust’ the TLS certificate presented by the RDMS during an HTTPS Browser Interface connection, the Quasonix Root Authority Certificate must be imported into the browser or operating system’s Certificate Store. -
Page 231: Figure 331: Firefox Certificate Manager
Generation Rack-Mount RDMS™ Figure 331: Firefox Certificate Manager Click on the Import… button. A File Browser displays. Select the Quasonix Root Authority file obtained from Quasonix, then click on the Open button. The Downloading Certificate window displays, as shown in Figure 332. -
Page 232: Figure 333: Firefox Certificate Viewer-Quasonix Root Ca
Generation Rack-Mount RDMS™ Figure 333: Firefox Certificate Viewer-Quasonix Root CA 10. Scroll through the Certificate Names in the Authorities tab of the Certificate Manager to ensure “Quasonix, Inc.” is in the list, as shown in Figure 334. Quasonix, Inc. -
Page 233: Edge, Internet Explorer, And Chrome
Generation Rack-Mount RDMS™ Figure 334: Firefox Certificate Manager with Quasonix Root CA Added 11. Using Firefox, browse to https://RDMS_IP, where RDMS_IP is the IP address of the RDMS. 16.2 Edge, Internet Explorer, and Chrome To add a certificate to Edge, Internet Explorer, and Chrome, use the Windows Certificate Browser tool. After a certificate has been added to the system, it is available for use in Edge, Internet Explorer, and Chrome. -
Page 234: Figure 335: Internet Properties, Content Tab
Generation Rack-Mount RDMS™ Figure 335: Internet Properties, Content Tab Click on the Certificates button. The Certificates screen displays. Click on the Trusted Root Certification Authorities tab, as shown in Figure 336. Quasonix, Inc. -
Page 235: Figure 336: Certificates Screen
Generation Rack-Mount RDMS™ Figure 336: Certificates Screen Click on the Import… button to start the Certificate Import Wizard. The Wizard is shown in Figure 337. Figure 337: Windows Certificate Import Wizard Quasonix, Inc. -
Page 236: Figure 338: Windows Certificate Import Wizard-Browse
Generation Rack-Mount RDMS™ Click on the Next button. Click on the Browse button under File to Import. Select the Quasonix Root Authority file obtained from Quasonix. Click on the Next button. Figure 338: Windows Certificate Import Wizard-Browse Select “Place all certificates in the following store.”... -
Page 237: Figure 339: Windows Certificate Import Wizard-Choose Certificate Store
Click on the Finish button. A message displays “The import was successful.” Click on the OK button. 10. View the list of Certificates under Trusted Root Certification Authorities, and verify that Quasonix Root CA is listed, as shown in Figure 340. -
Page 238: Figure 340: Certificates, Quasonix Certificate Imported
Generation Rack-Mount RDMS™ Figure 340: Certificates, Quasonix Certificate Imported 11. Using Edge, Internet Explorer, or Chrome, browse to https://RDMS_IP, where RDMS_IP is the IP address of the RDMS. Quasonix, Inc. -
Page 239: Appendix I - Rdms With -En Option
This appendix describes how to operate a 3U Rack-Mount RDMS Telemetry Receiver with the -EN (EVTM) option (Ethernet via Telemetry). The RDMS recovers EVTM encoded data and converts it from serial streaming clock and data back to the original Ethernet packets. -
Page 240: Hardware
343, which provides bi-directional EVTM and the ability to configure basic embedded transmitter settings. Figure 343: 3rd Generation RDMS 3U Three Channel Transceiver with the EN Option The receiver’s browser-based graphical user interface (GUI) and the 3U front panel provide RDMS and EVTM configuration, control, and status. -
Page 241: Figure 345: 3Rd Generation Rdms 3U Back Panel Connectors-Right Side
Generation Rack-Mount RDMS™ Figure 345: 3rd Generation RDMS 3U Back Panel Connectors-Right Side The ports used specifically for EVTM operation are described in Table 21. TMoIP ports are NOT enabled when using EVTM. Table 22: 3U Rack-Mount RDMS EVTM Ports... -
Page 242: Browser Interface
However, multiple browser interfaces can monitor an individual receiver’s status at once. The RDMS™ Browser Interface consists of a tool bar at the top of the screen, shown in Figure 346, with six selections that display a variety of parameters for each available channel. The Browser Interface defaults to the Network screen. -
Page 243: Figure 348: Evtm Embedded Transmitter Settings, Frequency Selection
Generation Rack-Mount RDMS™ EVTM transmitter settings may be changed as follows. A new transmitter frequency may be typed into the Frequency field, or the user may scroll to the desired frequency using the up/down arrow buttons. Any valid frequency may be selected. The field turns green when a change is made, as shown in Figure 348. -
Page 244: Figure 350: Evtm Embedded Transmitter Settings, Bit Rate Selection
Generation Rack-Mount RDMS™ Figure 350: EVTM Embedded Transmitter Settings, Bit Rate Selection Turn the randomizer or LDPC (low density parity check) On or Off by clicking the down arrow next to the parameter and then highlighting the required setting, as shown in Figure 351 and Figure 352. -
Page 245: Evtm Status
Generation Rack-Mount RDMS™ Figure 354: EVTM Embedded Transmitter Settings, RF Drop Down Menu 17.3.2 EVTM Status The EVTM icon on the Menu bar also provides EVTM status information. When the actual RF state is On, and the EVTM transmitter output is On, a check mark displays in a green circle, as shown in Figure 355. -
Page 246: Figure 358: Evtm Embedded Transmitter Settings
Generation Rack-Mount RDMS™ Figure 358: EVTM Embedded Transmitter Settings The EVTM menu, shown in Figure 359, includes the following parameters for controlling the embedded transmitter: • • Tx Frequency • Tx Mode • EN Bitrate • Randomizer • LDPC •... -
Page 247: Figure 360: Evtm Embedded Transmitter Rf Option
Generation Rack-Mount RDMS™ Figure 360: EVTM Embedded Transmitter RF Option • Tx Frequency - Scroll to the Tx Frequency option to set the embedded transmitter frequency. Click on Tx Frequency to display the selection screen, as shown in Figure 361. Any valid frequency may be entered in MHz, then press the Enter key on the front panel keypad. -
Page 248: Front Panel Evtm Status
Generation Rack-Mount RDMS™ • EN Bitrate - Scroll to the EN Bitrate option to select the embedded transmitter bit rate. Click on EN Bitrate to display the selection screen, as shown in Figure 363. Type the new bit rate, in Mbps, then press the Enter key on the front panel keypad. -
Page 249: Figure 365: Evtm Status, Green Square-Actual Rf Output On, Evtm Transmitter Output On
When the actual RF state is Off and the EVTM transmitter output is Off, a red square displays, as shown in Figure 366. Figure 366: EVTM Status, Red Square—Actual RF Off, EVTM Transmitter Output Off If you have questions or would like additional information about EVTM, contact Quasonix. Quasonix, Inc. -
Page 250: Appendix J - Acronym List
Generation Rack-Mount RDMS™ 18 Appendix J – Acronym List Acronym Description Automatic Gain Control Amplitude Modulation AQPSK Variant of Quadrature Phase Shift Keying ARTM Advanced Range Telemetry AUQPSK Variant of Quadrature Phase Shift Keying Bit Error Probability Bit Error Rate... - Page 251 Generation Rack-Mount RDMS™ Acronym Description MHCPM multi-h Continuous Phase Modulation Megahertz (connector type) Threaded RF connector OQPSK Offset Quadrature Phase Shift Keying PCMFM Pulse Code Modulation/Frequency Modulation Phase Modulation Phase Shift Keying QPSK Offset Quadrature Phase Shift Keying RDMS Receiver DeModulator Synchronizer...