Table of Contents
Advertisement
Quick Links
ISO 9001:2015
Certified
Installation and Operation Manual
Rack-Mount RDMS
TM
Telemetry Receiver
Quasonix, Inc.
6025 Schumacher Park Dr.
West Chester, OH 45069
19 July 2018
Revision 3.5
Specifications subject to change without notice.
All Quasonix products are under U.S. Department of Commerce jurisdiction; not covered by ITAR
No part of the document may be circulated, quoted, or reproduced for distribution without prior written approval from
Quasonix, Inc.
Copyright Quasonix, Inc., All Rights Reserved.
Advertisement
Table of Contents

Related Manuals for Quasonix QSX-RDMS-RM Series


Summary of Contents for Quasonix QSX-RDMS-RM Series
- Page 1 Revision 3.5 Specifications subject to change without notice. All Quasonix products are under U.S. Department of Commerce jurisdiction; not covered by ITAR No part of the document may be circulated, quoted, or reproduced for distribution without prior written approval from Quasonix, Inc.
-
Page 2: Table Of Contents
Extended S Band – XS ....................5 1.2.3.13 Extended Upper L Band – XU ..................5 1.2.3.14 Package Contents ........................5 Specifications ............................6 Installation Instructions .......................... 9 Mechanical ........................... 9 Thermal ............................11 Electrical ............................ 11 3.3.1 Rear Panel Connections ....................... 11 Quasonix, Inc. - Page 3 Modulation Scaling - Off ..................30 4.1.4.10.4 Modulation Scaling - Acquire ................. 30 4.1.4.11 Modulation Persistence (PCM/FM Mode Only) ............31 4.1.4.12 Differential Decoder ...................... 32 4.1.4.13 AGC Menu ........................32 4.1.4.14 AM Menu ........................36 4.1.5 Options Menu ........................39 Quasonix, Inc.
- Page 4 Modulation Scaling Menu ..................... 69 4.1.5.18.1 Mod Scale Index ....................69 4.1.5.18.2 Hold Threshold ...................... 70 4.1.5.19 Encoding Menu ......................71 4.1.5.19.1 Encoding ........................ 72 4.1.5.19.2 Spectrum Inversion ....................73 4.1.5.19.3 Bi-Phase ........................ 73 4.1.5.20 DC Antenna ........................73 Quasonix, Inc.
- Page 5 RDMS™ Racks Configured With Independent Group ID Names ......120 4.2.6.2.4 4.2.7 About Menu ......................... 121 4.2.8 File Menu ..........................122 4.2.8.1 Save/Load Presets ......................122 4.2.8.2 Save or Load RDMS Flash Presets ................126 4.2.8.2.1 RDMS Save Profile Menu ..................126 Quasonix, Inc.
- Page 6 Appendix B – AGC Compensation ....................162 10.1 AM Menu..........................162 10.1.1 Recommended Settings ...................... 162 10.2 SNR Estimator (Advanced Menu) ................... 162 Appendix C – Phase Noise Compensation ..................163 11.1 Trellis Demodulation Basics ....................163 11.1.1 Trellis Demodulation Summary ................... 164 Quasonix, Inc.
- Page 7 Figure 18: Inactive Main Menu Display with Wait Message ............... 20 Figure 19: Front Panel Keypad ........................21 Figure 20: Frequency Key on Front Panel ....................21 Figure 21: Main Menu, Frequency Setting ....................22 Figure 22: Frequency Entry Screen ......................22 Quasonix, Inc.
- Page 8 Figure 56: AM Menu, Bandwidth and Time Delay Highlighted ..............37 Figure 57: AM Menu, Scale Highlighted ..................... 38 Figure 58: AM Bandwidth and Time Delay Entry Screens ................38 Figure 59: AM Scaling Entry Screen ......................38 Quasonix, Inc.
- Page 9 Figure 92: Network Menu, IP Setting ......................52 Figure 93: Network Menu, Subnet Setting ....................52 Figure 94: Network Menu, Gateway Setting ....................53 Figure 95: Network Menu, Set Group Security ID Setting ................53 Figure 96: Enter New Group ID ........................54 viii Quasonix, Inc.
- Page 10 Figure 129: Advanced Menu, Encoding Menu Selection ................72 Figure 130: Encoding Menu, Encoding Selection ..................72 Figure 131: Encoding Menu, Spectrum Selection ..................73 Figure 132: Encoding Menu, Bi-Phase Selection ..................73 Figure 133: Advanced Menu, DC Antenna Selection ................. 74 Quasonix, Inc.
- Page 11 Figure 166: AGC Settings Window ......................94 Figure 167: AM Settings Window ........................ 95 Figure 168: Tape Output Settings Window ....................95 Figure 169: Muting Settings Window ......................95 Figure 170: Synchronize Bit Rate Settings Window ................... 96 Quasonix, Inc.
- Page 12 Figure 204: Example – All Clients’ Messages Window with Automatic Denial Message ......113 Figure 205: Example – Client 2’s Messages Window Prior to Releasing Control ........113 Figure 206: Example – Close Selected Rack Controls Message ............. 113 Figure 207: Example – Mission Control Window for Both Clients ............114 Quasonix, Inc.
- Page 13 Figure 241: Control Panel - Network and Sharing Center ................ 147 Figure 242: Start Menu - Control Panel ....................148 Figure 243: Control Panel, Display Selection ................... 149 Figure 244: Display Window, Set Custom Text Size Option ..............149 Quasonix, Inc.
- Page 14 Table 15: Recommended AM/AGC Settings .................... 162 Table 16: QPSK Factory Reset Values ..................... 167 Table 17: PCM/FM Factory Reset Values ....................168 Table 18: SOQPSK Factory Reset Values ....................169 Table 19: Multi-h CPM Factory Reset Values ................... 170 xiii Quasonix, Inc.
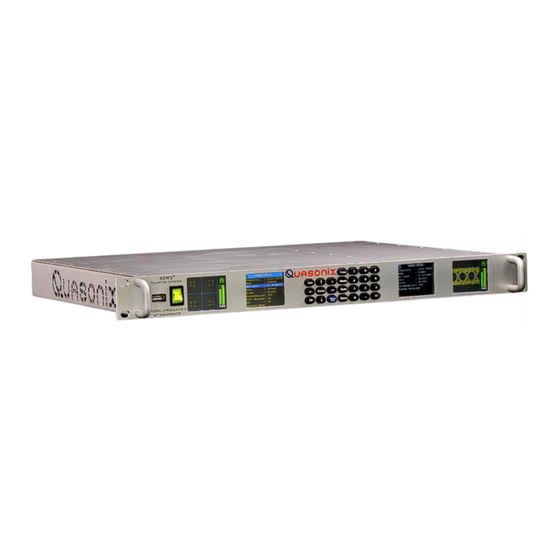
- Page 15 Rack-Mount RDMS Telemetry Receiver Quasonix, Inc.
-
Page 16: Introduction
Telemetry Receiver 1 Introduction 1.1 Description This document describes the installation and operation of the Quasonix Rack-Mount RDMS Telemetry Receiver. The RDMS™ (Receiver / DeModulator / bit Synchronizer) is designed to downconvert, demodulate, and bit synch to a variety of RF telemetry signals from flight-test aircraft. With an intuitive front-panel interface as well as an... -
Page 17: Band
Lower L, Upper L, and 1435.5 MHz 2394.5 MHz 1435.5 MHz S (Tri-band) P, Full-L, and S 400.0 MHz 2394.5 MHz 1435.5 MHz (Quad band) Full L, S, and C 1435.5 MHz 5150.0 MHz 1435.5 MHz (Quad band) Quasonix, Inc. -
Page 18: Options
Options The available options are listed below. Refer to section 1.2.3 for detailed descriptions of each option. Please contact Quasonix for assistance ordering receiver options. • 14 SAW filters (adds 70 kHz, 1.4, 3, 6, 14, and 28 MHz filters) •... -
Page 19: Detailed Option Descriptions
RS-422 – RS 1.2.3.7 The RS option specifies RS-422 clock and data outputs on 3-lug triax connectors. Clone Channel 2 – X2 1.2.3.8 The X2 option specifies Channel 2 configuration to match the Channel 1 bands and modes. Quasonix, Inc. -
Page 20: Extended C Band - Xc
L band is 1755.0 MHz to 1850.0 MHz. The extended tuning range is 1650.0 MHz to 1855.0 MHz. 1.3 Package Contents The contents of the box include the following: • Rack-Mount receiver unit • Power cord • CD with user manual, data sheets, etc. • Four (4) rubber feet with adhesive for lab bench use Quasonix, Inc. -
Page 21: Specifications
AGC time constant Adjustable to any value from 0.1 ms to 1000 ms First IF bandwidth 60 MHz (nominal) IF rejection > 90 dB Image rejection 70 dB RF input impedance 50 ohms VSWR 3:1 Max; 2.5:1 Typical Quasonix, Inc. - Page 22 1 Vp-p nominal, 4 Vp-p maximum NTSC de-emphasis Selectable On/Off Environmental Section Operating Temperature 0°C to +50°C Non-operating Temperature 0°C to +70°C Operating Humidity 0 to 95% (non-condensing) Altitude Up to 30,000 ft. (with the no displays options) Quasonix, Inc.
- Page 23 Status/SDI Out: DB-15 High Density female Connectors – combined channel Clock Out, Data Out, AGC Out, AM Out: BNC female Ethernet: RJ-45 Connectors – per chassis Data: USB Programming: MDM-25 male Power 100 to 240 VAC, 50/60 Hz Quasonix, Inc.
-
Page 24: Installation Instructions
The RM RDMS™ Telemetry Receiver’s enclosure fits in a standard 19” rack, occupying just 1U of rack space. Mechanical layouts are provided in Figure 4 and Figure 5. Figure 2: Mechanical Drawing – Front View Figure 3: Mechanical Drawing – Top View (Dual-channel Connectors Shown) Quasonix, Inc. -
Page 25: Figure 4: Interior 3-D Drawing Of Single-Channel Receiver
Rack-Mount RDMS Telemetry Receiver Figure 4: Interior 3-D Drawing of Single-Channel Receiver Figure 5: Portable 19” Rack Installation with Four RDMS™ Units Shown Quasonix, Inc. -
Page 26: Thermal
Connector Function Electrical Characteristics Connector Type I Out, video 50 ohms, DC coupled Q Out, video 50 ohms, DC coupled Clock Out 75 ohms, 3.3V TTL Data Out 75 ohms, 3.3V TTL AGC Out 1k ohms, DC coupled Quasonix, Inc. -
Page 27: Channel 1 Hd15 D-Sub Pinout
The pinout for J7, the HD15 D-sub connector, is shown in Table 5. Pin locations are illustrated in Figure 7. Table 5: Channel 1 HD15 D-Sub Pinout (J7) Electrical Char. Electrical Char. Electrical Char. SDI Out CH1 Clock D CH1 Clock B CH1 Demod Lock CH1 Data D Quasonix, Inc. -
Page 28: Channel 2 Hd15 Pinout
By default, the output data is valid on the falling edge of the clock, as shown in Figure 8. The polarity of the output clock may be inverted by toggling the Clock Polarity setting in either user interface. The RM RDMS™ can be operated through its front panel interface or Ethernet-based remote client interface (Remote RDMS™ Client). Quasonix, Inc. -
Page 29: Remote Control Interface
Following installation, the program can be found under the following Windows path: Start > All Programs > Quasonix Tools > Remote RDMS > Client Windows Vista and Windows 7 include .NET by default; however certain Vista users may still be prompted during the RRC installation process to install the latest version of .NET, which is included on the CD under the folder... -
Page 30: Network Requirements
Rack-Mount RDMS Telemetry Receiver For issues that occur during installation, call Quasonix Technical Support at 513-942-1287. 3.4.1 Network Requirements The following parameters are required for RRC to operate properly within a network: • Multicast must be enabled on the network level •... -
Page 31: Operating Instructions
In a single-channel configuration, waveform graphics are displayed on the left-most LCD and receiver settings are on the second LCD from the left. A static Quasonix logo is shown on the two right-most LCDs. In a dual-channel receiver, the two LCDs located to the left of the keypad are designated for Channel 1, while the other two LCDs are designated for Channel 2, as shown in Figure 9. -
Page 32: Waveform Graphics
An example of a PCM/FM eye pattern, taken from a spectrum analyzer, is shown in Figure 11. Figure 11: Example PCM/FM Eye Pattern An example of an SOQPSK constellation is shown in Figure 12. Figure 12: Example SOQPSK Constellation Quasonix, Inc. -
Page 33: Signal Quality
This estimate is calculated identically for all modes using one of two algorithms selected by the choice of SNR Estimator (refer to sections 4.1.5.22 and 4.2.3.1.2.9.4 for further details). 4.1.2 Navigation The Rack-Mount Receiver’s traditional hierarchical menu structure is navigated using the arrow and Enter keys on the front panel keypad, as shown in Figure 14. Quasonix, Inc. -
Page 34: Selecting A Receiver Channel
The channel number displays in the top left hand corner of the screen. In Figure 16, “CH 1” designates channel Figure 16: Active Main Menu Settings LCD Meanwhile, the LCD(s) for an inactive receiver will feature a menu bar that is grayed out and text that displays in white, as shown in Figure 17. Quasonix, Inc. -
Page 35: Main Menu Settings
Main Menu Settings The available options from the Main Menu screen include the following: • Frequency • Mode • Bit Rate • Combiner (Diversity Combiner option only) • Frequency Diversity (Diversity Combiner option only) • Data • Clock Quasonix, Inc. -
Page 36: Setting Frequency
There are two methods available to the user to set the receiver’s frequency. The first one is to press the Freq key on the front panel keypad. The second method is to highlight the Frequency option on the Main Menu, then press the Enter key on the PC keyboard. Figure 20: Frequency Key on Front Panel Quasonix, Inc. -
Page 37: Figure 21: Main Menu, Frequency Setting
For example, to set the frequency of an S-band receiver to 2250.5 MHz, press the following key combination: Figure 23: Example Keypad Combination for Setting Frequency The available center frequencies are based on the band(s) and any extended options that are ordered, as shown in Table 7. Quasonix, Inc. -
Page 38: Setting Mode
To set the mode, or modulation, press the Mode key on the front panel keypad for a display of the available choices. Use the keypad arrows to navigate to the desired mode, and then press the Enter key. Figure 24: Main Menu, Mode Setting Quasonix, Inc. -
Page 39: Setting Bit Rate
There are two methods available to the user to set the receiver’s bit rate. The first one is to press the Rate key on the front panel keypad. The second method is to highlight the Bit Rate option on the Main Menu, then press the Enter key on the PC keyboard. Figure 25: Rate Key on Front Panel Quasonix, Inc. -
Page 40: Diversity Combiner (Optional)
4.1.4.4 Diversity Combiner (Optional) A pre-detection diversity combiner is available as an option for dual-channel receivers. If diversity combining is installed on the RDMS™, it can be enabled through the Main Menu > Combiner option. Quasonix, Inc. -
Page 41: Frequency Diversity (Available With Diversity Combiner)
The FreqDiversity option is toggled On or Off using the Enter key on the front panel keypad. If there are two channels, the Combiner is set to On, and Frequency Diversity is Off, the channels are updated simultaneously. Figure 30: Main Menu, Frequency Diversity Setting Quasonix, Inc. -
Page 42: Setting Data Polarity
The RM RDMS™ includes a derandomizer, which can be enabled (On) or disabled (Off) by selecting the parameter from the Main Menu and pressing the Enter key on the front panel keypad. The default setting for the derandomizer is Off. Quasonix, Inc. -
Page 43: Force Break Lock (Psk Modes Only)
Scaling is as defined in the preset. When Tracking is set, the modulation scale index is actively being tracked. Note: The active setting is not saved when the rack is powered off, unless the Mod Persist option was set to On. Quasonix, Inc. -
Page 44: Modulation Scaling - Locked
When Modulation Scaling is set to Locked, the graphing eye pattern is displayed in green, indicating the optimal modulation index is set. Figure 37: Main Menu, Modulation Figure 38: Green Eye Pattern Display Scaling – Locked - Locked Quasonix, Inc. -
Page 45: Modulation Scaling - Off
Acquire mode has two states: Armed and Triggered. When Modulation Scaling is set to Acquire, in the absence of signal, the eye pattern will turn yellow, as shown in Figure 42, the state is set to Armed. In Armed state, modulation scaling operates continuously. Quasonix, Inc. -
Page 46: Modulation Persistence (Pcm/Fm Mode Only)
The default value is Off, as shown in Figure 43. Figure 43: Main Menu, Modulation Persistence – Off To retain a Locked index number, or to remain in Acquire mode, scroll to the Mod Persist option, then toggle the setting to On. Quasonix, Inc. -
Page 47: Differential Decoder
Figure 45: Main Menu, Differential Decoder Setting 4.1.4.13 AGC Menu Access the Automatic Gain Control (AGC) menu from the front panel Main Menu. Select the AGC Menu, and then press the Enter key on the front panel keypad. Quasonix, Inc. -
Page 48: Figure 46: Main Menu, Agc Menu Selection
The user may toggle the AGC state, Polarity, and AGC Zero Hold values by highlighting the desired parameter and pressing the Enter key on the front panel keypad until the desired value displays. Figure 47: AGC Menu, AGC and Polarity Highlighted Quasonix, Inc. -
Page 49: Figure 48: Agc Menu, Agc Zero Hold Off Highlighted
AGC Zero Hold causes the receiver to hold its zero setting, even if other parameters are changed. With AGC Zero Hold OFF, the receiver resets the AGC Zero value for any change of Mode, Bit Rate, or Frequency. Quasonix, Inc. -
Page 50: Figure 51: Waveform Graphics Before Agc Zero Set
An AGC Zero Set message briefly displays, as shown in Figure 53, to indicate AGC Zero is activated. After the AGC Zero is set, the signal strength bar changes from yellow to green, and a red line indicates the zero value set, as shown in Figure 54. Quasonix, Inc. -
Page 51: Am Menu
This process ensures that the AGC output voltage will not cross through zero volts DC under normal operation. 4.1.4.14 AM Menu Access the Amplitude Modulation (AM) menu from the front panel Main Menu. Select AM Menu, then press the Enter key on the front panel keypad. Quasonix, Inc. -
Page 52: Figure 55: Main Menu, Am Menu Selection
To change the Bandwidth, Time Delay, or Scale values, select the appropriate option, as shown in Figure 56 and Figure 57, then press the Enter key on the front panel. Figure 56: AM Menu, Bandwidth and Time Delay Highlighted Quasonix, Inc. -
Page 53: Figure 57: Am Menu, Scale Highlighted
The AM Scale has a range from 0.1 to 2.5. At its default setting of 1, the response is 2V p-p, into a 75 ohm load with a 50% AM. Figure 58: AM Bandwidth and Time Delay Entry Screens Figure 59: AM Scaling Entry Screen Quasonix, Inc. -
Page 54: Options Menu
The Options Menu, which is accessed through the Main Menu, provides the following selections: • Save Rack Presets Menu • Load Rack Presets Menu • Save Rack Presets -> USB • Load Rack Presets <- USB • Save a USB Preset 1 • Load a USB Preset 1 • Status Menu Quasonix, Inc. -
Page 55: Save Rack Presets Menu
‘Empty’. Pressing the ‘Enter’ key saves the current configuration in that slot. When a Save is successfully stored, the menu displays the message ‘Full’ next to the selected save slot. Quasonix, Inc. -
Page 56: Load Rack Presets Menu
When a saved configuration file exists, the menu displays the message ‘Available’ next to the load slot. Use the Up and Down arrow keys to select a load slot with the ‘Available” message displayed. Pressing the Enter key loads the stored preset and configures the receiver accordingly. Quasonix, Inc. -
Page 57: Save Rack Presets To Usb
USB memory stick. The operator can save up to 1000 profiles (or sets of presets) for this rack (or any other racks) onto the same USB memory stick. Even if all 1000 profiles (1000 sets of 8 presets) were saved, they would still only take up about 112 MB of space on the USB stick. Quasonix, Inc. -
Page 58: Load Rack Presets From Usb
1 through 8) previously saved on a USB flash drive (memory stick). To load rack presets from a USB flash drive, select the appropriate option, as shown in Figure 72, then press the Enter key on the front panel. Quasonix, Inc. -
Page 59: Figure 72: Options Menu, Load Rack Presets From Usb Selection
USB flash drive (memory stick). In this example, it was stored as profile 1. If there is no flash drive (memory stick) in the USB port on the front panel of the Rack-Mount RDMS™, the message in Figure 75 displays. Insert the flash drive into the USB port and redo the Load. Quasonix, Inc. -
Page 60: Save A Usb Preset
If the number entered is already in use, the entry screen shown in Figure 78 displays. To overwrite the existing file, press the Enter key again. If the number was typed in error, press the Escape key on the keypad to cancel the Save. Quasonix, Inc. -
Page 61: Load A Usb Preset
Mount RDMS™, this option allows a preset to be loaded from an external source (a USB flash drive). To load a single preset from a USB flash drive, select the appropriate option, as shown in Figure 81, then press the Enter key on the front panel. Quasonix, Inc. -
Page 62: Figure 81: Options Menu, Load A Usb Preset Selection
USB flash drive (memory stick). In this example, it is stored as profile 1. If there is no flash drive (memory stick) in the USB port on the front panel of the Rack-Mount RDMS™, the message in Figure 84 displays. Insert the flash drive into the USB port and redo the Save. Quasonix, Inc. -
Page 63: Status Menu
USB flash drive, and an option allowing software updates via external flash drive. The latter is particularly useful when debugging receiver issues with the help of Quasonix technical support. Figure 85: Options Menu, Status Menu Selection 4.1.5.7.1... -
Page 64: Application Update
USB flash drive, a Not Found message displays, as shown in Figure 88. Replace the USB flash drive with one containing the correct application file. Remove the USB flash drive when the installation is complete. Quasonix, Inc. -
Page 65: Network Menu
Note: Unlike other options, changes made within the Network Menu are not executed until the user clicks on the Apply New Settings parameter, located just below the Set Rack Alias field, shown in Figure 90. Apply New Settings does not display unless a change to any of the Ethernet parameters is detected. Quasonix, Inc. -
Page 66: Dhcp
When choosing an IP address, it is critical that the address is unique; otherwise the unit will not operate within the network properly. It is strongly recommended that the user contact their network administrator to receive a reserved address for this purpose. Quasonix, Inc. -
Page 67: Subnet Mask
The subnet mask identifies the portion of the IP address used as a host identifier for the subnet in which the Quasonix rack unit participates. It is expressed in a quad-dotted decimal representation, just like the unit’s IP address. The most common subnet mask is 255.255.255.0, which means that the unit’s last 8-bit number (i.e. 0 through 255) uniquely identifies it within its sub-network. -
Page 68: Set Group Security Id
A~Z and the right arrow button is used to advance to the next cursor position. Use the numeric buttons to add numbers to the Group ID. Press the Enter button to accept changes. Repeat this step to add or clear additional Group IDs. Quasonix, Inc. -
Page 69: Set Rack Alias
A~Z and the right arrow button is used to advance to the next cursor position. Use the numeric buttons to add numbers to the rack alias. Press the Enter button to accept changes. Repeat this step to add or clear additional rack aliases. Quasonix, Inc. -
Page 70: Lcd Backlight Option
A dialog screen displays, as shown in Figure 100, prompting the operator to enter a new LCD Backlight value using the rack’s front panel numeric keypad. When the new value is entered, press the Enter key on the keypad. Figure 100: LCD Backlight Value Entry Screen Quasonix, Inc. -
Page 71: Advanced Menu
Telemetry Receiver 4.1.5.10 Advanced Menu The Advanced Menu should only be accessed by advanced users. Contact Quasonix customer support before using these options. The Advanced Menu, which is accessed via the Main Menu, as shown in Figure 101, provides access to the following options: •... -
Page 72: Synchronize Measured Bit Rate
Press the Enter button to accept changes. Repeat this step to apply a different measured bit rate. A signal lock must be present for this entry screen to display. If there is no signal lock, the message shown in Figure 104 displays. Figure 103: Advanced Menu, Measured Bitrate Entry Screen Quasonix, Inc. -
Page 73: If Filter
1 MHz, 2 MHz, 4.5 MHz, 10 MHz, 20 MHz, and 40 MHz. These filters serve as anti-aliasing filters ahead of the A/D converter in the demodulator itself. In addition, they can provide an added measure of adjacent channel interference rejection. Figure 105: 70 MHz IF Module in 2” x 3” Chassis Quasonix, Inc. - Page 74 MHz, 14 MHz, and 28 MHz. The measured responses of the optional filters are shown in Figure 80 and Figure 81. Contact Quasonix for information about the optional filters. Figure 106: 70 MHz IF Module in 2” x 3” Chassis SAW Filter Responses, Narrow Group (10 MHz Span)
-
Page 75: Figure 107: Saw Filter Responses, Wide Group (Plotted On 100 Mhz Span)
Rack-Mount RDMS Telemetry Receiver Figure 107: SAW Filter Responses, Wide Group (Plotted on 100 MHz Span) Quasonix, Inc. -
Page 76: Figure 108: Optional Saw Filter Responses For 70 Khz To 6 Mhz
Rack-Mount RDMS Telemetry Receiver Figure 108: Optional SAW Filter Responses for 70 kHz to 6 MHz Quasonix, Inc. -
Page 77: Video Filter
Note: Operating the receiver in analog mode is mutually exclusive with operating it as a digital receiver. The bit rate for the digital receiver and the video filter cannot be set independently of one another. Quasonix, Inc. -
Page 78: Video Scale
The Video Scale option, shown in Figure 113, is used to set the video scale value. To change the Video Scale setting, select the Video Scale option, then press the Enter key on the front panel. Quasonix, Inc. -
Page 79: Video Invert
In Tier 0 (PCM/FM), the “Q” channel output of the RDMS delivers the demodulated FM output. Enabling the Video Signal Invert option inverts the FM output. The Video Invert option, shown in Figure 115, is used to set the video invert value to On or Off. Quasonix, Inc. -
Page 80: Video Deemphasis
The user may toggle the Video DeEmphasis value by pressing the Enter key on the front panel keypad until the desired value displays. 4.1.5.13 Phase Noise Compensation The Phase Noise Comp option, shown in Figure 117, is used to set the Phase Noise Compensation value to On or Off. Quasonix, Inc. -
Page 81: Tape Output
The Tape Frequency option, shown in Figure 119, is used to enter a tape frequency value (in MHz). The valid frequency range is 0.000 MHz to 20.000 MHz. To change the Tape Frequency value, select the Tape Freq option, then press the Enter key on the front panel. Quasonix, Inc. -
Page 82: Muting
For example, if data is not locked to a valid signal or is outside the valid range, the information is muted (stopped) so the recorder is not filled with bad data. Quasonix, Inc. -
Page 83: Muting Timeout
A dialog screen displays prompting the operator to enter a new Muting Timeout value (in milliseconds) using the rack’s front panel numeric keypad. The valid range is 0 to 46016 milliseconds. The Muting Timeout Entry screen is shown in Figure 123. When the new value is entered, press the Enter key on the keypad. Quasonix, Inc. -
Page 84: Modulation Scaling Menu
If the Locked index number is to be retained following a power-off cycle of the rack, then turn on Mod Persist from the Main Menu. Refer to section 4.1.4.11, Modulation Persistence. To change the Modulation Scale Index, select Mod Scale Index, then press the Enter key on the front panel. Quasonix, Inc. -
Page 85: Hold Threshold
• Eb/N0 is the ratio of signal energy per bit (Eb) to noise energy spectral density (N0), which is sometimes referred to as “SNR per bit”. Quasonix, Inc. -
Page 86: Encoding Menu
-20.000 to +30.000. When the new value is entered, press the Enter key on the keypad. Figure 128: Modulation Scaling Hold Threshold Entry Screen 4.1.5.19 Encoding Menu Access the Encoding menu from the Advanced Menu. Select ‘Encoding Menu’, shown in Figure 129, then press the Enter key on the front panel keypad. Quasonix, Inc. -
Page 87: Encoding
NRZ-M – Non-return to zero Mark (1) • NRZ-S – Non-return to zero Space The user may scroll through the Encoding options by pressing the Enter key on the front panel keypad until the desired value displays. Figure 130: Encoding Menu, Encoding Selection Quasonix, Inc. -
Page 88: Spectrum Inversion
The user may toggle the Bi-Phase value by pressing the Enter key on the front panel keypad until the desired value (On or Off) displays. 4.1.5.20 DC Antenna The DC Antenna option is only available when using the 5-band downconverter AND P and C bands are enabled. Quasonix, Inc. -
Page 89: Figure 133: Advanced Menu, Dc Antenna Selection
If a P band frequency is specified, it is assumed there is no downconverting antenna. If there is a downconverting antenna, it is ignored. The receiver is tuned to the actual P band frequency and the automatic spectral inversion is disabled. Quasonix, Inc. -
Page 90: Convolutional Decode
(“I”) data and one for quadrature (“Q”) data. This approach assumes a similar arrangement for the encoders in the transmitter, which is true of all Quasonix transmitters. The user may toggle the Convolutional Decoding value On or Off by pressing the Enter key on the front panel keypad until the desired value displays. -
Page 91: Factory Default
For configuration management purposes, only one client can configure a receiver at a given time. However, multiple clients can monitor an individual receiver’s status at once. The client’s monitoring capabilities include: • Receiver settings • Signal strength • Signal quality • Signal lock detect Quasonix, Inc. -
Page 92: Considerations For Running Multiple Gui Clients On A Single Computer
Settings window. An example is shown in Figure 138. Figure 138: Please Wait Message 4.2.1 Considerations for Running Multiple GUI Clients on a Single Computer When running multiple GUI clients on the same computer, the following cautions should be taken. Quasonix, Inc. -
Page 93: Selecting An Rdms™ Unit
RDMS Unit menu in the upper right-hand corner of the main application window. Each unit within the network is displayed by its IP address, and alias name, if previously assigned, as shown in Figure 140. Figure 140: Selected RDMS Unit Quasonix, Inc. -
Page 94: Figure 141: Selected Rdms Unit And Connect Screen Button
Figure 142: Connecting to RDMS™ Unit Additionally, the receiver’s menu LCDs will briefly show a connection image, as shown in Figure 143, to alert the operator that it is now being controlled remotely. Figure 143: RDMS™ Connected Image Quasonix, Inc. -
Page 95: Remote Control Menu
Basic Settings The Basic RDMS Settings screen is shown in Figure 145. The Remote RDMS™ Client automatically connects to the rack that was selected from the Selected RDMS Unit dropdown list (Figure 140). Figure 145: Basic RDMS Settings Window Quasonix, Inc. -
Page 96: Basic Settings Tab
The user may access either channel display by clicking on any field. The Remote Client automatically switches to the correct channel. If the user is operating a single-channel receiver, only Channel 1 displays, as shown in Figure 146. Figure 146: Basic RDMS Settings, Only One Channel Available Quasonix, Inc. -
Page 97: Figure 147: On-Screen Buttons
The Exit screen button is used to close the Basic RDMS Settings Window without making any changes. The Client Application (containing the Menu bar) remains open. 4.2.3.1.1.3 Basic Settings Window Directly below the client application status indicator is the Basic Settings window, shown in Figure 148. Quasonix, Inc. -
Page 98: Figure 148: Basic Settings Window
The Mode selections are shown in Figure 149. The Modulation Scaling settings are shown in Figure 150. Figure 149: Basic Settings Window, Mode Menu Quasonix, Inc. -
Page 99: Figure 150: Basic Settings Window, Modulation Scaling Menu
Telemetry Receiver Figure 150: Basic Settings Window, Modulation Scaling Menu When Modulation Scaling is set to Tracking, the graphs display in red, as shown in Figure 151. Figure 151: Modulation Scaling Set to Tracking, Signal Graph Displays Red Quasonix, Inc. -
Page 100: Figure 152: Modulation Scaling Set To Locked, Signal Graph Displays Green
When Modulation Scaling is set to Locked or Off, the graphs display in green, as shown in Figure 152. This indicates the optimal Modulation Index is set. For more information about the Modulation Index, refer to section 4.2.3.1.2.2, Scale Settings Window. Figure 152: Modulation Scaling Set to Locked, Signal Graph Displays Green Quasonix, Inc. -
Page 101: Figure 153: Modulation Scaling Set To Acquire, Signal Graph Displays Yellow
If delta h goes above the delta h threshold and settles again, the receiver is still locked, and the Eb/N0 at the settling point is higher than the last settling point, the current scaling is updated with the new estimate. There is no transition from Triggered back to Armed except for setting the mode to Acquire again. Quasonix, Inc. -
Page 102: Figure 154: Filter Settings Window, Pcm/Fm Mode
The graphical display, included for each channel, mimics the graphical display on the front panel of the rack-mount receiver. Depending on the modulation chosen, the monitor will either display an eye pattern for PCM/FM, or a signal constellation for the other modes. The monitor also features a Persistence selection (adjustable Quasonix, Inc. -
Page 103: Figure 156: Signal Graph And Signal Indicators Windows
(closed) green padlock displays. Conversely, if the receiver has not locked onto a signal or has recently lost lock, the indicator turns red and displays as an unlocked padlock icon, as shown in Figure 157. Figure 157: Signal Indicators, Signal Not Locked Quasonix, Inc. -
Page 104: Figure 158: Diversity Combiner Link With Lock
Note: The integrated Quasonix demodulator can detect and establish signal lock at very low signal levels. Therefore, it is not uncommon to see a red signal strength bar indicator accompanied with a green signal lock indicator. -
Page 105: Advanced Settings Tab
AGC and AM settings for antenna tracking • Tape Output Settings • Muting Settings • Synchronize Bit Rate Settings • Video Settings • Encoding selections • Four Enable/Disable checkbox options: Bi-Phase, Convolutional Decoder, Spectrum Inversion, and DC Antenna Quasonix, Inc. -
Page 106: Figure 162: Advanced Settings Tab (Pcm/Fm Version)
Muting Settings • Synchronize Bit Rate Settings • SNR Estimator selections • Enable/Disable checkbox options for Bi-Phase, Convolutional Decoder, Spectrum Inversion, and DC Antenna The Advanced Settings tab for all modes except PCM/FM is shown in Figure 163. Quasonix, Inc. -
Page 107: Figure 163: Advanced Settings Tab (Non-Pcm/Fm Version)
The Advanced Settings tab contains four on-screen buttons used to initiate or cancel various actions. These buttons (shown in Figure 164) are: • Apply Settings • Refresh Settings • Exit • Factory Reset (located at the bottom right corner of each Channel window) Quasonix, Inc. -
Page 108: Figure 164: On-Screen Buttons
The purpose of the Mod Scale Hold Threshold option is to set a signal-to-noise ratio (SNR) level (technically Eb/N0* level) below which the modulation index estimate will hold rather than track, so it does not get perturbed by Quasonix, Inc. -
Page 109: Figure 166: Agc Settings Window
This process ensures that the AGC output voltage will not cross through zero volts DC under normal operation. 4.2.3.1.2.4 AM Settings Window The AM (Amplitude Modulation) Settings window includes the following parameters: • AM Bandwidth (KHz) • AM Time Delay (us) • AM Scale (0.05-2.5) • AM Polarity Inverted (+/-) • AGC Compensate Quasonix, Inc. -
Page 110: Figure 167: Am Settings Window
For example, if data is not locked to a valid signal or is outside the valid range, the information is muted (stopped) so the recorder is not filled with bad data. Quasonix, Inc. -
Page 111: Figure 170: Synchronize Bit Rate Settings Window
In Tier 0 (PCM/FM), the “Q” channel output of the RDMS delivers the demodulated FM output. Enabling the Video Signal Invert option (box checked) inverts the FM output. Quasonix, Inc. -
Page 112: Figure 171: Video Settings Window
Figure 171: Video Settings Window 4.2.3.1.2.8.1 NTSC Video Demodulation While Quasonix RDMS™ receivers are primarily intended for digital data demodulation, analog FM waveforms can also be demodulated. When using the PCM/FM mode, base band analog from an FM digital appears on the I/Video A BNC connector. -
Page 113: Figure 172: Additional Advanced Settings, Encoding Menu Highlighted, Pcm/Fm Mode Only
For legacy PSK modes that use quadrature modulation (e.g., OQPSK), there are actually two independent decoders, one for in-phase (“I”) data and one for quadrature (“Q”) data. This approach assumes a similar arrangement for the encoders in the transmitter, which is true of all Quasonix transmitters. 4.2.3.1.2.9.3 Downconvert Antenna The DC Antenna option (box checked) is only available when using the 5-band downconverter AND P and C band are enabled. -
Page 114: Figure 173: Additional Advanced Settings, Check Boxes
There are two algorithms available to estimate SNR: DSP and AGC. Under normal conditions, with proper AGC zeroing, these two algorithms give substantially similar results. Figure 174: Additional Advanced Settings, SNR Estimator Quasonix, Inc. -
Page 115: Remote Monitoring Menu
All Devices Signal Lock Indicator, which tells the operator that all of the rack channels have signal lock. Figure 176 shows a single RDMS™ with two active channels. The Signal Lock field is highlighted in red to indicate there is no signal lock. Quasonix, Inc. -
Page 116: Figure 176: Multiple Rdms Performance Monitor, Two Active Channels, Signal Not Locked
Figure 177: Multiple RDMS Performance Monitor, Two Channels, One Signal Locked Figure 178 shows a single RDMS™ with two active channels. The Signal Lock field for Channel 1 and Channel 2 is highlighted in green and lock status is “True” to indicate both channels have signal lock. Quasonix, Inc. -
Page 117: Figure 178: Multiple Rdms Performance Monitor, Two Active Channels, Both Signals Locked
An installation with four receivers in a rack is illustrated by Figure 181. Two receivers have signal locks on Channel 1 and Channel 2, while the other two receivers have no signal lock on Channel 1 or Channel 2. Quasonix, Inc. -
Page 118: Tools Menu
Figure 180: Multiple RDMS Performance Monitor, Two RDMS™ Receivers in Rack Figure 181: Multiple RDMS Performance Monitor, Four RDMS™ Receivers in Rack 4.2.5 Tools Menu The Tools menu, shown in Figure 182, provides three options: Network Settings, Arrange Windows, and Firmware Upgrade. Figure 182: Tools Menu Quasonix, Inc. -
Page 119: Network Settings
All Ethernet settings for the rack-mount receiver that is currently selected are found on the Network Settings window. The window is divided into four sub-windows: • Ethernet Settings • Status • Alias Name • Additional Information Figure 184: Network Settings Screen Quasonix, Inc. -
Page 120: Ethernet Settings
IP Address. The default alias name is RDMS. When using the Multiple RDMS Performance Monitor (refer to Section 4.2.4.1), the alias can be used to quickly identify a particular rack in the displayed list. Examples of a rack alias might be “RDMSLab1”, “TestLabLevel4”, or “XYZProjectRDMS”. Quasonix, Inc. -
Page 121: Additional Information
To exit the Network Settings window without making any changes, click on the Cancel screen button. 4.2.5.2 Arrange Windows The Arrange Windows menu, shown in Figure 184, is accessed via the Tools menu (Tools > Arrange Windows), shown in Figure 183. Arrange Windows contains one option, Restore Default Locations. Quasonix, Inc. -
Page 122: Restore Default Locations
The Mission Management menu provides two options: Mission Control and Group Security Filter. Figure 191: Mission Management Tab, Mission Control Option 4.2.6.1 Mission Control To access the Mission Control screen, navigate to the Main Menu and then select Mission Management > Mission Control, as shown in Figure 191. Quasonix, Inc. -
Page 123: Figure 192: Mission Control Screen
PC screen or allowed to float freely on the screen. The Messages window allows a chat session between active clients. Type a message in the text box at the bottom of the window and click on the Send screen button. Quasonix, Inc. -
Page 124: Control Of Mission Control Client Window
Using the Selected RDMS Unit dropdown list, Client 1 selects a rack name and clicks on the Connect screen button. Figure 196: Selected RDMS Unit and Connect Screen Button In this example, the selected rack is assigned to another client. A rack assignment notification message displays, as shown in Figure 197. Quasonix, Inc. -
Page 125: Figure 197: Rack Assigned To Another Client Message
Figure 198: Request Sent Message After the request for control is sent, the Mission Management tab on Client 2’s RDMS menu bar begins to flash. Figure 199 shows Client 2’s desktop and Figure 200 shows only the Mission Management tab. Quasonix, Inc. -
Page 126: Figure 199: Tool Bar Flashes - Another Client Wants Control Of Rack
Telemetry Receiver Figure 199: Tool Bar Flashes – Another Client Wants Control of Rack Figure 200: Close Up of (Flashing) Mission Management Tool Bar An example of another Client 2’s Mission Control Window is shown in Figure 201. Quasonix, Inc. -
Page 127: Figure 201: Example - Client 2'S Mission Control Window
“I’ll be finished in 20 minutes.” The “Denied” message, shown in Figure 204, is sent automatically to all active clients. Messages sent from each client display in a different color in the chat window. In addition, Client 2’s Mission Management bar is no longer flashing. Quasonix, Inc. -
Page 128: Figure 204: Example - All Clients' Messages Window With Automatic Denial Message
After Client 2 (HCD-L2) clicks on the Release screen button; the Close Selected Rack Controls message displays (Figure 206). The message window gives Client 2 the chance to change his mind by clicking on No, or continuing by clicking on Yes. Figure 206: Example – Close Selected Rack Controls Message Quasonix, Inc. -
Page 129: Client Master
In the following example, ERIC-LAPTOP needs control of the rack and can’t get it for some reason. No one with access to HCD-L2 is responding to requests for control. Client ERIC-LAPTOP (who happens to be the Mission Operator with the password) clicks on the Enable Master screen button, shown in Figure 209. Quasonix, Inc. -
Page 130: Figure 209: Enable Master Example - Active Clients With Enable Master Screen Button
Only the ERIC-LAPTOP owner has access to HCD-L2 until he disables it as a client master. An Access Granted message displays for ERIC-LAPTOP, as shown in Figure 212. Figure 211: Mission Control Client HCD-L2 Master Enabled Quasonix, Inc. -
Page 131: Group Security Filter
RDMS™ front panel. Refer to section 4.1.5.8.5 for configure procedures. The sections following describe the functionality of the Ethernet Group ID filter screen. To access the Group Security Filter, navigate to the Main Menu, then select Mission Management > Group Security Filter, as shown in Figure 214. Quasonix, Inc. -
Page 132: Ethernet Group Id Filter
Scroll to the desired drive and folder. In the File name field, type the name for the Group ID list. Click on the Save screen button to save the file then exit the Save As screen. Quasonix, Inc. -
Page 133: Figure 216: Save Group Id Table File, Windows Explorer Selection Screen
Figure 217, allowing the user to select a saved XML file. Scroll to the desired drive and folder, then select the desired Group ID file to load. Click on the Open screen button to load the file and exit the Open screen. Quasonix, Inc. -
Page 134: Figure 217: Load Group Id Table File, Windows Explorer Selection Screen
Figure 1. If the rack addition or deletion changes do not display, you may need to apply the changes again or check to make sure your Group ID settings match the actual rack group ID settings. Quasonix, Inc. -
Page 135: Rdms Racks Configured By Department Groups
RDMS™ Racks Configured With Independent Group ID Names 4.2.6.2.4 This section describes a Group ID configuration in which all RDMS™ racks are identified individually. Notes are used to further distinguish a particular RDMS™ from others in the table. Quasonix, Inc. -
Page 136: About Menu
The About menu, shown in Figure 221, provides access to software version and copyright information as well as access to Help files. Figure 221: Remote RDMS™ Client Main Menu Bar, About Menu The About screen, shown in Figure 222, contains three screen buttons: Application Help, Communications Help, and OK. Quasonix, Inc. -
Page 137: File Menu
Flash Preset, Turn Off RDMS Unit, and Communications Help. The File menu options are shown in Figure 223. Figure 223: File Menu 4.2.8.1 Save/Load Presets Accessed from the File menu, the Save/Load Preset Files option allows the user to save and load settings stored on the Windows hard drive or other media. Quasonix, Inc. -
Page 138: Figure 224: Save/Load Preset Files
Cancel screen button closes the window without taking any action. Figure 224: Save/Load Preset Files When the user clicks on the Save Presets screen button, the Save Preset window opens within the window, as shown in Figure 225. Figure 225: Save/Load Preset Files, Save Preset Window Quasonix, Inc. -
Page 139: Figure 226: Save/Load Preset Files, Folder Name Window
226. Use the scroll bar to select the file to delete. The selected file name displays in the Delete field and the associated file description displays in the Preset Description window. The Preset File Valid heading displays in Quasonix, Inc. -
Page 140: Figure 228: Save/Load Preset Files, Delete Window
Preset file. Click on the Apply screen button to rename the file, or click on the Cancel screen button in the Rename window to exit the Rename window without renaming the file. Quasonix, Inc. -
Page 141: Save Or Load Rdms Flash Presets
When the user selects the Save RDMS Flash Preset option, the menu/window shown in Figure 231 displays. From this screen, the user can access the eight (8) storage slots on the RDMS™ rack to save settings. This mirrors the save settings on the RDMS™ rack display. Quasonix, Inc. -
Page 142: Rdms Load Profile Menu
When the user selects the Load RDMS Flash Preset option, the menu/window shown in Figure 232 displays. From this screen, the user can access the eight (8) storage slots on the RDMS™ rack to load settings. This mirrors the load settings on the RDMS™ rack display. Figure 232: RDMS Load Profile Window Quasonix, Inc. -
Page 143: Turn Off Rdms™ Unit
The RDMS Shutdown Warning window displays, as shown in Figure 234. If you are sure you want to power down the RDMS™, click on the Yes screen button. The RDMS™ shuts down. Note the front panel power switch will remain in the On position even though the RDMS™ is Off. Figure 234: RDMS Shutdown Warning Window Quasonix, Inc. -
Page 144: Communications Help
Rack-Mount Receiver usage. The Advanced Terminal Settings should only be accessed by advanced users. Contact Quasonix customer support before using these options. The Advanced Terminal Settings window can be accessed by navigating to the Main Menu and selecting: Remote Control >... -
Page 145: Advanced Terminal Window
The Advanced Terminal window, shown in Figure 238, amounts to a portal to the currently selected receiver’s serial control interface. This allows the user to communicate to the individual receiver “brick” using its basic command protocol. Figure 238: Advanced Terminal Window Quasonix, Inc. -
Page 146: Figure 239: Advanced Terminal Window With User Message
Advanced Terminal window is not safeguarded from accidental or improper changes to the receiver’s configuration. It is strongly recommended that users contact Quasonix Technical Support (Tel: 513-942-1287) prior to using the Advanced Terminal serial control interface. -
Page 147: Tier 0 (Pcm/Fm), Tier I (Soqpsk-Tg), And Tier Ii (Multi-H Cpm) Commands
Examples: Report AFC configuration AF ? Display AF command Help AF M Automatic Sets the AFC mode Standard Advanced None Frequency Examples: Control Mode AF M 0 Set AFC to Off AF M 2 Set AFC to Tracking Quasonix, Inc. - Page 148 Standard Basic For Asynch rate (legacy) Examples: modes, BR Report the bit rate A and BR setting B must be BR 5 Set bit rate to 5 specified separately Mbps BR 0.6 Set bit rate to 600 Kbps Quasonix, Inc.
- Page 149 Report DAC output configuration DO ? Display DO command Help DO AM M DAC Output Sets the DAC output AM Standard Expert None AM Multiplier scale multiplier Examples: DO AM M 2.5 Scale AM output by 2.5 times normal Quasonix, Inc.
- Page 150 (the operating range over which frequency and bit rate can be tracked) Examples: Report the current error limits Note: These limits should not be changed from the default settings unless advised by Quasonix to do so. Quasonix, Inc.
- Page 151 Force lock to On FL 0 Force lock to Normal FL -1 Force lock to Off Frequency Report or set receiver center Standard Basic None frequency Examples: Report the frequency setting FR 2200.5 Set modulation to 2200.5 MHz Quasonix, Inc.
- Page 152 Standard Advanced None Polarity of the lock indication to Command active high or active low Examples: Show the current lock output polarity LP 1 Set the active level to high LP 0 Set the active level to low Quasonix, Inc.
- Page 153 MI A S Sets the delta h settling time defaults to 500 MI H Hold Mod Index Tracking at current position MI I Sets Trellis Index MI T Tracking mode enable MI T H x Sets the Tracking Hold threshold Quasonix, Inc.
- Page 154 (NRZ) value used by Command and PSK the receiver (legacy) Examples: Show the current NRZ value NZ L Set the NRZ to Level NZ M Set the NRZ to Mark NZ S Set the NRZ to Space Quasonix, Inc.
- Page 155 Sets power level automatic Standard Advanced None Automatic control mode Command Control Mode Examples: PL A 0 Set the power level automatic control mode to Software PL A 1 Set the power level automatic control mode to Hardware Quasonix, Inc.
- Page 156 Sets the power level register to a value Example: PL C W reg value where C is Channel 0 or 1 reg is hex register index 00 to 03 value is 32 bit hex value to write to the register Quasonix, Inc.
- Page 157 Query Report the temperature in Standard Basic None Temperature degrees Celsius Derandomizer Report or set the Standard Basic None State derandomizer state Examples: Report the derandomizer state RN 0 Set the derandomizer RN 1 Set the derandomizer Quasonix, Inc.
- Page 158 5 milliseconds SY 5 100 Sets status header output once every 100 status updates Tape Output Displays the status of the Standard Advanced PCM/FM Tape Output option Command Example: Displays current tape output status settings (enabled/disabled and output frequency) Quasonix, Inc.
- Page 159 Examples: TO T 0 Sets the Tape Output Source to disabled TO T 1 Sets the Tape Output Source to enabled Version Report the current Firmware Standard Basic None (software) version information for the receiver Quasonix, Inc.
- Page 160 Command Examples: Report the verbosity level VL 0 Set the verbosity level to 0 VL 5 Set the verbosity level to 5 Show Options Displays the current Standard Advanced None hardware configuration and Command options on the receiver Quasonix, Inc.
-
Page 161: Operational Priority
Windows computer by doing the following: Access the Control Panel from the Start Menu. The Start Menu is usually the first icon on the bottom of the PC screen--a circle with four windows in it. Click on Control Panel (Figure 240). Quasonix, Inc. -
Page 162: Figure 240: Start Menu - Control Panel
(Figure 241). In some versions of the Windows operating system, there is an additional folder layer such as Control Panel \ All Control Panel Items \ Network and Sharing Center. Figure 241: Control Panel - Network and Sharing Center Quasonix, Inc. -
Page 163: Graphics In The Remote Client Are Not Rendering Correctly On A Pc Using Windows 7
PC screen--a circle with four windows in it. Click on Control Panel. Figure 242: Start Menu - Control Panel When the Control Panel screen displays, click on the Display selection, as shown in Figure 243. Quasonix, Inc. -
Page 164: Figure 243: Control Panel, Display Selection
The Display window contains an options menu. Click on Set custom text size (DPI), as shown in Figure 244. Figure 244: Display Window, Set Custom Text Size Option A Custom DPI Setting window displays, as shown in Figure 245. Quasonix, Inc. -
Page 165: Figure 245: Custom Dpi Setting Window
Windows XP scaling MUST be unchecked. Click on the OK button to save the settings and close the Custom DPI Setting window. The Remote Client graphics should now render correctly. If there still seems to be an issue, contact Quasonix. Quasonix, Inc. -
Page 166: Performance Specifications
By default, the RDMS™ is capable of acquiring a signal with a frequency error of up to ±100 kHz. 5.4 Bit Error Rate The RDMS™ meets the following BER limits, when tested with a signal source, which complies with IRIG 106-05. Quasonix, Inc. -
Page 167: Synchronization
The RDMS™ offers very fast, reliable acquisition, even at very low signal to noise ratio. Synchronization time is a function of modulation type and IF frequency error. Typical SOQPSK results (from 10,000 synchronization trials) are shown in Figure 247. Quasonix, Inc. -
Page 168: Figure 247: Synchronization Time At Various Signal-To-Noise Ratios
Rack-Mount RDMS Telemetry Receiver Figure 247: Synchronization Time at Various Signal-to-Noise Ratios Quasonix, Inc. -
Page 169: Maintenance Instructions
Rack-Mount RDMS Telemetry Receiver 6 Maintenance Instructions The Rack Mount Receiver requires no regular maintenance, and there are no user-serviceable parts inside. Quasonix, Inc. -
Page 170: Product Warranty
Rack-Mount RDMS Telemetry Receiver 7 Product Warranty The Rack Mount Receiver carries a standard parts and labor warranty of one (1) year from the date of delivery. Quasonix, Inc. -
Page 171: Technical Support And Rma Requests
Telemetry Receiver 8 Technical Support and RMA Requests In the event of a product issue, customers should contact Quasonix via phone (1-513-942-1287) or e-mail (support@quasonix.com) to seek technical support. If the Quasonix representative determines that the product issue must be addressed at Quasonix, a returned materials authorization (RMA) number will be provided for return shipment. -
Page 172: Appendix A - Bit Error Rate Testing
If TC is 2, a channel number is required P indicates a preset or fixed pattern length where 'n' is one of: PN6, PN9, PN11, PN15, PN17, PN20, PN23, PN31 or, for a fixed pattern length of 2 to 32 (fixed patterns are automatically determined) Quasonix, Inc. - Page 173 The test can be configured to make a single measurement or, when a time limit, bit count, or error count is set, automatically repeat the test. Examples: BE G S S indicates Single BE G R R indicates Repeat Quasonix, Inc.
- Page 174 The 'E' column indicates the BERT is enabled by displaying a pound sign '#'. If the BERT is not enabled, this column is blank. The 'R' column indicates the BERT is actually running and making a measurement by displaying a '!'. If the BERT is not running, this column is blank. Quasonix, Inc.
-
Page 175: Test Noise Commands
Note that the noise is injected following downconversion to baseband but before demodulation. Therefore, the noise will affect demodulator output signals, including video outputs and the front panel display (eye diagram or constellation), but it will not change measurements of the input signal (signal strength and signal quality). Quasonix, Inc. -
Page 176: Table 14: Test Noise Commands
TN [c] N n Set Test Noise Level Sets the test noise output level in E Range for n is -10.00 E to +50.00 E Example: TN 1 N 20.00 Set test noise output level for channel 1 to 20.00 E Quasonix, Inc. -
Page 177: Appendix B - Agc Compensation
Gaussian noise. This selection is recommended for ARTM modulation types (Tier 0, I, and II) or when an accurate AGC zeroing process is not feasible. Quasonix, Inc. -
Page 178: Appendix C - Phase Noise Compensation
The Phase Tree shown in Figure 248, shows all of the possible paths the phase trajectory can take over a period of seven bits. Figure 249 shows the two unique paths, based on whether the second bit is a 1 or 0. Figure 248: Ideal PCM/FM Phase Tree (h = 0.7) Quasonix, Inc. -
Page 179: Trellis Demodulation Summary
High phase noise can reduce the trellis detection gain because phase noise corrupts the tree. The following figures illustrate the differences in trellis detection gain depending on the amount of phase noise introduced. Figure 250: Trellis Detection Gain with Zero to Minimum Phase Noise Quasonix, Inc. -
Page 180: Phase Noise Impact
The demodulator is struggling to lock, even with good Signal to Noise Ratio (SNR). ("Good" SNR means the Quality bar is above one-quarter height.) • The eye pattern NEVER looks “clean,” as in Figure 252 • Symptoms get worse when the transmitter is under vibration • Symptoms get worse at low bit rates Quasonix, Inc. -
Page 181: Know Your Transmitter
If you know the brand and type of transmitter, these tips can help determine when to use PNC. If your transmitter was manufactured by these companies, PNC should be OFF: • Quasonix – guaranteed • Nova Engineering – highly likely •... -
Page 182: Appendix D - Factory Reset Values
Data Polarity Normal Derandomizer Disabled Differential Decoder IF Filter Auto Downconvert Antenna Disabled Enabled Convolutional Decoder Disabled Lock Output Polarity Active High NRZ Encoding NRZ-L Output Control Default Output Muting Disabled Phase Noise Compensation Disabled Tape Output Disabled Quasonix, Inc. -
Page 183: Table 17: Pcm/Fm Factory Reset Values
Data Polarity Normal Derandomizer Disabled Differential Decoder IF Filter Auto Downconvert Antenna Disabled Enabled Convolutional Decoder Disabled Lock Output Polarity Active High NRZ Encoding NRZ-L Output Control Default Output Muting Disabled Phase Noise Compensation Disabled Tape Output Disabled Quasonix, Inc. -
Page 184: Table 18: Soqpsk Factory Reset Values
Normal Data Polarity Normal Derandomizer Disabled Differential Decoder Enabled IF Filter Auto Downconvert Antenna Disabled Enabled Convolutional Decoder Lock Output Polarity Active High NRZ Encoding Output Control Default Output Muting Disabled Phase Noise Compensation Disabled Tape Output Disabled Quasonix, Inc. -
Page 185: Table 19: Multi-H Cpm Factory Reset Values
Clock Polarity Normal Data Polarity Normal Derandomizer Disabled Differential Decoder IF Filter Auto Downconvert Antenna Disabled Enabled Convolutional Decoder Lock Output Polarity Active High NRZ Encoding Output Control Default Output Muting Disabled Phase Noise Compensation Disabled Tape Output Disabled Quasonix, Inc. -
Page 186: Appendix E - Special Considerations For International Applications
Access the Control Panel from the Start Menu. The Start Menu is usually the first icon on the bottom of the PC screen--a circle with four windows in it. Click on Control Panel. Figure 253: Start Menu - Control Panel Quasonix, Inc. -
Page 187: Figure 254: Region And Language Selection
Figure 254). This causes the Region and Language window to display (labeled 3 in Figure 254). Figure 254: Region and Language Selection In the Region and Language window, click on the Additional Settings button. The Customize Format window displays (shown in Figure 255). Quasonix, Inc. -
Page 188: Figure 255: Customize Format Window
Use the down arrow in the List Separator column to change the comma to a period. Click on the OK button to complete the change and close the window. Click on the OK button in the Region and Languages window to close the window. The separator in the IP list should now be the period ( . ). Quasonix, Inc. -
Page 189: Appendix F - Acronym List
Kilobits per second Kilohertz Liquid Crystal Display mbps Megabits per second Snap on subminiature connector MHCPM multi-h Continuous Phase Modulation Megahertz (connector type) Threaded RF connector OQPSK Offset Quadrature Phase Shift Keying PCMFM Pulse Code Modulation/Frequency Modulation Phase Modulation Quasonix, Inc. - Page 190 Shaped Offset Quadrature Phase Shift Keying Shaped Offset Quadrature Phase Shift Keying –Telemetry SOQPSK-TG Group Tracking Loop Transistor Transistor Logic User Datagram Protocol UQPSK Unbalanced Quadrature Phase Shift Keying Universal Serial Bus Voltage Alternating Current Wide Area Network Quasonix, Inc.
Need help?
Do you have a question about the QSX-RDMS-RM Series and is the answer not in the manual?
Questions and answers