Table of Contents
Advertisement
Advertisement
Table of Contents

Related Manuals for Conviron GEN2000


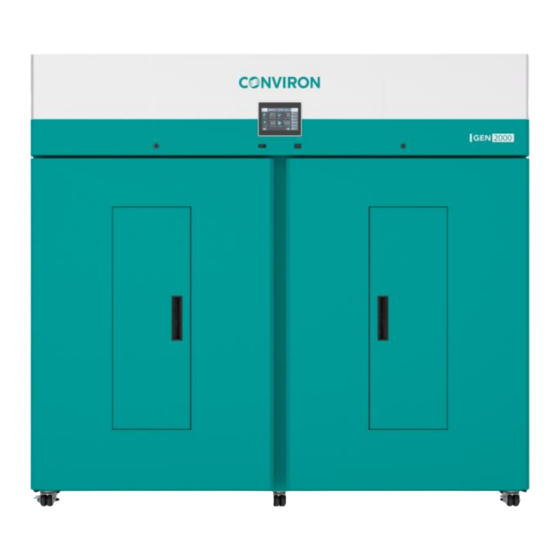
Summary of Contents for Conviron GEN2000
- Page 1 GEN2000 OPERATOR MANUAL 293430-ENG R01...
- Page 2 Canada, R3H 0R9 www.conviron.com June 15, 2020 Printed in Canada ©2020 Controlled Environments Limited Conviron is a registered trademark of Controlled Environments Limited. All other trademarks are the property of their respective owners. Information subject to change without written notice.
- Page 3 PREFACE Welcome to the GEN2000 Operator Manual. This manual describes the features and use of Conviron’s GEN2000 chamber and is written in a straightforward and minimally technical style. This manual is designed to provide sufficient detail for the different kit configurations, including a structured format that provides step-by-step instructions.
- Page 4 RoHS directive sets limits for the inclusion of hazardous chemicals. Document Conventions Conviron maintains a policy of continual improvement and reserves the right to change the product without prior notice. Therefore, the images used throughout this manual may differ slightly from the actual configuration due to updates and product changes.
- Page 5 A description of what you were doing before the problem occurred. Head Office Technical Services Conviron 590 Berry St. Winnipeg, Manitoba, Canada R3H 0R9 Conviron Technical Services Please visit www.conviron.com for global service contact information. June 15, 2020 | 293430-ENG | R01...
-
Page 6: Table Of Contents
TABLE OF CONTENTS PRECAUTIONS............................1 Hazard Identification Symbols ....................... 1 1.1.1 General Precautions ...................... 2 CHAMBER FEATURES ......................... 5 Chamber Configurations........................ 5 Control System ..........................5 Ventilation ............................5 Instrumentation Ports ........................5 Levelers ............................6 Central Alarm Contact ........................6 Central Management System (Optional) .................. - Page 7 3.12 Removing the Lamp Canopies, Shelves, and the Unifloor............21 3.12.1 Removing a Lamp Canopy and Lamp Canopy Supports ..........21 3.12.2 Removing a Wire Shelf and Wire shelf Clip ..............21 3.12.3 Removing an Air Shelf ....................21 3.12.4 Removing an Air Shelf Bracket ..................
- Page 8 Calibrating the Temperature and Humidity Sensor ..............40 Maintaining the Ultrasonic Humidity System (USH) ..............41 Calibrating the Temperature and Humidity Sensor ..............43 Adjusting the Door ........................44 Cleaning the Condensate Pump and Condensate Pan .............. 44 Cleaning the Condensate Pump and Condensate Pan in TA Configuration ......44 6.10 Cleaning the Fresh Air Filter ......................
- Page 9 Disconnecting UPS Battery Backup Power ..............38 Figure 6-2 LED Tube Orientation ....................... 40 Figure 6-3 GEN2000 USH Tank Access Panels ................41 Figure 6-4 Remove the USH Box from the Chamber Sequence ............42 Figure 6-5 USH Interior Details ......................42 Figure 6-6 Ceramic Disc Replacement ....................
- Page 10 LIST OF TABLES Table 1-1 Hazard Identification Symbols .................... 1 Table 3-1 Water Supply Parameters ....................10 Table 3-2 Back Panel Connection Descriptions ................25 Table 9-1 Terms and Definitions ....................... 53 viii June 15, 2020 | 293430-ENG | R01...
-
Page 11: Precautions
The equipment is intended to be installed, operated, maintained, and only serviced by trained personnel, according to the instructions and precautions described in the manuals provided by Conviron. The following precautions are intended to help guide users in the safe operation of Conviron chambers. Hazard Identification Symbols... -
Page 12: General Precautions
Operate your Conviron equipment for a minimum of five days before introducing any research material to ensure proper and stable operation. - Page 13 Precautions Warning: Hot surface hazards Personal injury could result from contacting hot surfaces within the chamber. The user accessible fluorescent lamps, the inaccessible refrigeration system components, and the inaccessible heater element become hot during normal operation. Do not touch. Warning: Slip and fall hazard Personal injury could result.
- Page 14 GEN2000 Operator Manual June 15, 2020 | 293430-ENG | R01...
-
Page 15: Chamber Features
The GEN2000 chamber ships in one piece, requiring minimal assembly and easy installation in most research labs. Chamber Configurations The base GEN2000 chamber can be fitted with any of the following specially configured LED kits. Each kit is also available with an fluorescent lighting option; •... -
Page 16: Levelers
Refer to the Conviron Central Management Operator’s Manual for complete instructions. CMP-Link (Optional) The CMP-LINK feature enables Argus Titan 900 full interaction with any Conviron chamber or room that is equipped with CMP6060 control system. With CMP-LINK enabled, features of Titan... -
Page 17: Hardware Options
Chamber Features Hardware Options Factory installed options available with the GEN2000 include: • RJ45 connection port and network card - provides connectivity to the facility network. • Additive Humidity – adds moisture to the chamber above the ambient level. •... - Page 18 GEN2000 Operator Manual June 15, 2020 | 293430-ENG | R01...
-
Page 19: Installation
3 INSTALLATION GEN2000 units must be placed in ventilated areas with circulating air flow. Chamber Temperature Range Install the chamber in a dry, well-ventilated area where the ambient temperature is maintained between 68-95°F (20 - 35°C). Ideally, the temperature around the chamber will be 70°F (21°C). -
Page 20: Water Supply
Removing the Chamber from the Shipping Pallet The crated GEN2000 chamber weighs approximately 1100 pounds (499 kg) and should be removed from the shipping pallet with a forklift. -
Page 21: Figure 3-1 Metal Shipping Bracket
Installation Remove the screws securing the metal shipping bracket to the pallet and to the bottom of the chamber (Figure 3-1). Figure 3-1 Metal Shipping Bracket Position the forklift truck to place the forks under the chamber floor in the location shown in Figure 3-2. -
Page 22: Moving The Chamber Into Final Position
Slowly push the chamber into its final location. Levelling the Chamber The GEN2000 is equipped with four levelers (Figure 3-3) to prevent the unit from rolling on its casters once installed, and to compensate for any variations in the floor level. The chamber may have to be lifted slightly in order to adjust the levelers. -
Page 23: Configuration Kit Overview
Installation Configuration Kit Overview The GEN2000 chamber can be purchased with, or converted to, any of four configurations, each designed to suit specific plants and applications. Replacing the back-wall plenum, canopies, and shelves allows researchers to convert the chamber and adapt to a variety of research programs requiring different light intensity, airflow direction, growth height and growth space. -
Page 24: Sh Configuration
GEN2000 Operator Manual SH Configuration Horizontal airflow across shelves optimizes growth area for shorter plants (Figure 3-4) by forcing the air into the chamber through the perforated back-wall plenum. One additional tier with two additional lamp canopies and two additional wire shelves may be ordered as an option for the SH configuration (Figure 3-6). -
Page 25: Ta Configuration
Installation TA Configuration The TA configuration uses a solid back-wall plenum and a perforated floor to direct the airflow upward through the plant material. TA configuration provides 43.5” (110.5cm) of growth height. Figure 3-7 TA Configuration 3.7.1 Unifloor® ® The Unifloor , available only in the TA Kit, has openings that allow conditioned air to be distributed evenly up through the floor into the chamber. -
Page 26: Tc Configuration
GEN2000 Operator Manual TC Configuration The TC configuration distributes air vertically through the individual air-shelves to minimize condensation within petri dishes and containers. Arrange the air-shelves and light canopies to provide a growth height of 6.5″ (16.5cm). TC configuration provides 6.5”... -
Page 27: Lamp Canopies And Wire Shelves
Installation 3.10 Lamp Canopies and Wire Shelves Lamp canopies and wire shelves are mounted on metal support clips attached between the slotted pilaster strips on the interior center and the left and right chamber walls. Lamp canopy supports (Figure 3-11) are two long metal brackets that are secured to two pilaster strips on the same side of the chamber. -
Page 28: Installing The Lamp Canopies And Wire Shelves
GEN2000 Operator Manual 3.11 Installing the Lamp Canopies and Wire Shelves Conviron chambers may be configured onsite using one of four pre-packaged lighting and shelving kits; SH, TA, TC, or IN. To create equidistant growth height on each tier in the SH kit, ensure that the distance from the shelf to the underside of the canopy is 20″(51cm) for two tiers and... -
Page 29: Figure 3-14 Install The Canopy Support Brackets
Installation Correct Incorrect Figure 3-14 Install the Canopy Support Brackets Ensure the canopy support brackets are firmly seated into the slots in the pilaster and that the canopy support is level and secure before installing the canopy. Incorrectly installed canopy support brackets could cause the canopy to collapse. Line up the canopy cables with the closest ports on the rear wall (Figure 3-15). -
Page 30: Installing Wire Shelves
GEN2000 Operator Manual 3.11.2 Installing Wire Shelves To install the wire shelves: Starting at the bottom of the chamber, install the shelf clips (Figure 3-18) for the appropriate number of shelves and to achieve the required growth height. Insert the angled top tab of the shelf-clip into the pilaster at the required level. -
Page 31: Removing The Lamp Canopies, Shelves, And The Unifloor
Installation 3.12 Removing the Lamp Canopies, Shelves, and the Unifloor Prior to installing a new configuration kit, the existing configuration kit must be removed. Retain all associated fasteners, clips, brackets, shelves, and canopies for future use. 3.12.1 Removing a Lamp Canopy and Lamp Canopy Supports Refer to Section 3.11.1 Installing Lamp Canopies and reverse the steps to remove a lamp canopy and lamp canopy supports. -
Page 32: Replacing The Back-Wall Plenum
GEN2000 Operator Manual 3.13 Replacing the Back-Wall Plenum All GEN2000 chambers are constructed with one piece back-wall plenums. Each configuration kit contains a three piece back-wall plenum and the required canopy(ies), canopy supports, shelves and shelf clips. Images used in these back-wall replacement installation instructions are for an SH kit. -
Page 33: Figure 3-22 Remove The Plenum
Installation Figure 3-22 Remove The Plenum Do not allow the cables to become trapped or pinched between the plenum and the chamber wall while removing the back-wall plenum. The cables could become damaged, causing decreased performance. The replacement plenum consists of three panels. Install the panels, starting at the top of the back wall, in the following order: •... - Page 34 GEN2000 Operator Manual Install the screws loosely to temporarily hold the panel in place. Do not tighten the screws until all thee panels are installed and correctly aligned. Position the middle panel along the bottom groove of the top panel and hold it in position loosely with screws.
-
Page 35: Connecting The Communication, Central Alarm Contact , And Condensate Pump
Installation 3.14 Connecting the Communication, Central Alarm Contact , and Condensate Pump Connect the communication, customer alarm, and condensate pump connectors to the ports on the rear of the chamber as shown in Figure 3-24 and described in Table 3-2. Figure 3-24 Back Panel Connections Table 3-2... - Page 36 GEN2000 Operator Manual June 15, 2020 | 293430-ENG | R01...
-
Page 37: Start Up
4 START UP Once the cabinet is assembled, leveled, and all connections have been made, the cabinet can be powered on. Ensure that the cabinet is operating properly before introducing any research material. Start Up Procedure Before powering ON, ensure all mechanical, fluid, and electrical connections are secure. -
Page 38: Visual Checks
Check that all lights function when turned on and that the doors are light tight. Inspect the doors with interior lights on, in a darkened room. Refer to the Conviron Chambers Maintenance & Troubleshooting Manual for more information. Operate your Conviron equipment for a few days before introducing any plant material. -
Page 39: Operation
Do not touch the lamps while in operation. Allow the lamps to cool before changing burned out tubes. Refer to the lamp manufacturer’s specifications. The standard lighting systems for the GEN2000 use high efficiency T5 LED lamps configured to suit the intensity required for each application and kit. Lamp combinations have been designed to ensure uniform light distribution. -
Page 40: Lighting Options
• Reduced sensitivity to temperature variations. Contact Conviron for LED tube replacement. 5.3.2 Fluorescent Lighting – Optional Optional T5 fluorescent lamps provide a balanced spectrum for plant growth. The lighting is programmable, dimmable from 10% to 100% of maximum output. -
Page 41: Aspirator
Operation Aspirator Located on the center wall between the growth areas, the aspirator houses the sensors used to monitor temperature and humidity levels within the chamber. The aspirator receives an air sample from the chamber to measure and control conditions. Figure 5-1 Aspirator Instrumentation Port... -
Page 42: Fresh Air Inlet And Exhaust Ports
GEN2000 Operator Manual 5.6 Fresh Air Inlet and Exhaust Ports The fresh air inlet allows the operator to manually adjust the rate at which fresh air is introduced into the chamber. The adjustment knob is located on the lower-left side of the chamber and can be adjusted from fully closed (no fresh air) to fully open to allow up to 20 ft /min (0.57m... -
Page 43: Bypass Dehumidification - Bdh Option
Operation Plant pots or trays are placed directly on the wire shelves, or directly on the Unifloor in a TA configuration. The shelves can be installed in any position within the chamber, depending on the experiment requirements. Bypass Dehumidification – BDH Option Bypass Dehumidification (BDH) is an optional dehumidification system used to control relative humidity setpoints below the combination of the ambient conditions and moisture load in the cabinet. -
Page 44: Adjusting The Co Control
The CO monitor operates in two ranges: up to 2000 ppm, and up to 3000 ppm. Refer to the CMP6060 Control System Manual for more information. Customized ranges are available upon written request. Contact Conviron for more information. Ambient CO... -
Page 45: Shutdown
Conviron Chambers Maintenance & Troubleshooting Manual. Open the fresh air inlet and exhaust ports and leave the chamber and observation doors slightly open to reduce moisture buildup. - Page 46 GEN2000 Operator Manual June 15, 2020 | 293430-ENG | R01...
-
Page 47: Cleaning And Maintenance
6 CLEANING AND MAINTENANCE The GEN2000 chamber requires regular maintenance in order to continue performing to specifications. Warning: Read and understand the product manuals before moving, installing, operating, or servicing this equipment. Failure to follow these instructions could result in equipment damage, serious personal injury, or death. -
Page 48: Disconnecting The Mains Power
GEN2000 Operator Manual Warning: Potential user injury after service Personal injury to the users could result from not replacing the access panels after service. Ensure the access panel are replaced and secure before operating the chamber after service. Disconnecting the Mains Power Before cleaning, maintaining, or servicing this chamber, disconnect it from power. -
Page 49: Cleaning The Chamber
Cleaning and Maintenance Cleaning the Chamber The GEN2000 chamber requires regular cleaning and maintenance in order to continue performing to specifications. For a thorough cleaning, for example when changing the interior configuration or before beginning a new experiment, disconnect power at the mains and at the UPS battery backup. -
Page 50: Calibrating The Temperature And Humidity Sensor
Dispose of the used tube(s) following local requirements, or contact the local authorities for proper disposal procedures. Calibrating the Temperature and Humidity Sensor Conviron recommends that the temperature and humidity sensors be calibrated yearly. Contact Conviron Service for more information. June 15, 2020 | 293430-ENG | R01... -
Page 51: Maintaining The Ultrasonic Humidity System (Ush)
Cleaning and Maintenance Maintaining the Ultrasonic Humidity System (USH) The GEN2000 chamber has two USH tanks, mounted on the upper-right and upper-left of the machine compartment (Figure 6-3). Figure 6-3 GEN2000 USH Tank Access Panels Clean the USH box every month and replace the ceramic dics every six months. When not in use, the USH box (located inside the machine compartment), must be drained and cleaned. -
Page 52: Figure 6-4 Remove The Ush Box From The Chamber Sequence
GEN2000 Operator Manual Optional CO Connection USH Water Connection Detail A Detail B Detail C Detail D Detail E Detail F Figure 6-4 Remove the USH Box from the Chamber Sequence Pour the water out of the box and wipe the interior surfaces of the USH box (Figure 6-5, Detail A) with a damp cloth to remove biological residue and particulate matter. -
Page 53: Calibrating The Temperature And Humidity Sensor
This is very important to prevent water from splashing over electrical components. Replace the USH box into the chamber by reversing the removal steps above. Calibrating the Temperature and Humidity Sensor Calibrate the temperature and humidity sensors yearly. Contact Conviron Service for more information. June 15, 2020 | 293430-ENG | R01... -
Page 54: Adjusting The Door
GEN2000 Operator Manual Adjusting the Door Operation of the door, at the hinge point, presents a crush hazard. The door may be removed from the chamber if absolutely necessary. Contact Conviron for door removal instructions. Cleaning the Condensate Pump and Condensate Pan Warning: Electrical shock hazard during maintenance or service. -
Page 55: Cleaning The Fresh Air Filter
During regular operation the fresh air inlet filter should be inspected once per month and cleaned as required. Refer to the Conviron Chambers Maintenance & Troubleshooting Manual for more information on cleaning and washing the fresh air inlet filter. 6.11 Performing Maintenance Inside the Machine Compartment The machine compartment is located on top of the chamber and should only be accessed by qualified service technicians. - Page 56 GEN2000 Operator Manual June 15, 2020 | 293430-ENG | R01...
-
Page 57: Troubleshooting
7 TROUBLESHOOTING Conviron Technical Support is available to all users at no charge, to either assist with troubleshooting or to order parts, for the life of the equipment. Have the Serial Number, located on the rating plate on the rear of the chamber, available when requesting Service. -
Page 58: Figure 7-1 Ups Controller Location
3. Locate the UPS controller on the far left-hand side of the machine compartment (Figure 7-1) and check the BATT.FAIL indicator (Figure 7-2). Figure 7-2 BATT.FAIL Indicator Figure 7-1 UPS Controller Location 4. If the LED is red, contact service or Conviron. June 15, 2020 | 293430-ENG | R01... -
Page 59: Fuse Schedule
Troubleshooting Fuse Schedule Fuse Description Conviron Location System/Component Protected FUSE - 2.5A, 250V, MDL, TIME DELAY 233327 Main Control Panel PLC Controller FUSE - 0.75A, 250V, ABC, FAST 79815 Main Control Panel Central Alarm ACTING FUSE - 6A, 250V, MDL, TIME DELAY... - Page 60 GEN2000 Operator Manual June 15, 2020 | 293430-ENG | R01...
-
Page 61: Technical Specifications
8 TECHNICAL SPECIFICATIONS Conviron maintains a policy of continual improvement and reserves the right to change the technical characteristics of the GEN2000 without prior notice. GEN2000 Specifications Short Plant Tissue Culture Tall Plant Incubator (SH) (TC) (TA) (IN) Chamber Crated... -
Page 62: Figure 8-1 Sample Gen2000 Rating Plates
GEN2000 Operator Manual Figure 8-1 shows an example of the GEN2000 chamber rating plates, located on the left side of the chamber. Please have the Serial Number available when requesting service. 120/208Vac 60Hz Version 230/400Vac 50Hz Version Figure 8-1 Sample GEN2000 Rating Plates... -
Page 63: Additional Information
9 ADDITIONAL INFORMATION Terms & Definitions Table 9-1 lists the terms and their definitions used throughout this manual. Table 9-1 Terms and Definitions Term Definition Humidity level expressed as a percentage of the maximum humidity level Greek letter Phi – SI prefix for electrical phase ... -
Page 64: Product Updates
Conviron also provides retrofit systems for competitive products. For example, Conviron offers a control system retrofit that is compatible with competitive products and that, once installed, works with Conviron’s Central Management System (CMS). - Page 66 Management System Certified to ISO9001 293430-ENG-R01| June 15, 2020 ©2020 Controlled Environments Limited. Conviron is a registered trademark of Controlled Environments Limited. All other trademarks are the property of their respective owners. Information subject to change without written notice.
Need help?
Do you have a question about the GEN2000 and is the answer not in the manual?
Questions and answers