Advertisement
Table of Contents
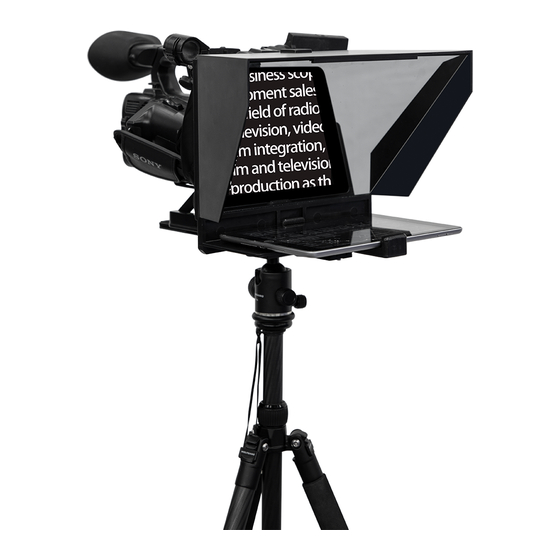
Mounting the Camera
Mount the camera to the camera mounting bracket
using the 1/4" BSW camera screw, slide the camera
forward and ensure that the lens is inside the hood.
Use the hood slide screw to centre the lens inside
the hood and place the black light excluder around
the lens. Secure it using the drawstring.
Camera Balancing
Loosen the two screws
A
(marked
A
A
that the hot shoe plate will
slide back and forth.
Mount the unit with
camera attached to the
tripod and slide the unit
back and forth until you
achieve a balance
.
Then retighten the
screws.
autocue.com
Straight-read Assembly
2. Remove the two thumbscrews
attaching the monitor mounting
bracket to the drop bracket.
4. Align the bolt on the back of
the monitor mounting plate with
the hole in the centre of the drop
bracket.
in the picture) so
6. Attach an optional pistol
grip to the hot shoe plate on
the underside of the SSP07
unit.
1. Place your SSP07 on a smooth, level
surface. Remove the thumbscrews holding
the hood and monitor mounting plate.
3. Remove the thumbscrews
securing the monitor to the
monitor mounting bracket.
5. Secure it to the drop plate
with the knob.
7. Now attach your camera
to the camera mounting
bracket using the screw
supplied.
Camera screw
SSP07
Prompter
Guide
Advertisement
Table of Contents

Subscribe to Our Youtube Channel
Related Manuals for AUTOCUE SSP07


Summary of Contents for AUTOCUE SSP07
- Page 1 Mounting the Camera Straight-read Assembly SSP07 1. Place your SSP07 on a smooth, level surface. Remove the thumbscrews holding the hood and monitor mounting plate. Prompter Guide 2. Remove the two thumbscrews attaching the monitor mounting bracket to the drop bracket.
- Page 2 Components 5. Attach the tripod camera mounting plate Hood and glass to the hot shoe plate on the underside of Monitor the SSP07 unit. Hood Bracket Camera Bracket Hot Shoe Plate Drop Bracket Monitor mounting plate Vertical position Hood thumbscrew Hood Slide 9.
Need help?
Do you have a question about the SSP07 and is the answer not in the manual?
Questions and answers