Samsung SP-H700AE Owner's Instructions Manual
Hide thumbs
Also See for SP-H700AE:
- Owner's instructions manual (84 pages) ,
- Manual de instrucciones (84 pages)
Table of Contents
Advertisement
Quick Links
1-800-SAMSUNG (1-800-726-7864)
Samsung Electronics America
Service Division
400 Valley Road, Suite 201
Mount Arlington, NJ 07856
www.samsungusa.com
Samsung Electronics Canada Inc.
Samsung Customer Care
7037 Financial Drive
Mississauga, Ontario
L5N 6R3
www.samsung.ca
O w n e r ' s I n s t r u c t i o n s
BP68-00232A-00
Advertisement
Table of Contents

Related Manuals for Samsung SP-H700AE


Summary of Contents for Samsung SP-H700AE
- Page 1 1-800-SAMSUNG (1-800-726-7864) Samsung Electronics America Service Division 400 Valley Road, Suite 201 Mount Arlington, NJ 07856 www.samsungusa.com Samsung Electronics Canada Inc. Samsung Customer Care 7037 Financial Drive Mississauga, Ontario L5N 6R3 www.samsung.ca O w n e r ' s I n s t r u c t i o n s...
-
Page 2: Important Safety Information
Important Safety Information Thank you for choosing Samsung! Your new Samsung Projector represents the latest in projector technology. We designed it with easy-to-use on-screen menus and closed captioning capabilities, making it one of the best products in its class. We are proud to offer you a product that will provide convenient, dependable service and enjoyment for years to come. -
Page 3: Fcc Information
U.S. Government Printing Office, Washington, DC 20402, Stock Number 004- 000-00345-4. The party responsible for product compliance: SAMSUNG ELECTRONICS CO., LTD America QA Lab of Samsung 3351 Michelson Drive, Suite #290, Irvine, CA92612 USA Warning User must use shielded signal interface cables to maintain FCC compliance for the product. -
Page 4: Table Of Contents
Table of Contents Preparation Picture Adjustment Features and Design...8 Selecting Picture Mode ...34 Caution on Lamp Use and Replacement ...9 Custom Settings of the Picture ...35 Projector and Accessories Selecting and Adjusting Color Temperature ...36 Front/Upper Side and Accessories ...12 Gamma Correction ...37 Rear Side and Cables ...14 Saving Custom Picture Settings ...38... -
Page 5: Features And Design
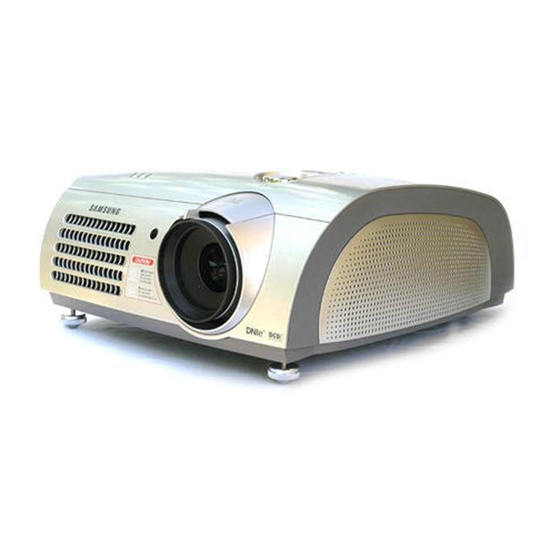
Features and Design Optical engine adopting advanced DLP technology HD2 + DMD panel capable of 1280x1720 resolution 5X-speed color wheel designed to reduce digital artifacts 250W Lamp designed to improve luminance Vivid colors Quality picture tuning focused on improving color - this unit aims at realizing color coordinates that meet broadcasting standards on video production. - Page 6 Preparation Projector and Accessories ...12 Installation and Basic Adjustments ...18...
-
Page 7: Projector And Accessories
PROJECTOR AND ACCESSORIES Front/Upper Side and Accessories Front/Upper Side Indicators MENU - TEMP (Red LED) Used to open the on-screen Menu. - LAMP (Blue LED) POWER - STAND BY (Blue LED) Used to turn the projector on or off. Refer to page 13 for details. SOURCE Remote Control Signal Receiver Used to select input signals from the external... -
Page 8: Rear Side And Cables
PROJECTOR AND ACCESSORIES Rear Side and Cables Rear Side Remote Control Signal Receiver RS-232C port S-VIDEO Input port DVI Input port COMPOSITE Input ports PC Input port Cables Power Cord Plug adapter used for Video (COMPOSITE) Cable 110V Connected to the wall Connected to the outlet ∏. -
Page 9: Operating The Remote Control
PROJECTOR AND ACCESSORIES Operating the Remote Control Operating Move/Select Button Move Menu Item (Up) Setting the Adjustment (left), or move to upper item Inserting Batteries into Remote Control Press on the part of the lid to remove it. Insert two AAA-sized 1.5V batteries by matching +/-. -
Page 10: Installation And Basic Adjustments
INSTALLATION AND BASIC ADJUSTMENTS Installation and Turning On To Install the Projector Install the projector so that the projection is perpendicular to the screen. Center the lens to the screen. If the projector is not positioned perpendicular to the NOTE screen, the image may appear trapezoidal. -
Page 11: Zoom And Focus Adjustment
INSTALLATION AND BASIC ADJUSTMENTS Zoom and Focus Adjustment Using the Zoom Knob and the Focus Ring You can adjust the size of image within zoom range by manipulating the Zoom Knob. Focus the picture on the screen using the Focus Ring. Zoom Knob Focus may appear dim if the projector is installed at a shorter than recommended distance. -
Page 12: Using The Lens Shift Dial
INSTALLATION AND BASIC ADJUSTMENTS Using the Lens Shift Dial Using the Lens Shift Dial Move the picture projected on the screen up and down within the lens range by turning the Lens Shift Dial on the top side of the projector with your fingers. Lens Shift Dial DOWN INSTALLATION AND BASIC ADJUSTMENTS... -
Page 13: Connections And Source Setup
Connections and Source Setup Before Connections ...26 Connecting to Video Equipment ...27 Setting up the External Input Source ...30 Naming the External Connections ...31... -
Page 14: Before Connections
Before Connections Check the followings before connecting the projector to other devices. Check the following Before Connecting 1. Refer to the manual of the device the projector is connected to. The number and position of ports may differ depending on type of devices. 2. -
Page 15: Connecting To Dvd
CONNECTING TO VIDEO EQUIPMENT Connecting to DVD Rear side of Projector S-VIDEO OUT Rear Connection Connect COMPONENT1 or COMPONENT2 (Y/Pb/Pr) ports of the projector to Component port on the rear side of DVD using Component Cable. Viewing the picture Turn on the projector and press the COMP.1 COMP.1 button to select Component1. -
Page 16: Setting Up The External Input Source
Setting up the External Input Source You can select a device connected to the projector to display. Press the desired source button (COMP.1/ COMP.2/ S-VIDEO/COMPOSITE/ PC/DVI). Pressing a button switches to the respective mode. One Touch You can not switch to the mode if the projector is not connected to the respective device. -
Page 17: Picture Adjustment
Picture Adjustment Selecting Picture Mode ...34 Custom Settings of the Picture ...35 Selecting and Adjusting Color Temperature ...36 Gamma Correction ...37 Saving Custom Picture Settings (Save) ...38 Setting up DNIe ...39 Selecting Picture Size...40 Film Mode ...42 Overscan ...43 Still Picture ...44... -
Page 18: Selecting Picture Mode
Selecting Picture Mode Press the P.MODE button. Each press of the button, picture mode is switched to Dynamic, Standard, Movie1, Movie2, User1, User2, User3 and Custom. One Touch MENU Select 3, 4 …/† 2, 4 EXIT Press the MENU button. The main menu is displayed. -
Page 19: Selecting And Adjusting Color Temperature
Selecting and Adjusting Color Temperature You can change tint of the entire screen to suit your needs. Color Temperature Menu 5500K Used to deliver optimal image quality for black-and-white films. Color temperature of the picture mode of Movie2 is set to 5500K. 6500K This temperature is used for the most video MENU productions. -
Page 20: Saving Custom Picture Settings
(Component1/ Component2/ NOTE S-Video/Composite/PC/DVI). Setting up DNIe DNIe (Digital Natural Image engine) is an image enhancing function developed by Samsung Electronics. It enables users to enjoy brighter, sharper and more dynamic pictures. MENU Select 2, 3, 4 …/†... -
Page 21: Selecting Picture Size
Selecting Picture Size Press the P.SIZE button. Each press of the button, picture size is switched to Full, Panorama, Zoom1, Zoom2 and 4:3. One Touch MENU Select 2, 3, 4 …/† 2, 3, 4 EXIT Press the MENU button. The main menu is displayed. Press the L or M button to move to Picture. -
Page 22: Film Mode
Film Mode Supports enhanced screen quality for films of 24 frames. MENU Select 2, 3, 4 …/† 2, 3, 4 EXIT Press the MENU button. The main menu is displayed. Press the L or M button to move to Picture. The Picture menu is displayed. -
Page 23: Still Picture
Still Picture Used to pause playback to see a still picture. Press the STILL button. Each press of the button pauses and resumes play back. One Touch Setup Flipping/Reversal of Projected Image ...46 Light Setting ...47 Correcting V-Keystone ...48 Test Patterns ...49 Restoring the Factory Default Settings...50 Information ...51... -
Page 24: Flipping/Reversing The Projected Image
Flipping/Reversing the Projected Image To support positioning of the projector, horizontal/vertical flipping and picture reversal are available. Press the INSTALL button. The screen will flip over horizontally or vertically with each press of the button. One Touch MENU Select 3, 4 …/†... -
Page 25: Correcting Vertical Keystone
Correcting Vertical Keystone Used to compensate image shape when image distortion occurs. Press the V.KEYSTONE button. Press the œ or √ button to adjust picture image optimally. One Touch MENU Select 2, 3 …/†/œ/√ 2, 3 EXIT Press the MENU button. The main menu is displayed. -
Page 26: Restoring The Factory Default Settings
Restoring the Factory Default Settings Used to restore setting values to factory defaults. MENU Select 2, 3, 4 …/†/œ/√ 2, 3, 4 EXIT Press the MENU button. The main menu is displayed. Press the L or M button to move to Setup. The Setup menu is displayed. -
Page 27: Menu Option
Menu Option Setting the Language...54 Setting the Menu Position...55 Setting the Menu Translucency ...56 Setting the Menu Display Time...57 Selecting the Quick Menu ...58... -
Page 28: Setting The Language
Setting the Language You can select the language used for the menu screen. MENU Select 3, 4 …/† 2, 4 EXIT Press the MENU button. The main menu is displayed. Press the L or M button to move to Menu Option. The Menu Option menu is displayed. -
Page 29: Setting The Menu Translucency
Setting the Menu Translucency You can set the translucency of menu. MENU Select 3, 4 …/† 2, 3, 4 EXIT Press the MENU button. The main menu is displayed. Press the L or M button to move to Menu Option. The Menu Option menu is displayed. -
Page 30: Selecting The Quick Menu
Selecting the Quick Menu Press the QUICK button. The menu you used previously will appear. One Touch Connecting to PC Before Connecting to PC ...60 Setting up the PC Environment...61 Connecting to PC ...62 Automatic Picture Adjustment ...64 Frequency Adjustment ...65 Fine Tuning with the Phase Adjustment...66 Positioning the Screen ...67 Zooming the Screen ...68... -
Page 31: Before Connecting To Pc
Before Connecting to PC Check the following before connecting the projector to a PC. Check the following before connecting: Adjust the PC display setting to the resolution and frequency supported by the projector. Refer to the PC user manual (graphic and sound card) when connecting the projector to PC. -
Page 32: Connecting To Pc
Connecting to PC You can connect a PC to the projector and use it as a monitor. Using PC Video Cable or DVI Cable Rear side of Projector DVI-D Video PC Video Cable Cable Connect PC (RGB In) port on the rear side of the projector to the monitor output port of PC using PC video cable. -
Page 33: Automatic Picture Adjustment
Automatic Picture Adjustment Used to adjust frequency and phase of PC screen automatically. Before adjusting! Set the input mode to PC. MENU Select 2, 3, 4 …/† 2, 3 EXIT Press the MENU button. The main menu is displayed. Press the L or M button to move to Setup. The Setup menu is displayed. -
Page 34: Fine Tuning With The Phase Adjustment
Fine Tuning with the Phase Adjustment Used to fine tune the PC screen. Before adjusting! Set the input mode to PC. MENU Select 2, 3, 4 …/†/œ/√ 2, 3, 4 EXIT Press the MENU button. The main menu is displayed. Press the L or M button to move to Setup. -
Page 35: Zooming The Screen
Zooming the Screen Used to extend PC screen from the center. Before adjusting! Set the input mode to PC. MENU Select 2, 3, 4, 5 …/†/œ/√ 2, 3, 4, 5 EXIT Press the MENU button. The main menu is displayed. Press the L or M button to move to Setup. -
Page 36: Troubleshooting
Troubleshooting Before Contacting Service Personnel...72... -
Page 37: Before Contacting Service Personnel
Before Contacting Service Personnel If this projector does not operate properly, check the following first. If the problem is continues, contact your dealer. Installation and Connection Symptoms Troubleshooting No Power. Be sure that the power cord in place and the power switch on the rear side of the projector is turned on "-". -
Page 38: Remote Control Specifications
Other Information Storage and Maintenance ...76 Purchasing Accessories ...77 Structure of Screen Menu ...78 Lamp Replacement ...81 Specifications ...82 Remote Control Specifications ...83... -
Page 39: Storage And Maintenance
Storage and Maintenance Clean and maintain the projector in the following way. Cleaning the Projector and Lens Use a dry soft cloth. Do not use flammable materials such as benzene and thinner. Do not use a wet cloth. It may result in malfunction. -
Page 40: Structure Of Screen Menu
Structure of Screen Menu You can see the entire structure of screen menu. Buttons used for Screen Menu Open Menu/Exit Menu Select Composite/S-Video/Component Input Mode Input Source List : Component1 √ √ Edit Name Move Enter Return Input Source List Component1 / Component2 / S-Video / Composite / PC / DVI Edit Name Component1 / Component2 / S-Video / Composite / PC / DVI... -
Page 41: Lamp Replacement
Structure of Screen Menu Menu Option √ Language : English Menu Position √ √ Menu Translucency : Opaque Menu Display Time : 120 Sec √ Move Enter Return Menu Option Language English / Español / Français / Menu Position Menu Translucency Opaque / High / Medium / Low Menu Display Time 5 / 10 / 30 / 60 / 90 / 120 / Stay On... -
Page 42: Specifications
Specifications Design and specifications of the product may be modified without prior notice for better performance. This appliance is Class B device that can be used in both residential and industrial areas. Model Classification Panel Size Resolution Lamp Type Life Time Power Power Consumption Voltage...
Need help?
Do you have a question about the SP-H700AE and is the answer not in the manual?
Questions and answers