
Subscribe to Our Youtube Channel
Related Manuals for Tekvox TEK 1201-MV


Summary of Contents for Tekvox TEK 1201-MV
- Page 1 1201-MV 79033-MV User Manual TEK 1201-MV 6x1 4K Seamless Multiview Presentation Switcher with HDBaseT All Rights Reserved Version: 79033-MV_2020V1.2 www.tekvox.com...
- Page 2 Operation of this equipment in a residential area is likely to cause interference, in which case the user at their own expense will be required to take whatever measures may be necessary to correct the interference. Any changes or modifications not expressly approved by the manufacture would void the user’s authority to operate the equipment. www.tekvox.com...
- Page 3 • Unplug the power cord when left unused for a long period of time • Information on disposal for scrapped devices: do not burn or mix with general household waste, please treat them as normal electrical wastes www.tekvox.com...
-
Page 4: Table Of Contents
Table of Contents 1. Product Introduction ........................6 1.1 Features ............................... 6 1.2 Package List ............................7 1.2.1 TEK 1201-MV Switcher ......................7 1.2.2 TEK 1201-MV-RX Receiver ......................7 2. Specifications ..........................7 2.1 Switcher ............................... 7 2.2 Receiver ............................... 9 3. - Page 5 7.2 Signal Switching Commands ......................34 7.3 Audio Setting Commands ........................ 36 7.4 Function Setting Commands ......................37 7.5 CEC Commands ..........................44 7.6 Special Commands ........................... 46 8. Firmware Upgrade ........................50 8.1 Switcher ............................. 50 8.2 Receiver ............................. 50 www.tekvox.com...
-
Page 6: Product Introduction
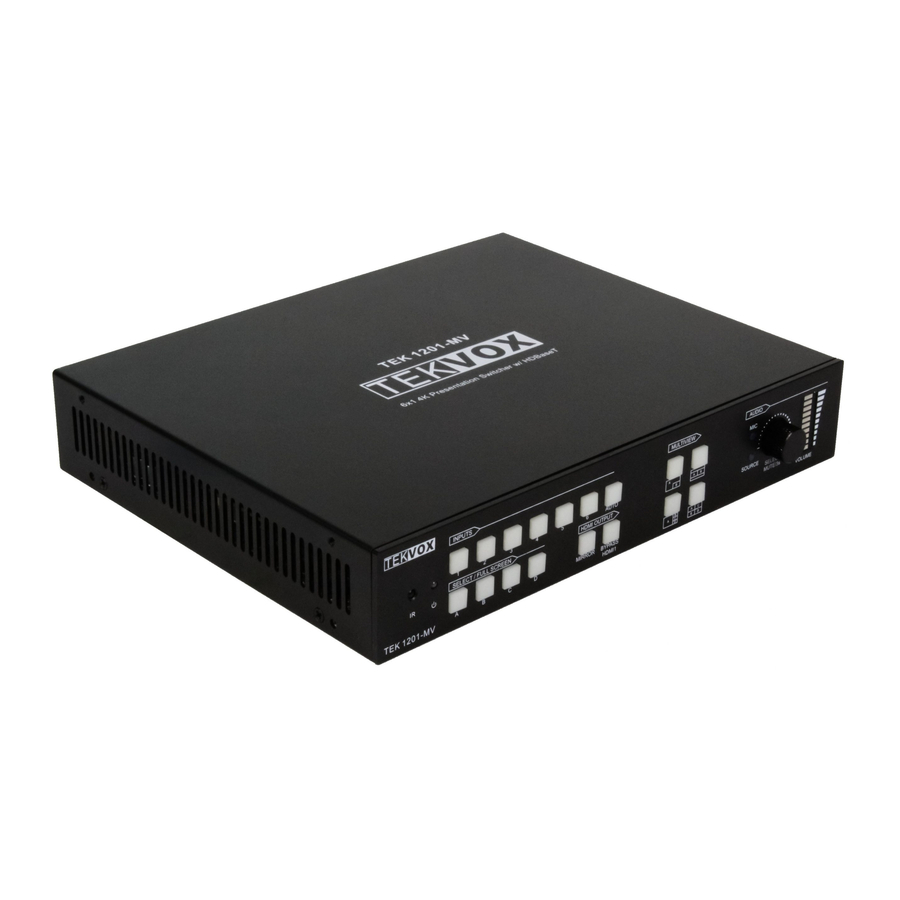
79033-MV User Manual 1. Product Introduction The 6x1 4K seamless presentation switcher kit consists of a TEK 1201-MV switcher and a TEK 1201- MV-RX receiver. The switcher offers five HDMI and one USB-C input, along with mirrored HDBaseT and HDMI outputs. The HDBaseT output supports PoH and can be paired with a compatible HDBaseT receiver to extend 4K@60Hz 4:4:4 / 1080P signals up to 328 feet (100 meters) over a single CAT cable. -
Page 7: Package List
1201-MV 79033-MV User Manual 1.2 Package List 1.2.1 TEK 1201-MV Switcher 1x 6x1 4K Presentation Switcher ⚫ 2x Mounting Ears with 4 Screws ⚫ 4x Plastic Cushions ⚫ 2x 3-pin Terminal Blocks ⚫ 1x 4-pin Terminal Block ⚫ 1x 5-pin Terminal Block ⚫... - Page 8 (1) Type-B USB, (2) Type-A USB 3.0, (3) 3.5mm jack, (1) Type-A Control Connector USB, (1) 4-pin terminal block, (1) RJ45 General Transmission Distance 4K@60Hz 4:4:4/1080p ≤ 328 feet (100 meters) Bandwidth 18Gbps Operation Temperature 23° ~ 131°F (-5°C - 55°C) Storage Temperature -13° ~ 158°F (-25°C ~ 70°C) www.tekvox.com...
-
Page 9: Receiver
23° ~131°F (-5 ~55°C) Storage Temperature -13° ~158°F (-25 ~ 70°C) Relative Humidity 10% to 90%, Non-condensing External Power Supply Power over Cable (PoC) Power Consumption 10w (Max) Product Dimensions 6.61” (168mm) x 0.91” (23mm) x 5.31” (135mm) Product Weight 1.1lbs (500g) www.tekvox.com... -
Page 10: Panel Description
Rotate the knob to increase or decrease the volume of the selected audio ⚫ Press and hold the knob for at least 3 seconds to mute the selected audio; rotate the knob to ⚫ unmute. Note: Please refer to 4. Front Panel Control for more details about button usages. www.tekvox.com... -
Page 11: Switcher Rear Panel
RS232: Connects to a control device (e.g. PC) or a third-party device for RS232 control ⚫ TCP/IP: Connects to a control device (e.g. PC) to control the switcher by GUI. ⚫ 6. DC 24V: DC connector for power adapter connection. www.tekvox.com... -
Page 12: Receiver Front Panel
4. SPDIF OUT: Connects to speaker or amplifier for audio de-embedding. 5. IR IN: Connects to IR receiver for IR pass-through. 6. IR OUT: Connects to IR emitter for IR pass-through. 7. RS232: Connects to a control device (e.g. PC) or a third-party device for RS232 pass-through control. www.tekvox.com... -
Page 13: System Connection
LED will turn blue, and the window A and B LEDs turn blue. The factory default correspondence between the two input sources and the two output windows is: Input 1 -> Window A Input 2 -> Window B www.tekvox.com... -
Page 14: Fullscreen Setting
MIX and MIC mixing audio inputs are controlled simultaneously. Rotate the knob to increase or decrease the volume of the selected audio. Press and hold the knob for at least 3 seconds to mute the selected audio; rotate the knob to unmute. www.tekvox.com... -
Page 15: Video Signal Switching
Example: Press and hold Window B button for at least 3 seconds (A, C, and D LEDs go out, and then the corresponding input source LED will turn blue). After 3 seconds, A, B, C, and D LEDs will turn blue. www.tekvox.com... -
Page 16: Gui Control
IP Address: 192.168.0.178 Subnet Mask: 255.255.255.0 Type 192.168.0.178 in a web browser, and it will enter the log-in page below: Username: admin Password: admin Type the username and password, then click “Login” to enter the section for video switching. www.tekvox.com... -
Page 17: Control Tab
Press “Power Off” to enter system standby mode. ⚫ Note: The source selectors, Auto, Window A~D, Mirror, and Bypass HDMI 1 buttons are the same as the front panel buttons. Please see 4.5 Video Signal Switching for more details. www.tekvox.com... -
Page 18: Display Control
Command: Type a command in this box to be sent to control a third-party device, then click ⚫ “Send”. Audio: Click the volume down, volume up, or volume mute icons to send CEC commands to ⚫ control the volume of the display device. Power: Click “Power Off” to enter system standby mode. ⚫ www.tekvox.com... -
Page 19: Audio Control
⚫ MIC In: Enable or disable microphone audio input. ⚫ MIC Volume: Use the volume bar, volume up, volume down, and mute buttons for Mix and MIC ⚫ audio control. Power: Click “Power Off” to enter system standby mode. www.tekvox.com... -
Page 20: Multiview Tab
1201-MV 79033-MV User Manual 5.2 Multiview Tab 5.2.1 Pre-Defined Multiview Mode Up to 12 pre-defined multiview modes can be selected, and then click the gear icon to enter the interface below to select the input source for each window. www.tekvox.com... - Page 21 Example: PIP (Picture in Picture) Resize Resize Example: One large and three small Resize Resize Swap: Press the button to cycle through the video sources displayed in each window. Example: In Multiview Mode Swap Swap Swap Example: In Fullscreen Mode Swap Swap Swap www.tekvox.com...
-
Page 22: User-Defined Multiview Mode
Layout: Select the Layout to be saved, and then click “Save” to save the user-defined layout. ⚫ The factory defaults of user-defined layouts 1~4 are: ⚫ User- Layout defined Note: The user-defined multiview mode can be invoked by using the “User 1 ~ User 4” buttons on the IR remote. www.tekvox.com... -
Page 23: Display Setting Tab
Baud Rate: Set the baud rate for the display device. It supports 9600, 19200, 38400, 57600, ⚫ and 115200. Command Format: The default command format is ASCII; select “Hex” to enter commands as ⚫ hexadecimal strings. www.tekvox.com... -
Page 24: Resolution Tab
“Save”. The command is usually used to select the input source for the display device. 5.4 Resolution Tab Select the output resolution for HDMI and HDBaseT outputs. Select “Auto for Rx” to set output resolution to that of the display device connected to the RX. www.tekvox.com... -
Page 25: Cec Tab
5.5 CEC Tab 5.5.1 Source Control Select the HDMI input source to be controlled, and then click the desired function buttons. 5.5.2 Display Control Select the output display device to be controlled, and then click the desired function buttons. www.tekvox.com... -
Page 26: User-Defined Cec Command
1” or “Trigger 2” box to send that command to control the selected device. Note: The CEC standard is primarily formulated by TV manufacturers, and is generally compatible with TVs and Blu-ray Players, and may not be compatible with the source devices of other manufacturers, such as, Apple TV, etc. www.tekvox.com... -
Page 27: Edid Tab
Select the compatible built-in EDID for the selected input source. 5.6.2 EDID Upload Prepare the EDID file (.bin) on the control PC, click the user-defined box to select the EDID file (.bin), then click “Apply” to upload the user-defined EDID. www.tekvox.com... -
Page 28: Network Tab
1201-MV 79033-MV User Manual 5.7 Network Tab Select “Static IP” or “Dynamic Host Configuration Protocol” (DHCP) Modify the static IP Address, Subnet Mask, and Gateway (Static IP only) 5.8 Tags Tab Modify the multiview layout labels. www.tekvox.com... -
Page 29: Security Tab
USB-C source device (e.g. Macbook). When the main window is any HDMI source, the USB host is PC (USB-B), and all USB devices are used to control the PC. Manual: Manually set the USB Host to PC (USB-B) or USB-C ⚫ www.tekvox.com... -
Page 30: Gui Upgrade
Type the username and password (the same as the GUI login setting; modified password will be available only after a reboot) to login to the configuration interface. After that, click “Administration” in the source menu, then click “Upload Firmware”. Select the desired update file, and press “Apply” to begin the upgrade. www.tekvox.com... -
Page 31: Ir Remote Control
MIC (MIX+MIC): Mute, volume up and down ⚫ Source: Mute, volume up and down ⚫ Note: All IR remote buttons function in the same way as those in the GUI tab. Please refer to 5. GUI Control for more details. www.tekvox.com... -
Page 32: Rs232 Control
All commands need to be ended with “<CR>” ⚫ All feedbacks are ended with “<CR><LF>” ⚫ In the commands, “[”and “]” MUST be typed in actual operation ⚫ Type commands carefully, as they are case-sensitive ⚫ These same commands are used with TCP/IP port 4001 ⚫ www.tekvox.com... -
Page 33: System Commands
501xx (xx = 00 ~ 60) 502xx (xx = 00 ~ 60) 50815 ~ 50823 50824 ~ 50832 50833 ~ 50841 50842 ~ 50850 50851 ~ 50857 50858 ~ 50863 50811 ~ 50813 50801 ~ 50809 50732 ~ 50733 www.tekvox.com... -
Page 34: Signal Switching Commands
Switch input source to window A xx= 01 ~ 06 01 - HDMI 1 02 - HDMI 2 507xx 507xx (xx= 01 ~ 06) 03 - HDMI 3 04 - HDMI 4 05 - HDMI 5 06 - USB-C www.tekvox.com... - Page 35 Set the local HDMI output mode to Bypass 50730 50730 HDMI1 50731 Get the local HDMI output mode 50729 / 50730 50732 Auto switching in full screen mode 50732 50733 Manual auto switching in full screen mode 50733 50732 50734 Get the switching mode 50733 www.tekvox.com...
-
Page 36: Audio Setting Commands
50614 50615 Disable MIX audio mixing 50615 50614 50616 Get the MIX audio mixing status 50615 50617 Enable the source audio mute 50617 50618 Disable the source audio mute 50618 50617 50619 Get the source audio mute status 50618 www.tekvox.com... -
Page 37: Function Setting Commands
1 - 3840x2160 60HZ 2 - 3840x2160 50HZ 3 - 3840x2160 30HZ 5080x 4 - 1920x1200 60HZ 5080x (x = 1 ~ 9) 5 - 1920x1080 60HZ 6 - 1920x1080 50HZ 7 - 1440x900 60HZ 8 - 1360x768 60HZ 9 - Auto www.tekvox.com... - Page 38 27 - 1920x1200@60Hz 8bit Stereo Audio 508xx 508xx (xx = 24 ~ 32) 28 - 3840x2160@30Hz 8bit Stereo Audio 29 - 3840x2160@60Hz 4:2:0 Deep Color Stereo Audio 30 - 3840x2160@60Hz Deep Color Stereo Audio 31 - From HDBT Display 32 - USER www.tekvox.com...
- Page 39 52 - 1920x1080@60Hz DVI No Audio 508xx 53 - 1920x1080@60Hz 8bit Stereo Audio 508xx (xx = 51 ~ 57) 54 - 1920x1200@60Hz 8bit Stereo Audio 55 - 3840x2160@30Hz 8bit Stereo Audio 56 - From HDBT Display 57 - USER www.tekvox.com...
- Page 40 Get whether to automatically send RS232 50883 50881 ~ 50882 commands after signal detection 50884 Enable auto standby after no signal detection 50884 50885 Disable auto standby after no signal detection 50885 50886 Get auto standby setting status 50884 ~ 50885 www.tekvox.com...
- Page 41 06 - 2 WINDOWS PIP LD 07 - 2 WINDOWS PIP RU 08 - 2 WINDOWS PIP RD 09 - 4 WINDOWS PBP 3L1R 10 - 4 WINDOWS PBP 1L3R 11 - 4 WINDOWS PBP 3U1D 12 - 4 WINDOWS PBP 1U3D www.tekvox.com...
- Page 42 39 - 2 WINDOWS PIP LD 40 - 2 WINDOWS PIP RU 41 - 2 WINDOWS PIP RD 42 - 4 WINDOWS PBP 3L1R 42 - 4 WINDOWS PBP 1L3R 44 - 4 WINDOWS PBP 3U1D 45 - 4 WINDOWS PBP 1U3D www.tekvox.com...
- Page 43 Get the user-defined multiview mode for User 4 509xx (xx = 58 ~ 69) 50914 Resize display windows 50914 50893 Enable PoC 50893 50894 Disable PoC 50894 50895 Get PoC status 50893 ~ 50894 50918 Set USB Host mode to auto-switch 50918 www.tekvox.com...
-
Page 44: Cec Commands
Send CEC STOP command to source device 510xx 510xx (xx = 46 ~ 50) xx = 46 ~ 50 (HDMI 1~5) Send CEC PLAY command to source device 510xx 510xx (xx = 51 ~ 55) xx = 51 ~ 55 (HDMI 1~5) www.tekvox.com... - Page 45 = 89: HDMI output xx = 90: HDBT output Send CEC VOLUME DOWN command to display device 510xx xx = 91 ~ 92 510xx (xx = 91 ~ 92) xx = 91: HDMI output xx = 92: HDBT output www.tekvox.com...
-
Page 46: Special Commands
/-[x][y]:zz zz 3 - 38400 4 - 19200 5 – 9600 30 31 32 33 y = number of octets in HEX command zz zz = HEX data to be sent (z = 0~9, A~F and up to 20 octets) www.tekvox.com... - Page 47 Set the ASCII “Power Off” command "zzzz" to be sent to remote display device when the switcher enters standby mode x = Baud rate (1 ~ 5) /+PD[x]:zzzz 1 - 115200 /+PD[5]: ABCDEFG\x\n12 2 - 57600 3 - 38400 4 - 19200 5 - 9600 www.tekvox.com...
- Page 48 2. When typing “\\”, only one “\” will be sent Display input select to 3. When reading “\r” immediately after “\x”, “\r” send:Input will be converted to “0x0D” in HEX 4. When reading “\n” immediately after “\x”, “\n” will be converted to “0x0A” in HEX www.tekvox.com...
- Page 49 Baud rate: 9600 4 - 19200 Display input select to send 5 - 9600 HEX:49 6E 70 75 74 zz zz= HEX data to be sent (z = 0 ~ 9, A ~ F, and up to 20 octets) www.tekvox.com...
-
Page 50: Firmware Upgrade
“SUCCESS.TXT”. If this is the case, then the firmware has updated successfully. If this is not the case, then the firmware upgrade has failed. Confirm the name of the upgrade file (.bin), and then repeat the above steps to update again. 7. Remove the USB cable after firmware upgrade, and reboot the receiver. www.tekvox.com...
Need help?
Do you have a question about the TEK 1201-MV and is the answer not in the manual?
Questions and answers