Table of Contents
Advertisement
Quick Links
Advertisement
Table of Contents

Subscribe to Our Youtube Channel
Related Manuals for ALLIANCE ALLPH 91Kw


Summary of Contents for ALLIANCE ALLPH 91Kw
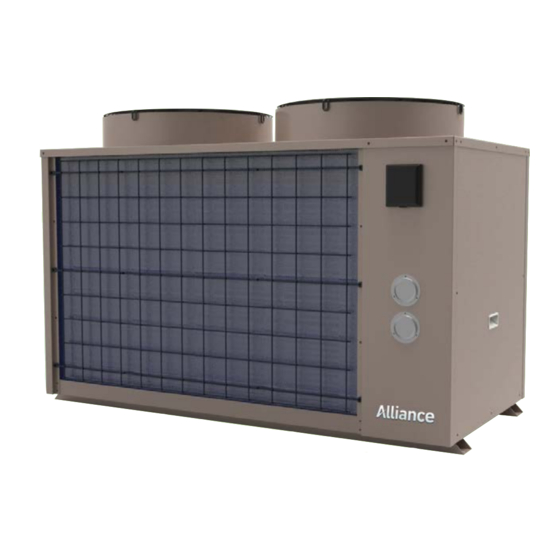
- Page 1 Swimming Pool Heat Pump Installation & Operation Manual Model: ALLPH 91Kw...
-
Page 2: Table Of Contents
Contents 1. Preface 2. Specifications 2.1 Performance Data of Swimming Pool Heat Pump Unit 2.2 Dimensions for Swimming Pool Heat Pump Unit 2.3 Unit Structure and Dimensions 3. Installation and Connection 3.1 Installation of System 3.2 Swimming Pool Heat Pumps Location 3.3 How Close to Your Pool? 3.4 Swimming Pool Heat Pumps Plumbing 3.5 Swimming Pool Heat Pumps Electrical Wiring... -
Page 3: Performance Data Of Swimming Pool Heat Pump Unit
Preface 1. PREFACE In order to provide our customers with quality, reliability and versatility, this product has been made to strict production standards. This manual includes all the necessary information about installation, debugging, discharging and maintenance. Please read this manual carefully before you open or maintain the unit. The manufacture of this product will not be held responsible if someone is injured or the unit is damaged, as a result of improper installation, debugging, or unnecessary maintenance. -
Page 4: Specifications
Specification 2.SPECIFICATION 2.1 Performance data of Swimming Pool Heat Pump Unit *** REFRIGERANT : R410A Model ALLPH91Kw Unit Heating Capacity BTU/h 310000 17.5 Heating Power Input 31.2 Running Current 380~415V/3N~/50Hz Power Supply Compressor Quantity scroll Compressor Fan Quantity 200×3 Fan Powerlnput Fan Rotate Speed vertical Fan Direction... -
Page 5: Unit Structure And Dimensions
Unit Structure and Dimensions 2.SPECIFICATION 2.2 The dimensions for Swimming Pool Heat Pump Unit Models :ALLPH91Kw Airflow direction Water Outlet φ110 Water Inlet φ110 2170... -
Page 6: Installation And Connection
Installation and Connection 3.INSTALLATION AND CONNECTION 3.1 Installation illustration Valve Chlorinator cell Water outlet Water supply Pool Water inlet Sand filter Water pump (or other type filter) Installation items: The factory only provides the main unit and the water unit; the other items in the illustration are necessary spare parts for the water system ,that provided by users or the installer. -
Page 7: Swimming Pool Heat Pumps Location
Installation and Connection 3.INSTALLATION AND CONNECTION 3.2 Swimming Pool Heat Pumps Location The unit will perform well in any outdoor location provided that the following three factors are present。 1. Fresh Air - 2. Electricity - 3. Pool filter piping The unit may be installed virtually anywhere outdoors. -
Page 8: Swimming Pool Heat Pumps Plumbing
Installation and Connection 3.INSTALLATION AND CONNECTION 3.4 Swimming Pool Heat Pumps Plumbing The Swimming Pool Heat Pumps exclusive rated flow titanium heat exchanger requires no special plumbing arrangements except bypass(please set the flow rate according to the nameplate). The water pressure drop is less than 10kPa at max. Flow rate. Since there is no residual heat or flame Temperatures, The unit does not need copper heat sink piping. -
Page 9: Swimming Pool Heat Pumps Electrical Wiring
Installation and Connection 3.INSTALLATION AND CONNECTION 3.5 Swimming Pool Heat Pumps Electrical Wiring NOTE: Although the unit heat exchanger is electrically isolated from the rest of the unit, it simply prevents the flow of electricity to or from the pool water. Grounding the unit is still required to protect you against short circuits inside the unit. -
Page 10: Usage And Operation
Usage and Operation 4. USAGE AND OPERATION 4.1Function of wire controller Welcome V1.0 v1.0 Loading..Function Button Name Press this button to start up/shut off the unit, ON/OFF cancel current operation or back to upper interface. Press this button to check button function HELP or system state. -
Page 11: Usage Of The Controller
Usage and Operation 4. USAGE AND OPERATION 4.Usage of wire controller 4.1 The way to use You can use “ ” at any interface, it will show relevant button function of current interface. You can press “ ”to exit the "help" interface. For example:... - Page 12 Usage and Operation 4. USAGE AND OPERATION Press “ ”at clock interface, the screen shows as follow: Both are OK when system shows ON or OFF ON:Eco.heating Date: 31/01/2011 Press“ ” Time: 05:55 Inlet temp.: 2 5.0℃ to enter Week: Thursday Outlet temp.: 25.0℃...
-
Page 13: The Operation Of Mode Switching
Usage and Operation 4. USAGE AND OPERATION 4.3 The operation of mode switching At main interface, you can switch modes of cooling, economic heating, heating, rapid heating by pressing “ ”. Or switch modes of cooling, economic heating and automatic. The different unit gets different mode types. -
Page 14: The Operation Of Parameter Setting
Usage and Operation 4. USAGE AND OPERATION 4.5 The operation of parameter setting At main interface, press“ ”or“ ”to enter parameter setting interface, press ” (decreasing)can change parameter value, press“ ” to save the “ ” (increasing)or“ setting and exit . Press“ ” can not save the setting but exit.(You can refer to parameter table to set relevant temperature.)... - Page 15 Usage and Operation 4. USAGE AND OPERATION Press“ ”to select needing parameter Hour bit flashing Date: 31/01/2011 Date: 31/0 /2011 Time: 05:55 Press“ ” Time: 05:55 Week: Thursday Week: Thursday Timer Timer Date format Date format Press“ ” Hour bit flashing or“...
-
Page 16: The Operation Of Timer Setting
Usage and Operation 4. USAGE AND OPERATION Hour bit flashing ON:Cooling Date: 31/01/2011 No operation Time: 06:55 Inlet temp.: 25.0℃ in 10s Week: Thursday Outlet temp.: 25.0℃ Timer Date format 31/01/2011 06:55 THU. It has been changed 4.7 The operation of timer setting You can set four timer on and timer off according to you needing. - Page 17 Usage and Operation 4. USAGE AND OPERATION Press“ ” to enter Timer setting interface Hour bit flashing Timer1:00:00-00:00 Timer1:00:00-00:00 Press“ ” Timer2:00:00-00:00 Timer2:00:00-00:00 Timer3:00:00-00:00 Timer3:00:00-00:00 Timer4:00:00-00:00 Timer4:00:00-00:00 Press“ ” Minute bit flashing Hour bit flashing or“ ” Timer1:07:00-00:00 Timer1:07:00-00:00 Timer2:00:00-00:00 Timer2:00:00-00:00 Press“...
- Page 18 Usage and Operation 4. USAGE AND OPERATION Press“ ” Timer1:07:30-22:00 Timer zone Timer2:00:00-00:00 Press“ Daily timer ” Timer3:00:00-00:00 to back to upper Timer4:00:00-00:00 interface Press“ ” to back to upper interface Date: 31/01/2011 ON:Cooling Time: 05:55 Press“ ” Inlet temp.: 25.0℃...
- Page 19 Usage and Operation 4. USAGE AND OPERATION Press“ ” Mon.:Timer1 Timer zone Press“ Tue.: Timer1+ Timer3 ” Wed.: ON Daily timer Thu.: Timer3+ Timer1 to enter Fri.: Timer4 Sat.: Timer2+ Timer4 “Daily timer ” Sun.: OFF Press“ ” Flashing Mon.:Timer1 Mon.:Timer1 Tue.: Timer1+ Timer3 Tue.: Timer1+ Timer3...
- Page 20 Usage and Operation 4. USAGE AND OPERATION Press“ ” to back to upper interface Date: 31/01/2011 Timer zone Press“ ” Time: 05:55 Daily timer Week: Thursday to back to Timer Date format upper interface Press“ ” to back to upper interface ON:Cooling Inlet temp.:...
-
Page 21: Keyboard Lock
Usage and Operation 4. USAGE AND OPERATION 4.8 Keyboard lock To avoid mis-operations, please lock the controller after parameter setting. At the main interface, pressing “ ”for 5 seconds,the keyboard will be locked. When the keyboard is locked, pressing“ ”for 5 seconds, the keyboard will be unlocked. Locked ON:Cooling ON:Cooling... -
Page 22: Maintenance And Inspection
Maintenance and Inspection 5. MAINTENANCE AND INSPECTION 5.1 Malfunction table You can refer to the malfunction table to find out the failure cause and solution. Malfunction Display Resolution Reason Power on Normal working The temp. Sensor is broken or Inlet temp. Sensor failure Check or change the temp. -
Page 23: Sysb Malfunction Table
Maintenance and Inspection 5. MAINTENANCE AND INSPECTION 5.2 BHB10 malfunction Table 5.2.1 The common failure cause and solution. Digital Detector Malfunction Canse Solution display display System 1 exhaust temp.failure The sensor is open or short circuit Check or change the sensor P181 System 2 exhaust temp.failure The sensor is open or short circuit... -
Page 24: Appendix
Appendix 6.APPENDIX APPENDIX1. Connection of PCB illustration PC8001 Connections explanation: Meaning Symbol Symbol Meaning Live line DI11 System protection signal Null line AI 01 Water input temperature input Compressor 1 output(220VAC) RO 01 AI 02 Water output temperature output Compressor 2 output(220VAC) RO 02 AI 03 System 1 fan coil temperature input... - Page 25 Appendix 6.APPENDIX APPENDIX2. Connection of PCB illustration CC04 RO04 CC03 RO03 CC02 RO02 CC01 RO01 RLY4 RLY3 RLY2 RLY1 BHB10 Connections explanation: Symbol Meaning System1 mangtic valve outlet(220-230VAC) RO01 System2 mangtic valve outlet(220-230VAC) RO02 System1 alert outlet(220-230VAC) RO03 System2 alert outlet(220-230VAC) RO04 System1 mangtic valve inlet(220-230VAC)...
- Page 26 Appendix 6.APPENDIX APPENDIX3. Caution & Warning 1. The unit can only be repaired by qualified installer centre personnel or an authorised dealer. 2. This appliance is not intended for use by persons (including children) with reduced physical sensory or mental capabilities, or lack of experience and knowledge, unless they have been given supervision or instruction concerning use of the appliance by a person responsible for their safety.
- Page 27 Appendix 6.APPENDIX APPENDIX4. Cable specification 1. Single phase unit Nameplate Creepage protector Signal line maximum Phase line Earth line current No more 2×1.5mm 1.5mm 30mA less than 0.1 sec than 10A 2.5mm 30mA less than 0.1 sec 10~16A 2×2.5mm 30mA less than 0.1 sec 16 ~25A 2×4mm 25 ~32A...
- Page 28 Code:20160606-0009...
Need help?
Do you have a question about the ALLPH 91Kw and is the answer not in the manual?
Questions and answers
What is a p6 error