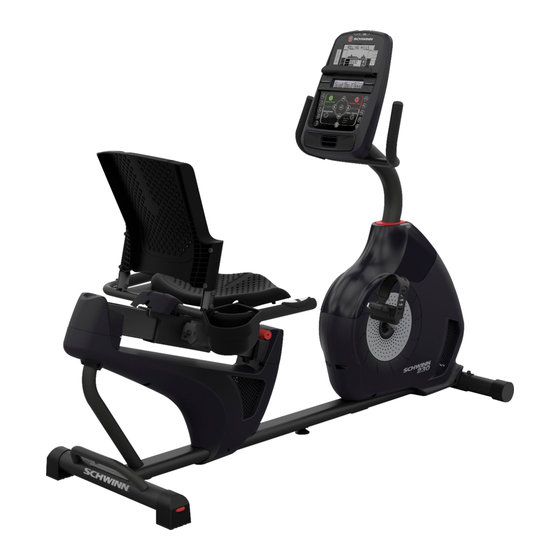
Schwinn 230 Assembly Manual / Owner's Manual
Hide thumbs
Also See for 230:
- Assembly manual / owner's manual (42 pages) ,
- Assembly manual (36 pages) ,
- Service manual (60 pages)
Table of Contents
Advertisement
Advertisement
Table of Contents

Related Manuals for Schwinn 230


Summary of Contents for Schwinn 230
- Page 1 230 / 510R ASSEMBLY MANUAL / OWNER’S MANUAL...
-
Page 2: Table Of Contents
TABLE OF CONTENTS Important Safety Instructions Safety Warning Labels / Serial Number Manual (Quick Start) Program Parts Interval Program Hardware Challenge Programs Tools Modify Display of Workout Values Assembly Pausing or Stopping Moving the Machine Summary Mode Leveling the Machine Maintenance Features Maintenance Parts... -
Page 3: Important Safety Instructions
IMPORTANT SAFETY INSTRUCTIONS This icon means a potentially hazardous situation which, if not avoided, could result in death or serious injury. Obey the following warnings: Read and understand all warnings on this machine. Carefully read and understand the Assembly instructions. genuine replacement parts can cause a risk to users, keep the machine from operating correctly and void the •... - Page 4 • This appliance is not intended for use by persons (including children) with reduced physical, sensory or mental...
-
Page 5: Safety Warning Labels / Serial Number
SAFETY WARNING LABELS AND SERIAL NUMBER WARNING! WARNING! • Injury or death is possible if • Keep hands caution is not used while using • Read and follow all warnings • Refer to the Owner’s Manual for additional warnings and •... - Page 6 SPECIFICATIONS Maximum User Weight: Total Surface Area (footprint) of equipment: 111.8 cm Machine Weight: (44”) Power Requirements (AC Adapter): Input Voltage: Output Voltage: 162.5 cm (64”) 70.3 cm (27.7”) Before Assembly Basic Assembly Tips Follow these basic points when you assemble your machine: •...
-
Page 7: Parts
PARTS 14 (R) 13 (L) Item Description Item Description Main Frame Upper Shroud Front Stabilizer Shroud Cap Rear Stabilizer Console Seat Frame Assembly Left Pedal (L) Seat Back Right Pedal (R) Seat Bottom Water Bottle Holder Cover AC Adapter Seat Adjustment Handle Console Mast... -
Page 8: Hardware
HARDWARE / TOOLS Item Description Item Description Lock Washer, Flat Washer, M8 Curved Washer, Lock Washer, M8 Curved Washer, M8 Note: Tools Included Not Included (recommended) 4 mm... -
Page 9: Assembly
ASSEMBLY 1. Attach Stabilizers to Frame Note: Make sure the Schwinn ™ decal on the rear... - Page 10 2. Attach the Seat Frame Assembly to the Seat Rail NOTICE:...
- Page 11 3. Attach Seat Pads to Seat Frame Assembly...
- Page 12 4. Attach Cover to Frame Assembly...
- Page 13 5. Attach Seat Adjustment Handle to Frame Assembly...
- Page 14 6. Connect the Cables and Attach the Console Mast to Frame Assembly NOTICE:...
- Page 15 7. Remove Hardware from Console NOTICE: Note: 8. Connect Cables and Attach Console to Frame Assembly NOTICE:...
- Page 16 9. Attach Pedals to Frame Assembly NOTICE: The Left Pedal is reverse-threaded. 14 (R) 13 (L)
- Page 17 10. Attach Water Bottle Holder to Frame Assembly...
- Page 18 11. Connect AC Adapter to Frame Assembly 12. Final Inspection Do not use until the machine has been fully assembled and inspected for correct performance in accor- dance with the Owner’s Manual.
-
Page 19: Moving The Machine
BEFORE YOU START Moving the Bike The machine may be moved by one or more persons depending on their physical abilities and capacities. NOTICE: Be careful when you move the bike... -
Page 20: Leveling The Machine
Leveling the Bike To adjust the leveler on the Frame Rail: Do not adjust the levelers to such a height that they detach or unscrew from the machine. Injury to you or damage to the machine can occur. -
Page 21: Features
FEATURES Console Seat Adjustment Handle Handlebar, Upright Adjustable Seat Fully Shrouded Flywheel Water Bottle Holder Power Connector Contact Heart Rate (CHR) Sensors Transport Wheel Handlebar, Side Stabilizer Media Tray Pedal Bluetooth Heart Rate (HR) Receiver (not shown) ® Leveler Bluetooth Connectivity (not shown) ®... -
Page 22: Console Features
Console Features The Console provides important information about your workout and lets you control the resistance levels while you Note: Connect Bluetooth ® button Keypad Functions Connect Bluetooth Heart ® ® Rate Chest Strap (quick push and release of the button) or a Bluetooth ®... - Page 23 Program Display Program Display Bluetooth ® heart rate sensors or a Bluetooth ® Bluetooth ® Bluetooth ® Heart Rate (Pulse) your chest, become short of breath, or feel faint. Contact your doctor before you use the machine again. Speed Distance Note: Time Calories...
-
Page 24: Bluetooth ® Heart Rate Monitor
® ™ Note: Workout with Other Fitness Apps ® our latest list of supported partners, please visit: www.nautilus.com/partners Bluetooth Heart Rate Monitor (not supplied) ® ® connected, the Console will display the Bluetooth ® with your Bluetooth ® If you have a pacemaker or other implanted electronic device, consult your doctor before using a Bluetooth ®... - Page 25 • • Heart Rate Calculations...
- Page 26 OPERATIONS What to Wear How Often Should You Exercise your chest, become short of breath, or feel faint. Contact your doctor before you use the machine again. Use the values calculated or measured by the machine’s computer for reference purposes only. The heart •...
-
Page 27: Manual (Quick Start) Program
Note: Manual (Quick Start) Program During a Manual Workout, each column represents Quick Start Note: If a Manual workout is performed for more than 99 minutes and 59 seconds (99:59), the units for Time will reset Interval Program Note: Challenge Programs Rolling Hills Ride in the Park... - Page 28 Pyramids Summit Pass Stream Crossing Cross Training Uphill Finish Mount Hood Heart Rate Control Console monitors your heart rate in beats per minute (BPM) from the Contact Heart Rate (CHR) Sensors on the machine or from your Bluetooth Heart Rate Chest Strap, ®...
-
Page 29: Modify Display Of Workout Values
Modify Display of Workout Values Note: Changing Resistance Levels Push the Resistance Level Increase( ) or Decrease( ) buttons to change the resistance level at any time in a workout Pausing or Stopping Muting the Console Note: Workout Summary Mode every 3 seconds: Note:... -
Page 30: Maintenance
MAINTENANCE regular maintenance is done. Worn, damaged or loose components must be repaired or replaced immedi- ately. Only manufacturer supplied components can be used to maintain and repair the equipment. If at any time the Warning labels become loose, unreadable or dislodged, replace the labels. If purchased in US/Canada, contact Customer Service for replacement labels. -
Page 31: Maintenance Parts
Maintenance Parts Console Transport Wheel Console Cable, Lower Seat Back Stabilizer, Front Shroud, Right Seat Cover Heart Rate Cable, Lower Pedal, Right Water Bottle Holder Drive Pulley Power Connector Handlebar, Side Speed Sensor Magnet Shroud, Upper Seat Bottom Speed Sensor Shroud Cap Seat Adjustment Handle Crank Arm... -
Page 32: Troubleshooting
TROUBLESHOOTING Condition/Problem Things to Check Solution No display/partial display/ Check electrical (wall) unit will not turn on outlet Check connection at front of unit Check data cable integrity Check data cable Be sure cables at base of mast and at back of console are con connections/orientation Check console display for Check for visual sign that console display is cracked or other... - Page 33 Condition/Problem Things to Check Solution Resistance does not Check data cable integrity change (machine turns on and operates) Check data cable connections/orientation Check Servo Motor (requires shroud removal) Check Console If the above steps do not resolve the problem, contact Cus tomer Service (if inside US/Canada) or your local distributor (if Check electrical (wall) sleep mode) while in use...
-
Page 35: Warranty (Us/Canada Only)
WARRANTY ( if purchased in US/Canada ) Who Is Covered This warranty is valid only to the original purchaser and is not transferable or applicable to any other person(s). What Is Covered Nautilus, Inc. warrants that this product is free from defects in materials and workmanship, when used for the purpose intended, under normal conditions, and provided it receives proper care and maintenance as described in the Product’s Assembly and Owner’s manual. - Page 36 ™ Nautilus Schwinn ™ ™ ™...
Need help?
Do you have a question about the 230 and is the answer not in the manual?
Questions and answers
DOES MY NEW SCHWINN 230/519R HAVE A CONSOLE BACK LITE ON THE DISPLAY? IF SO, MY CONSOLE DOES NOT LITE UP. I HAVE CHECKED THE ELECTRIC INPUT WIRE AND IT HAS POWER TO IT. I ALSO DOUBLE CHECKED THE PLUG IN CABLE TO THE CONSOLE AND IT IS PLUGGED IN CORRECTLY, WHAT COULD BE THE CAUSE OF NO LITE ON MY BRAND NEW CONSOLE?