
Subscribe to Our Youtube Channel
Related Manuals for IFM Electronic efector160 LR7000


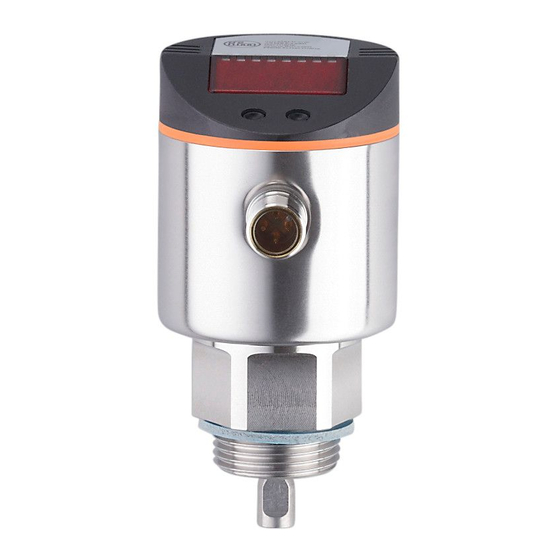
Summary of Contents for IFM Electronic efector160 LR7000
- Page 1 Operating instructions Electronic level sensor LR7000 Tel: +44 (0)191 490 1547 Fax: +44 (0)191 477 5371 Email: northernsales@thorneandderrick.co.uk Website: www.heattracing.co.uk www.thorneanderrick.co.uk...
-
Page 2: Table Of Contents
Contents 1 Preliminary note ���������������������������������������������������������������������������������������������������4 1�1 Symbols used ������������������������������������������������������������������������������������������������4 2 Safety instructions �����������������������������������������������������������������������������������������������4 3 Items supplied������������������������������������������������������������������������������������������������������5 4 Functions and features ����������������������������������������������������������������������������������������6 4�1 Operation with single probe ���������������������������������������������������������������������������6 4�2 Operation with coaxial probe �������������������������������������������������������������������������7 4�3 Applications ���������������������������������������������������������������������������������������������������7 4�3�1 Restriction of the application area ��������������������������������������������������������8 5 Function ���������������������������������������������������������������������������������������������������������������9 5�1 Measuring principle ���������������������������������������������������������������������������������������9 5�2 Features of the unit ��������������������������������������������������������������������������������������10... - Page 3 6�5 Installation of the unit with coaxial probe in the tank �����������������������������������22 6�6 Alignment of the sensor housing �����������������������������������������������������������������22 7 Electrical connection ������������������������������������������������������������������������������������������22 8 Operating and display elements ������������������������������������������������������������������������24 9 Menu ������������������������������������������������������������������������������������������������������������������25 9�1 Menu structure ���������������������������������������������������������������������������������������������25 9�2 Explanation of the menu ������������������������������������������������������������������������������26 10 Parameter setting ��������������������������������������������������������������������������������������������27 10�1 General parameter setting �������������������������������������������������������������������������27 10�2 Basic settings (unit on delivery) �����������������������������������������������������������������29...
-
Page 4: Preliminary Note
13�1 Setting ranges �������������������������������������������������������������������������������������������37 14 Maintenance ����������������������������������������������������������������������������������������������������37 15 Applications������������������������������������������������������������������������������������������������������38 15�1 Minimum level monitoring with early warning and alarm ���������������������������38 15�2 Pumping station / empty the tank with overflow protection ������������������������39 15�3 Storage tank ����������������������������������������������������������������������������������������������40 16 Factory setting �������������������������������������������������������������������������������������������������41 1 Preliminary note 1.1 Symbols used ►... -
Page 5: Items Supplied
• Improper or non-intended use may lead to malfunctions of the unit or to unwanted effects in your application� That is why installation, electrical connection, set-up, operation and maintenance of the unit must only be carried out by qualified personnel authorised by the machine operator� 3 Items supplied • Level sensor LR7000 • Operating instructions... -
Page 6: Functions And Features
E43202 73 - 90 / ¾" NPT E43206 Only use rods and coaxial pipes from ifm electronic gmbh� The optimum function is not ensured when using components from other manufacturers� 4 Functions and features The unit continuously detects the level in tanks and generates output signals according to the parameter settings�... -
Page 7: 4�2 Operation With Coaxial Probe
For the correct function when used with single probe, the unit needs a large enough metal launching plate� It is necessary for transferring the microwave pulse to the tank with optimum transmission power� The flange plates that are available as accessories are not sufficient as launching plates (for suitable launching plates → 6.4). -
Page 8: 4�3�1 Restriction Of The Application Area
4.3.1 Restriction of the application area • The unit is not suitable for bulk materials (e�g� plastic granulates)� • If the unit is to be used in acids or alkalis, in hygienic areas or in electroplating applications: first check the compatibility of the product materials (→ 13 Technical data) with the media to be monitored� • Incorrect measurements or signal loss may be caused by the following media: - Highly absorbing surfaces (e�g�... -
Page 9: Function
5 Function 5.1 Measuring principle fig. 5-1 fig. 5-2 The unit operates to the principle of guided wave radar� It measures the level using electromagnetic pulses in the nanosecond range� The pulses are transmitted by the sensor head and guided along the rod (fig� 5-1)�... -
Page 10: 5�2 Features Of The Unit
5.2 Features of the unit 5.2.1 Easy set-up • When the unit is supplied with operating voltage for the first time, the probe length, the medium to be detected and the type of probe used must be entered� The unit is then ready for operation. (→ 10.2) • If necessary, parameters for the output signals and optimisation of the monitoring functions can be set (→ 10.3 to → 10.5). -
Page 11: 5�2�4 Offset For Indicating The Real Level In The Tank
• Window function / normally open (fig� 5-4): [OUx] = [Fno]� • Window function / normally closed (fig� 5-4): [OUx] = [Fnc]� The width of the window can be set by means of the difference between FHx and FLx� FHx = upper value, FLx = lower value� fig. -
Page 12: 5�2�7 Io-Link Communication, Parameter Setting, Evaluation
• Temporary loss of signal caused e�g� by turbulence or foam formation can be suppressed by a delay time (→ 10.5.6 [dFo]). During the delay time the last measured value is frozen� If the measured signal is received again in sufficient strength within the delay time, the unit continues to work in normal operation� If, however, it is not received again in sufficient strength within the delay time, the outputs pass into the safe state�... -
Page 13: Installation
6 Installation 6.1 Installation location / environment • Vertical installation from the top is preferred� 6.1.1 Unit with single probe • For a safe function, the unit requires a launching plate (→ 6.4). • For optimum operation the unit is to be installed as near as possible to the tank wall� Distance between the rod and the tank wall: minimum 40 mm, maximum 300 mm�... - Page 14 measurements: adhere to increased minimum distances depending on type and intensity of the soiling� • For installation in pipes: - The inside pipe diameter (d) must be at least 100 mm (fig� 6-1)� - Only install the unit in metal pipes� • For installation in bosses: - The diameter of the boss (d) must be at least 60 mm (fig�...
- Page 15 fig. 6-3 fig. 6-4 50mm • Strong foam formation and strongly moving surfaces can lead to malfunctions (see the following fig�)� Recommended remedies: use a coaxial probe, install a still pipe or bypass� Note: minimum diameter d = 100 mm� The upper access to the bypass (A) and the fill openings of the still pipe (B) must be above the maximum level�...
-
Page 16: 6�1�2 Unit With Coaxial Probe
6.1.2 Unit with coaxial probe • There are no minimum distances to the tank wall and the baffles (B) required� • Minimum distance to the bottom of the tank: 10 mm� • The vent hole (A) must not be covered by mounting elements or similar�... -
Page 17: 6�2�2 Installation Of The Coaxial Pipe
Substances such as screw retaining compounds may migrate into the medium� Make sure that they are harmless! When using mechanical means of securing (e�g� tooth lock washer), protruding edges must be avoided� They may cause interference reflection� 6.2.2 Installation of the coaxial pipe This subchapter is only relevant if the unit is to be operated with a coaxial probe�... -
Page 18: 6�3�2 Shortening Of The Coaxial Pipe
► Remove the rod from the unit� ► Shorten the rod� ► Remove all burrs and sharp edges� ► Screw the rod to the unit again and tighten it� Recommended tightening torque: 4 Nm� ► Precisely measure the probe length L, note the value� It must be entered during parameter setting of the unit (→ 10.2). -
Page 19: 6�4 Installation Of The Unit With Single Probe
6.4 Installation of the unit with single probe For the correct function when used with single probe, the unit needs a large enough metal launching plate� It is necessary for transferring the microwave pulse to the tank with optimum transmission power� The flange plates that are available as accessories are not sufficient as launching plates�... -
Page 20: 6�4�2 Installation In Closed Metal Tanks (With Flange Plage)
6.4.2 Installation in closed metal tanks (with flange plage) Flange plates are not supplied. They must be ordered separately (→ 3). fig. 6-8 fig. 6-9 ► Arrange for a bore hole in the tank lid� It must have a minimum diameter (d) to enable sufficient transfer of the measured signal to the probe (fig� 6-8)� The diameter depends on the wall thickness of the tank lid: Wall thickness [mm] 1���5... -
Page 21: 6�4�4 Installation In Plastic Tanks
150 mm ► The lower edge of the process connection should be flush with the installation environment (see fig� 6-5)� ► Avoid non-flush installation (see 6-6)� ► Use seals or washers (see D in fig� 6-7) to reach the required height� 6.4.4 Installation in plastic tanks 150 mm To enable sufficient transfer of the measured signal, note in case of installation in... -
Page 22: 6�5 Installation Of The Unit With Coaxial Probe In The Tank
When installed in plastic tanks, there may be deterioration caused by electromagnetic interference� Remedy: • Apply a metal foil to the outside of the tank� • Apply a shielding screen between the level sensor and other electronic units� • Operation with coaxial probe efficiently protects the unit from electromagnetic interference�... - Page 23 OUT2 OUT1/IO-Link Connection Core colours for ifm sockets: brown blue 2 (OUT2) pnp switching signal white • pnp switching signal 4 (OUT1) black • IO-Link When the unit is supplied with operating voltage for the first time, the probe length, the medium to be detected and the type of probe used must be entered. Only then is the unit ready for operation (→ 10.2).
-
Page 24: Operating And Display Elements
8 Operating and display elements 3 4 5 6 Mode/Enter 1 to 8: indicator LEDs - LED 1: green = indication of the level in cm� - LED 2: green = indication of the level in inch� - LED 3: green = indication of the level in % of the final value of the measuring range� - LED 4 - LED 6: not used�... -
Page 25: Menu
9 Menu 9.1 Menu structure cm inch S... -
Page 26: 9�2 Explanation Of The Menu
9.2 Explanation of the menu SP1/rP1 Upper / lower limit value for the level at which OUT1 switches� FH1/FL1 Upper / lower limit for the acceptable range (monitored by OUT1)� SP2/rP2 Upper / lower limit value for the level at which OUT2 switches� FH2/FL2 Upper / lower limit for the acceptable range (monitored by OUT2)�... -
Page 27: Parameter Setting
10 Parameter setting During parameter setting the unit remains in the operating mode internally� It continues its monitoring function with the existing parameters until the parameter setting has been completed� 10.1 General parameter setting 3 steps must be taken for each parameter setting: Select the parameter ►... - Page 28 • Change from menu level 1 to menu level 2: ► Press [Mode/Enter] until [EF] is displayed. Mode/Enter Set ► Press [Set] briefly� > The first parameter of the submenu is Mode/Enter Set displayed (here: [res])� • Locking / unlocking The unit can be electronically locked to prevent unwanted adjustment of the set parameters: ►...
-
Page 29: 10�2 Basic Settings (Unit On Delivery)
10.2 Basic settings (unit on delivery) On delivery of the unit, you must first enter the basic settings� The complete parameter setting menu cannot be accessed before this� Malfunctions may occur if wrong basic settings are entered� 10.2.1 Entering the probe length ►... -
Page 30: 10�3 Configuration Of The Display
10.3 Configuration of the display ► Select [Uni] and set the unit of measurement: [cm], [inch]� Factory setting: cm� ► Select [SELd] and set type of indication: - [L] = The level is indicated in cm or inch� - [L%] = The level is indicated in percent of the final value of the measuring range�... -
Page 31: 10�5�3 Setting Of Switching Limits (Window Function)
► Select [rP1] / [rP2] and set the value at which the output switches off� rPx is always lower than SPx� The unit only accepts values which are lower than the value for SPx� 10.5.3 Setting of switching limits (window function) ►... -
Page 32: 10�7 Changing Basic Settings
10.7 Changing basic settings Required after a factory reset [rES] and after changes to the probe or to the application area� 10.7.1 New entering of the probe length Approach for single probes: ► Measure the probe length L to a precision of ± 2 mm (± 0�1 inch)� L = lower edge of the of process connection to the rod end�... -
Page 33: Operation
11 Operation After power on, the unit is in the Run mode (= normal operating mode)� It carries out its measurement and evaluation functions and generates output signals according to the set parameters� 11.1 Operating indicators Numerical value + LED 1 Current level in cm�... -
Page 34: 11�4 Error Indications
11.4 Error indications Possible cause Recommended measures [E�000] Fault in the electronics� Replace the unit� Probe detached from the unit; Check whether the probe is still [E�031] possibly incorrect setting of the attached to the unit� probe length� Check the parameter [LEnG]� Measurement disturbed by • Install the unit in a still pipe or bypass�... -
Page 35: 11�5 Output Response In Different Operating States
11.5 Output response in different operating states OUT1 OUT2 Initialisation according to the level and according to the level and Normal operation OU1 setting OU2 setting OFF for FOU1 = OFF; OFF for FOU2 = OFF; Fault (E�0xx) ON for FOU1 = on ON for FOU2 = on 12 Scale drawing Dimensions in mm... -
Page 36: Technical Data
inch L (probe length) 4�0 A (active zone) 6 (4) L - 4 (L - 6) 2�4 (1�6) L - 1�6 (L - 2�4) I1 (inactive zone 1) 1�2 I2 (inactive zone 2) 1 (3) 0�4 (1�2) The values in brackets apply to the setting [MEdI] = [LOW] (setting for the detection of oils and oil-based media)�... -
Page 37: 13�1 Setting Ranges
13.1 Setting ranges [LEnG] inch Setting range 10���160 4�0���63 Step increment 0�5 0�2 [OFS] inch Setting range 0���100 0���39�4 Step increment 0�5 0�2 The setting ranges for the switching limits (SPx, rPx, FHx, FLx) depend on the probe length (L)� In general the following applies: inch SPx / FHx 1�5 (3�5) -
Page 38: Applications
15 Applications 15.1 Minimum level monitoring with early warning and alarm Switching output 1: early warning Slightly above rP1 (to suppress wave movements) Below preset level → early warning, start refilling Hysteresis function, normally closed (Hnc) Switching output 2: alarm Min. value reached again → alarm reset Below min. value → alarm Hysteresis function, normally open (Hno) OUT1 OUT2 XX�X = display value... -
Page 39: 15�2 Pumping Station / Empty The Tank With Overflow Protection
level is reached, this is signalled by the LED OUT1 going out and output 1 switching off� 15.2 Pumping station / empty the tank with overflow protection Switching output 1: control to empty tank Upper value exceeded → submersible pump ON Lower value reached → submersible pump OFF Hysteresis function, normally open (Hno) Switching output 2: overflow protection Maximum value exceeded → alarm Slightly below SP2 (to suppress wave movements) -
Page 40: 15�3 Storage Tank
15.3 Storage tank Monitoring of the acceptable range (alarm) and level control Switching output 1: refilling Upper preset value reached → finish refilling Below lower preset value → start refilling Hysteresis function, normally closed (Hnc) Switching output 2: safety function min - max Max. value exceeded → alarm Below min. value → alarm Window function, normally open (Fno) OUT1 OUT2 XX�X = display value A = refill;... -
Page 41: Factory Setting
16 Factory setting Factory setting User setting SP1 / FH1 50% SP/FHmax rP1 / FL1 50% rP/FLmax SP2 / FH2 100% SP/FHmax rP2 / FL2 100% rP/FLmax FOU1 FOU2 SELd LEnG nonE MEdI nonE Prob nonE SP/FHmax = LEnG value minus 3� rP/FLmax = LEnG value minus 3�5�...
Need help?
Do you have a question about the efector160 LR7000 and is the answer not in the manual?
Questions and answers